• Hi all and welcome to TheWoodHaven2 brought into the 21st Century, kicking and screaming! We all have Alasdair to thank for the vast bulk of the heavy lifting to get us here, no more so than me because he's taken away a huge burden of responsibility from my shoulders and brought us to this new shiny home, with all your previous content (hopefully) still intact! Please peruse and feed back. There is still plenty to do, like changing the colour scheme, adding the banner graphic, tweaking the odd setting here and there so I have added a new thread in the 'Technical Issues, Bugs and Feature Requests' forum for you to add any issues you find, any missing settings or just anything you'd like to see added/removed from the feature set that Xenforo offers. We will get to everything over the coming weeks so please be patient, but add anything at all to the thread I mention above and we promise to get to them over the next few days/weeks/months. In the meantime, please enjoy!

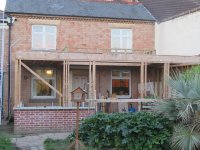
Self Build Orangery

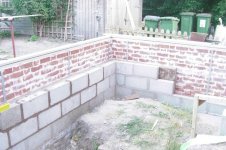
That's quite some progress and some nice looking bricklaying too. What would have caused a stone lintel to crack like that?
 
I like the brickwork, Jon. It's been a foul winter for that sort of work.
 
You certainly have some challenges there but great progress so far!

I can't get my head found why the bathroom extension has 18" thick concrete roof? That's way OTT and is going to weigh in at getting on for a tonne per sq metre.
I wonder if it could be craned off? as breaking up in situ won't be easy or kind to the floor below.

Good luck

Bob
 
Sorry I missed the update. Love the bricks/ brickwork. Lovely mellow appearance,

What make/ name of brick ?
 
I really don't know how some of you find the time to write your excellent WIPs, by the time I've finished, often i the dark, I'm good for nothing else but hitting the sack.

Anyway, today is the first day since the spring (and that horrible wet winter) that I'm not able to get out and do some work, who would ever imagined that in the UK. It's raining heavily this morning so there's time for an update before I go out to tidy up the workshop.

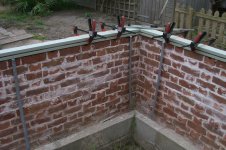
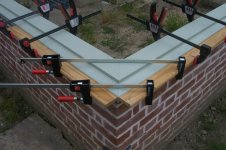
The last update finished off with the completion of the facing bricks, before I complete the inner course of blocks, I needed to screw the cill section to the back side of the facing bricks. This caused me some headaches with the cills that join at 90degrees, as my original plan was to attach the restraint straps to the underside of the cill and then sit the cill on folding wedges to level before drilling into the facing brick and plugging and screwing the strap. However, a combination of a mitred corner with long dominoes and the wall ties fouling on the restraining straps meant there was not enough wiggle room to get the mitred joint connected. So Plan B was put into action, I set all the straps to the facing bricks setting the height of each strap using a laser level. The cills were then lined up on top of the straps and the position of each mark on the underside of the cill before removing all the straps from the wall and attaching to the underside of the cill. With the help of a couple assistances, we lift the whole cill section, mitre joint connected high up over the wall to clear the restraining straps before lowering down into position. Bingo!! Everything lined up perfectly and all that was needed was to fill the underside of the cill with mortar and point up.
CIMG1365.JPG
CIMG1364.JPG
CIMG1366.JPG

Now the cill was fastened I could complete the inner block work.
CIMG1375.JPG

In the above picture, the block work is finished up to DPC level, but on this build I won't be using a DPM, the floor make up here will be recycled foam glass followed by a 100mm limecrete floor. The gaps between the foam glass (which looks like BBQ charcoal) prevents any capillary action and therefore provides the moisture break required. The system is LABC approved, although my inspector had never come across it, and I've specified 220mm of foam glass which provides a U value of 0.2W/(m2k). The limecrete floor isn't strictly necessary in the orangery, in fact it's a more expensive option, however, two rooms downstairs have have had concrete floors poured with no DPM fitted, and all this does is drives the moisture into the walls and so we suffer terrible damp problems. The one room with the original floor (quarry tiles laid on ash) is perfectly dry. The house is covered in a concrete render and this is just preventing the brickwork from ever drying out, the render will be removed and replaced by a breathable lime render. As I'm installing underfloor heating through out the house, all the floors will be dug up and replaced with a breathable limecrete floor.

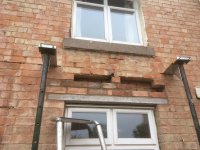
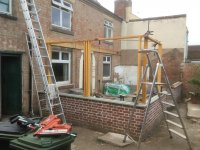
Back to the extension, before I could bolt the main joist to the rear wall of the house, I needed to replace the cracked stone lintel that was shown in my previous post. Fortunately the lime mortar made it an easy task of removing the lintel and some surrounding bricks, before replacing with a new concrete lintel. This wall will become an internal wall and plasterboarded so the ugly concrete lintel won't be seen.
IMG_0789.JPG
IMG_0790.JPG
fe081e23-4870-4870-9af4-a7fad4bc1ca5.jpg

At this point I could order some wood!!
IMG_5665.JPG

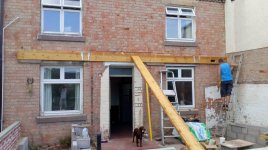
I managed to place a special order for a 7.2m length of 47x 247 so I could do the rear joist in one piece, but boy was it heavy. I screwed some blocks to the rear wall so I could support the beam whilst I drilled the holes for the 12mm rawlbolts. I've never used resin fixings before but with hindsight this job was crying out for them, I lost count of how many times that beam was lowered and then lifted back into position. A 12mm hole was drilled in the wall via the predrilled holes in the beam, the beam was then lowered to open the holes up to 18mm to take the rawl bolts, the beam was then lifted back up, only to find the rawlbolts were spinning so was lowered again so I could tighten and set the anchors hard into the brick work before finally lifting the beam back into position for the final time. I'm sure resin fixings would have been easier. All this on one of the hottest days of the year. I could barely lift my knife and fork at the end of the day!!!!
21b7ebb5-b421-4ba1-a883-bad985375d3a.jpg

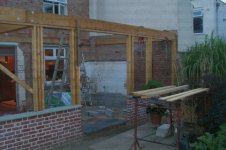
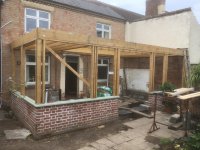
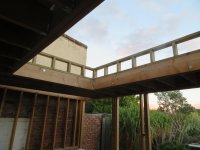
Getting to the point of ordering wood had taken the best part of 10month since the footings were dug, however the main structure went up over a couple of weekends which made the project visually take a big leap forward.
IMG_0802.JPG
CIMG1388.JPG
CIMG1389.JPG
IMG_0817.JPG
IMG_0818.JPG

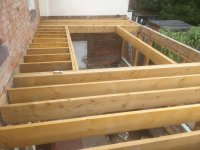
The timber yard delivered 10 sheets of 18mm OSB for the roof sheathing whilst I was out and unfortunately placed it right in front of my workshop door, blocking access, so rather than move them and then move them again later I cut them all to size and place them on the roof, however they all need lifting to fit the firring pieces across the joists to give the correct fall to the roof.
IMG_5691.JPG
IMG_5689.JPG
IMG_5688.JPG
IMG_5693.JPG

Well that brings us bang up to date, I want to get the insulation and the EPDM on the roof before the weather changes for the worst, I'll then probably wrap the structure to keep the winter weather at bay, before migrating to the workshop to make a start on the roof lantern and windows.

That is after I've tidied and made room in the workshop....................

Jon
 
Cracking job, that man. How many Weetabix did you need to keeplifting that chunk of wood ? I know I couldn't.

Your upstand construction for the lantern is also interesting. How will you face it off ?
 
RogerS":246udjow said:
Cracking job, that man. How many Weetabix did you need to keeplifting that chunk of wood ? I know I couldn't.

Your upstand construction for the lantern is also interesting. How will you face it off ?

Thanks Roger,

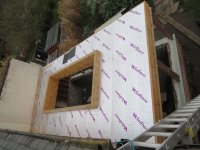
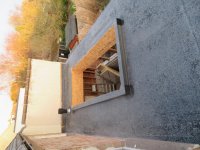
The upstand will be clad in 9mm OSB either side, with 100mm celotex between. The inner OSB will drop down and cover the joist and will itself be covered with plasterboard. The outer OSB will have the EPDM directly bonded to it.

Jon
 
RogerS":1yi07o5w said:
........Your upstand construction for the lantern is also interesting. How will you face it off ?

If I remember my drawings correctly, this roof will be a warm deck, meaning the insulation will sit on top of the joists (and OSB). Therefore, what looks like a huge upstand now will be much reduced in the end.
 
Mike your memory serves you well.

The upstand at present is 325mm, on top of the joists will 18mm OSB, 130mm insulation topped off with 9mm ply, the firrings close to the house are 47mm deep so once the roof is covered the upstand height will be some where in the region of 121-168mm.

Jon
 
I'm really not very good at these WIP postings. I'm sorry to say it's been 5 months since my last update.

I'd all but given up on getting the EPDM on and the roof watertight before Xmas because of the incessant rain we had leading up to Christmas, Mike had advised not to fit the insulation and the top deck of ply unless I could get the EPDM promptly as the water would get trapped leading to rot.

Life then threw us a real spanner in the works, I was due to fly out to Majorca with my parents for a 10 day holiday over the Xmas period, unfortunately the evening before we were due to fly my mum suffered a stroke, so the holiday was cancelled and I unexpectedly found myself at home over Xmas. After a couple of days of turmoil and shock, I noticed the weather had been dry and was forecast to stay dry for most of the week, so to take my mind of things I decided to crack on with the roof. (Mum is making a good recovery and is back on her feet)

There's not too many photos of the roof covering as most nights I finished working by torch light.
IMG_5709.JPG
IMG_5711.JPG
IMG_5732.JPG


All the EPDM came from Rubber4Roofs, who are 20minutes from me, I found them incredibly helpful and they didn't laugh too hard when I rang them in desperation having kicked over a pot of primer on the roof!!! :oops: :oops:

I went for the thicker 1.5mm rubber, the extra cost was marginal and it gave additional peace of mind. I had help getting it on the roof, the roll was VERY heavy, it was a struggle even with the extra pair of hands. I'm fortunate that my bedroom window opens onto the orangery roof, so the best way was to lug the roll through the house, up the stairs and out through a window.

The drawback of those bedrooms windows is I now look out over all the air bubbles trapped under the rubber!! :(

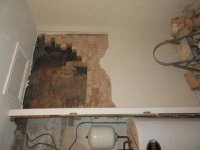
Just after I got the roof watertight (apart from the great hole in the middle), the weather returned to it's usual wet and cold, so I turned my attention to the insides. I need to remove a chimney breast as the downstairs wall is being removed, the external stack had already been removed to below the roof line, so I started in loft working down until I broke into the bedroom.
IMG_5720.JPG
and just kept going
IMG_5722.JPG

IMG_5726.JPG

Up to now, the chimney has been constructed with lime mortar, and a quick tap, either with hand or hammer was enough to free the brick, however when the chimney breast in the kitchen was bricked up to take a gas fire (originally the chimney housed a range cooker, you can still the tiles splash back), the left hand pillar was rebuilt at some point with rock hard mortar, my SDS chisel won't touch it, but as the wall is currently only single skin I don't want to use too much force to demolish it. I'll insert a beam to support the upper wall before taking a sledge hammer to what remains of the chimney breast.

Although I thoroughly enjoyed the process up to now, I couldn't wait to get back to some woodworking and here was my first opportunity, the roof lantern :eusa-dance:
IMG_5734.JPG
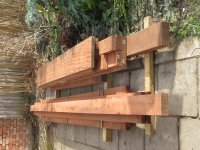
A lovely pile of Sapele :eusa-clap:
The long 4m cill sections were awkward running through my P/T, but I was fortunate that boards were pretty flat and twist free to start with.
57384456236__27BD2694-F90E-49CD-B648-C3B580B56824.JPG
I wanted to do something to break up the plain rafters and was going to go for chamfers until I found the large round over bit
IMG_1074.JPG
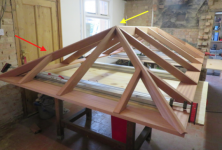
The only space I've got large enough and out of the weather to dry assemble the lantern is in my kitchen, it really does give it a sense of scale, the lantern fills the kitchen, I have to breath in to reach my cooker!!
IMG_5755.JPG
The lantern is pretty much finished, I'll break it all down now and paint it before reassembling in position on the roof.
 
Cor blimey ! Sapele :o Now, there's posh! Great posts...I can see them posting....which one of us will finish first ?

Whose system have you chosen for the glass. liners etc ?
 
Before I can knock down and remove that internal wall and the rest of the chimney breast in the kitchen I need to fit a new exterior door to what is currently my outside toilet, but will become the entrance to my utility room.

IMG_5747.JPG

View attachment 1

I would like to fit the door to the inner leaf of the brick work (solid 9" wall) so it's set back slightly. I want to avoid having a wide wooden threshold, so I'm thinking of fitting a stone step/cill to match the stone head above the door, however I can't find any examples on the net of how to overcome the weather sealing / draught proofing.

I know I could machine a slot for a pile carrier on the underside of the door, and fit a wooden weather bar to deflect the rain at the bottom but would this come up to modern day standards? (I already have two very draughty exterior doors - I don't want to deliberately add another).

Can anyone advise or show examples?

Ta
Jon
 

Attachments

  • IMG_5748.JPG
    IMG_5748.JPG
    294.1 KB · Views: 9,166
Thanks Bob,

I generally use a digital camera to avoid the issues with i-phone photos, the two pictures above of the door have been taken with that camera and yet I'm having rotation issues still.

Rotating the photos and then reloading them doesn't appear to make much difference, I'll experiment further.

Jon
 
Hi Roger,

I've always viewed Sapele as a dependable but dull hardwood, I use it for anything painted, however, I had some lovely grain patterns on this batch and I'm almost loathed to paint it.

I'm going to use the Exitex Capex system of roofing bars, powder coated aluminium. I would have preferred to go a more traditional route, timber bars with a lead capping, but I decided to go with the Exitex system for speed of installation - I just hope it doesn't look too modern.

My money is on yours to be finished first :obscene-drinkingcheers:

Jon
 
The basic problem is with the way that apple store the photos which is the basic file plus an orientation indicator.
It might be that when you load the photo onto an apple device, that the storage system comes into play. You might still have to rotate in "photos" to get it right.

I cant try this as i take photos on iphone and post from a pc platform.

Good luck
Bob
 
Lovely looking lantern, Jon! I hope you've thought of a way of getting it up on the roof...... :lol:
 
It is a shame about the pictures but the work is impressive. Do you know what caused the issues with the rubber I am going to fit mine soon so any tips would be appreciated.
 
Hi Michael,

They're not big issues, I'm told I'm a perfectionist so little things p155 me off. However my lessons learnt would be:

1) Get help, it's best to roll the rubber down onto the deck adhesive, doing this by yourself it's difficult to get it to roll straight and flat.
2) The roof lantern made things difficult for me, I ended up gluing it down in four sections, if yours is one flat roof it should be fairly straightforward.
3) Do it in the summer. The advise is to let the rubber settle for a period of time, the rubber is supplied folded so will have creases, the longer you can leave it lying flat in the heat the better your chances of losing the creases.

Other than that it's a fairly easy process and gets you a waterproof roof potentially in a day.

Jon
 
Norty Raskel":3owkcv82 said:
.....
3) Do it in the summer. ..... lying flat in the heat .....
Jon

LOL....you do know where Michael lives, don't you ? :lol:

Your lantern is very, very tidy. If I can make mine as well, I'll be very pleased.

Did you look into the Alukap system at all ?
 
Jon...how have you constructed the roof lantern ? Proper joints ? Screws ? Domino's ?
 
Hi Roger,

A combination of dominoes and screws, but the decision was based really on the need to assemble it in the kitchen and then dismantle before rebuilding on the roof. I think on final assembly I'll add glue to the joints/dominoes so the joints should be rock solid.

I received my order of Exitex Capex on Wednesday, I'll get some photos up over the weekend.

Jon
 
Norty Raskel":27u7retg said:
Hi Roger,

A combination of dominoes and screws, but the decision was based really on the need to assemble it in the kitchen and then dismantle before rebuilding on the roof. ....

Jon

I was hoping you'd say that ! Did you do your domino's vertically or horizontally ?
 
Two vertical dominoes in the birdmouth and a single horizontal at the ridge. I did think about going straight through the ridge with a single long domino to pin the rafters on both sides, but in the end put separate dominoes either side.

Jon
 
Thanks Jon. Getting the orientation right to facilitate assembly is challenging, to say the least, as far as I'm concerned.
 
Looking at your lantern, Jon..

Is there any reason why the jack rafter finishes below the hip rafter ? Surely it needs to be flush at the top to support the glass completely ? (red arrow)

What's the little gizmo shown by the yellow arrow ?
 
Hi Roger,

The hip rafter is chamfered along its length to accommodate the change in angles at the corner (the hip backing angle), so the jack rafter joins at the bottom of that chamfer to form a continuous surface up to the peak of the hip chamfer. I hope that makes sense.

I don't see your picture, so I'm not sure what the yellow arrow is pointing at.

Incidentally I found this calculator invaluable during the design phase https://www.blocklayer.com/roof/roofeng.aspx

Jon
 
Norty Raskel":go4rcd1s said:
Hi Roger,

The hip rafter is chamfered along its length to accommodate the change in angles at the corner (the hip backing angle), so the jack rafter joins at the bottom of that chamfer to form a continuous surface up to the peak of the hip chamfer. I hope that makes sense.

I don't see your picture, so I'm not sure what the yellow arrow is pointing at.

Incidentally I found this calculator invaluable during the design phase https://www.blocklayer.com/roof/roofeng.aspx

Jon


Senior moment !

jon's lantern.png

It looks like a step ie the end of the jack rafter is not flush with the chamfer on the hip rafter.
 
Hi Roger,

I thought that must be what you were referring to, as I couldn't think of anything else.

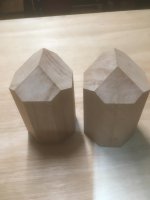
I made a block up to fit the end of the ridge, to make the joins of the rafters neater as they will be very much on show.

I made one in softwood first to proof the concept
IMG_1075.JPG

And then made the real thing with some additional detailing
IMG_1134.JPG

Jon
 
That's an interesting approach and provides very good strength at the corners as well as being visually appealing. Shame you're painting that lovely sapele !
 
Back
Top