• Hi all and welcome to TheWoodHaven2 brought into the 21st Century, kicking and screaming! We all have Alasdair to thank for the vast bulk of the heavy lifting to get us here, no more so than me because he's taken away a huge burden of responsibility from my shoulders and brought us to this new shiny home, with all your previous content (hopefully) still intact! Please peruse and feed back. There is still plenty to do, like changing the colour scheme, adding the banner graphic, tweaking the odd setting here and there so I have added a new thread in the 'Technical Issues, Bugs and Feature Requests' forum for you to add any issues you find, any missing settings or just anything you'd like to see added/removed from the feature set that Xenforo offers. We will get to everything over the coming weeks so please be patient, but add anything at all to the thread I mention above and we promise to get to them over the next few days/weeks/months. In the meantime, please enjoy!

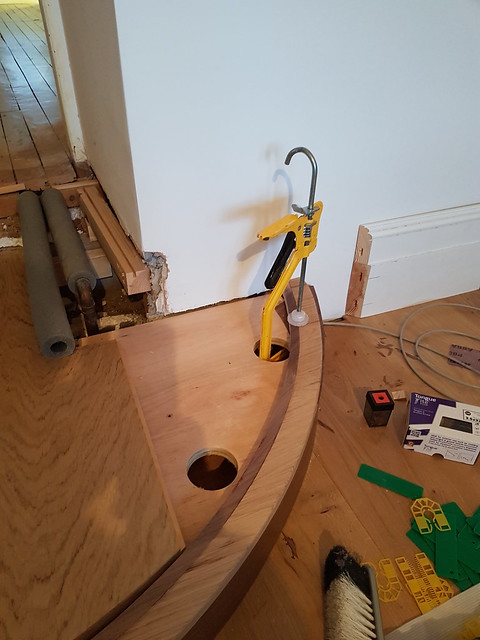
Set of circular segmented steps

TrimTheKing":34ogsbjz said:
Come on Roger, you're an infinitely resourceful and indefatigable man, I'm sure you can pop it all apart somehow...

Not a snowball's.
 
He, or she, who never made a mistake never made anything. The only words of comfort I can think of.

But where there is a will there is a way. Sleep it on it.
 
Rodger...feel your pain, we've all been there!

Could you not cut the moulding in a couple of palaces, and domino in some clever splices to give you a better radius.....make some thought about where to do the cuts and the material for the splices and you would probably be the only person that will see it.

Sent from my SM-J530F using Tapatalk
 
Thanks, Jonathan.

I'd thought about that. Cutting in the middle, moving the two halves into the right position and then inserting a walnut wedge in the gap but veto'd by Chief Designer. I'm going to take a raincheck for a while on this project. At least we have another door into the room!

Had a peek at your website. There's some quality stuff there :eusa-clap:
 
Rodger.

I wouldn't put it in the middle, it would kind of smack you in the face as a mistake ....I would divide in 3.....so 2 splices and it would look like a design feature.

One of the problems you could come up with in the future is....because of the cross grain it could split.

I now very little about this but would love to try steam bending something like that..

ps....where did you see my website addresses?

Sent from my SM-J530F using Tapatalk
 
Now where were we ? Ah yes ...


A suggestion by my wife prompted a bit of lateral thinking
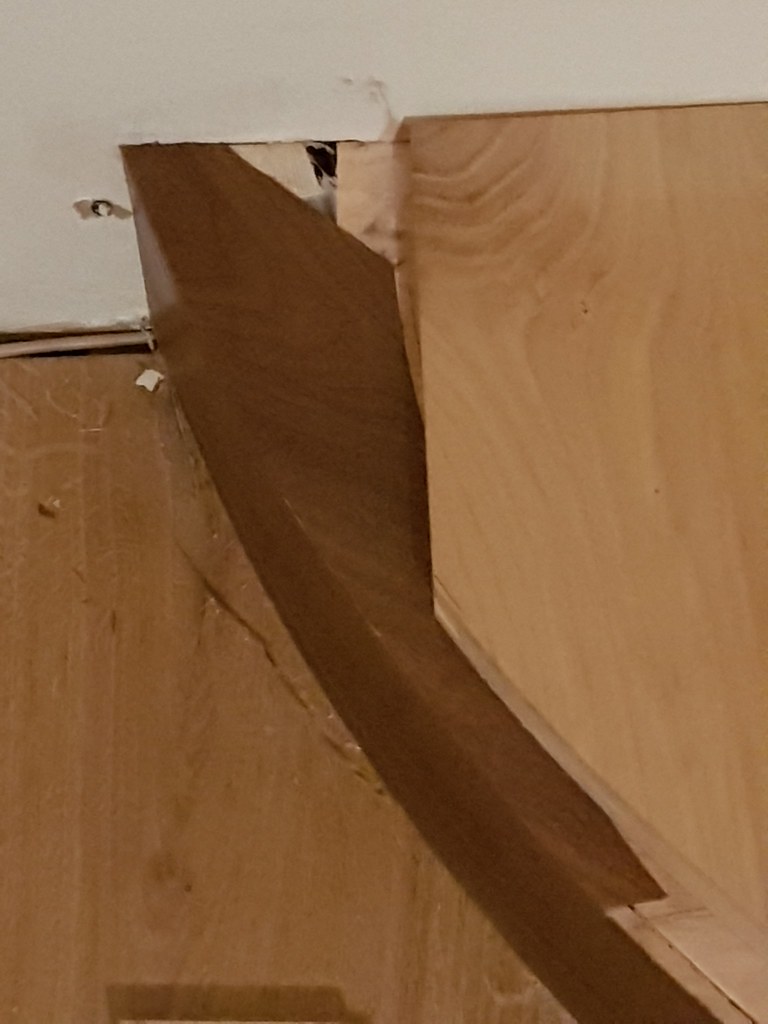


Turn it into a 'feature'... :eusa-dance:


Don't look too closely at the duff join in the veneer. It's not really that noticeable in the flesh. Honest.


Well aware that the corner edge is vulnerable but can live with that.

Laid the floorboards for the bottom step in place, placed the nosing assembly on top and drew a pencil line between the two. Originally I'd planned to use the template I'd made/bodged ages ago...where we talked about bearings and offsets..but came to the conclusion that it would be better to go the pencil-round route.

The curves are cut close to the line on the bandsaw and then sanded on the linisher which makes short work provided you are careful not to go too gung-ho.


Then it's just a simple task of finely sanding to the required shape and offering each piece up to the nosing to check for a fit. Easy-peasy :eusa-whistle: ...not. Do I do it in the house with the nosing fixed (permanently or temporarily...both have their plus and minuses) - trekking back and forth between house and workshop? Or take the nosing out to the workbench, clamp it in place and finesse the curves on the floorboards there? The latter being very handy since the linisher is only feet away. I opted for the latter.

I used the central piece of floorboard as my reference
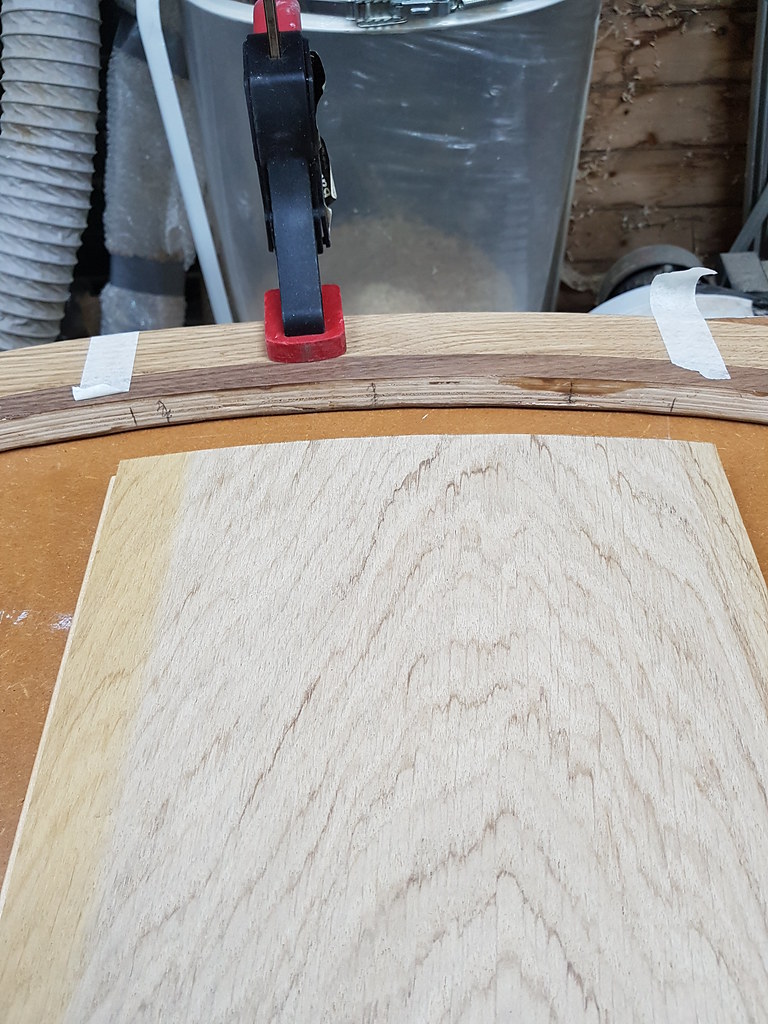

That piece went in very easily as did the next one a long but by the time I started on the third piece it all started getting very tricky as the individual pieces slipped and slid relative to each other. And relative to the nosing. But they all look OK-ish once in place. Eventually.

But now I’m in a quandary and a rod for my back of my own making. How the Hell do I fix them all down ?

I can glue and screw (using Tongue-Tite screws …ideal for this purpose) the nosing down first but how do I ensure that it’s in the right place relative to where the floorboards will be?

And if I do that then how do I get the floorboards into place as they are T&G


I can’t glue them up as a unit and then drop them into place after fitting the nosing because (a) the CH pipe makes that difficult and more importantly (b) I’ve found that their position relative to the nosing is critical if gaps here and there are not to appear. They shouldn’t do because it’s a nice perfect curve…not ! Think I might have had some play in my trammel when I made the original templates.

I can’t fit the floorboards down first ahead of the nosing as then I can’t get any screws into the nosing and neither can I clamp it down while the glue sets.

Current thoughts are to remove the bottom tongue of the groove of each piece so that they can drop down onto the adjacent floorboards tongue but I do know that the floorboards are not 100% flat and so I’m going to have to glue them in place with a damn heavy weight on each to keep them flat until the glue sets ….but even then I’m concerned that the glue could fail and let them pop back up, as it were. I’m reluctant to screw them down using those plug and dowel sets as they’d be too visible.

Also I noted that the nosing moves slightly as the Tongue-Tite screws are inserted.

So the current plan is to get my mate, Richard, up. We place the floorboards in position unfixed. Apply glue where the nosing will go. Offer up the nosing to get the best tightest fit to the floorboards. Then while he holds the nosing rigidly in place, I remove the floorboards which then allows us to screw the nosing down. Then starting at one side, apply glue for the first floorboard, screw it down through its tongue using Tongue-Tite screws. Drop the next one in place and repeat the fixing…all the while making sure that they are as snug a fit as possible to the nosing.

And hopefully the last one will drop precisely into position with nary a gap. But I don’t think I have anything heavy enough to keep any bent ones down until the glues has gone off.

Straws…clutching.

Any ideas, chaps ? :eusa-think:
 
I've struggled a bit trying to understand exactly what you are doing here :)

If I see it right your nosing and floor panels will fit together into a large semi circular panel. Rather than fit that panel in bits to the step base couldn't you make the panel up then fix it as one piece.

I'm thinking some kind of Tee toggle on the underside that go into keyhole slots in the sub panel. Dry fit until it all seems tight then glue it on. or don't glue if it is strong enough and just screw it down under the top step.
 
Robert":1aknqsyb said:
I've struggled a bit trying to understand exactly what you are doing here :)

You and me both ! :D
Robert":1aknqsyb said:
If I see it right your nosing and floor panels will fit together into a large semi circular panel. Rather than fit that panel in bits to the step base couldn't you make the panel up then fix it as one piece.

It's a nice idea but impractical to glue up, clamp and manhandle as it's so large relatively. Even if I managed to do that, there's a potential weakness in the joint between nosing and floorboards...think trying to glue the two ends of a piece of ply together. Lots of end grain on end grain.

Robert":1aknqsyb said:
I'm thinking some kind of Tee toggle on the underside that go into keyhole slots in the sub panel. Dry fit until it all seems tight then glue it on. or don't glue if it is strong enough and just screw it down under the top step.

The top step isn't accessible to do any screwing down.
 
The answers to a couple of my concerns have been staring me in the face ! :eusa-doh:

Keeping the nosing assembly in place for gluing and screwing ...sorted !


My concern about removing part of the T&G on the floorboards ? Only necessary on the last piece :D All the rest can be 'finessed' into place without removing anything. :text-bravo: So I can use the T&G to keep it all level and secure.
 
While the nosing is being glued down (I used a version of No-Nails as it dries slightly flexible) attention turned to the top step.

Having learned a lot from making the bottom step and being a smaller step, it went together much quicker and slicker than the bottom step.

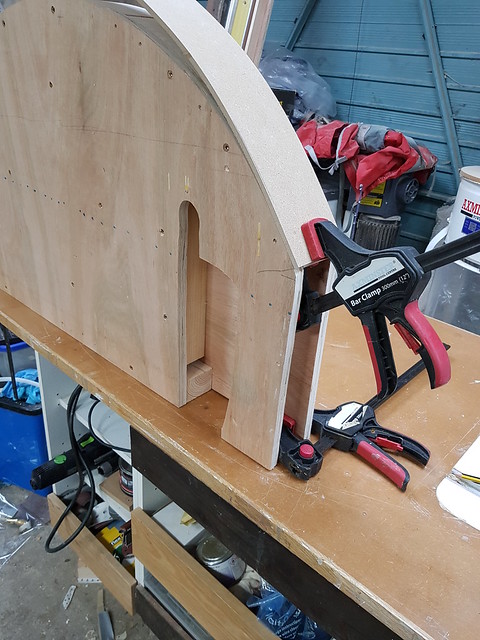
Create the subframe with suitable cutout for the CH pipes.

Bandsaw curved blocks to support the riser.

Glue and screw all together then ..

Glue the riser in place - pre-curving it using the hot-air gun technique…brilliant tip.


Add lots of screws to hold it down tight against the curved support blocks

[

And when the glue went off, add the veneer, stick the whole lot in the vacuum press et voila

 
Glad to see you are beating this job into submission once more rahter than the other way round! :lol:

Incidentally looking at the latter photos, is your clamp rack a cunning design or did you mislay your spirit level that day?

Bob
 
Phil":215jc7yb said:
Looking good Roger.

Is that a bit of an echo chamber on the top right of the one pic?
:o :shock: :( :)

Which one, Phil ?

Bob...it was held in by friction. Over-enthusiastic slamming of the Up'n'Over door two years ago made it slip. I never use those clamps.
 
Being slow on the uptake, Phil...still don't get you ! :)
 
Phil":3hflnppy said:
Roger, the gap in the top circle, just above the chamber entrance


Got you...that was before it was all screwed down tight ! Thought I had a photo but clearly not !
 
Glueing the nosing assembly for the top step was even trickier due to the tighter radius. Dominos are NOT the right thing to use...DAMHIKT. Bit stupid of me TBH. I'd thought 'more is best' and daily cut domino slots all the way round. But they are cut along radial lines. So as you go round the curve, the axes of the dominos means that you're trying to fit the two pieces together in conflicting directions. Even with wide domino slots in one of the pieces. If my explanation isn't that good I can make a sketch. It all got a bit frantic towards the end with dominos being pulled out, cut off, shavings mixed with glue wiped off, sweat, cussing. Obvious really in hindsight. :oops:

One of those few occasions when a biscuit is the best option.

And so we're on the home straight and time for the floorboards to go on the top step. Originally I'd wanted them to follow on through in a seamless manner and segue into those that would be laid later in the hall. But then I realised that trying to manhandle and accurately sand the curves on the ends of 2.4m lengths of board just simply wasn't going to happen. So a traditional threshold strip was the way to go.

Not that many boards. I wanted to slot the two outer boards under the existing plasterboard to give me the option of not fitting any skirting board in the door opening if I or CD decided that that was the neater option. Enter the ever-brilliant Fein, slide along on top of the floorboard and trim away.

I'd thought that I'd taken a load of WIP photos but clearly didn't. My apologies. And so without further ado.

Ta da !

Finished ! (apart from making good)


Please ignore the colorimetry. It's my camera.
 
Well done Roger. It was always only a question of how and when, not if........ :D
 
Thanks chaps.

I forgot to add that my 'fudge' toolkit for awkward dings in fancy wood was pressed into service. Lots of different shades of wax. A multitude of oil paints and fine brushes. Earth pigments of varying colours and coloured crayons.
 
:text-bravo: Jobs a good'un Roger! Looking great. But then it always was going to be fine once the toys were repatriated to the pram! :lol:
 
Respect.

You did NOT let that barsteward job beat you. "Ave! Rogerius Maximus Liginius! We who are about to make similar almighty screwups salute you!".

Samson Crassus Gallia.
 
Back
Top