
-
Hi all and welcome to TheWoodHaven2 brought into the 21st Century, kicking and screaming! We all have Alasdair to thank for the vast bulk of the heavy lifting to get us here, no more so than me because he's taken away a huge burden of responsibility from my shoulders and brought us to this new shiny home, with all your previous content (hopefully) still intact! Please peruse and feed back. There is still plenty to do, like changing the colour scheme, adding the banner graphic, tweaking the odd setting here and there so I have added a new thread in the 'Technical Issues, Bugs and Feature Requests' forum for you to add any issues you find, any missing settings or just anything you'd like to see added/removed from the feature set that Xenforo offers. We will get to everything over the coming weeks so please be patient, but add anything at all to the thread I mention above and we promise to get to them over the next few days/weeks/months. In the meantime, please enjoy!
You are using an out of date browser. It may not display this or other websites correctly.
You should upgrade or use an alternative browser.
You should upgrade or use an alternative browser.
Shed rebuild
- Thread starter Coolhands
- Start date

Rod
Old Oak
I like the colour scheme - coming on nicely
Rod
Rod
Coolhands
New Shoots
haha yeah the boards have 'matured' since they've been left on the ground / grass etc while I've been building the main frame. It now looks like a 300-year-old barn lolRod":1mg5r5ws said:I like the colour scheme - coming on nicely
Rod
Coolhands
New Shoots
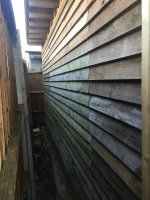
Back wall completed last night (except for eaves, to do later); it has 3 sections / lengths of featherboard. Will hopefully do front wall tonight. Pleased to report the drip rail is working well - I have also purchased guttering etc to put up at some point.

Mike G
Petrified Pine
It's best to stagger the joins in boards such that they aren't one above the other, for a couple of reasons. Firstly, a continuous board above a join helps holds the top of the boards stable against curling as they dry. As you have it, the bottom edge of one board curling would release pressure on the board below. This is always a potential weakness at the corners, but you avoid it where you can. Secondly, butt joints are a potential rout in for water, but if there is a continuous board below a weep, the water is more inclined to follow a path back out. With a join below it, water can easily stay inside the wall wetting the end grain, and eventually leading to failure.
It isn't a huge deal. I wouldn't suggest changing it now. However, I'd try to avoid doing this elsewhere.
It isn't a huge deal. I wouldn't suggest changing it now. However, I'd try to avoid doing this elsewhere.
Coolhands
New Shoots
:eusa-dance:
Front wall and remaining right wall (not shown) now complete. Well, except for eaves all round which will be a bit fiddly and time consuming but I can do them another time. Now all the main exterior components are done, and I can start on the inside.
I had to buy some more featherboard for the right wall, (didn’t want new on the front) and spent 70 quid! I’m glad I managed to reuse all my original featherboard for the rest, the de-nailing effort was worth it!
I’ve been taking advantage of the reasonable weather. It rained a bit yesterday afternoon but I could still work, and it’s not cold which is great for this time of year.
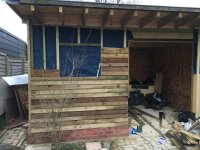
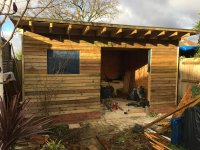
Front wall and remaining right wall (not shown) now complete. Well, except for eaves all round which will be a bit fiddly and time consuming but I can do them another time. Now all the main exterior components are done, and I can start on the inside.
I had to buy some more featherboard for the right wall, (didn’t want new on the front) and spent 70 quid! I’m glad I managed to reuse all my original featherboard for the rest, the de-nailing effort was worth it!
I’ve been taking advantage of the reasonable weather. It rained a bit yesterday afternoon but I could still work, and it’s not cold which is great for this time of year.

DaveL
Old Oak
Yes, looking good!
Rod
Old Oak
Good Work
Rod
Rod
Excellent, looks great. I love the old cladding, gives it a really great look.
Coolhands
New Shoots
Lights arrived at work. Just got to get them home safely! :lol:
I bought 2 to start with but I’ve gone for warm white, and also purchased the frame etc they offer to make fitting easier. A bit more expensive than £19 (I think 32 each) but might be worth it.

Edit (there is a top-box on the bike holding them upright)

I got them home safely and tested them to make sure they work ok. Warm white seems decent. These are to go on the ‘modelling’ side of my workshop. I may evaluate them before I decide whether to use more of the same or go cool white for the workshop side (motorcycle maintenance etc)
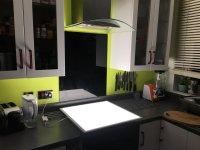
I bought 2 to start with but I’ve gone for warm white, and also purchased the frame etc they offer to make fitting easier. A bit more expensive than £19 (I think 32 each) but might be worth it.
Edit (there is a top-box on the bike holding them upright)
I got them home safely and tested them to make sure they work ok. Warm white seems decent. These are to go on the ‘modelling’ side of my workshop. I may evaluate them before I decide whether to use more of the same or go cool white for the workshop side (motorcycle maintenance etc)

4ndy
Seedling
That's a rather scary sail you've attached to the back, think I'd have been inclined to lie them flat! Hope you get home in one piece!
MY63
Old Oak
Those lights look great workshop is looking good too.

- Joined
- Jul 21, 2014
- Messages
- 10,414
- Reaction score
- 164
Malc2098":730c5ugz said:The workshop's looking a lot like a modern kitchen. Nice. :eusa-whistle:
A chap has to have a brew now and then :lol:
Bob
Coolhands
New Shoots
I wanted to fit the old doors for at least some nod towards security, so I did that tonight. I had to cut some off some height, and fitted the left one. The right one however needed to be about half the width, so take one door - and cut in half!
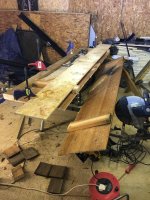
Reattach a side bit
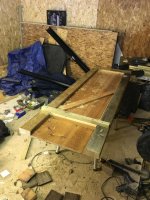
Et voila one suicide door!
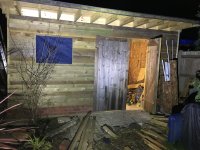
I plan to make some decent doors properly in the summer, but at the moment needs must.
Reattach a side bit
Et voila one suicide door!
I plan to make some decent doors properly in the summer, but at the moment needs must.
Coolhands
New Shoots
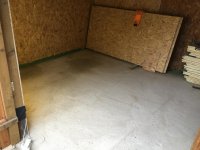
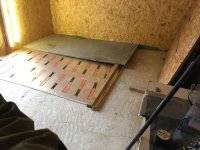
Today I tidied up everything and emptied it out so I could put the floor down. Trip up the dump at 8.30am to take about 10 bags of waste wood / offcuts to make moving about possible. I bought 2 new sheets of insulation to make flooring a bit quicker & easier and used lots of the original too (which is all in small pieces cos of the original arrangement). I also had to use the original osb floor boards which aren’t in great condition but too expensive to replace. Looks alright now it’s down.
Tidy up and sweep:
Boards going down:
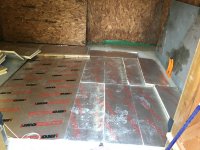
I’m now in the process of making the stud internal wall. This serves 2 functions: to split the space into a clean side (modelling) and a dirty side (motorbike); and to support the cross beam mid-way to help prevent roof sag.
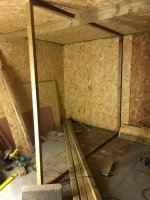
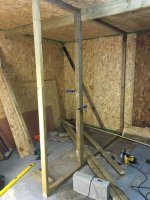
I’m making it on top of the floor so in theory it would be possible to remove in the future if I wanted one big space for some reason. Probably never will though. When that is made I will spray white.
Tidy up and sweep:
Boards going down:
I’m now in the process of making the stud internal wall. This serves 2 functions: to split the space into a clean side (modelling) and a dirty side (motorbike); and to support the cross beam mid-way to help prevent roof sag.
I’m making it on top of the floor so in theory it would be possible to remove in the future if I wanted one big space for some reason. Probably never will though. When that is made I will spray white.
Coolhands
New Shoots
Thanks you’re very kind. I keep thinking I’m not doing enough! But you know what it’s like, even doing the floor required much cutting of original osb boards as this shed floor dimensions is different / smaller then the original.
I also find everything’s a struggle as either the tools you need are put away somewhere, (eg I’m using that block in the pic above to stand on, as my step ladder is not available!!!) or there’s not enough space cos of all the building materials that are in your way!
I’ve started adding an extra cross beam at a lower level with a gap above it. This runs from the right side to the stud wall. It is to enable me to use straps to hold a motorbike up when I want to take the forks out, for example. It doesn’t have to be too strong. I planned it, so there is a gap in the wall to slide it into, and a stud for it to sit on. (Bit hard to see the beam cos it blends into the other wood in the pics)
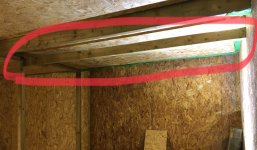
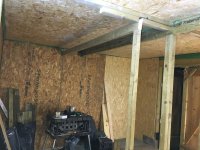
I also find everything’s a struggle as either the tools you need are put away somewhere, (eg I’m using that block in the pic above to stand on, as my step ladder is not available!!!) or there’s not enough space cos of all the building materials that are in your way!
I’ve started adding an extra cross beam at a lower level with a gap above it. This runs from the right side to the stud wall. It is to enable me to use straps to hold a motorbike up when I want to take the forks out, for example. It doesn’t have to be too strong. I planned it, so there is a gap in the wall to slide it into, and a stud for it to sit on. (Bit hard to see the beam cos it blends into the other wood in the pics)
Coolhands
New Shoots
Got the stud wall up today. I decided to bring it forward all the way and have left the correct space for a regular door once door liner is fitted at this end. I was also able to use all the left over insulation used previously under the floor since I had bought 2 new sheets.
This was handy for 2 reason - my modelling room will be able to warm up quickly and retain heat when I’m in there (with door shut once I fit one); and it got rid of all the insulation so I don’t have to dispose of it up the dump - only a few scraps left now. Only negative is there was more than I though so I might not have had to buy 2 sheets for the floor (mentioned above) and could have saved some money. However speed was an issue too, when putting down the floor so on balance I probably made the right decision.
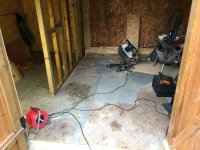
Better overview of floor (not much to see really):
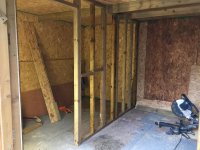
Stud wall frame complete:
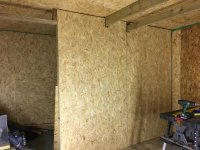
Osb fitted this side:
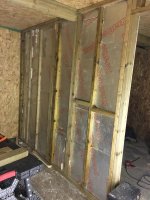
Insulation viewed from modelling room side:
I’ve cut one osb ready for this side, and just have to purchase one more (last one!) and cut. Then a tidy up and paint, hopefully. Will try to do in the week after work.
This was handy for 2 reason - my modelling room will be able to warm up quickly and retain heat when I’m in there (with door shut once I fit one); and it got rid of all the insulation so I don’t have to dispose of it up the dump - only a few scraps left now. Only negative is there was more than I though so I might not have had to buy 2 sheets for the floor (mentioned above) and could have saved some money. However speed was an issue too, when putting down the floor so on balance I probably made the right decision.
Better overview of floor (not much to see really):
Stud wall frame complete:
Osb fitted this side:
Insulation viewed from modelling room side:
I’ve cut one osb ready for this side, and just have to purchase one more (last one!) and cut. Then a tidy up and paint, hopefully. Will try to do in the week after work.

will1983
New Shoots
Where did you buy your insulation from?
I need about 15 sheets in the next week or two.
Will
I need about 15 sheets in the next week or two.
Will
Coolhands
New Shoots
selco (I have a member card). They do various thicknesses.
Question to anyone still reading: I want to make the window frame / lining. I intend to have a single piece double-glazed window made to the opening.
Do I use (say) 150x25mm PAR redwood planed, then what? Rebate using a router to accept the window up against an edge - in which case would I want the removed material to be on the inside or outside? if you know what I mean.
Then, would I just use beading to secure the window in the recessed frame?
I am thinking about security and also rain. If rain, I would want to put window in from the outside (so rain wouldn't leak 'past' and into the shed; but then that would be easy for a scrote to lever out any beading holding the window in?
But if other way round then rain could run into shed (if pane was inserted from inside the building & beading was therefore inside)
any thoughts / links to something for me to read?
Question to anyone still reading: I want to make the window frame / lining. I intend to have a single piece double-glazed window made to the opening.
Do I use (say) 150x25mm PAR redwood planed, then what? Rebate using a router to accept the window up against an edge - in which case would I want the removed material to be on the inside or outside? if you know what I mean.
Then, would I just use beading to secure the window in the recessed frame?
I am thinking about security and also rain. If rain, I would want to put window in from the outside (so rain wouldn't leak 'past' and into the shed; but then that would be easy for a scrote to lever out any beading holding the window in?
But if other way round then rain could run into shed (if pane was inserted from inside the building & beading was therefore inside)
any thoughts / links to something for me to read?

Malc2098
Sequoia
If the window isn't overlooked then it'll be more favoured by a scrote than one that is overlooked.
Whichever way you rebate it in, you can always put some metal bars across and up and down the reveal inside screwed or bolted to studs.
Whichever way you rebate it in, you can always put some metal bars across and up and down the reveal inside screwed or bolted to studs.
MY63
Old Oak
Sorry I cant help with your question but still reading 
Coolhands
New Shoots
Bit of an update, I finished interior and painted white, took a whole day believe it or not (don’t bother with cheap sprayers, I wasted an evening on one. Totally useless, now binned). Fitted bench at normal table height for sitting at for model making etc. Then promptly got everything in out the damp garden (FYI tarps don’t work)
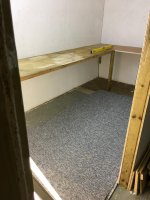
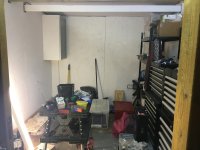
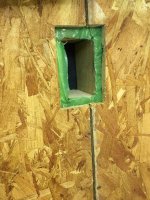
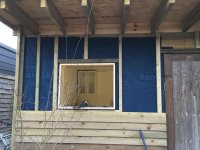
Fitted window frame which meant I found I had made a mistake with featherboard when I cut the material open, so featherboard had to be taken down, and new put up the correct width to meet the window frame correctly
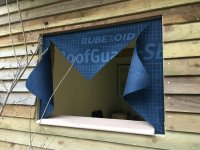
This gap is wrong:
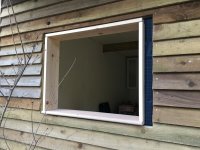
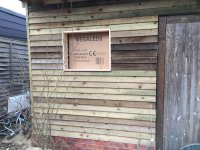
Down she goes
And up! With new boards
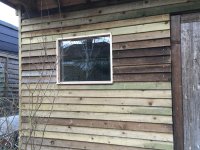
Had double glazed unit made for 30 quid and fitted today. I sandwiched between wooden beading, and used a cheap window / frame sealer (in a gun) to seal.
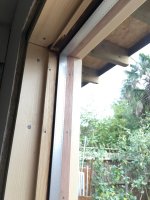
Finally, I have fitted old batten units to my motorbike side, and wired up. And one LED wired up on modelling side. Used proper wire etc but is still attached via an extension lead at the moment. But can now switch on and off easily and see properly. Phone pic is bad - can’t cope with contrast - but in real life it is all nice and bright now.
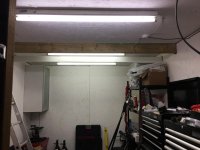
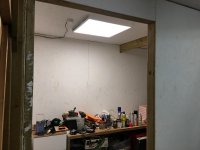
Next up is to get proper electrician (a neighbour) to wire properly to house etc, but will be a few weeks yet.
Fitted window frame which meant I found I had made a mistake with featherboard when I cut the material open, so featherboard had to be taken down, and new put up the correct width to meet the window frame correctly
This gap is wrong:
Down she goes
And up! With new boards
Had double glazed unit made for 30 quid and fitted today. I sandwiched between wooden beading, and used a cheap window / frame sealer (in a gun) to seal.
Finally, I have fitted old batten units to my motorbike side, and wired up. And one LED wired up on modelling side. Used proper wire etc but is still attached via an extension lead at the moment. But can now switch on and off easily and see properly. Phone pic is bad - can’t cope with contrast - but in real life it is all nice and bright now.
Next up is to get proper electrician (a neighbour) to wire properly to house etc, but will be a few weeks yet.
DaveL
Old Oak
Good progress, well done.
MY63
Old Oak
I like your window nice and simple was your frame too far back or was there another issue.
Michael
Michael

Coolhands":1u62pepa said:....(FYI tarps don’t work)
....
Tell me about it. Looks like you've been using one of those blue woven ones which are totally useless. I think I've tried most of them in the last month or so. Some even come with a 'do not use as a roof covering' or 'Our guarantee does not cover the eyelets' buried in the small print.
To anyone contemplating getting a tarpaulin, go for the heaviest gauge you can...they will last a reasonable length of time.
Your workshop is coming along nicely.
Coolhands
New Shoots
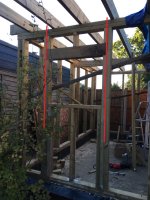
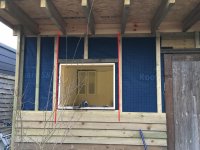
The issue is I only cut my featherboard up to the edge of the batten. I assumed the edge of the batten was the edge of the window, (as the blue material hid the true window edge). But it isn't - as can be seen by the earlier picture.MY63":2mti2s04 said:I like your window nice and simple was your frame too far back or was there another issue.
Michael
The red lines indicate the same position in both pics, and you can see how the window frame is over (by one 2x4" upright) compared with where the batten is.
Coolhands
New Shoots
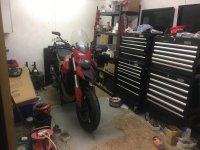
Yeaa baby! Motorbike in, for some immediate maintenance (I use as a daily commuter so need it back on the road for tomorrow morning! Now I can work in the dry & light). Haven’t had time to tidy up yet!!
MY63
Old Oak
I follow you now thanks for taking the time to explain.
Was there a reason why you only used the led panel in your modelling side or did you have the strip lights from the previous workshop.
Was there a reason why you only used the led panel in your modelling side or did you have the strip lights from the previous workshop.
Coolhands
New Shoots
Yeah just trying to keep costs down, so I’m just reusing the 3 fluorescent tube battens I already had from before + 2 new LED on the posh side!
MY63
Old Oak
I appreciate that I ordered the wood for my frame today almost Had a heart attack 
Coolhands
New Shoots
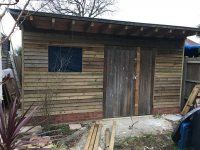
Well just to close this off as it’s basically finished. Just need to finish electrics and tidy up around the site (garden etc). In the summer I will remake the doors.
By the way I bought the frame with the LED lights to make it easy. The transformer can be situated inside - there is enough depth. The lamp then slides in and final side clips on, it’s very easy to use but effective. (Note this does mean you need 60cms clear in one of the directions to be able to slide it in). For me the extra cost is worthwhile.
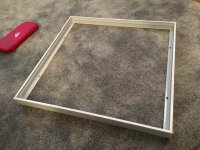
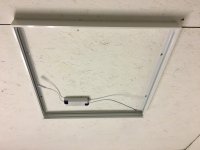
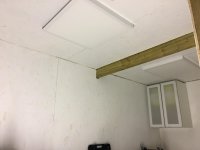
Final view. I will update in the summer once garden looks more pleasant! I need some stain to darken that window frame...
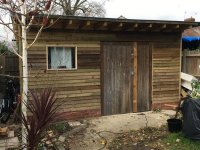
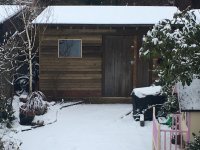
By the way I bought the frame with the LED lights to make it easy. The transformer can be situated inside - there is enough depth. The lamp then slides in and final side clips on, it’s very easy to use but effective. (Note this does mean you need 60cms clear in one of the directions to be able to slide it in). For me the extra cost is worthwhile.
Final view. I will update in the summer once garden looks more pleasant! I need some stain to darken that window frame...
Mike G
Petrified Pine
Congratulations, Coolhands, that's a fine looking shed which will last for generations. You must be very pleased. It cheers me somewhat that there are so many decent workshops being built, standing on plinths and with an airgap over the frame.
StevieB
Nordic Pine
Excellent - really enjoyed reading this build, you should be proud of your achievements!
Excellent! Looks fantastic mate and a testament to your hard work and the fantastic guidance of Mike and many others on this forum.
Coolhands
New Shoots
yes thanks all for the positive support along the way, it does get a bit exhausting at times during the build (with all the things in everyday life that are going on as well). I never would have know about the brick plinth until someone pointed me towards this forum so it cheers all  bscene-drinkingcheers:
bscene-drinkingcheers: