• Hi all and welcome to TheWoodHaven2 brought into the 21st Century, kicking and screaming! We all have Alasdair to thank for the vast bulk of the heavy lifting to get us here, no more so than me because he's taken away a huge burden of responsibility from my shoulders and brought us to this new shiny home, with all your previous content (hopefully) still intact! Please peruse and feed back. There is still plenty to do, like changing the colour scheme, adding the banner graphic, tweaking the odd setting here and there so I have added a new thread in the 'Technical Issues, Bugs and Feature Requests' forum for you to add any issues you find, any missing settings or just anything you'd like to see added/removed from the feature set that Xenforo offers. We will get to everything over the coming weeks so please be patient, but add anything at all to the thread I mention above and we promise to get to them over the next few days/weeks/months. In the meantime, please enjoy!

Shoulders on Pin Boards and Tenons

Andy Kev.

Nordic Pine
Joined
Jan 4, 2021
Messages
716
Reaction score
58
I'm definitely not qualified to be offering "how to" tips but here is something that I stumbled on at the weekend and the reason I'm posting this is because it works. I'll be amazed if nobody else does it but a quick trawl of books and the internet did not turn up this method of how to get the shoulders on dovetail pin boards and tenons just right. So please regard it as a start point for discussion rather than me trying to tell you how things should be done.

The problem: the shoulder cut, being such a short one seems to be generally expected to fit "straight from the saw" while a final trim with a paring chisel is usually recommended. That's where the problems start for me as I occasionally pare a bit down towards the first tail/tenon and so the final result can be a bit of gappiness at the shoulder.

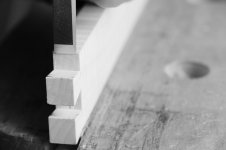
This is my counter to that and assuming that you've got your marking out right, it can hardly go wrong. The first thing is to saw the shoulder a fraction above the line, say one millimetre, so any inaccuracy is unimportant. Then place the tail board flat on the bench and with a chisel that is slightly broader than the shoulder is long, tap in the marked line and and angle the cut a degree or two upwards. Repeat from the other side (the cuts should meet more or less in the middle). Now with a chisel that is slightly narrower than the shoulder is wide and with the board held/clamped on its edge, tap bang on vertically or even a degree downwards (you can because the chisel is narrower and its only end grain) to remove the slight hump or tent (to use the Charlesworthian term), usually in one go.

The result is shoulders which consistently conform bang on to the marked line on their edges and are either flat or a fraction undercut.

Any thoughts/disagreement/outrage?
 
No outrage at all, Kev. The point is to make a joint that works, and to make it in the least painful and most repeatable way possible. Anything which works is fine. Any trick or technique is perfectly OK. Personally, I don't pare with dovetails at all. It's all straight from the saw (other than chopping down to the shoulder line between pins and tails, obviously), but I have been sawing bits of wood for many a long year, and am the golden point where the graph of sawing skills is at an all time high and the eyesight graph hasn't yet declined enough to be important.
 
Andy Kev.":4kr5ch47 said:
This is my counter to that and assuming that you've got your marking out right, it can hardly go wrong. The first thing is to saw the shoulder a fraction above the line, say one millimetre, so any inaccuracy is unimportant. Then place the pin board flat on the bench and with a chisel that is slightly broader than the shoulder is long, tap in the marked line and and angle the cut a degree or two upwards. Repeat from the other side (the cuts should meet more or less in the middle). Now with a chisel that is slightly narrower than the shoulder is wide and with the board held/clamped on its edge, tap bang on vertically or even a degree downwards (you can because the chisel is narrower and its only end grain) to remove the slight hump or tent (to use the Charlesworthian term), usually in one go.
I can't really visualise what you're saying here Andy, but a few pics would help considerably. I always, but always saw off the shoulder line by around a mm (or less) and then vertically chisel back onto it, usually with the aid of a large 'tapometer'. I've always done it this way as my tutor at uni (Gordon N. Aldersley) told me to do it this way as he said that a saw cut will always leave a fluffly line, whereas a chisel won't. He was right. The other thing of note is that he probably taught Alan Peters as well but arguably, very, very little :eusa-whistle: - Rob
 
It depends what you're working with, of course. If pine, then a saw will leave a cleaner line than a chisel.
 
Andy Kev.":3o83bod1 said:
Then place the pin board flat on the bench ...
Is this a typo? The way I read your post you are describing how to cut the shoulder at the edge of the tail board, not the pin board. If you are really working on the pin board I have completely misunderstood so disregard the rest of this post.

I have seen the "tent" approach you describe used on at least 1 youtube video but don't recall who it was. Anyway, they used basically the same technique for chiselling out the waste between tails (and pins) rather than just on the shoulder at the edge of the board.

Do you mark the shoulder line with a pencil or a knife? I use a knife and make sure I make a fairly deep line. Maybe even use a chisel to make a "knife wall". I do this on all 3 sides of the shoulder at the edge of the board. That is all that really matters. I then cut off most of the waste and pair back the bit that is left in the middle of the shoulder, making sure I don't disturb the knife wall around the edges. The centre bit can even be undercut a little without affecting how the joint looks. So a similar technique to yours, but not exactly the same.

I do agree with you that that shoulder, whilst it looks like it should be the easiest part of the joint to cut, is often the bit that is easiest to screw up.
 
@Just4fun

Yes it was a typo. I will now amend.

I feared that photos might be necessary. I'll have a go with the camera tomorrow. and I do mark out the lines with a knife, just deep enough to lay a chisel in.

@MikeG I did this with hard maple and it worked a treat. IMO pine is one of the more difficult woods to work for obvious reasons. It demands sharp chisels and fine cuts.
 
Mike G":px3cmcn6 said:
It depends what you're working with, of course. If pine, then a saw will leave a cleaner line than a chisel.
GN Aldersley will be turning in his grave at the very thought of using pine :lol: - Rob
 
Some photos would definitely be appreciated.

My dovetails have been a bit hit and miss recently. If I do the pins straight from the saw, they've tended to be too tight, but if I try to pare them to the marking line I always seem to end up with a gap! I think part of the issue is that when I chisel into end grain, the chisel just wants to follow the grain (even if I take very light cuts). I appreciate this will be down to poor technique on my part.

I think the answer (for me) is to stick with doing them straight off the saw, but to get used to sawing very close to the line. Right next to it in fact. I think if I stick with that I will, in time, hopefully get good results in the most efficient way. However, I'm very open to all tricks and tips!

In the meantime I will continue to work on repairing gaps in dovetails...
 
Woodbloke":3jxvbbsm said:
Mike G":3jxvbbsm said:
It depends what you're working with, of course. If pine, then a saw will leave a cleaner line than a chisel.
GN Aldersley will be turning in his grave at the very thought of using pine :lol: - Rob

what would he have made of using plywood?

My first real DT's project was done in birch ply

DSCN0132b.jpg
 
Just4fun":2p6skw5m said:
Andy Kev.":2p6skw5m said:
Then place the pin board flat on the bench ...
Is this a typo? The way I read your post you are describing how to cut the shoulder at the edge of the tail board, not the pin board.

Does it not all depend on whether you have a half pin, or half tail at the ends ? The method applies to both, of course.

In school woodwork they had us clamp a piece of scrap across the baseline as a guide. Over aggressive chiseling can drift beyond a knifed line. With the scrapwood guide, they are almost guaranteed to be in one crisp line. And - subject for debate - you don't have to leave a knifed baseline if you don't want one. It seems a popular affectation to leave a very prominent one these days though. I imagine somewhere someone is knifing a line across machine cut dovetails to give them that "handcut look".
 
I've got a couple of pics but have been stumped when it comes to uploading them. I click on "upload picture" and then it says to use "browse" but instead of browse "choose file" is displayed and when I click on that, nothing happens.

Does anybody know what needs to be done? (My computer is an Apple if that is significant.)
 
Andy Kev.":zgzzzue5 said:
I've got a couple of pics but have been stumped when it comes to uploading them. I click on "upload picture" and then it says to use "browse" but instead of browse "choose file" is displayed and when I click on that, nothing happens.

Does anybody know what needs to be done? (My computer is an Apple if that is significant.)

Transfer/drag your selected pics to the Desktop. When you hit 'Choose File' a separate window opens on your screen; highlight the pic you want, click 'Open' . Then click 'Add the File'; wait a few moments for it to upload to the server. Select the place in your post where you want the pic to be, then click 'Place in Line' and you should see it drop into place. Easy peasy - Rob
 
Hi Andy,
Plenty of mac users roundabouts myself included.

I see. Browse appears on my iMac. Choose file appears on my iPad. Never noticed before. Which are you using?

When you hit the Choose File button you should get a method of navigating to and selecting your desired image.

I don't understand why nothing happens at all at the moment. Leave it with us.
 
I tried it on the Apple desktop. I'll have another go on the macbook.
 
Andy Kev.":15m9ev5b said:
I tried it on the Apple desktop. I'll have another go on the macbook.

I wonder if your desktop browser (which one are you using BTW) has a security setting preventing uploading images. I'll have a look in safari and firefox which is what I have here.
 
I've had no problems uploading images on other websites and so I don't have a clue as to why it's not working here.
 
Sorry Andy I am at a loss too. I have tried all sort o& settings on FF and Safari and cannot replicate a situation where I cannot search and select an image to upload.

I’ll have to pass this one up the support tree.
 
Sheffield Tony":1u0e0nae said:
Does it not all depend on whether you have a half pin, or half tail at the ends ? The method applies to both, of course.
Very true. I just thought it best not to complicate things with an unusual joint layout.

And - subject for debate - you don't have to leave a knifed baseline if you don't want one. It seems a popular affectation to leave a very prominent one these days though.
That isn't to my taste so I only put knife marks at the base of the waste areas. A bit fiddly but - to me - preferable to have a leftover knife mark that didn't even help me making the joint.
 
Andyp":3qki7z6j said:
Andy can you let us know which operating systems and browser you are using.
I'm currently installing Mac OS Big Sur on my laptop which I understand is the latest version of the operating system. It might work after I've done that. My browser is Safari.
 
Wide Chop.JPG

Right then, this is the first of the two lateral chops (one from each side) with a chisel wider than that edge of the shoulder angled up a bit towards the middle (grossly angled up in the picture just for illustration purposes).

And then we have the third chop with a chisel narrower than the shoulder so that there's no danger of going below the marked line and to remove the slight hump potentially left by the first two chops.

Narrow Chop.JPG

(It would appear that Big Sur is the solution.)

mod edit to sort out photos
 
There are two entries of your first pic as that is what you have entered.

your second picture has not been placed inline which why it appears at the end of your post with a dotted surround.

There are two step to picture upload

1) upload your chosen photos - this puts them on our server
2) use the cursor and "place inline" to insert the photos into your text where you want them.

I'll edit your post next with pics done properly

Bob
 
Andy Kev.":2q51d4wv said:
View attachment 1

Right then, this is the first of the two lateral chops (one from each side) angled up a bit towards the middle.

And then we have the third chop with a chisel wider than the shoulder so that there's no danger of going below the marked line and to remove the slight hump potentially left by the first two chops.


(It would appear that Big Sur is the solution.)

mod edit to sort out photos
I can see what you're nattering about now and that's how I used to do them as well. However if you read Rob Ingham's book, 'Cutting Edge Cabinetmaking' he places a dead square block of wood exactly on the shoulder line. The back of the chisel is then held firmly against it and is pushed down by hand or with the aid of a tapometer. You can then cut exactly to the shoulder line all round in one cut. Easy - Rob
 
Woodbloke":32ydchvj said:
Andy Kev.":32ydchvj said:
View attachment 1

Right then, this is the first of the two lateral chops (one from each side) angled up a bit towards the middle.

And then we have the third chop with a chisel wider than the shoulder so that there's no danger of going below the marked line and to remove the slight hump potentially left by the first two chops.


(It would appear that Big Sur is the solution.)

mod edit to sort out photos
I can see what you're nattering about now and that's how I used to do them as well. However if you read Rob Ingham's book, 'Cutting Edge Cabinetmaking' he places a dead square block of wood exactly on the shoulder line. The back of the chisel is then held firmly against it and is pushed down by hand or with the aid of a tapometer. You can then cut exactly to the shoulder line all round in one cut. Easy - Rob

That's a good idea and I would be prepared to use it for chopping away at the gaps between tails. However, it would be a bit of a faff for coming in on the narrow end of the shoulder. I appreciate the idea that that should not be necessary as you have come in from both sides bang on the guide but I found that to do the three chops was quick and efficient. I suppose it proves the old adage that there's always more than one way of doing things in woodworking.
 
Andy Kev.":rqtmt97u said:
That's a good idea and I would be prepared to use it for chopping away at the gaps between tails. However, it would be a bit of a faff for coming in on the narrow end of the shoulder. I appreciate the idea that that should not be necessary as you have come in from both sides bang on the guide but I found that to do the three chops was quick and efficient. I suppose it proves the old adage that there's always more than one way of doing things in woodworking.
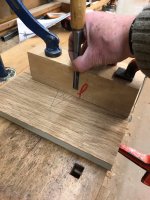
Nope, it's no faff in any way. You can chop everything on the shoulder line in a fraction of the time:

IMG_5252.jpg

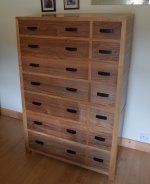
Set your work up so that the shoulder line is spot on underneath the datum edge of the block. The back of the chisel must be held securely against it, tap or push down once...job done. It works and it's that easy. When I had to do all the dovetails in English Walnut for my wife's skeletal chest of drawers (14 drawers, in all around 10m :shock: ) a couple of years ago:

DSC_0010.jpg

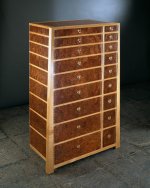
...which was based on this one:

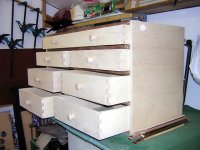
eighteen-large_01.jpg

...I used the 'block' method aka Rob Ingham. Had I used your 'three cut' method I'd still be doing them now :lol: Try it, it works! - Rob
 
Back
Top