• Hi all and welcome to TheWoodHaven2 brought into the 21st Century, kicking and screaming! We all have Alasdair to thank for the vast bulk of the heavy lifting to get us here, no more so than me because he's taken away a huge burden of responsibility from my shoulders and brought us to this new shiny home, with all your previous content (hopefully) still intact! Please peruse and feed back. There is still plenty to do, like changing the colour scheme, adding the banner graphic, tweaking the odd setting here and there so I have added a new thread in the 'Technical Issues, Bugs and Feature Requests' forum for you to add any issues you find, any missing settings or just anything you'd like to see added/removed from the feature set that Xenforo offers. We will get to everything over the coming weeks so please be patient, but add anything at all to the thread I mention above and we promise to get to them over the next few days/weeks/months. In the meantime, please enjoy!

Small Box

Dalboy

Old Oak
Joined
Aug 29, 2014
Messages
1,337
Reaction score
119
Another present finished, still have more to do yet.

Made from Sapele, Ash and Tulip wood for the tray did not want Sapele for the tray as it would have made the thing just to dark.
Lined with sticky backed felt. It measures 10" long 5" deep and 5 1/2" tall

DSCF5693_zpsiobrzjql.jpg


DSCF5694_zps3gurbea5.jpg


DSCF5698_zpsomtlcdiw.jpg
 
This is beautiful, and the red looks lovely in comparison with the wood. Reminds me of a cigar box, what do you plan to store within?
 
Yeah I like that a lot! Love the insert and the red, and also the lighter banding on the outside.

If any comment, maybe the sides could be a little slimmer for my taste but still a lovely piece.

Thanks for sharing.

Cheers
Mark
 
That is a really lovely piece and the red sets it off a treat.

You were right about using Tulip internally, it does make it lighter.
 
Thank you all

Dan0741":1rtlqsz9 said:
This is beautiful, and the red looks lovely in comparison with the wood. Reminds me of a cigar box, what do you plan to store within?

This is a jewellery box which is being given as a Christmas present


Mike G":1rtlqsz9 said:
How did you manage that on a lathe? ;) :lol:

Quite easy but the corners took a bit of sorting :twisted: :lol: :lol: :lol:
 
Another present finished, still have more to do yet.

Made from Sapele, Ash and Tulip wood for the tray did not want Sapele for the tray as it would have made the thing just to dark.
Lined with sticky backed felt. It measures 10" long 5" deep and 5 1/2" tall
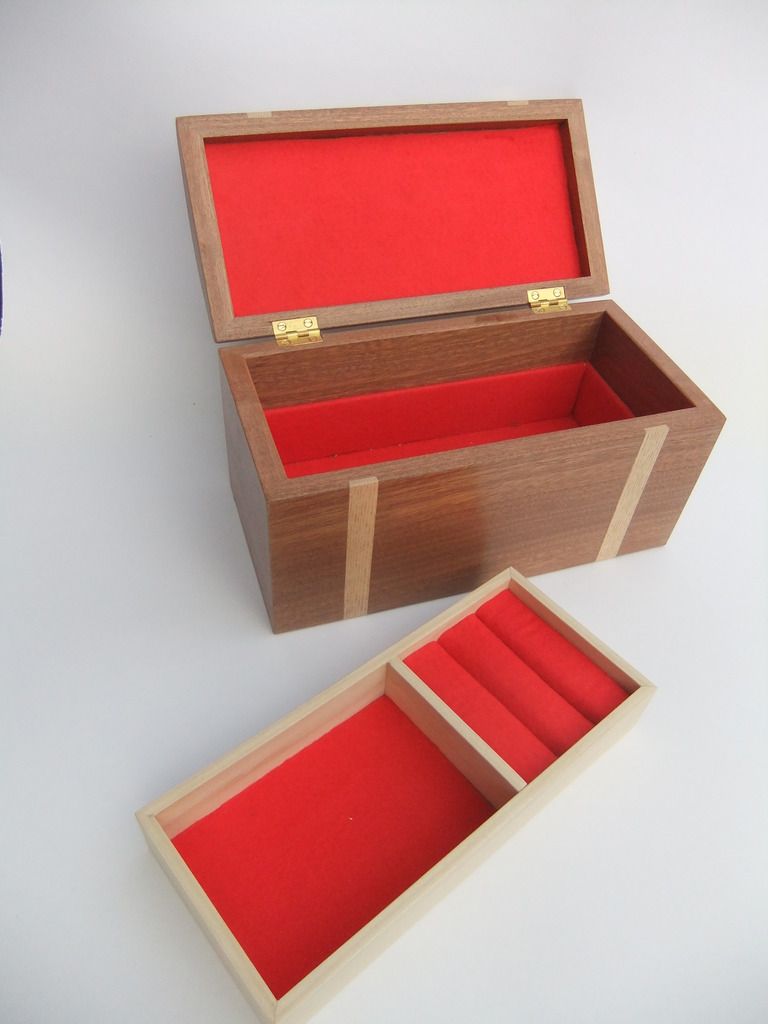
DSCF5693_zpsiobrzjql.jpg

Nice job. If I could add one comment based on the pic above, I suspect (though could be wrong..it has been known :oops: ) that the hinges have been set a fraction too high, or that the screwheads are binding. The gap 'twixt lid and box seems bigger than it ought, but that said, installing brassware on projects is one that I detest :twisted: and it can usually take me at least half a day to get it right - Rob
 
Woodbloke":9uie8731 said:
Nice job. If I could add one comment based on the pic above, I suspect (though could be wrong..it has been known :oops: ) that the hinges have been set a fraction too high, or that the screwheads are binding. The gap 'twixt lid and box seems bigger than it ought, but that said, installing brassware on projects is one that I detest :twisted: and it can usually take me at least half a day to get it right - Rob

Thank you Rob I like constructive criticism as it helps a lot.

But in this case you did get it wrong :lol: :lol: :lol:

The hinges are set in correctly (took me ages like you) and the screws are below the surface. What you are referring to is down to me firstly I rounded the joint edges giving that appearance wish I had not and the small gap at the end I got a little over zealous sanding that corner :oops: :oops: :oops:

It does not show in the flesh, I also did have to double take on the corner nearest to us in the first picture as it looks like the mitre joint did not look as if it met but if you look at the other picture you can in fact see it does.

Please keep pointing things out as I may have missed something. I am having great fun using hand tools at the moment even if it is only re-sharpening all of my chisels and planes they don't half make things a lot easier.

I will still use the machines for the main dimensioning of the wood however.

The next thing I want to have a good go at a project with hand cut dovetails in the near future as I want to make a nice box for my carving chisels along with all the bits for that side of the hobby.
 
Dalboy":31j0j0r4 said:
But in this case you did get it wrong :lol: :lol: :lol:

The hinges are set in correctly (took me ages like you) and the screws are below the surface. What you are referring to is down to me firstly I rounded the joint edges giving that appearance wish I had not and the small gap at the end I got a little over zealous sanding that corner :oops: :oops: :oops:
Good to know :lol: When I do small stuff like this, the way I get a close matching fit between lid and box is to stick a whole bit of sandpaper on some mdf and then place the box/lid in turn on top of it. A bit of subtle finger pressure and frequent testing of one against the other usually results in a decent fit, with the benefit of no rounded edges, or dips at the corners - Rob
 
Andyp":st2bwg0h said:
Very nice box indeed Derek. How was the top made?

From a single piece of wood stuck onto the main box before cutting the lid off, then given it the dome shape
 
Back
Top