• Hi all and welcome to TheWoodHaven2 brought into the 21st Century, kicking and screaming! We all have Alasdair to thank for the vast bulk of the heavy lifting to get us here, no more so than me because he's taken away a huge burden of responsibility from my shoulders and brought us to this new shiny home, with all your previous content (hopefully) still intact! Please peruse and feed back. There is still plenty to do, like changing the colour scheme, adding the banner graphic, tweaking the odd setting here and there so I have added a new thread in the 'Technical Issues, Bugs and Feature Requests' forum for you to add any issues you find, any missing settings or just anything you'd like to see added/removed from the feature set that Xenforo offers. We will get to everything over the coming weeks so please be patient, but add anything at all to the thread I mention above and we promise to get to them over the next few days/weeks/months. In the meantime, please enjoy!

Small workshop

I may be missing something or it may have been discussed already, but don't you need PP for decking that is more than 30cm above ground level?
 
Thanks Bob the more I think about it the better the overlapping joints recommended by Malcolm and Mark earlier. And yes your width idea helps a lot.

Don't work about it Nick this decking is less than 300mm from the ground.

Thanks for the help guys I think if I batch the sections of deck by the standard sizes I can work it out with the least waste.
 
If you go down the mitred route I would cut each board slightly long, chop the mitre on one end and then offer it up to mark the square cut off at the other end.

Alternatively leave them all long at the square end and then once you've finished all the boarding cut them all off together with the track saw. That way you can guarantee a consistently straight line.

Thinking about it now I think I would put all the boards down on one side slightly over your miter line and cut that with the track saw to. that way your mitre joint line will be straight right across the deck too.

The staggered butt joint would be easier mind, just work across the deck alternating your boards left and right, use a spacer between the end of your board and the side of the previous one to ensure consistent spacing..

first row: left board, right board
second row: right board, left board
third row: as per first
fourth row: as per second
etc
etc
etc
until you're done.
 
Thanks Will
The track saw was my plan for the mitre.
The current part of the deck which I replaced 6 months ago is 3.6 m long and 20 boards wide obviously I want to reuse these boards in the new deck and I just cannot work out the sizes required.
In my defence one of our spaniels had a tumour removed from his ear this morning so there is quite a lot of stress around at the moment. He is fine and recovering well :)
I am going to have another go tomorrow.
 
I gave up trying to work out where to put the joints in the deck so I have ordered 28x 3.6m 47x100mm for the joists and 211.2m of assorted deck boards I will join the boards where they need to be joined avoiding those close to the mitres or overlapping joints whichever my other half decide she likes on the day.
2 sheets of plywood for my sons desk and even got free delivery woo hooo oh and a bag of those special nails for the joist hangers which I also got 30 of
 
Circumstances have dictated that my next stage of works are path and decking. I would have preferred to make my workbenches first well at least one.
Anyway there is a small piece of grass in the middle area with a black basalt path going round it.
The final batch of 1800 kg of stone arrived late last week and is sitting on our drive.
Our current deck was replaced about 6 months ago more like 10 months actually.

2019-08-22_09-27-01 by my0771, on Flickr

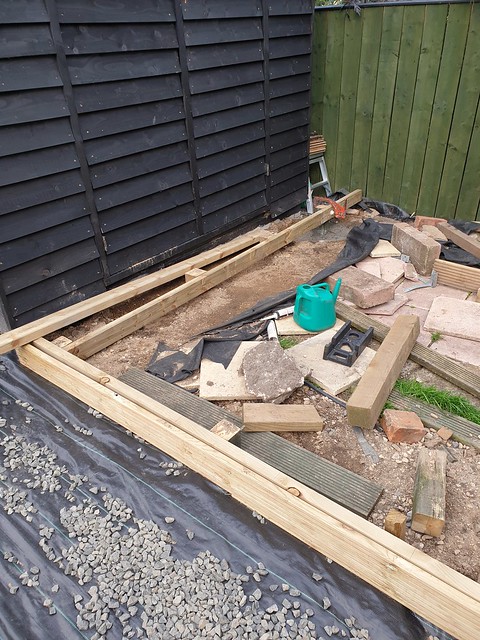
Circumstances also told me I had to sort the path out asap so in the picture you can see where I have placed my posts continuing the edge of the workshop forwards until it joins the extension of the original deck.

I would appear when setting the posts in front of the workshop doors I feel I must have either been suffering from hypoglycemia or was in fact drunk as they neither line up nor are vertically square.
I will correct this tomorrow weather permitting by doing something clever with the track saw or circular saw to even them up.
 
I have realised yesterdays explanation and picture were poor to say the least I hope this picture and explanation are slightly better.

2019-08-23_07-39-39 by my0771, on Flickr

In the bottom right you can see the existing deck with its step. I have made a box section to extend the step forward. The intention is for the step to disappear into the riser of the new deck leading to the workshop doors.
I had always planned to do this so the lower side of the doorstep on the workshop is level with the original deck. The ground dips in every possible way in every direction it also has paths and paving all over it my current plan is to break through where posts are required and cover the rest in weed barrier removing any grass and weeds I come across. Not ideal but it as good as I can get.
I am using 47mm x 100mm as joists as there is not much ground clearance in places so I plan to fit posts every 1.2 m.
I hope this makes more sense.
 
We have made a little more progress with the garden part of the build. My son and I have been laying out the decking joists cutting them to size and marking out where the posts are going to go. Tomorrow we are going to dig our post holes and lay the weed barrier. The double joist in front of the workshop has been placed exactly where my foot has been landing for the last few months and I have placed one post in the centre of each door.

2019-08-26_08-24-14 by my0771, on Flickr

The flower bed was a late addition but I have managed to position it to help with the joint in the 3.6 m long end beams.
 
I am still trying to get my head around this decking malarkey the frame has been removed and refitted with the weed barrier in place. Holes dug and posts fixed there were some places that had the old path which was some form of concrete which was impervious to blows from the large hammer so some posts sit on top of that.
Here is my plan for the mitre part.

2019-09-08_06-08-40 by my0771, on Flickr

Sorry it looks a little messy I ensured that the short joist from the flower box and the tail from the path were 90 degrees. Using the frame square I marked and cut a short piece to support the corner.
I hope this picture explains it.

2019-09-08_06-08-21 by my0771, on Flickr

I have made the double joist to support the end of the deck boards it starts at the inside corner of the two decks. I have still to add more posts and lots more framing to do.
If anyone spots any mistakes please let me know.
 
TrimTheKing":1u2jnvcu said:
Difficult to tell from those pics where exactly you are planning to have the mitre line running.
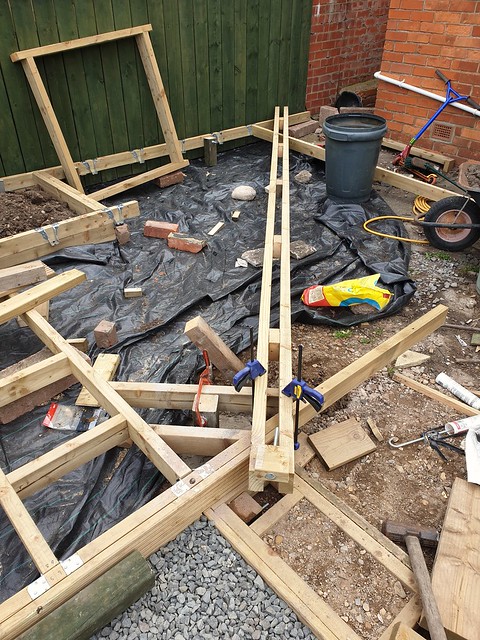
Thanks the deck runs down the fence line on the left in the picture and joins with the deck in front of the back of the house.

2019-09-09_12-28-10 by my0771, on Flickr

I think the double joist gives me the option of either a mitre or the overlapping type joint recommended by others here.
The end nearest my feet is centered on the inner corner of the two decks in order to maintain the 45 degrees it does not end where I would like it to. This means I will have some straight pieces by the opening to the garage door.
I have made a block with a bolt running through it to fit in the end of the pair of joists which will allow it to be fixed in place.
Any help would be appreciated.
 
So where the mitres will join is in the gap between the double joist running vertically in the last pic?

If so, does the mitre have to be 45deg...? Why not run the mitre at whatever angle is required so you don't end up with any non-mitred parts...? It will mean two different angle cuts for each join but will get you where you want to be. Orrrrr, you go with the staggered one and make life a LOT easier...

Or am I misunderstanding your quandary?
 
I thought I had everything worked out but plans change and I have added a piece down the fence line which has caused the issue.
My main concern is around the joint at the inside corner of the two decks at the front of the picture. Is it strong enough and is the idea correct.
As you said the decks will meet down the double joist my plan for a mitre involved joining all of my track together 3.9m and cutting the mitre with my plunge saw. I understand that the mitres don't have to be 45 degrees but I think I may be over complicating things by trying to be clever. Although I am coming around to the idea of the staggered joint as you sensibly suggest.
 
Sometimes posting or talking about an issue helps to order things in the mind so thanks to Mark I woke up this morning with a clear plan. Well when I say clear I mean I have decided to follow the advice given here to use an overlapping pattern rather than the mitre plan.

2019-09-10_07-29-38 by my0771, on Flickr
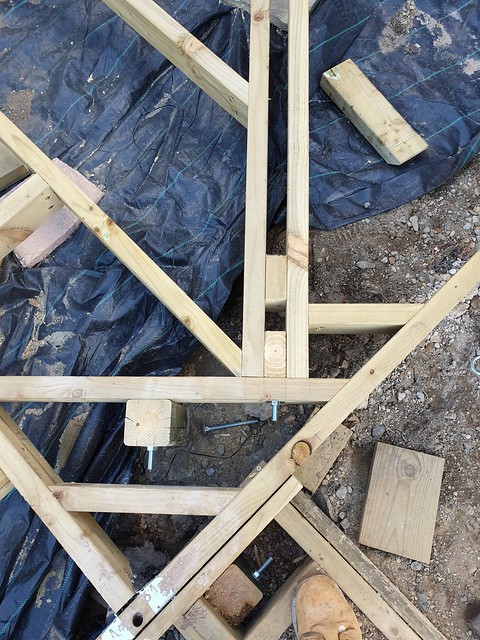
I am pleased with my progress today unfortunately I am going back to see the surgeon on Friday I know more surgery will be needed as I have fingers triggering on both hands now so my plan to have everything finished within a year is less likely now.
 
I have terrible difficulties trying to visualise stuff like this. To help I would put down a few decking boards, without attaching them, just to see what it looks like.
With the care and attention you have put into everything else I cant see it being anything other than looking very nice.
 
Thanks Malcolm
Andy I understand where you are coming from I also find it difficult at times drawings help. But in this circumstance actually writing it down helped me to work out what I needed to do.

2019-09-11_04-33-44 by my0771, on Flickr

I used the first 45 degree noggin to fix the corner to 90 degrees the second noggin was the anchor for the double joist to support the joint in the deck boards. I have repeated the same method at the other end of the double joist although I only used a single mitred noggin.

2019-09-11_04-34-09 by my0771, on Flickr

As you can see in this picture I have started to put the mitred joists in place down the fence line I am limited to working a couple of hours a day now so it is going to take some time.
 
I've only just looked at this for the first time in weeks (sorry!!).

I don't want to be a wet blanket, but any decking above 300mm (a foot) high requires planning permission. Whether you go down that route is going to boil down to a judgement on your behalf as to whether or not any of your neighbours are likely to complain.
 
Mike G":jmvjadc8 said:
I've only just looked at this for the first time in weeks (sorry!!).

I don't want to be a wet blanket, but any decking above 300mm (a foot) high requires planning permission. Whether you go down that route is going to boil down to a judgement on your behalf as to whether or not any of your neighbours are likely to complain.

Thanks Mike I appreciate your input,
I have spoken to the local planning department who have told me that as with the workshop I am entitled to measure from the highest point. I had to use the 45 x 97 mm as joists as the 147 mm joists would not fit without digging down.
The back corner on the fence line is the highest point and the inner corner is one of the lowest points.

I would like to say thank you to yourself and everyone else here for the support throughout this project I can honestly say it would not have happened without it.
 
The great decking jigsaw begins
My son and I have cleaned the older deck (just over 1 year old) The edges have been trimmed back where the new joist has been added. I have spent the last couple of days moving boards around trying to find the best place for the joints.

2019-10-03_08-51-27 by my0771, on Flickr

I need to have joints along the length of the deck and am unsure of the expansion gap required the boards have a 5 mm gap between them any advice would be appreciated.
 
That'll be nice with some chairs, a table and some filled glasses to sit out with of an evening!
 
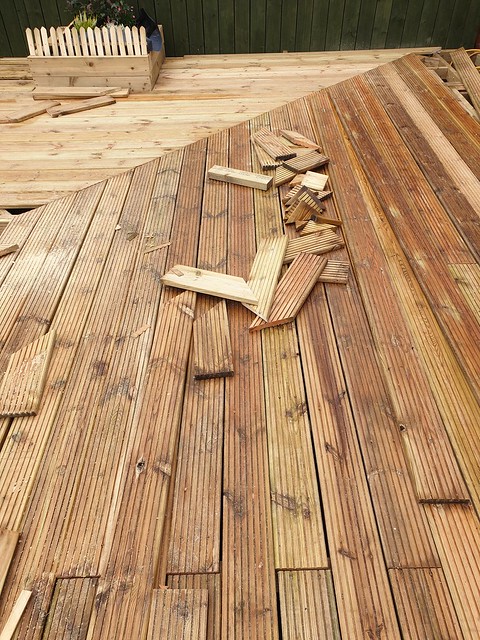
All was going well until I decided I wanted to use a mitre joint across the big joint.
I know everyone said not to do it and it is difficult I did try the overlapping joint but I did not like it.
I selected a start point and marked 45 degrees and an end point and marked 45 degrees there, then took a chalk line between the two points and struck a line which I then cut with the track saw.
For some reason I did not bother to check it was 45 degrees until after I had made the cut so it turns out it was 44 degrees not bad for guess work but no good to go around a 90 degree corner.
My solution was to take everything up re cut the mitres individually and lay each pair at the same time.
I wish I had done this from the start but there you go I have learnt something and and managed to keep my waste to a minimum.

2019-10-19_01-17-45 by my0771, on Flickr
2019-10-19_01-18-16 by my0771, on Flickr
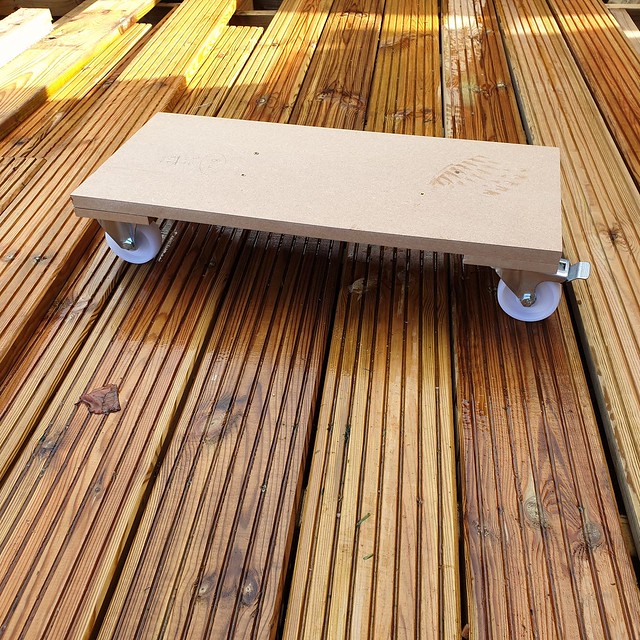
I still have some issues with hands and now shoulder so I find it difficult to bear weight on my hands. When I was struggling to move my son suggested I needed a hover board. This started me thinking and I came up with this using Aldi's finest castors and some scraps of MDF donated by my neighbour. It is fantastic I can roll up and down the deck putting screws in or taking them out after making a mistake

2019-10-19_01-17-29 by my0771, on Flickr

I may well run the track saw up the sides of the cut as one or two do not line up as nicely as I would like but it is just a deck.
 
Unless you’re ocd, Michael, you won’t notice them with a glass in your hand!

Looking good.
 
Looking back over the last 14 months since I started building my workshop and the decking leading from the house to it.
I know I have said this before but I doubt it would have happened without the support of members of this forum not just technical but there has also been a lot of support that got me through a few wobbles.
When I started in October 2018 we had four rescue Spaniels who took great interest in my efforts.
Sadly we lost Keela at the end of 2018 and her brother Diesel a year later they came to us as ex working trials dogs via a spaniel rescue. They were six years old when they came to us and we had them for six and seven years respectively.

keela and diese 3 by my0771, on Flickr

keela and diese 2 by my0771, on Flickr
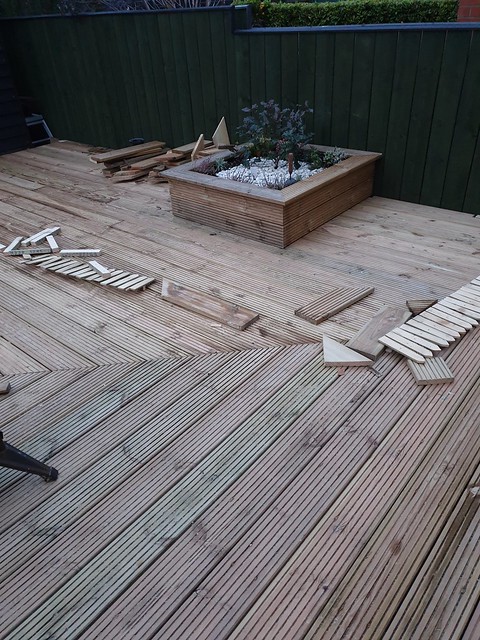
Keela on the left has the white nose, Diesel followed me everywhere even when it was cold and I was working outside he was never far away.
The reason for adding the raised flower bed was to give us a suitable place to put their ashes.

2019-11-10_05-52-48 by my0771, on Flickr

On a more positive note I have re discovered my mojo and have finally made some progress on the interior benches.

2019-12-23_09-53-35 by my0771, on Flickr

This is one of two frames to go along the rear wall and will be a marking and assembly area 2.3m by 800mm. They are mortise and tenon at the top with rails screwed in place at the bottom. There are more supports to add around the corners I will be fixing them to the walls for more strength. I am also considering a torsion style box on top of the frames to give extra support to the tops.

The woodworking bench is going to be a heavier construction with 100 mm sq posts 75 mm x 50mm rails there will be rails top and bottom. The top will be traditional M&T I am currently making a self centering mortising jig which I think will lead me to using loose tenons for the lower joints.

https://www.youtube.com/watch?v=96iT4zuYBOc

I would love to say I am going to have everything finished by the end of the year
 
....You don't need to state which year do you :lol:
interesting illusion makes it look like the front nearside leg is made from three sections lengthwise but magnifying the image shows it as one piece with knots.

Keep up the good work

Bob
 
Having filled the workshop with stuff that was in the way of Christmas well it was all of my tools and leather and suede and..... well you get the idea so this morning I emptied everything and started fitting the frames I had made an strengthening them.
Left side.

2019-12-28_06-21-00 by my0771, on Flickr

And a few hours later the right side followed I put some cross bracing across the corners and glued and screwed them in place. I am not sure if the height is correct it is wrist height, I think it is easier to go up than down should I need to.

2019-12-28_06-15-58 by my0771, on Flickr

It turned out that the temporary benches where I had piled all of my useful items on (ok junk) were also using the tops I wanted for the end benches. I wish I was more organised that would make things easier.
 
After my success with the other benches I decided to crack on with the woodworking bench. Although I had already cut the tenons for the top rails I decided to remake them using floating tenons.

2019-12-31_07-42-10 by my0771, on Flickr
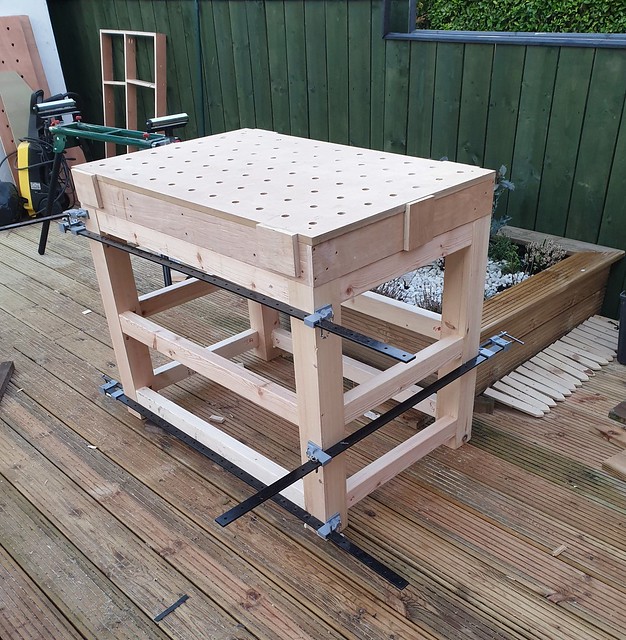
I have glued the long sides but ran out of daylight before I could finish the short sides. I did try the top to see what it will look like when it is finished.

2019-12-31_08-01-48 by my0771, on Flickr
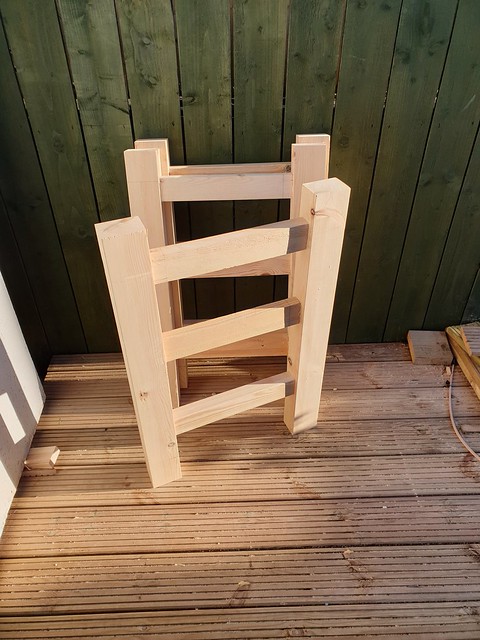
Seems quite high. I will wait and see when it is all glued up.
 
This is the final bench I need to make for this workshop it is just over 2 m long the frame (like a ladder style) is 95 mm x 45 mm pressure treated that I have been using as a temporary bench from very early in the build.
All it needed was some legs.

2020-01-12_12-51-35 by my0771, on Flickr

I am simply going to notch the top of each leg to allow it to sit inside the frame I am a little unsure of the fixing I would like to use bolts. Ideally I want this to be freestanding like all of the other benches so I can pull them out for cleaning.
 
I think the end is in sight I have attached the legs to the upper frame I need some bracing top and bottom.
I have used left over floor pieces which I saved for this purpose.
The bench along the back wall is about 75 mm lower but that will be fixed when I make the support box for the tops.

2020-01-13_09-06-18 by my0771, on Flickr

I have lots of sorting and tidying up to do.

2019-12-31_08-01-48 by my0771, on Flickr

I am thinking I may need some sort of vice to go with this MFT top workbench if anyone could help me to choose one I would appreciate it.
 
if you do not want to go down the coneventional woodowrking vice and if you want real flixibility you could consider one of these.
You would have to add an extra rail for the vice to clamp to.

[youtube]LiGY1DCyjXY[/youtube]
 
Depends what you want to clamp but there are lots of clamping options which use dog holes. Ones which apply pressure downwards onto bench or laterally against dogs


A standard wood vice may need some extra structure underneath to fit too.
 
Thanks I was just thinking about a standard woodworking vice fitted to the side of the bench like this

https://www.axminster.co.uk/axminster-t ... e-ax968364

I am starting to transfer a lot of tools and junk from the house to the workshop at some point I have to move my leather and suede. I was surprised to find there is quite a lot of stock to move over and as it is quite expensive I don't want to risk it getting damaged.
I was thinking of investing in a small 500w oil filled radiator to keep the cold out I know we have not had any really cold weather as yet but I am sure it is on its way.
 
MY63":7mv2oz77 said:
Thanks I was just thinking about a standard woodworking vice fitted to the side of the bench like this

https://www.axminster.co.uk/axminster-t ... e-ax968364

I am starting to transfer a lot of tools and junk from the house to the workshop at some point I have to move my leather and suede. I was surprised to find there is quite a lot of stock to move over and as it is quite expensive I don't want to risk it getting damaged.
I was thinking of investing in a small 500w oil filled radiator to keep the cold out I know we have not had any really cold weather as yet but I am sure it is on its way.

I would guess that it might be humidity that would give problems with leather and similar stock? if that is the case maybe a dehumidifier might be needed too. These produce a little heat too as well as a source of water for the steam iron but can shut down at near zero temperatures - check the operating temp range. So you might need a little heater too with a thermostat set to keep the dehumidifier running happily.

Bob
 
My 'shop has been at 4C each morning this week.

I have a 750w oil filled radiator and with me working and machine heat, it goes upon to about 10 -11C fairly quickly, (and a really thick and lines cardigan)!

I had my suede stored inside a paper bag in a cold loft for years before I built the 'shop and I don't think it's deteriorated any. I would think that damp would be the problem.
 
Back
Top