• Hi all and welcome to TheWoodHaven2 brought into the 21st Century, kicking and screaming! We all have Alasdair to thank for the vast bulk of the heavy lifting to get us here, no more so than me because he's taken away a huge burden of responsibility from my shoulders and brought us to this new shiny home, with all your previous content (hopefully) still intact! Please peruse and feed back. There is still plenty to do, like changing the colour scheme, adding the banner graphic, tweaking the odd setting here and there so I have added a new thread in the 'Technical Issues, Bugs and Feature Requests' forum for you to add any issues you find, any missing settings or just anything you'd like to see added/removed from the feature set that Xenforo offers. We will get to everything over the coming weeks so please be patient, but add anything at all to the thread I mention above and we promise to get to them over the next few days/weeks/months. In the meantime, please enjoy!

some work

MJOriginals

Seedling
Joined
Dec 1, 2018
Messages
44
Reaction score
0
Location
Polmont,Falkirk, Scotland
Hi all

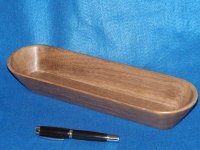
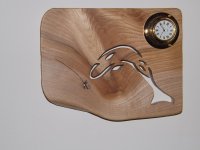
it seems to be quite a quiet forum perhaps there's not many scroller's here, it is my main activity but i try not to just do the normal things i like to try new things to see how far i can take the tool. Love working with different woods to try them out and see what I can produce.
tried various things so here's a few photos of stuff I have made recently.
hope you like them welcome your comments and critique.

Martyn
 

Attachments

  • DSCF2346.JPG
    DSCF2346.JPG
    287 KB · Views: 10,964
  • bread bowl 2-1.JPG
    bread bowl 2-1.JPG
    488 KB · Views: 10,964
  • DSCF1809.JPG
    DSCF1809.JPG
    222.8 KB · Views: 10,964
  • DSCF2363.JPG
    DSCF2363.JPG
    270.1 KB · Views: 10,964
  • hyacynth1.JPG
    hyacynth1.JPG
    219.5 KB · Views: 10,964
Really nice. I.m no good at creativity but I like looking at it.
 
Nice to see scrolling in 3D, rather than as just glorified jigsaw puzzles.
 
Lovely work Martyn, thanks for posting. I too suffer from the lack of a creativity gene but seeing work likes this does wonders for inspiration. I too own a Hegner but since a flurry or childrens toys, 2 and 3D, when the kids were younger it has not seen much use
 
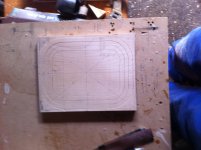
Re the bowl, its not the actual bread bowl but the steps in general are shown below in the photos, but basically you get a flat piece of wood and cut the shape out with a specific angle that you have to calculate,
then as the bits come out you assemble them overlapping glue them up and sand the bowl. The amount of sanding is very dependent on how good your cutting is, the first one you do takes alot of sanding but I can assure you if you stick with it there gets to be less sanding.
Also you learn not to stick the base on till you have shape sanded the sides it makes a big difference.

better details than this in the book Wooden bowls from the scroll saw by Carole Rothman (isbn 978-1-56523-433-8
thats where i got it from, but then just experiment with shapes, I have used this technique and a trick of my own to create a basket candle stick shown in the last photo.
 

Attachments

  • IMG_1235.JPG
    IMG_1235.JPG
    314.2 KB · Views: 10,892
  • IMG_1236.JPG
    IMG_1236.JPG
    280.1 KB · Views: 10,892
  • IMG_1237.JPG
    IMG_1237.JPG
    335.6 KB · Views: 10,892
  • DSCF2610.JPG
    DSCF2610.JPG
    520.8 KB · Views: 10,892
MJOriginals":ifeygaof said:
sorry dont know why photos sideways

Martyn

What device do you take the photo's with Martyn? In the photo hosting tutorial it explains about the way round you need to orient an iPhone to get the photo's to come out properly, so it could be that.
 
Some great pieces and good to see the variety of work you have produced.

9fingers":1fydrdtk said:
Some really nice work there Martyn.

You are right in that the scrolling forum is very quiet. Dalboy has posted some of his scroll work and might be a good contact for artistic ideas and decoration techniques.

Bob

I only scroll the odd piece so am no expert I tend to make more models and turned work.
 
MJOriginals":1hdsgfwx said:
hi Mark
thanks for info will read up and try and figure it out for better presentation on the next ones

Martyn

Martyn, there are two steps to uploading and displaying photos.

The uploading, you are doing fine but this leaves them stacked up at the bottom of the post with a white border and often hanging off the side of the post and looking cr4p.
The second stage is for each photo place the cursor in your text where you want the photo and then use "place inline" button to insert it tidily into the text.
Repeat for each photo each time placing the cursor first.
If you are taking photos on apple devices either always take them in landscape with volume buttons pointing downwards or after taking them rotate using the photos app before uploading.

hth

Bob
 
I can only endorse what has already been posted above.

Very, very smart work.

:eusa-clap:

:text-coolphotos:

You have now pressed my Scrolling-urge button, just need to find the time.
 
Back
Top