• Hi all and welcome to TheWoodHaven2 brought into the 21st Century, kicking and screaming! We all have Alasdair to thank for the vast bulk of the heavy lifting to get us here, no more so than me because he's taken away a huge burden of responsibility from my shoulders and brought us to this new shiny home, with all your previous content (hopefully) still intact! Please peruse and feed back. There is still plenty to do, like changing the colour scheme, adding the banner graphic, tweaking the odd setting here and there so I have added a new thread in the 'Technical Issues, Bugs and Feature Requests' forum for you to add any issues you find, any missing settings or just anything you'd like to see added/removed from the feature set that Xenforo offers. We will get to everything over the coming weeks so please be patient, but add anything at all to the thread I mention above and we promise to get to them over the next few days/weeks/months. In the meantime, please enjoy!

Staircase upgrade - ...

Andyp":1y9pdxlq said:
Your determination to see this through is inspirational. I would have given up long ago and GALMI :D

I tried that approach right at the start. Local company...do very good stuff. Turned it down.
 
RogerS":j4jr8obj said:
Andyp":j4jr8obj said:
Your determination to see this through is inspirational. I would have given up long ago and GALMI :D

I tried that approach right at the start. Local company...do very good stuff. Turned it down.

Why did they turn it down Roger? I would have thought for the pros it was nothing exceptional.
 
Andyp":2o6gic4p said:
Why did they turn it down Roger? I would have thought for the pros it was nothing exceptional.

Frankly, there isn’t a company in the country that would touch the existing staircase with a barge pole, let alone what Roger is attempting to do as doing a tidy job is nigh on impossible to the existing stair and would be more likely to damage their own reputation than it’s worth.

I’m sorry Roger, but it really is a fools errand and I have said this from the very start, I’m reluctant to give advice on something I know will not work well.
 
Andyp":trjj11x9 said:
RogerS":trjj11x9 said:
Andyp":trjj11x9 said:
Your determination to see this through is inspirational. I would have given up long ago and GALMI :D

I tried that approach right at the start. Local company...do very good stuff. Turned it down.

Why did they turn it down Roger? I would have thought for the pros it was nothing exceptional.

They reckoned it would take 6 weeks and they're geared up more for doing just workshop stuff which I can understand. Site work can be a right PITA. TBH I think 6 weeks was pushing it and they simply didn't want to do it.
 
Trevanion":38il9wa3 said:
Andyp":38il9wa3 said:
Why did they turn it down Roger? I would have thought for the pros it was nothing exceptional.

Frankly, there isn’t a company in the country that would touch the existing staircase with a barge pole, let alone what Roger is attempting to do as doing a tidy job is nigh on impossible to the existing stair and would be more likely to damage their own reputation than it’s worth.

I’m sorry Roger, but it really is a fools errand and I have said this from the very start, I’m reluctant to give advice on something I know will not work well.

Happy to prove you wrong :D ;)
 
RogerS":3i51ho00 said:
Happy to prove you wrong :D ;)

Don't get me wrong, I'm more than happy to be proved wrong but I just do not see it working tidily and I'll gladly eat my hat when I see it wrap around the corner smoothly with the spindles without looking really odd and out of place. It's just in my eyes this so far has almost been four months of your life totally down the pan (I know you've been up to other things also, but all this time is rather precious isn't it?) and however much expense for all the timber for what is really a sows ear pretending to be a purse.

I know you've said your stance on what I'm about to say several times, but had you torn out the old staircase, had whatever patchwork needing doing done to the walls, and then designed your staircase to accommodate such features as the continuous handrail you wouldn't really be far off completed by now as it would've been so much easier, a more enjoyable experience, and would look like it was supposed to be like that rather than a what is simply bodge on top of a bodge.

I know it's a rather scathing viewpoint, but it is mine and it is honest rather than being falsely optimistic.
 
Your points are well made, Dan, but for one thing.

The time to have made a new staircase was three years ago. Not now. The inner hall is HUGE. You could fit a Barratt box inside it pretty much. So the thought of ripping out the existing staircase, putting in a new one ..(it would have to be the same configuration as we are severely storage-limited and that under-stairs storage is vital), getting scaffolding back in, re-plastering it then redecorating it. Out of the question.

The alternative to a continuous rail is a Burbidge newel posted anathema. Besides, Chief Designer wants a continuous rail.

You might ask 'Well, why didn't he do it three years ago?". That's a fair question but when you're chief ripper-outer, materials orderer, plumber, electrician, kitchen installer, one bathroom, two en-suites and a downstairs bog installer, Kingspan installer, general joiner, tile-layer, garden-bed maker, orangerie-designer and builder and desperately trying to stay one step ahead so as to be ready for the builders each day....then just maybe something has to give !

EDIT: I forgot to mention that I didn't have a workshop or any machines then !
 
I do have one question.

Most staircases have newel posts which effectively act as anchors for the handrail at either end. But with a continuous handrail, no newels. So how do you go about fixing it without the spindles dropping out ?
 
RogerS":3hs29vzy said:
The time to have made a new staircase was three years ago. Not now. The inner hall is HUGE. You could fit a Barratt box inside it pretty much. So the thought of ripping out the existing staircase, putting in a new one ..(it would have to be the same configuration as we are severely storage-limited and that under-stairs storage is vital), getting scaffolding back in, re-plastering it then redecorating it. Out of the question.

I don't see why you keep saying this though, you wouldn't need to replaster and redecorate the WHOLE room, only where the stairs lie against the wall and you're only talking a few days work to patch that up tidily to the rest of it including painting it. You're only plastering two walls at a pitch to the first floor, which can be done by a single man off a hop-up, no need for scaffolding or serious expenses. You probably wouldn't even need to plaster it if you're going off the same rise and fall dimensions as the new stair wall strings would cover most of the old work anyway.

RogerS":3hs29vzy said:
The alternative to a continuous rail is a Burbidge newel posted anathema. Besides, Chief Designer wants a continuous rail.

A continuous handrail with a volute is fine and very pretty, provided the stair has been designed for it, yours was a newel post and closed string arrangement with a landing and it really doesn't lend itself to having a continuous handrail put onto it, as you've found out by your handrails not intersecting nicely and the steep drop-off at the end of the string into the volute.

RogerS":3hs29vzy said:
You might ask 'Well, why didn't he do it three years ago?".

You couldn't do it three years ago, but you could do it now.

I urge you before you waste any more of your own very precious time to think carefully about how you would like to spend it. If you finish that handrail and balustrade, you will be spending the rest of your days wishing you had done it differently, I can guarantee you that.
 
Trevanion":3etl0o3c said:
.....
I don't see why you keep saying this though, you wouldn't need to replaster and redecorate the WHOLE room, only where the stairs lie against the wall and you're only talking a few days work to patch that up tidily to the rest of it including painting it. You're only plastering two walls at a pitch to the first floor, which can be done by a single man off a hop-up, no need for scaffolding or serious expenses. You probably wouldn't even need to plaster it if you're going off the same rise and fall dimensions as the new stair wall strings would cover most of the old work anyway.

You always see where the new plastering join is. And yes, I do use good plasterers. by a single man off a hop-up although I don't know any with the length of arms that using a hop-up would require.

Trevanion":3etl0o3c said:
You couldn't do it three years ago, but you could do it now.

Not a chance. Never made a staircase in my life and not about to start now.
 
Hey Roger, I've been popping in with interest as and when possible, and hats off to you Sir! 8-)

This is such a brave and tricky operation, requiring a lot of skill and patience. Top banana! (with no pun intended). Looking fabulous so far! :eusa-clap:

:text-coolphotos: :text-bravo:
 
RogerS":2fpv75lw said:
Not a chance. Never made a staircase in my life and not about to start now.

It would be a lot easier than what you're attempting, and make what you're trying to do now a lot easier as well as everything will actually work as it should. At the moment, you're trying to force something that simply just isn't going to work and as a consequence, you've wasted a good amount of time doing it.

You didn't listen months ago, it's clear you won't listen now. I won't keep dragging on the issue but I'm not willing to give any advice on something I know full well can not be done.
 
Trevanion":10h4c4wy said:
RogerS":10h4c4wy said:
Not a chance. Never made a staircase in my life and not about to start now.

It would be a lot easier than what you're attempting, and make what you're trying to do now a lot easier as well as everything will actually work as it should. At the moment, you're trying to force something that simply just isn't going to work and as a consequence, you've wasted a good amount of time doing it.

You didn't listen months ago, it's clear you won't listen now. I won't keep dragging on the issue but I'm not willing to give any advice on something I know full well can not be done.

No worries, Dan.
 
RogerS":1hxdorki said:
OK...new approach here. At 9.45...works for me :D

Impressive. Seriously hot on PPE, I now realise why they have half closed eyes and gritted teeth. Fingers, eyes and electrical wires just a tad too close to the sharp spinney bits for my liking.
Any more tips for good horror films Roger. ;)
 
Lons":3ir0k7mb said:
RogerS":3ir0k7mb said:
OK...new approach here. At 9.45...works for me :D

Impressive. Seriously hot on PPE, I now realise why they have half closed eyes and gritted teeth. Fingers, eyes and electrical wires just a tad too close to the sharp spinney bits for my liking.
Any more tips for good horror films Roger. ;)

"Train to Busan" ? ;)
 
i love the way these guys fashion the turns by hand and eye but why oh why do they always paint it such a horrid sh*tty brown colour? when they sprayed the pindles they looked really nice.
 
@AndyT: Is that staircase in Dunster Castle? If so, I have very similar pictures - it's wonderful - Oak IIRC.

@RogerS: I too hate the look of that "pair" of Newels - it's somewhat disturbing to look at -- if the installer did that, how well done are the even-more-structural aspects of the thing?

Aside: I also have diCristina's book on tangent handrailing (found it on one of the shelves in the study only this week). I was sufficiently interested to look up the author's business address (on Google Street View) a few years ago. It's still there in San Francicso, but there's no evidence now of it being a production workshop.

It's nice to think there are quite a few West Coast mansions with his sweeping curvy staircases as a memorial to a superb craftsman, but I so wish he hadn't put "simplified" in the title -- it's so demoralizing...

;-) E.
 
Eric the Viking":3mwbj510 said:
@AndyT: Is that staircase in Dunster Castle? If so, I have very similar pictures - it's wonderful - Oak IIRC.

;-) E.

Yes, Dunster. I think it's so much better than carving as mere superficial decoration - it's more like a display of exuberant sculpture; the outside natural world brought into the house.
 
Here's a few photos of the second trial piece. I can see the advantage now of a ply template. I couldn't before. Next time I'll use a couple.


I've tried a mixture of devices.

Power plane - apart from the fact that it's a really horrible manky one from a DIY shed - you can't easily see what you're doing.
Belt sander - ditto.
Angle grinder with :

flap wheel - not bad
Saburrtooth - excellent

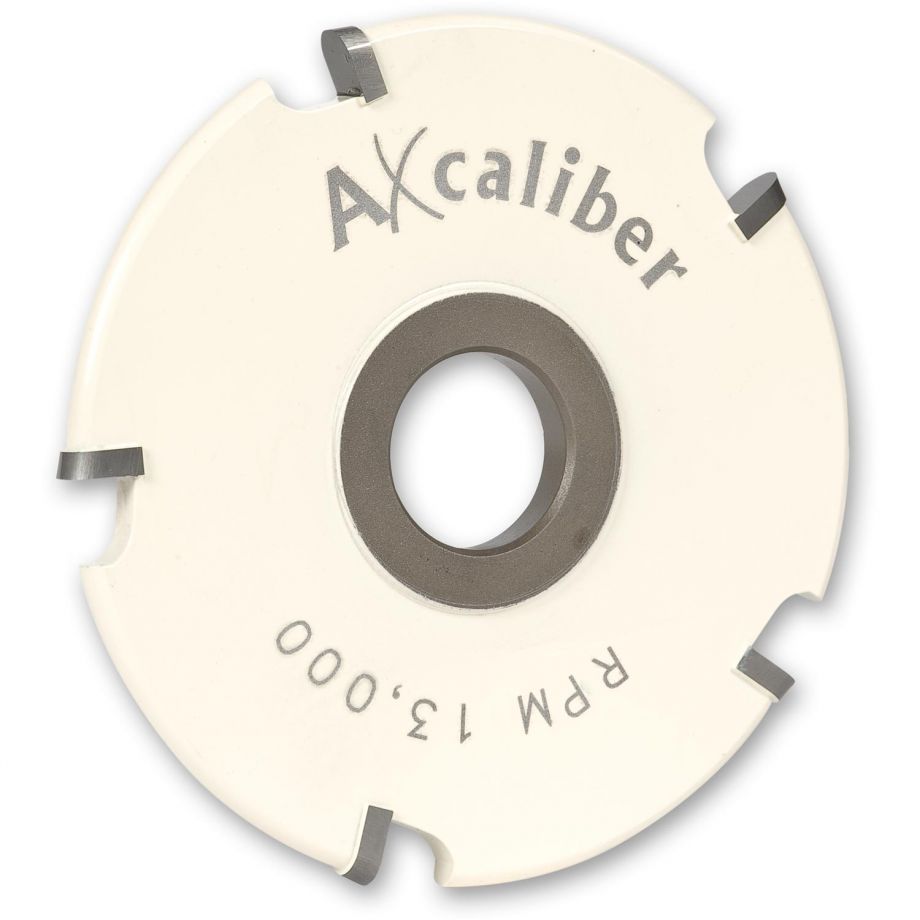
Axminster carver
951739_xl.jpg
- hairy but gets the job done.

Microplane - too slow

The trouble with a lot of these is that their cutting action is rotary and so you've still got the scalloped areas to work out flat. Saburrtooth do a flat wheel but it's not that flat and TBH not much more use than the curved one that I have. I was going to send it back unopened to Axminster but thought..better try it..you never know. So I did and it isn't and so I can't.

I'm waiting for an adapter to use a Flexcut chisel in my Bosch power chisel that I've had for donkeys' years and had totally forgotten about.

And here it is in situ with the easing. Not bad.

P1130512 by countryman69, on Flickr
P1130509 by countryman69, on Flickr

And the good thing is that looking down from the top, not too much of a problem with the spindles. I was concerned I'd have to do something fancy if the curve was away from the stringers and new support. The sides aren't brilliant but ....Proof of Concept...Proof of Concept :lol:

 
Wow!!

:text-bravo:

Just like watching the Asian guys' video, but with stills. :D
 
DaveL":jfu1tdg9 said:
Well that is quite a break though. [emoji41]

Oi...you sayin' I'm not working fast enough ? :o

I think maybe 'breakthrough'....LOL
 
Trevanion":32crkqoq said:
meccarroll":32crkqoq said:
Trevanion":32crkqoq said:
I'll gladly eat my hat when I see it wrap around the corner smoothly

Now where is that hat! :text-lol:

Emphasis on “smoothly”! The hat hasn’t come off the coat hanger just yet.

Yes I did take your comments out of context, sorry about that, but the gremlin came out :?

You have to agree that Rodger is determined to succeed and it's looking like he will.
 
meccarroll":nmsg7z5h said:
Yes I did take your comments out of context, sorry about that, but the gremlin came out :?

You have to agree that Rodger is determined to succeed and it's looking like he will.

I agree that it's good progress but it's completely wasted time on something that will always be sub-par, no matter how nice a handrail. I can't abide time-wasting, it's a massive pet peeve of mine. If you do a half-job you will always look at it and go "I wish I had done X, Y or Z" and that will constantly bear on your mind until you either re-do the job properly or die, if you do it correctly ONCE and you never have to think about it again.

"People are frugal in guarding their personal property; but as soon as it comes to squandering time they are most wasteful of the one thing in which it is right to be stingy." - Seneca
 
Trevanion":1x2ce8lc said:
....but it's completely wasted time on something that will always be sub-par, ....

You are, of course, entitled to your own opinion. Even though it's wrong ! ;)
 
Mod Hat on.
Gents,
I feel that whilst it is fine for someone to admit they have been wasting their own time if they so wish, time thought to be wasted can often be the time the other person cares to take learning how to do something.
Lets keep things friendly please.

Bob
 
RogerS":24wyiu3g said:
You are, of course, entitled to your own opinion. Even though it's wrong !

When I say that, I'm not suggesting that your own work will be sub-par, Roger, and my comments only have good intentions. I'm talking about the existing stair itself being a complete swine, and no matter how nice of a handrail you put on top of it, it will still be a swine.

My hat isn't on the plate just yet :)

9fingers":24wyiu3g said:
Mod Hat on.
Gents,
I feel that whilst it is fine for someone to admit they have been wasting their own time if they so wish, time thought to be wasted can often be the time the other person cares to take learning how to do something.
Lets keep things friendly please.

Bob

As I said above, the comments are only meant with good intentions and aren't supposed to be overly negative towards Roger. I consider him (and everyone else here) a colleague and I'm only expressing what I honestly think, rather than falsely egging him on to achieve something I personally don't believe will work right.

I'll keep my thoughts to myself for now.
 
Roger, as you are feeling poorly, how about yet another video on how someone else makes a curvy handrail?
Google knows we like this sort of thing, and it's hard not to feed the algorithm, but I was quite surprised by this one, from Peru.

[youtubessl]bCvjsPK5LB8[/youtubessl]

It's more entertainment than instruction, at least for me. (And the stairs are not like yours, but bear with me.)

It includes the obligatory shots of how to use an unguarded circular saw to shave a curve, and a spindle moulder which looks more wobbly than it probably should, but the real surprise for me was the choice of template material for a wreath. It appears at 10 minutes 22 but only briefly - I thought I had missed seeing what it was, but it comes back in a clearer shot a few moments later. Not accurate, but cheap, and very inventive!
 
BigMonka":3rpsybfe said:
Roger how’s the staircase going?

Many thanks for asking. Slowly, is the word. Timescales slipping by the day and crashing into other commitments.
 
My sincere apologies to one and all for this long overdue update. Thing is I thought that I’d posted a lot of it but clearly not.

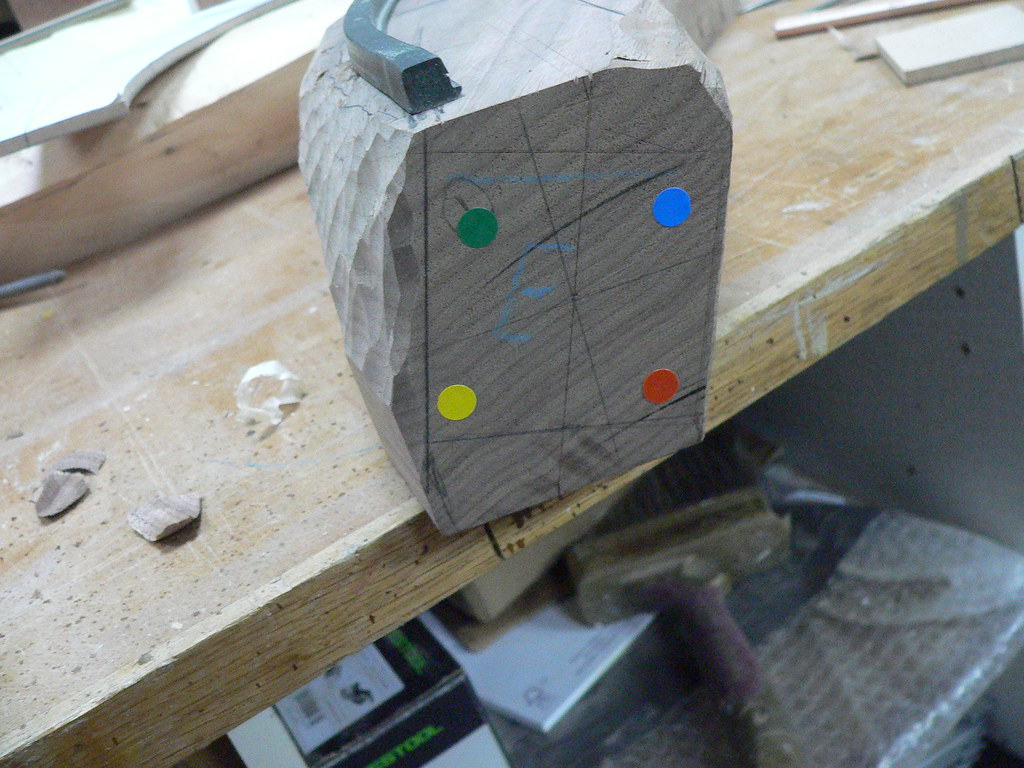
Working on getting the basic mould out for the main wreath was challenging. Trying to visualise where the lines should go and at what twist/angle as we move down the length of the wreath had me tearing my hair out. To help, I used coloured stickers at either end to make sure I was applying the line with the correct twist in the right direction which helped a bit.


Workholding

When I was making up the trial pieces I was struggling to keep the wood secure in a normal bench vice and a bit of research brought up this vice which is superb for this sort of work. Each jaw pivots and then the whole vice pivots.


Orienting with the straight handrails

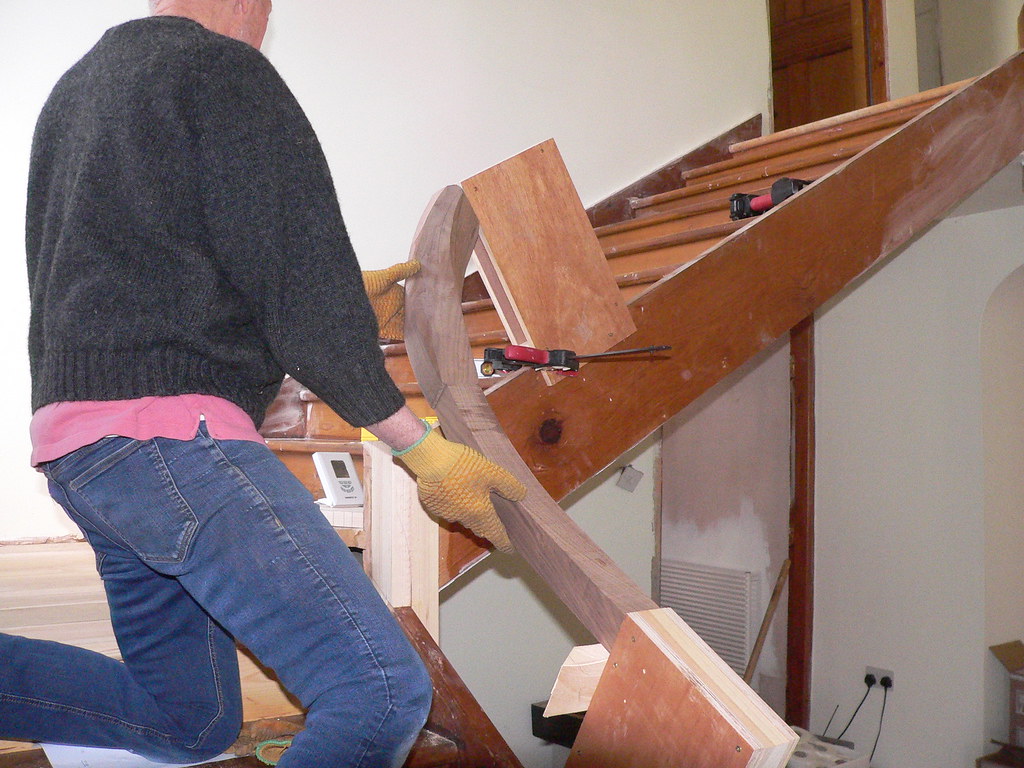
One of the things I was keen on was seeing how the wreath would line up with the two adjacent handrails. I wasted a lot of time trying to find a way of temporarily fixing these two adjacent straight handrails with two secure reference points at the ends for the wreath and also thinking that they needed to be at the finish height for the handrail. Of course, they do not. They can be as low as I want and so I made a couple of guide posts out of ply that were screwed at the right position on the stringers.

You can see them here and also the wreath slowly coming together.


It’s in there somewhere…


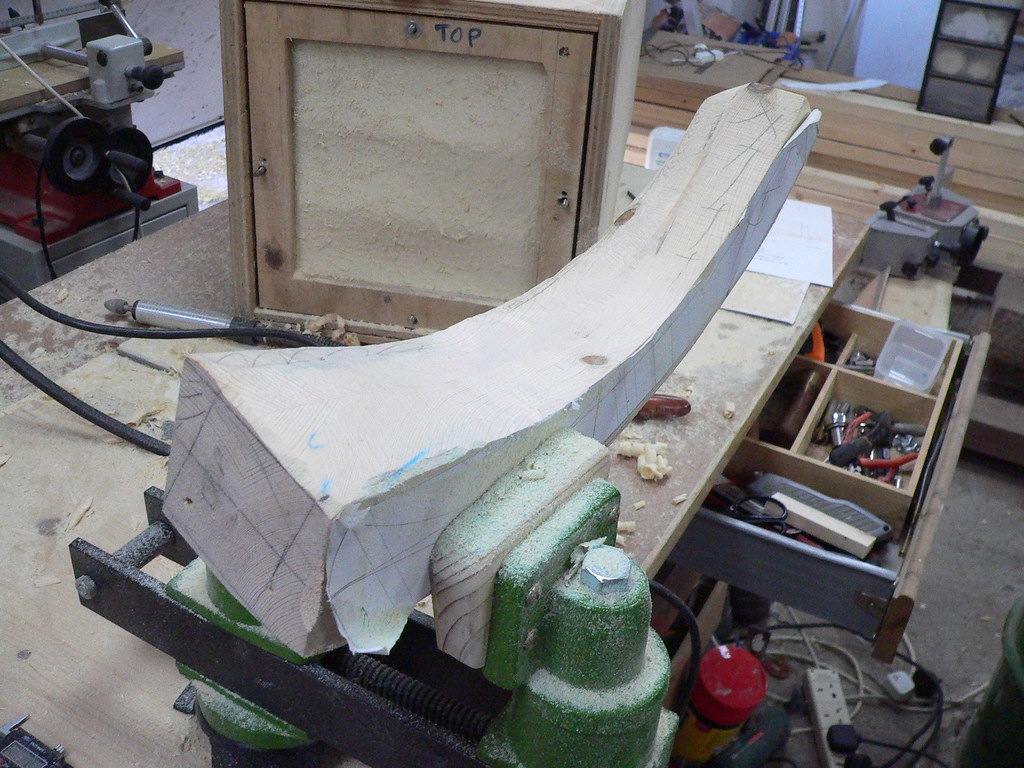
Here’s a few photos taken as work ‘progressed’.


That ‘box’ right of frame with ‘TOP’ on it is my home-grown dust filter. Inside is a pre-filter (still available) and the main filter (no longer available) from Axminster and intended for one of theirs …possibly a Jet. Airflow is created by a massive fan at the other end sucking in the dust. Works well.

Shaping was done using an assortment of tools ranging from spokeshaves (convex and concave), Saburrtooth discs, grinder abrasive wheels and my Mirka Ceros. And an infinite amount of patience.

 
Having got the wreath and easing pretty much into shape, my attention then turned to actually moulding it into the correct profile.

My original plan, as those who have been reading this saga from the start, was to use gouges of the right profile. I wasted an awful lot of time on trying to source these and, as many of you pointed out, gouges are not particularly helpful. I bought over £200 worth of gouges from one tool shop, tried one, realised they were a non-starter and then drove all the way back the next day to return the others unused.

I then started using normal chisels which turned out to be a bit of a disaster because (a) walnut seemed to be a bit brittle and so would crack along the grain and (b) this was particularly noticeable as the wreath twisted its way along. Really, really frustrating to find the grain direction change as you went round the same part of the wreath. At places the top would go in one direction, the side another and the bottom another still.

So back to the catalogues and online tool shops which was when I discovered the Flexcut range of power carving chisels which were very tempting.


Only problem was, I didn’t actually have the ‘engine’ to fit them to and was reluctant to shell out a lot of money for what is, after all, a one-off project.

But then to my delight, I came across this adaptor and remembered that I had an old Bosch power chisel ..probably 20 years old if not older..and that could be my ‘engine’.


The combination turned out to be excellent at roughing out some of the profile.


The Flexcut chisels cut really cleanly provided you keep touching the edge up.

Highly recommended


Marking where the profile lines should go was fun and games because all my marking gauges had too large a profile on the head to go tightly round the mould. I ended up making a small make-shift scratchstock to mark the lines.

This is the profile I’m aiming for…

Proof of concept


Piece off the straight handrail


Each part of the profile required a different type of approach ranging from the ‘simple’ straight line, a block and a paring chisel


My 45 degree angle block plane


A cutting disk in a Proxxon


Lons kindly lent me his Foredom to try but I couldn’t really get on with it…practice makes perfect, I guess. I found my Proxxon easier to control and used these Saburrtooth burrs


My armoury


Various photos as work ‘progressed’ aka lurched along


Using the nasty Proxxon router jig


to create these


Various rasps ranging from the gorgeous Auriou rasps which are a delight to use to the more inferior and not particularly nice-to-use Liogier and even worse still but perfect for one particular area…a pressed steel rasp (the one with the red handle)


Until we finished it…more or less..the ends are left to finesse into the straight handrails when they’re finally mounted in position.


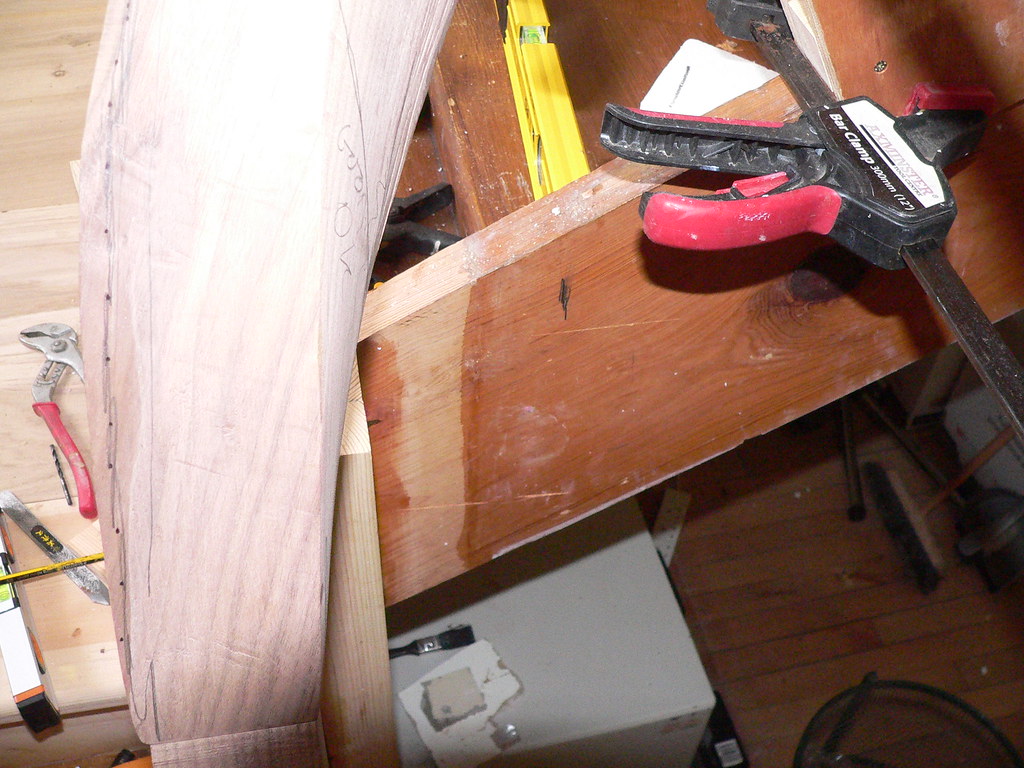
And now for confession time. Right at the very outset when I was starting this, i was given some very good advice about making sure that I had good long shanks at the ends. In my ignorance (pig-headedness) I could see a reason for having a short shank (say 10mm or so) but not the 50mm that I was being advised to have. After all, the bits are straight on either side of the join and so 10mm should be enough. WRONG! I should have listened. The join isn’t the main reason. It’s having room for the Zipbolts to go in easily and properly and not have to be bodged like this


Anyway, that's where we're up to. Then Summer (such as it is) came along and outside work has taken priority.
 
Back
Top