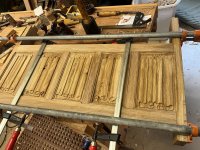
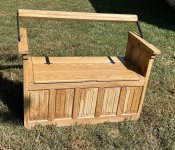
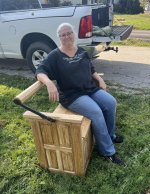
• Hi all and welcome to TheWoodHaven2 brought into the 21st Century, kicking and screaming! We all have Alasdair to thank for the vast bulk of the heavy lifting to get us here, no more so than me because he's taken away a huge burden of responsibility from my shoulders and brought us to this new shiny home, with all your previous content (hopefully) still intact! Please peruse and feed back. There is still plenty to do, like changing the colour scheme, adding the banner graphic, tweaking the odd setting here and there so I have added a new thread in the 'Technical Issues, Bugs and Feature Requests' forum for you to add any issues you find, any missing settings or just anything you'd like to see added/removed from the feature set that Xenforo offers. We will get to everything over the coming weeks so please be patient, but add anything at all to the thread I mention above and we promise to get to them over the next few days/weeks/months. In the meantime, please enjoy!

Strycsitten Construction Thread

kirkpoore1

Old Oak
Joined
Jul 21, 2014
Messages
1,179
Reaction score
257
Location
O'Fallon, Illinois
I took a whole bunch of pics while I was building the strycsitten over the last month. Unfortunately, I was way too busy to put together a build thread while I was doing it. So, I start that now. I may not get it all posted before my Scotland trip, but I will let you know it was delivered on Thursday, a couple of days before the wedding, and got this reaction:

IMG_014185.jpg

OK, on to the planning process. Lisa, my girlfriend and the bride's mother, wanted something her daughter would cherish and (hopefully) hand down to future generations. I proposed a strycsitten, and she was all for it. The main issues were how big and whether it would have an incorporated chest. Size was determined by Lisa's car (40" wide max"), normal seat height (17" chosen), and how far one would want to lean back. We chose 11" long pivot arms (hole to hole). I got the arms ordered from a blacksmith friend before the end of July, and started searching the web for good examples to act as models. I came up with these two, both from the St Thomas Guild webpage (https://thomasguild.blogspot.com/se...00+02:00&max-results=20&start=3&by-date=false):

strycsitten_painting.jpg
Museum_strycsitten.jpg

The open frame strycsitten had iron pivot bars on the outside. That would help it fit in Lisa's car. The 16th century example, with integral chests and linenfold panels, was my preferred decorative choice however.

After getting home from vacation on about August 10, I got to work drawing this up. I've never been comfortable with Sketchup and don't have any CAD software, so it was time for the pencil & ruler approach again.
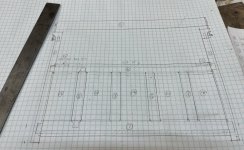
front_plan.JPG
side_plan.JPG
This was intended to give room to two sitters. OK, two modern American sitters, not half-starved medieval householders. Internal dimension is 35" wide for the seat. It does fit two.

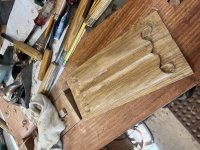
Next up was to firm up the details to see if they were practical. First question was whether two tall or four short panels on the plan side. I made up a linenfold panel to see if my preferred four panel configuration would look proportionately OK.
IMG_013939.JPG
IMG_013949.JPG

Side wise the panel came out well and seemed proportionately correct.

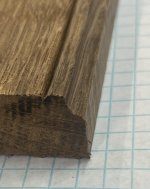
Next was to test molded edge designs. I decided to test these two, made up with a shaper cutter and a scratch stock:
IMG_013953.JPG

IMG_013954.JPG

I was happier with this second pattern, and decided to us that on the stiles and lower rails.

More later. I'm finally tired enough to sleep...

Kirk
 
Thanks Kirk. Following with interest. I love the look of it but can't help a niggling doubt that the single bar backrest might need a tapestry cushion or two... it's a bit reminiscent of church pews designed to keep you awake all through the sermon!
 
AndyT":esass4zr said:
. I love the look of it but can't help a niggling doubt that the single bar backrest might need a tapestry cushion or two... it's a bit reminiscent of church pews designed to keep you awake all through the sermon!

My thoughts exactly Andy, though I was once invited to sit in a rather expensive Hans Wegner chair I had been admiring only to find it rather uncomfortable because of the rounded backrest.
 
AndyT":fyzk43ko said:
Thanks Kirk. Following with interest. I love the look of it but can't help a niggling doubt that the single bar backrest might need a tapestry cushion or two... it's a bit reminiscent of church pews designed to keep you awake all through the sermon!

You should see some of the other styles--they can look like Frank Lloyd Wright proper posture torture devices. :)

strycsitten-innsbruck.jpg


I wouldn't be surprised if the crossbar earned a blanket cover. The pivot arms are rock solid so they can take the extra weight.

Kirk
 
Ok, on to the next step. For wood, I found some excellent air dried white oak on Facebook Marketplace. I spent $200 for about 75 board feet, with a mix of 4/4 and 6/4. The wood was still a little green, mostly 16-18%, but air dried oak never gets below 12% here unless it lives in a house. Since this design is all frame and panel (except the top), I am not concerned about shrinkage. I just made sure to cut the panels wide enough that they will still cover the width after they've reached equilibrium--no more than 3/16" on a 6" wide panel.

IMG_013956.JPG
Selecting three 4/4 boards, I cut some into sections long enough for two panels, then jointed and planed them down to 3/4" and let them sit while moving on to the frame. This let the released tension warp the planks again so I could joint them flat again later.

leg_panel_stile_blanks.JPG
Moving onto the frame, the legs were 5/4 and the rails 4/4 pieces, so I cut them out of the 6/4 stock. The stiles were all 3/4", so they came out of the 4/4 stock. All pieces were cut to rough length, jointed and planed. Rail tenons were going to be 1/2", so I laid out all of those in pencil on the legs.


arm_glueup.JPG
crossbar-first-Glueup.JPG
I glued up the arm blanks and the crossbar and set them aside. All looked good [cue ominous foreshadowing music for a future episode].

tenoning.JPG
Next, back to the legs. I mortised these on my mortiser, then tenoned both the rails and the tops of the legs on the tenoner. I hand planed the inside (reference surface) of the arms and squared the bottoms, then mortised them too. This allowed me to do the first dry fit:
rail_dry_fit.JPG
side_rail_dry_fit.JPG

More tomorrow, where I will show pictures of (hang on to your seat, Bob) actual handwork. And some of it will actually be pretty decent. :)

Kirk
 
It may be Tuesday for y'all, but it's still Monday for me, so while I'm awake and Bob's asleep here's the next chapter.

The stiles on the strycsitten are notched into the rails to allow the molded edges to merge visually better. Now, I kind of screwed this up since the stile bottoms shouldn't have been notched in, but I only discovered that after doing the front and back stiles. Anyway, I had a bit of a dilemma with the stiles since they're only 3/4" stock and the tenons only 3/8" thick (flush on the back of the stiles, with 1/4" wall thickness on the back of the rails since they're 1" thick).

The problem is that my mortiser is an autofeed machine which is too powerful for small chisel & bit sets. Even with the feed slowed down, 1/4" chisels will jam with chips and break. 3/8" chisels are as slow as I dare go, and I wasn't confident they'd go much more than an inch without the chips jamming. So I sawed and rough-chiseled the notches in the rails first to clear the space, then mortised the rails.

stile_notch_3.JPG
stile_notch_4.JPG

The results, after much back-and-forthing to bevel each stile and fit them into their particular location, were OK. Not great, just OK.
stile_dryfit_2.JPG
At this point I'd been posting daily pics on Facebook to a medieval WW page, and a friend of mine there electronically slapped me on the back of the head via PM and said "You dolt, why aren't you using a shave guide to get a good match?"
homer-simpson-doh.jpg


Ah! Of course! I knew about them, but had never actually made or used one. I ran out to the shop (it was just before I went to bed) and flattened some cherry scrap and glued a couple of pieces at 90 degrees. The next morning (ok, late morning), I went out and did some careful cutting at 45 degrees and was ready.
shave_guide.JPG
shave_guide_fit.JPG
These examples are of an end stile and middle rail. The shave guide took a little work for me to get comfortable with, but pretty soon I was getting not only much better results but much quicker ones too. I could clear up all the fit problems on the front and back rails, but I was able to make them much better at the cost of a little height.
side_dry_fit_with_stiles.JPG

Now that things were fitting, it was time to decorate them. The stiles and the underside of the rails were to get this profile:
trim_end.JPG
This was a 3 part cut, with the cutaway portion done on the shaper (spindle molder) and the thin line done with a scratch stock since there was very little to remove. Finally, I'd use a plane to round over the edge.
scratch_stock_trim.JPG


Rail tops got beveled with a spokeshave since the bevel had to stop at the stile base.
spokeshave_bevel.JPG

I was pretty happy with the results after skimming the faces with the plane to get rid of the tool marks. Here's the dry fits:
dry side fit with trim.JPG

full_frame_fit_with_trim.JPG

Not perfect--I goofed up a few spots. But overall they were small & sparse enough I was happy.

More Tuesday. I will try to get this done before I fly.

Kirk
 
Last post before I get on the plane tomorrow:

Next up was the getting the top glued up. This was three planks that I jointed and planed down to 3/4" . The edges, of course, weren't straight or flat so I used my #7 to take care of them.
jointing_top_1.JPG
jointing_top_2.JPG
top_glue_up.JPG

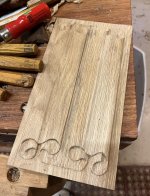
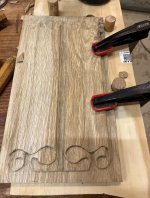
Next, on with the panels. I planed all down to 1/2" thick then put a 1/2" wide rabbet around the whole edge, leaving a thickness of of 1/4". Like on the tutorial, then, on each panel it was then draw, plane, draw, plane, draw, plane until the profile was cut, then on to the ends.
linenfold_plans.JPG
linenfold_01_layout.JPG
linenfold_02_plow_ready.JPG
linenfold_04_hollows.JPG
Hard to see the hollows--you have to look where the lines aren't.
linenfold_05_rounding_off.JPG
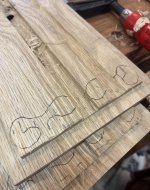
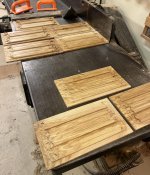
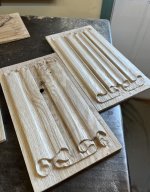
I found it easier to plane and then carve panels in batches, usually 4-5 per day, rather than plane one panel, carve it, and go onto the next.

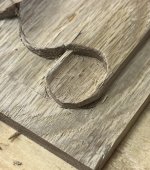
Next up was to start carving the ends. I tried to stick with one pattern at a time until those four or five were done. This allowed more consistency across the panels.
linenfold_06_end_01.JPG
linenfold_07_end_02.JPG
linenfold_08_end_03.JPG
linenfold_09_end_04.JPG

More panels finished and then oiled:
linenfold_10_complete_wide_panel.JPG
linenfold_11_complete_wide_panel_2.JPG
linenfold_12_first_three_wide.JPG
linenfold_13_next_two_wide.JPG
linenfold_14_eight_wide_oiled.JPG

OK, that's it for now. It's really a PITA to make a long post on my phone, so I think this will have to continue when I get back. I'll try to answer any questions though, so fire away.

Kirk
 
Thanks for that, incredible that you managed it on your phone! That was a whole lot of work doing those panels so well. Hell of a gift.
I found the Edinburgh tour of the old basements which had been left when they demolished the really old buildings, then they built new ones on top a couple of hundred years ago, to be fascinating. Built on a hillside and two stories high in places, and they had people living in them as well.
Ian
 
Cabinetman":2rtzzzdh said:
Thanks for that, incredible that you managed it on your phone! That was a whole lot of work doing those panels so well. Hell of a gift.
I found the Edinburgh tour of the old basements which had been left when they demolished the really old buildings, then they built new ones on top a couple of hundred years ago, to be fascinating. Built on a hillside and two stories high in places, and they had people living in them as well.
Ian


I wasn’t clear—I posted that from my computer but won’t be posting more until I get back because it’s so hard to do on the phone.

I’ve heard something about the basement tour. We may give it a shot, if this flight delay ends so I can leave Toronto. :)

Kirk
 
Cr*p! I never finished this thread. I guess I drank too much beer in Scotland. (No Scotch--it's all horrible.)

Meanwhile back at the ranch, I was finishing up linenfold panels and gluing up the top. I love linefold and was super happy with the results. I think this was the last pic I took as I was finishing carving them:
IMG_014138.JPG

After that I went immediately into assembly, starting with a test fit of the front and back:
IMG_014142.JPG
Here the stiles are being glued into the rails, but the legs are only there to ensure everything fits properly, not being glued up.

Then was testing the arms to make sure the notches accommodated the swing I wanted:
IMG_014143.JPG

The next day (September 10) I glued up the sides first, then reassembled and glued the front and back.
IMG_014146.JPG

After this was the full assembly:
IMG_014147.JPG
IMG_014151.JPG

On to the next day (Sep 11):
Final work involved adding the hinges, a soft-close fixture, and then finish.
IMG_014156.JPG
IMG_014161.JPG
IMG_014159.JPG

Here's a look at the inside, with the shiplapped poplar bottom:
IMG_014163.JPG

And finally, the very satisfied mother of the bride:
IMG_014166.JPG

Kirk
who finished this thread, even if six months late...
 
Great result, Kirk. Well done. I love linenfold too, and will sneak some in to something one day, despite the expressed wishes of the other half of the design team. I'm not sure that a strycsitten would be the most comfortable of seats...
 
Great project. It looks like it was a challenge and a lot of fun to make.

And you end up with an attractive sculptural piece of furniture, perfect for the right sort of setting.
 
The linen fold panels certainly add to the piece.

I do wonder if that back rest could do with some padding though.
 
Very interesting thread that I have somehow missed. Nice work and nice oak too.

This gives a bit more info into styles for anyone interested: https://blog.lostartpress.com/2018/03/3 ... andbanken/

There is, or certainly used to be, a German made, pierced end, fairly early one of these at Igtham Mote. In a bit of a state though, but also has the octagonal back end rotator. I've never tried sitting on it.
 
Back
Top