• Hi all and welcome to TheWoodHaven2 brought into the 21st Century, kicking and screaming! We all have Alasdair to thank for the vast bulk of the heavy lifting to get us here, no more so than me because he's taken away a huge burden of responsibility from my shoulders and brought us to this new shiny home, with all your previous content (hopefully) still intact! Please peruse and feed back. There is still plenty to do, like changing the colour scheme, adding the banner graphic, tweaking the odd setting here and there so I have added a new thread in the 'Technical Issues, Bugs and Feature Requests' forum for you to add any issues you find, any missing settings or just anything you'd like to see added/removed from the feature set that Xenforo offers. We will get to everything over the coming weeks so please be patient, but add anything at all to the thread I mention above and we promise to get to them over the next few days/weeks/months. In the meantime, please enjoy!

Sunburst Dining Table - WIP. *** NOW FINISHED ***

Jimmy Mack":1ucarfmo said:
The veneer work looks mega Roger. This is indeed a brave project. [emoji122]

Re: the apron.... Do you have a bag press?

I'd probably press laminations over a caul, the brick method looks a bit of a hassle to me.

You could also clamp them in between a male and female caul.

Maybe use 2.5mm constructional veneers or bendy ply, bendy would get the thickness up quicker.... How handy is your bandsaw? You could get your constructional veneers this way.

Do you remember my round oak table thread? Not a beauty like yours Roger, though I pressed my aprons, if it helps.

Sent from my Moto G (5) using Tapatalk
I'm coming round to your way of thinking Jim. I've got some air dried Ash which should bend nicely and 8 x 3mm or 4mm bandsawn veneers, with a cherry surface veneer, should minimise spring back. The only downside is that the Ash is at the bottom of my timber pile so I'll need a dry day to get at it! In the meantime I can be making a former to put on the vacuum bag.


Sent from my ONEPLUS A5010 using Tapatalk
 
fiveeyes":ek5r00b2 said:
That sir, is just outstanding!! I am looking forward to the top. :text-bravo:

Thanks fiveeyes. Patience - it's coming.

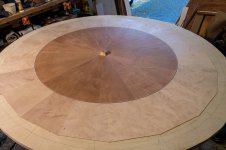
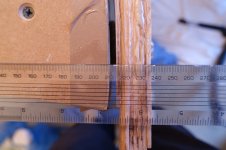
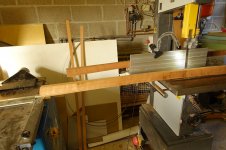
I started to tackle the top in exactly the same way as the underside. I had some cherry 60mm thick and 240mm wide. The central disk will be 1,000mm in diameter, so 3143mm in circumference. This means that I need to get 16 veneers from my stock, each one 200mm wide. That allows 3.75mm per veneer. I want each veneer to finish at 2mm thick, so need to cut them at 2.5mm to allow for any unevenness in the cutting, which I can take out on the drum sander. I need to keep reminding myself that every veneer will end up at the thickness of the thinnest piece. That’s an allowance of 3.75mm per veneer including the kerf, so having practiced on some scrap it seemed doable. When I came to cut the cherry, I ended up with only 14 veneers. Bummer! That’s not enough to get a symmetrical and uniform starburst. I decided to try again, and again I ended up with 14 veneers. Double Bummer!!

Anyway - it is what it is. I went on to cut the birdseye maple (BEM) veneers and guess what? Without touching the set up of the bandsaw I got 7 veneers from a plank just 22mm thick. That’s only 3.14mm per veneer, including the kerf. That means I should have got 19 veneers from the cherry. Go figure! I don’t understand it! The key thing is that I now have more than enough of my prized birdseye maple, so it’s not a disaster. These are stacked “in stick” indoors for just over 2 weeks to allow them time to stabilise.

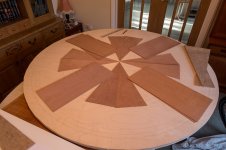
I decided that the way forward would be to use equal veneers from both sets, in alternating pairs of 2 bookmatched veneers. I cut a template from some scrap ply to get the angle right in the centre i.e. 22.5 deg. . Here is the disk set out with one set of segments from one batch in place, and the others ready for cutting into segments.

DSC07173-1.jpg

The end pieces of each semicircle were cut oversize to allow for trimming, and also to allow room for further shrinkage, having learned the hard way with the underside. Here are the two sides roughly laid out and ready for each edge to be shot straight ready for joining, which I do as before using the router on a rail technique.

DSC07174-1.jpg

Here are the 2 sides assembled ready for trimming and joining together.

DSC07179-1.jpg

I draw a line along the edge and leave it a couple of days to see whether there is any further shrinkage across the grain. Hooray - there isn’t!

DSC07180-1.jpg

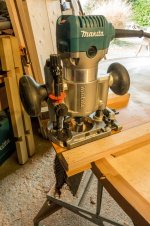
I rough cut the 2 halves to size in a straight line with a hand saw, leaving perhaps 3mm to be removed accurately. Time to shoot the 2 halves straight, ready for joining which I do as before using my little Makita trim router on a Festool rail. This works particularly well for this task, as one half of each cut is against the grain, so would be difficult with a hand plane on a shooting board. Even so, I take it slowly, just trimming away about 1mm at a time with slow passes of the router.

Before joining the 2 sides together I place them on the table and line up the focal point of all the segments with the precise centre of the table. It is much easier doing it now rather than when the disk is assembled because I can actually see the central point. Then I draw around the complete disk, so that I can place it in exactly the right place when assembled.

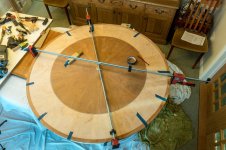
Having joined the 2 halves together, I immediately glue them to the table top as I’m not going to give it time to move, again using West Systems epoxy with the 206 slow hardener and colloidal silica as a thickener exactly as before. Remember to mix the resin and hardener well first, and only then add the thickener. This is because the 206 hardener is much thinner than the resin, and the thickener would soak it up and the curing would be uneven. There is over an hour of workable life once mixed so I can be calm and methodical setting it up. Then into the vacuum bag for about 6 hours. Once it starts to go off - about 90 mins - I cover it with an electric blanket and duvet to speed up the curing. At least then it is sufficiently cured by the evening to be able to turn off the pump!

DSC07181-1.jpg

Once out of the bag I take off the tape so that the adhesive isn’t left on the surface of the table. The central points have pulled in nicely.

DSC07184-1.jpg

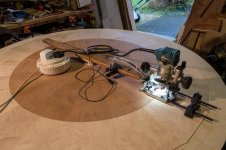
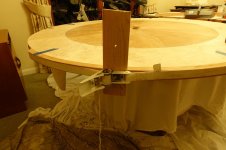
Next job is to trim the cherry circle to its final diameter, so on goes the router and trammel again, just like last time, so no new photos. Then I arrange the BEM veneers around the circumference, bookmatching where possible, and making sure that they are all approximately the same width. The width of the veneers dictates that there needs to be 20 pieces, so to ensure even spacing, I make sure that each quadrant has 5 veneers, and shoot the edges to join them together and glue them to the table, 2 at a time this time, just like I did on the underside, using a plywood platten held down with cauls. The final piece is cut marginally oversized, so that it is a snug fit just short of the cherry disk.

DSC07186-1.jpg

Then I take a thin shaving off the edges, retrying after every shaving, until it is a snug fit. I focus on getting the sides right as the join with the cherry will be filled with a 3mm string of ebony and sycamore.

DSC07189-1.jpg

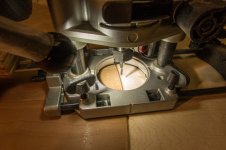
Time to cut the groove for the stringing again. I have to confess that this is when my bum starts blinking like a camel in a sandstorm! :lol: On with the trammel again, and line up the 3mm cutter with the join between the cherry and BEM.

DSC07192-1.jpg

I’ve attached a mini LED spot light to the trammel arm which makes for really good visibility. I have a couple of these which I also use on the band saw and router table. I then slowly walk one full circuit with the router to make sure it is lined up with the join all the way round. No reason why it shouldn't because the pivot point has not been moved, but always nice to get confirmation. It also helps ensure that everything is tight, not moving, and that there are no trip hazards.

DSC07193-1.jpg

I check that all the thumb nuts are tight and that the cutter is firmly locked in place. The strings have been cut 5mm deep, so the groove is going to be 4mm deep. Close the garage door so no one coming up the drive tries to speak to me mid cut (the buggers invariably do), take a deep breath and go for it.

DSC07194-1.jpg

All goes without any drama. Yay!

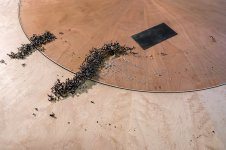
For the underside I trimmed the excess string off with a router, but this time my nerves won’t stand it, and having left less string proud of the surface - around 1mm or less - I trim it flush with a scraper. Far less harrowing!

DSC07196-1.jpg

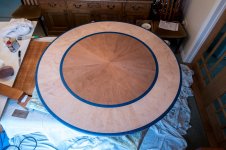
All comes out nicely. That’s the top more or less complete.

DSC07199-1.jpg

The trammel hub will remain in place as it will be needed to trim the table to its final diameter before fitting the 25mm wide cherry edging. However, I’m leaving that for the time being so that the edge is less prone to damage.

DSC07200-1.jpg

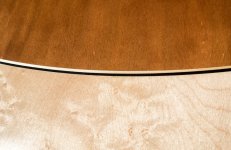
I’m not unhappy with the result. The BEM really “pops” in the light, and almost seems to "flash" as you change your viewing angle - the photos really don’t do it justice.

Next job is the skirt which I’m going to laminate up in air dried ash and veneer with cherry. However the ash is at the bottom of my timber stack, so I’ll have to wait for a reliably dry day to lug a load of wood outside to get at what I want. Sunday is looking favourite.
 
Love it.

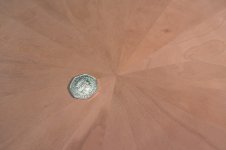
I especially love how the cherry meets in the centre!
 
RogerM":3cen6sih said:
.....
I’m not unhappy with the result. The BEM really “pops” in the light, and almost seems to "flash" as you change your viewing angle - the photos really don’t do it justice.

.....


That's 'chattoyance' for you. And why I love BEM.
 
That stringing looks gorgeous....I think you should treat yourself to the cordless router body.... It's got L E Ds too[emoji41]

Sent from my Moto G (5) using Tapatalk
 
Jimmy Mack":1w4qksjc said:
That stringing looks gorgeous....I think you should treat yourself to the cordless router body.... It's got L E Ds too[emoji41]

Thanks Jimmy. The cordless version would have been useful in this application, but I'm also trying to justify a new camera! :lol:

fiveeyes":1w4qksjc said:
That is a stunner. You have every privilege to be pleased. Looks to me like the 'bar' has been raised.
Merry Christmas!

Thanks. It's the first time I've attempted something like this so enjoying the learning process. I've made the apron as shown in the "calculating spring back" thread. Now ready for veneering. Sadly, I'm now banished from having vacuum bag and pump with glued up items curing in the dining room until the new year, :( so the next phase will have to wait a couple of weeks. Happy Xmas!
 
Roger, that centre point is first class. Truly quality work. :eusa-clap:

I've been on a veneering course and know just how difficult it is to get things like those points in perfect unison.
 
Contrary to popular belief, this is not an abandoned project! There was a long layoff over the Xmas/New Year, followed by 2 weeks walking on Gran Canaria (highly recommended), but now back in full swing. The next task was to make the apron. This is laminated up with 8 strips of air dried ash 60mm x 3mm thick, with a facing veneer of 1.5mm cherry. This was covered in the “Calculating Springback” thread, so if you are familiar with that you may want to skip this bit as it covers the same ground to keep it all in one place.

I made a former out of some old MDF and covered the “business side” with parcel tape to make sure the laminations didn’t stick to it. The plan is to have the apron in 3 parts with joins that coincide with the legs.

First the ash is glued up using cascamite in preference to Titebond as the open time is greater to make clamping up a less stressful exercise. The resultant assembly is left overnight to set.

DSC07205.jpg

According to the springback formula, with 8 laminations the springback should be about 5mm, which it is!

DSC07206.jpg

DSC07207.JPG

The facing cherry veneer is then glued on using the vacuum bag.

DSC07389.jpg

The blue tape is to hold the veneer in place until the vacuum has pulled the whole lot tight.

Next job is to make the lipping for the edge of the table. I toyed with the idea of using pieces cut from the solid, but it would have been horribly wasteful, so I decided to laminate it up in the same way as the apron, with the circumference completed in 3 sections. The table top is 28mm thick, so I cut 21 strips 32mm x 3mm x 1600mm, so far as possible keeping them consecutive from the same plank for consistency of grain and colour. Each was run through the drum sanded taking just enough off to remove the bandsaw marks. Each of the segments will have 7 laminations.

DSC07390.jpg

I made up another former and clamp up the strips just as with the apron.

DSC07394.jpg

I have left cutting the table down to its final size to prevent damage to the edge, but now it’s time to commit, and this is yet another wind up. The further I get into the project the more time I have invested and the higher the stakes. I use exactly the same technique as before with the trim router on a trammel.

DSC07396.jpg

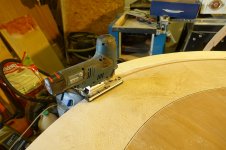
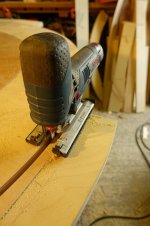
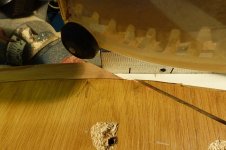
I use a 6mm down shear cutter to penetrate about 20mm in maybe 3 passes. Then I move the router out by about 10mm and repeat with a larger straight cutter, leaving a groove about 10mm wide. Then I cut the waste off with a jigsaw close to the outer edge of the cut.

DSC07397.jpg

DSC07398.jpg

This leaves a lip on the underside of the table which I trim freehand with the trim router using the trim base and the 6mm down shear cutter, having first turned the table over so that I can cut from the underside..

DSC07399.jpg

DSC07402.jpg

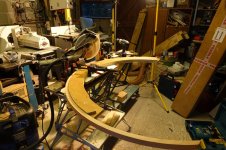
Now to cut an accurate scarf joint in the edging strips. After much head scratching the solution was simple. I screwed the former I had used to glue up the edging strip to a piece of scrap MFC with one straight edge, and clamped that to the fence on my SCMS. I set the blade at 55 deg which is the maximum angle I can get, clamped the edging back onto the former, and made the cut.

DSC07551.jpg

DSC07553.jpg

The cut is made in the approximate centre of the former so that there is space to attach an edging piece from both sides.

DSC07556.jpg

These are then glued to the edge of the table one at a time using TB2 and and old strap that was originally used to hold a tumble dryer on top of a washing machine, and which ratchets up drum tight. There is a piece of scrap behind the ratchet to prevent it denting the table edge.

DSC07557.jpg

It appears that I have reached the maximum number of photos that can be loaded in one post, so to be continued ..........
 
Impressive work.

I also like the bookcase and drinks cabinet in the working area!
 
..... here!

When the next edging strip is glued on I use the same method, but add a sash clamp to bridge the scarf joint to hold it is tight. The second clamp was actually put on first to hold the edge firmly in position so that the clamp across the joint didn’t make the edge slip whilst it was being clamped down. That may sound “a bit Irish” but hopefully it makes sense!

DSC07561-1.jpg

DSC07562-1.jpg

The final piece was a bit tricky to fit as there is absolutely no margin for error in cutting the scarf joints (which I did as I went rather than all together). In this case, the sash clamps were placed across both scarf joints. The blue tape is to hold the edge roughly in position whilst I get the ratchet band in place, and then also to hold the ratchet band in place before it is tightened up. The piece of scrap is placed behind the ratchet to stop it denting the edging strip.

DSC07564-1.jpg

Finally, the edge needs to be cut flush with the top. I first trimmed the top and bottom to about 0.5mm of the surface with a router ……

DSC07565-1.jpg

DSC07567-1.jpg

…. taking the last 0.5mm down with a card scraper, which was a bit laborious, but surprising quick. Then I attached the trammel for the last time and using the down spiral cutter I took a whisker off all the way around to be sure I had a perfect circle and no lump or bumps in the edge. No photos of this I’m afraid. Finally I rounded the edge with a 19mm radius half round bearing guided cutter.

DSC07578-1.jpg

No maths behind the selection of a 19mm radius cutter apart from the fact that I already had one and seemed fine for the job! :lol: As always, I started with somewhere it wouldn’t show if I made a mistake, and thankfully I did. I started with rounding off the underside, and halfway round the bearing came off the cutter. Aaaaggghhh! I thought I was checking every variable, but checking the tightness of the bearing bolt was not one of them!

IMG_20190210_151954.jpg

I trimmed the edges of the “wound” flat with a chisel and glued in an offcut from the edging strip.

DSC07570-1.jpg

This was then taken down with a block plane and a final cut taken with the router. On the completed table it’s hard to find, and it is on the underside, so no real issue.

DSC07573-1.jpg

DSC07581-1.jpg

Next I rough fit the apron. I draw a circle the same radius as the apron on the underside of the table with a beam compass …..

DSC07579-1.jpg

…. and screw blocks just touching the inside of the line. Then I simply screw through the blocks into the skirt. The ends of the skirt are joined with some cherry blocks.

DSC07697-1.jpg

DSC07698-1.jpg

That’s the top more or less complete apart from final finishing. I'm well in to building the base so will post progress on that soon.
 
Brilliant Roger and excellent recovery.
I feel better about the state of my workshop each time I get a glimpse of yours.
 
Malc2098":2mgq62a9 said:
Impressive work.

I also like the bookcase and drinks cabinet in the working area!

Thanks Malc. I can't take credit for the bookcase and drinks cabinet. That predates me taking up furniture building. I wish it had an oiled finish rather than a sprayed acrylic finish, and I would definitely have a go at building it if we were looking for one now!

Andyp":2mgq62a9 said:
Brilliant Roger and excellent recovery.
I feel better about the state of my workshop each time I get a glimpse of yours.
:lol: I know. It's towards the end of the project and a massive clearout is needed before I start the next one. It's getting bad even by my standards! :oops:
 
Roger, I am sooo mpressed by this project both in the quality of the write up and your attention to detail is phenominal.

Maybe you should produce a brochure to show to anyone new who visits and sees your table so that can really appreciate the achievement!

Bob
 
9fingers":2mrt2qht said:
Maybe you should produce a brochure to show to anyone new who visits and sees your table so that can really appreciate the achievement!
Bob

Great idea. I made one for the settle that Pinch made for me. I used his wip posts and photos, edited them a bit and got a book made online.

I can dig out the details of who I used if you are interested.
 
It's looking great, Roger. Excellent job on the lipping. Rotten luck with the bearing, but nice recovery, I've never had this happen myself... So I'll be checking them bearings in the future!

Looking forward to the next stage [emoji846]

Sent from my Moto G (5) using Tapatalk
 
We're on the home straight now! The base is going to be a a simple 3 legged affair inspired by George Johnson whose work with expanding dining tables I have always admired. As a matter of courtesy I emailed George to let him know of my intentions and he couldn’t have been more helpful, so if you get to read this George, many thanks for your very useful suggestions!

I still needed to make sure that what I had in mind was going to look right, would be sufficiently rigid, and I also suspected that there would have to be a deceptively large number of subtleties that I hadn’t appreciated, so I ran up a mockup in softwood first before butchering some expensive cherry. I started with some simple templates run up in scrap ply so that each component would be repeatable.

Here’s my first attempt half assembled. .

162829.jpg

Having mounted the table on top, I concluded that I was on the right track but both the legs and feet were too chunky, so I slimmed both of them down just on one leg and foot to satisfy myself. That seemed to work. Those with an eye for engineering may say that the arched feet will have an unacceptably high bending load where they meet in the middle, and also where the mortise and tenon joins the feet, so will that central joint be strong enough?

Tests showed that it would be!

DSC07723-1.jpg

DSC07389.jpg

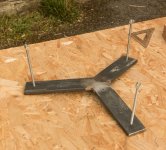
So is my joinery that strong? Maybe, but could be that the strength can be attributed to this little beauty made in 50mm x 10mm steel by our local fabricators :)

DSC07734-1.jpg

This is let in to the underside of the feet, and the bolts go up into the legs, through the mortise and tenon and into the dowel nuts which will be covered with a plug. All the bending load is being taken by the steel plate and I don’t think it’s going to go anywhere.

Time to repeat in cherry. First of all I make some templates in scrap MDF and plywood, taking the shape from the mock up. All the joints are cut whilst the stock is still square to make it easier to measure and cut. The central join in the feet is cut on the SCMS. The steel plate rises at 6 deg from the horizontal, so I simply set the blade 6 deg from the vertical, and 30 deg horizontally and bingo - job done.

Oh don’t you just wish it was that easy :) . Whilst that was it in theory, in practice I had to nibble at it on the SCMS 8 or 10 times until I got it right.

DSC07730-1.jpg

DSC07729-1.jpg

Fortunately I had anticipated the problem and had cut the feet 30mm over length to allow me to have multiple “bites of the cherry” (pun). Doh!

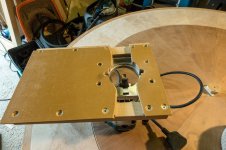
I wanted the ends of the feet to be curved as though they were part of a circle, so I made a very simple jig. First I screwed a piece of scrap that was the same width as the mitre channel on my bandsaw table to the underside of a piece MFC. Then I screwed another piece to the topside with a shallow notch in the edge which determined the length of the foot. I tilted the table by 10 deg, clamped the jig to the table, put the point of the foot in the notch and simply rotated the workpiece through the blade as though it was the hand of a clock. Simples! Here it is in action on the mock-up version. The recess on the underside is to house the steel plate and cut on the router table.

DSC07704-1.jpg

Next I attached the template to the workpieces using double sided tape and shaped it with a bearing guided cutter on the router table.

DSC07706-1.jpg

The mortise and tenons on the legs were simply cut by hand, and the length and angle of the M&T shoulders determined from the mock-up legs.

Another template, drawn from the mock-up determined the extent of the chamfers that were taken off each foot and leg. Having drawn around the template, the bulk of the waste was cut off freehand with the band saw, and then taken down to the line by hand using a microplane.

DSC07738-1.jpg

Time for a glue up. I put a domino in each face of the central joint more to index the surfaces than for any other reason, loosely screwed and bolted the steel plate in place, and then clamped the whole lot together. I had experimented with several ways of clamping up, and the simplest and most reliable method is the one shown.

DSC07739-1.jpg

Before finally glueing the legs into the feet, I rough fitted the legs in place and bolted the tops in to their final position. The wooden blocks screwed to the underside of the table are temporary. I’ll beef them up in cherry when I’m happy with the fit. This went according to plan, so the legs were glued into the feet and the bolts through the steel plate up into the legs were tightened up and the hole for the dowel nuts plugged. The blue tape is to mask the wood around the joint so that any squeeze out doesn’t soak into the wood and affect the finish.

DSC07749.jpg

And all of a sudden that’s the woodwork finished! Yay! Time to think about a finish.

My original plan was to use a resin finish like a bar polish, or Rustins Plastic Coating which is absolutely bomb proof as on my original side table test pieces. However, whilst bomb proof, it is a little like putting wood in a plastic bag, and in the event of damage needs to be completely stripped and refinished. It also dries quite fast and I was a little concerned that it might be difficult to get an even finish on a large area. Time to consider something else.

In the end I decided to test a Polyvine water based lacquer, Osmo Raw, Osmo finishing oil and Fiddes clear hardwax. I still had the test pieces from when I was trying out various glues for the sunburst, so I divided them into 4 and used a different finish on each quarter.

To my eye at least, the Clear Lacquer turned the cherry a greyish brown, which I didn’t like. The Osmo Raw was the palest finish on the maple which was great, but it completely killed the colour of the cherry, making the finish look cloudy. The Osmo Top Oil gave the cherry a lovely honey colour, and the Fiddes was similar. However, the Osmo Top was the most yellowing on the maple.

In fairness to Osmo, they do warn against using Osmo Raw on darker woods, and they also advocate just one coat is enough on pale woods, which should then have subsequent coats of Osmo PolyX or Osmo Top Oil. I tried this over the Osmo Raw on the pale test piece and it barely darkened it at all. But how resilient to marking are they? Only one way to find out.

DSC07750-1.jpg

DSC07753-1.jpg

I put a small puddle of red wine, milk, coffee, tea and water on each finish for both the cherry and the maple, and then added a cup of hot (but not boiling) water which sat in a some spilt coffee. I left this for an hour before wiping it clean. All 4 finishes shrugged this off, so nothing to choose on resistance to marking.

So the final decision is Osmo Raw on the maple, followed by the Osmo recommendation of 4 thin coats of Clear Top Oil (Satin). Not only should this be durable, but it will keep the maple pale, and in the event of any marks in future it can be patched easily, unlike a resin or lacquered finish.

I masked the edge of the maple as shown.

DSC07765-1.jpg

I then applied the Osmo Raw very thinly with a cloth, and as soon as I had finished applying it I removed the masking tape to minimise any detectable ridge caused by a meniscus at the edge. Then LEAVE IT ALONE UNTIL DRY! On a test piece I had tried feathering the edge with a clean cloth, but when the Top Oil is applied, even the slightest smear of Osmo Raw on the cherry shows through. So LEAVE IT ALONE! Just to be safe I threw away all cloths that had been used to apply the Osmo Raw so that I didn’t use one by mistake on the cherry, and had I used a brush for the Raw I would have used a different one for the Top Oil.

Once dry I ran a scraper very lightly along each edge to remove any high points on the maple, denibbed and then applied the Top Oil all over. After 4 coats, denibbing between each with a 160 grade pad, it just remained to re-attach the apron and legs and put it into its’ new home.

DSC07833-1.jpg

DSC07837-1.jpg

DSC07844-1.jpg

DSC07845-1.jpg

DSC07849-1.jpg

DSC07864-reduced.jpg

I’m not unhappy with the result. It does the job it was intended to do and fits in well with the rest of the kitchen. This project took me further outside my woodwork comfort zone than I have ever been and the learning curve was not only near vertical, but I had great fun climbing it as well. Sometimes you’ve just got to go for it!

Anyway - if you’ve got this far and not lost the will to live, thanks for reading.
 
That's lovely Roger, an absolute beauty and an excellent write up too.

Top marks on the thorough R&D with the finishing ... and not just diving in.

Will bring years of pleasure I'm sure.

Well done.


Sent from my Moto G (5) using Tapatalk
 
That's really beautiful. I hope to hell that no-one drops anything on it. I'd have been tempted to wrap it in the armour of something like Rustins Plastic Coating, just to be sure, and to save palpitations every time anyone went near it with a mug of hot tea.

Fantastic work, and an excellent write-up, too.
 
Fandabby Roger!

Very interested to read about the Osmo Raw. I have some sample sachets or Raw as well as some Polyvine mat wax finish stuff on order from Ax. I'm still trying to play around with a suitable finish for my stash of Olive Ash, which as you know will have the clear pale coloured timber on the outside and a highly figured, swirly brown patterned grain towards the centre of the board, with no clear delineation 'twixt the two. It's a bit of a conundrum to work out which finish, or combination of finishes, is going to suit the material.
So far I've tried the satin version of the Polyvine on a small sample which looks fine but I'm leaning towards more of a mat finish these days. Decisions, decisions.......- Rob
 
Think its all been said above so I can only add the same thoughts.

Congratulations on a beautiful result!
 
Thanks for all the kind comments guys.

RogerS":173pptdl said:
Roger, that centre point is first class. Truly quality work. :eusa-clap:

I've been on a veneering course and know just how difficult it is to get things like those points in perfect unison.

Thanks Roger. I found that the easiest way was to glue up the segments in pairs. It's relatively easy to get a good point on each pair, and then take great care matching the pairs up. Don't be mean with the tape!

9fingers":173pptdl said:
Roger, I am sooo mpressed by this project both in the quality of the write up and your attention to detail is phenominal.

Maybe you should produce a brochure to show to anyone new who visits and sees your table so that can really appreciate the achievement!

Bob

Thanks Bob. I think that maybe comes from me being a skinflint when it comes to wasting materials. I only just had enough birdseye maple, and a cock-up with that would have been catastrophic. When I'm in learning mode, as is the case on virtually every aspect of this build, I find it lowers the stress levels if I have a practice run first. Helps keep my ticker from over revving! :lol:

Jimmy Mack":173pptdl said:
It's looking great, Roger. Excellent job on the lipping. Rotten luck with the bearing, but nice recovery, I've never had this happen myself... So I'll be checking them bearings in the future!

It was the first time a bearing has come off for me too Jim. I think I may have had it off (so to speak :lol: ) previously so maybe I didn't tighten it back up enough. Will always check in future.

Woodbloke":173pptdl said:
Fantastic stuff going on there...nice bit of recovery on the mangled underside :D - Rob

Thanks Rob. It just goes to show that my approach in doing the bits that don't show first paid off in spades on this occasion. With the table the right side up I struggle to find the repair now.

Jimmy Mack":173pptdl said:
That's lovely Roger, an absolute beauty and an excellent write up too.
Top marks on the thorough R&D with the finishing ... and not just diving in.
Will bring years of pleasure I'm sure.
Well done.

Thanks Jim. There seemed to be little to choose between the finishes so far as durability is concerned. Time will tell!

Mike G":173pptdl said:
That's really beautiful. I hope to hell that no-one drops anything on it. I'd have been tempted to wrap it in the armour of something like Rustins Plastic Coating, just to be sure, and to save palpitations every time anyone went near it with a mug of hot tea.

Fantastic work, and an excellent write-up, too.

Thanks Mike. I know what you mean. This is intended for everyday use and I very nearly went with the Rustins Plastic Coating as it has worked well on the practise side tables I made and which have been in use for 15 months now without any signs of wear. It's just that I doubted my ability to get a really even finish over such a wide area with a product that seemed to dry very quickly. Also in the event of any damage it can't be repaired easily, so it would need stripping back to bare wood. I know of your aversion to Osmo, but based on my admittedly rather superficial tests, it does seem to be very hard wearing, and it can be patched without stripping it back. Never-the-less, we are keeping a small stack of coasters on the table and they WILL be used! We also have a soft table protector which will be covered with a PVC tablecloth for when the grandchildren are visiting!

Time will tell whether I have made the right choice. However, with veneers between 1.5mm - 2mm thick, if it turns out to be marking too easily, I can strip it back with a random orbital sander and revert to the Plastic coating or bar polish if I have to without any fear of sanding through to the substrate. I'm really hoping that isn't necessary though!

Woodbloke":173pptdl said:
Fandabby Roger!

Very interested to read about the Osmo Raw. I have some sample sachets or Raw as well as some Polyvine mat wax finish stuff on order from Ax. I'm still trying to play around with a suitable finish for my stash of Olive Ash, which as you know will have the clear pale coloured timber on the outside and a highly figured, swirly brown patterned grain towards the centre of the board, with no clear delineation 'twixt the two. It's a bit of a conundrum to work out which finish, or combination of finishes, is going to suit the material.
So far I've tried the satin version of the Polyvine on a small sample which looks fine but I'm leaning towards more of a mat finish these days. Decisions, decisions.......- Rob

Thanks Rob. The Osmo Raw experience was interesting, and once again goes to show the value of testing on scrap first before committing. It really does do a very good job of keeping pale wood pale - in this instance the BEM - but it totally destroys the figure in darker wood like cherry. It looks as though you're peering at it through a fog, and in fairness to Osmo, they do warn against using it on darker hardwoods. I was amazed at how little of the Raw is needed to keep the maple pale - just wipe on a single coat and wipe it off again! But be warned that even the slightest contamination on adjacent darker wood will show clearly when you put a clear oil on over the top. It looks like you've spilt some white primer on it and not wiped it off properly - it's that obvious!

fiveeyes":173pptdl said:
For me, that is about as good as good gets.
Absolutely beautiful, great skills. Particularly liked your approach to problem solving, and the testing of finishes. Well done.
Darn fine writing, too.

Thanks Fiveeyes. Whilst I admit that it's not too shabby, I'm sure that you would find some mistakes if you looked hard enough. I've really enjoyed the write-up too - it does make you think about what you are doing, and I've found that I frequently referred back to my original thread to remind myself how I tackled things. Amazing how you forget!
 
RogerM":1uy194js said:
I was amazed at how little of the Raw is needed to keep the maple pale - just wipe on a single coat and wipe it off again! But be warned that even the slightest contamination on adjacent darker wood will show clearly when you put a clear oil on over the top. It looks like you've spilt some white primer on it and not wiped it off properly - it's that obvious!

Thanks for the 'heads up' Rog. It looks like my new, unopened and unwrapped tin of Osmo Raw is going back to AxHQ on the 13th April. I'm going to a book signing event there to meet John Makepeace and get hold of an autographed copy of his Parnham House book - Rob
 
That is truly a beautiful piece of furniture. I'm going to show SWMBO and see what she thinks. I'm fed up of 'joinery' stuff !
 
RogerS":1gk1bzm7 said:
That is truly a beautiful piece of furniture. I'm going to show SWMBO and see what she thinks. I'm fed up of 'joinery' stuff !

Haha! Thanks Roger. Actually, my next project is a kitchen Island for my daughter and then I'm looking forward to some basic wood butchery replacing a deck!
 
RogerM":1c5iqq6i said:
............So is my joinery that strong? Maybe, but could be that the strength can be attributed to this little beauty made in 50mm x 10mm steel by our local fabricators :)
View attachment 16.............

Repent, sinner!! :lol: :lol:

I had Custard of UKW with me a couple of days ago. We talked about your table for at least 5 minutes. He's obviously a pro furniture maker and does loads of veneering, and I can tell you that he is seriously impressed with this piece of work. As am I. He also told me that I've got to get into veneering, especially now I've a shed full of spectacular bog oak, so I'm going to go back through this thread frame by frame at some point and absorb the lessons.

Beautiful work, Roger. You should be very proud.
 
Back
Top