• Hi all and welcome to TheWoodHaven2 brought into the 21st Century, kicking and screaming! We all have Alasdair to thank for the vast bulk of the heavy lifting to get us here, no more so than me because he's taken away a huge burden of responsibility from my shoulders and brought us to this new shiny home, with all your previous content (hopefully) still intact! Please peruse and feed back. There is still plenty to do, like changing the colour scheme, adding the banner graphic, tweaking the odd setting here and there so I have added a new thread in the 'Technical Issues, Bugs and Feature Requests' forum for you to add any issues you find, any missing settings or just anything you'd like to see added/removed from the feature set that Xenforo offers. We will get to everything over the coming weeks so please be patient, but add anything at all to the thread I mention above and we promise to get to them over the next few days/weeks/months. In the meantime, please enjoy!

The Niff-Naff Cabinet; ABW components

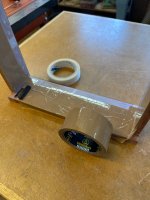
The back panel was going 'walkabout' all over the place so I had to cramp it down to the B&D Workmate for a few days:

IMG_8058.jpeg

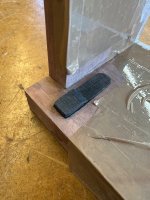
...but this was only a temporary measure as I need to have access to the whole face to sand and finish it. I was doing a bit of serious head scratching last night trying to fathom out how to hold it flat so that I could get the Festool sander to within 3mm of the edge...then I remembered that I had some gash buttons in a drawer somewhere and they would probably do the trick if I use a chunky bit of 18mm ply. This morning I went over to Wickes in town and bought a quarter sheet (quite good stuff btw):
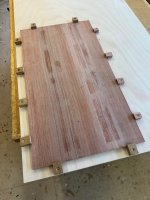
IMG_8059.jpeg

...and screwed the whole panel down proper flat. I had to shoot in one or two of the buttons to make them grip at about 3mm, but essentially the panel can now be sanded and polished - Rob
 
Last edited:
Having secured the back panel it was sanded through the grits to 320g and then masking tape applied:

IMG_8061.jpeg

...and then the surplus was removed by slicing through with a wheel gauge and peeling off the excess:

IMG_8062.jpeg

The buttons were repositioned and it was given a first coat of Rubio Monocoat:

IMG_8063.jpeg

...which needs 48hrs to harden off before anything else is applied. In the meantime I decided to mask off the whole of the inside with tape to allow glue 'squeeze out' to be easily removed.

IMG_8065.jpeg

The white shiny stuff is low tack tape, used mainly for picture framing which is easily positioned exactly on the edge of the rebate and the brown tape is ordinary parcel stuff which is a bit more 'icky; I've never done this before so am a bit hesitant, but having thought if through, it ought to work:

IMG_8064.jpeg

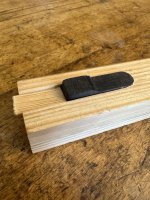
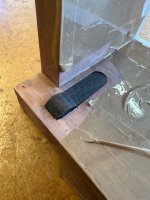
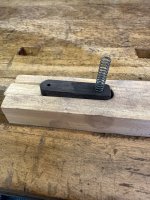
Once the recess for the spring catch had been fixed (a bit glued in and cleaned up) the original ABW one was too long (not possible to shorten) so a new one will be made (block shown) whilst the Rubio on the back panel cures - Rob
 
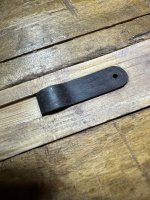
The ABW components are small n'fiddly but quite good fun to make. First off the blank, surprisingly, needs to be a loose though not sloppy fit into the recess as it eventually has to move up and down:

IMG_8066.jpeg

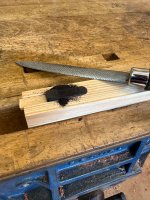
Most of the excess has been removed on the bandsaw, so the next job is to make a softwood cradle to hold it for shaping:

IMG_8068.jpeg

... which is relatively easy to do with a small, fine rasp:

IMG_8069.jpeg

...and now roughly to shape:

IMG_8070.jpeg

...and fitted into the recess for a trial fit:

IMG_8071.jpeg

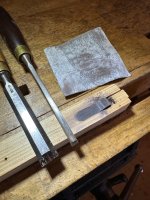
A 'blunt' chisel, scribing gouge and sandpaper can then be used to finish it smooth:

IMG_8074.jpeg

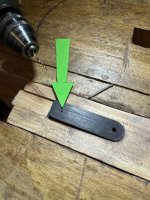
The pilot hole for the screw is very carefully drilled dead centre:

IMG_8076.jpeg

...and then the piece is flipped over and a small pin prick is made to drill a 1mm, very shallow hole (arrowed) for a veneer pin;

IMG_8077.jpeg

The pin is tapped in lightly, clipped to around 2mm long and then it's used to mark out the slight depression (arrowed):

IMG_8078.jpeg

...where the spring will eventually be housed. Meantime, the pin is removed in the catch and a 1mm deep hole drilled to hold the the other end of the spring. As the spring is about 4.5mm diameter, a 5mm hole was drilled, bearing in mind that the spring needs to fully compress without obstruction:

IMG_8079.jpeg

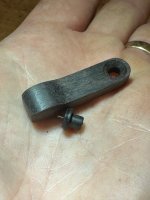
The screw hole is then drilled and coutersunk. (On the original catch, this tiny hole was revealed as it was shortened which was the reason it had to be remade):

IMG_8081.jpeg

......so that the screw (polished brass head) again isn't constricted in the hole. The catch is then detail sanded with 400g paper. The hole under the top of the carcase houses a 'button' to maintain the shadow gap:

IMG_8083.jpeg

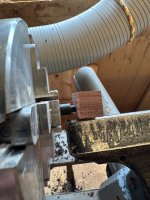
...and is turned from an offcut of round ABW. Once mounted in the chuck, I used an offcut of Bubinga with the same size hole (4.5mm) to turn a teeny tiny tenon that's a comfortable, but not a tight fit. It it's too tight, it won't come out again and I'm fubar'd!

IMG_8084.jpeg

A little chamfer needs to be turned on the button:

IMG_8086.jpeg

...to allow the door edge to ride smoothly over it. Once finally sanded, ti can be parted off:

IMG_8088.jpeg

...and trial fitted into the 'ole, making absolutely sure that it's not pushed down completely:

IMG_8090.jpeg

I always use ABW for these accent details as it's incredibly hard but relatively easy to work and shape into these sorts of components. I've used Rosewood before now and Ebony, but ABW is 'número uno'. The final fitting of these two components is done right at the end when the door is offered up 'in situ' - Rob
 
Last edited:
Back
Top