• Hi all and welcome to TheWoodHaven2 brought into the 21st Century, kicking and screaming! We all have Alasdair to thank for the vast bulk of the heavy lifting to get us here, no more so than me because he's taken away a huge burden of responsibility from my shoulders and brought us to this new shiny home, with all your previous content (hopefully) still intact! Please peruse and feed back. There is still plenty to do, like changing the colour scheme, adding the banner graphic, tweaking the odd setting here and there so I have added a new thread in the 'Technical Issues, Bugs and Feature Requests' forum for you to add any issues you find, any missing settings or just anything you'd like to see added/removed from the feature set that Xenforo offers. We will get to everything over the coming weeks so please be patient, but add anything at all to the thread I mention above and we promise to get to them over the next few days/weeks/months. In the meantime, please enjoy!

The Niff-Naff Cabinet; door construction...door rebate for glass

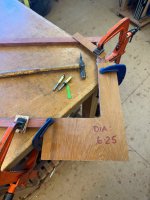
With SWIMBO glued to the bat n'ball I sloped off to the 'shop to finish the jointing on the door. The rails were shot in for a snug fit:

IMG_7921.jpeg

...at either end. Nothing but a super-duper honed blade on the LN 51 will take off the wispy end grain shavings needed for a fit; if the edge is a bit 'tired' it will just chatter across the end grain. With that done, the rails were cramped to the Domino board:

IMG_7922.jpeg

....making sure that they were the right way up. It has been known otherwise:eek: Next up was a dry fit to see what it looked like which was generally fine, but one corner was some way out!

IMG_7923.jpeg

This looks bad but is easy to fix with two minutes work an a sharp chisel:

IMG_7924.jpeg

Simply pare away part of the domino to remove the 'step' when the rail is re-fitted. Once done, the door was dropped into the cabinet and fitted snuggly:

IMG_7925.jpeg

...top and bottom. It's even out of wind or twist on the sides:

IMG_7926.jpeg

...bearing in mind I did that rather hairy procedure on the router table a while back to trim a bit off, which also it seems made both edges parallel. Even though the dry door frame is a snug fit, when the hinges are fitted, there'll be some shavings removed top and bottom to allow it to clear the cabinet and swing open freely - Rob
 
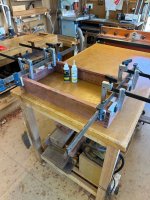
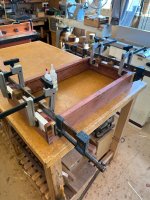
Today's the day for the glue up, so I thought I'd try something I've never, ever done before...so what could possibly go wrong? Normal, proper, sound practice is to glue up the door frame separately and then plane it to fit the cabinet, but this time I glued the frame inside the cabinet as it fitted really quite snug. The first coupla pics show:

IMG_7930.jpeg

IMG_7931.jpeg

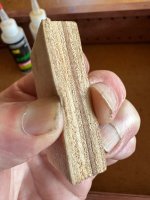
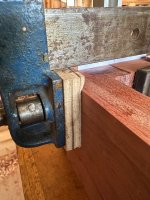
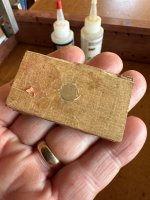
...show the frame glued inside with paper taped to the areas where 'squeeze out' occurs. Glue use is 30min epoxy which is great stuff in this hot weather. The cramping bocks I use have a super squishy face and are made from 12mm ply with bits of 3mm Nairn foam flooring stuck to them with ds tape:

IMG_7932.jpeg

This means that any discrepancy between the door stile and carcase:

IMG_7933.jpeg

...can be accommodated as the pressure is applied. The blocks also have a cunning 6mm rare earth magnet on the ply side:

IMG_7934.jpeg

...so they stay exactly where you put them on the cramp. After a few hours the cramps came off:

IMG_7935.jpeg

...and you can clearly see the bits of paper taped to the project. I was half expecting to have to use a tapometer to remove the door frame but fortunately it lifted:

IMG_7936.jpeg

...straight out - Rob

Edit - watch Channel 4 news tonight!
 
Well, I know this is a radical approach to a glue up and those glue blocks are nifty, but full credit to the C4 journalists for sending a film crew to Salisbury to cover the event for the world! 🤣
SWIMBO sent me a WotsAp message as she almost bumped into Alex Thompson (+camera/sound bloke) from Ch.4 news the other day; he was strolling along the corridor just outside the Histo Lab after having done a piece on how SDH is managing with the current heatwave. No wood mangling unfortunately - Rob
 
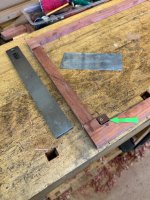
Having glued up the door reasonably well, I started to clean up the outside faces (a bit ruff n'ready at this stage) with a scraper, checking for straightness with an LV edge; note the support given to the work using the wrong side of the bench dog (arrowed):

IMG_7937.jpeg

The four very rough corners were then template routed to shape:


IMG_7938.jpeg

The job is cramped as shown with the big hd carver cramps fixing the door securely to the assembly table. The template is cramped to the corner so I'm able to sneak up onto the edge(s) with several very fine passes. The smaller router cutter would have been ideal but it's not available as a top bearing cutter from Ax, so I used the 12mm one (arrowed). After the first pass:

IMG_7939.jpeg

....and the second pass:

IMG_7940.jpeg

...so that after a couple more very fine passes, the cutter was coplanar with the job:

IMG_7941.jpeg

In about 40 mins I'd done all four corners:

IMG_7942.jpeg

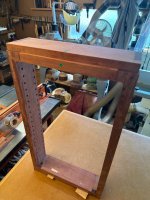
...so that when offered up into the cabinet it was starting to look reasonable:

IMG_7943.jpeg

It was vital to turn the door over for two of the corners to avoid cutting uphill or even back cutting, which is not recommended, especially in this stuff. Easy enough to shape the corners with rasps and files etc but not nearly as accurate and I'd still be at it this time tomorrow!

It's virtually impossible to do this sort of routing with one pass only on the corners, (I've tried with disastrous results) but it's easy enough if the edges is snuk up to with severial very fine ones - Rob
 
This morning's adventure in the 'shop involved getting the door clearances top and bottom so that the hinges can be fitted and to let the door swing open, but, as always there was a problem:

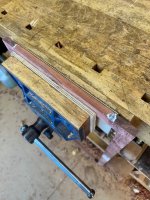
IMG_7948.jpeg

This shows the door rail n'stiles in the vice and normally, with say Oak or Walnut, this would be relatively easy to plane with a finely set No.5. The Bubinga as shown has a quarter sawn face (massive tear out!!) and two sections of end grain which make it difficult if not almost impossible to plane, so the only option was to rout off the small amount of material to fit the door. It's a fairly 'exact science' to fit these Brusso leaf hinges as the clearances needed top and bottom are:

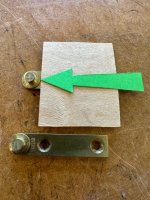
IMG_7950.jpeg

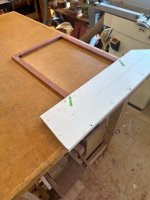
... twice the thickness of the washer (arrowed) or two thicknesses of 0.6mm veneer. The next issue to solve was how to hold the door in place; I found a piece of straight Contiboard to act as a guide for the top bearing cutter:

IMG_7944.jpeg

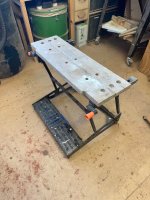
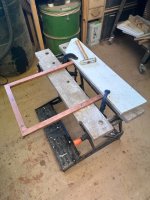
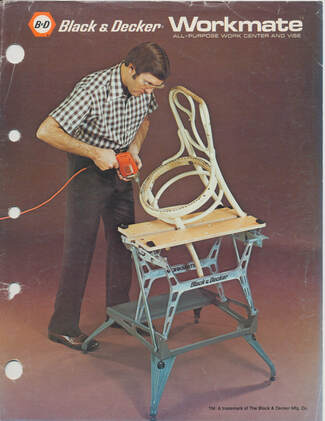
...but there was no way to clamp one end to the assembly bench (closest arrow) so I resorted (and not for the first time) to my old B&D Workmate:

IMG_7945.jpeg

...so that a relatively difficult holding problem now became absurdly simple:

IMG_7946.jpeg

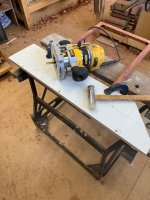
The Contiboard could be tapped exactly into position to take a teeny-tiny wispy few shavings:

IMG_7947.jpeg

...with my small deWalt router and top bearing cutter. With just two or three light passes one end was cleaned up:

IMG_7949.jpeg

...so that once the other end had the same treatment:

IMG_7952.jpeg

...it fitted snugly, but the veneer shims couldn't be inserted at the top. After a few more very careful passes, adjusting the cut at each end to make the door stand squarely; it fitted allowing both pairs of shims to fit smoothly:

IMG_7953.jpeg

I'm deliberately trying to keep hand planing this stuff to an absolute minimum as it'll tear out at the drop of the proverbial chapeau and at this stage of the job I need that like a hole in the head. For the moment, I'll keep the deWalt/Workmate combo set up in case I need to take off another slitherino from the rails when the hinges are fitted - Rob

Edit - top and bottom bearing cutters are by far the most useful ones to have and were used constantly when I worked as a pro many years ago
 
Last edited:
Every workshop needs a Workmate or two. The proper Ron Hickman sort like Rob's, not a present day pale imitation.
My grandad bought me this one in the early 90's and I replaced the original top years ago with some planks of iroko (which is all it's fit for) but my DiL Emma from Canadia was given one by her dad with the original aluminium frame, probably dating from the early 70's. I told her it's now worth a small fortune and never to sell it! - Rob
 
My grandad bought me this one in the early 90's and I replaced the original top years ago with some planks of iroko (which is all it's fit for) but my DiL Emma from Canadia was given one by her dad with the original aluminium frame, probably dating from the early 70's. I told her it's now worth a small fortune and never to sell it! - Rob
All you might need to know is here:

 
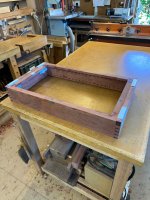
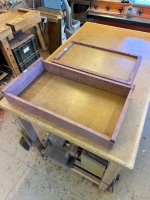
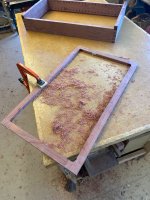
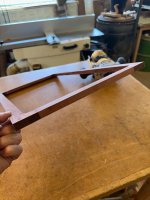
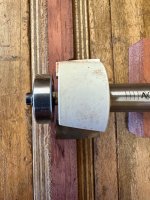
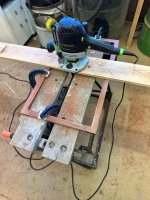
Today's task was to machine the rebate in the door for the glass. This is a little bit ticklish as the cutter bearing and Allen bolt:

IMG_7958.jpeg

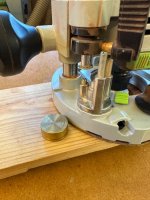
...drops below the level of the door and only half of it will be in contact for the final couple of cuts, so a suitable cramping arrangement needs to be organised to make it so. The depth of the rebate is 10mm and the Bubinga is only 14mm thick so there's not a lot of 'wiggle room'. The long base was screwed to the underside of my OF1400 and a suitable bearing selected from the Ax Rebate Set cutter to give a width of 6mm:

IMG_7959.jpeg

IMG_7960.jpeg

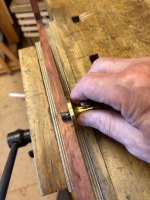
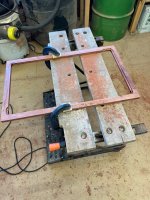
As usual, I used a LN wheel gauge (set a tiny fraction over 10mm) to scribe the depth of cut to mitigate against possible 'break out'...which has been known to happen! Initially I cramped the door to the assembly table:

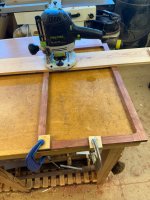
IMG_7961.jpeg

....but decided that it didn't give me enough options for secure cramping, so I switched the B&D Workmate:

IMG_7971.jpeg

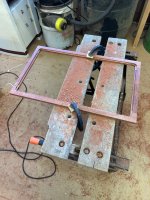
...with the first light pass just taken. With this sort of internal rebate on shallow material, it's a bit of a slow pita as each side has to be cut separately, so the G cramps have to be moved four times for each cut, but progress was gradually made:

IMG_7972.jpeg

...with the Domino's now appearing as the depth increases:

IMG_7973.jpeg

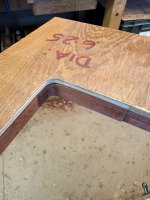
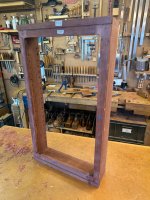
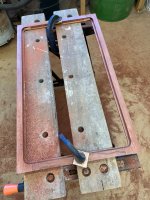
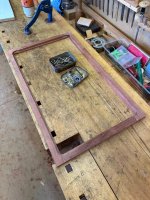
The last couple of very fine passes to bring the cutter onto the line were done and this pic shows the rebate completed:

IMG_7974.jpeg

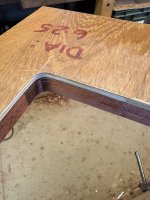
...so that on the bench, with all the dust swept away:

IMG_7975.jpeg

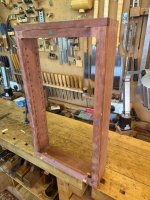
...it's ready for the corners to be chopped out square - Rob
 
Last edited:
All this attention to detail...
I can now see that I am entirely outclassed.
I lack your skill and patience.
Same here
Thanks chaps, appreciated. I've made a couple of these things now using these techniques, so although it's by no means 'second nature' it's not quite as onerous as it looks; what makes it very difficult above all else is the nature of the timber and as I didn't have very much of it in the first place, I can't afford to make any serious gaffs...although that has happened on other projects at this stage:cry:

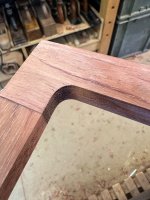
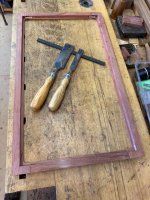
To finish off today's labouring in a not too hot 'shop, the corners:

IMG_7976.jpeg

....were squared out with a couple of 'Richter' chisels, which needed honing again after two corners had been done - Rob
 
Back
Top