• Hi all and welcome to TheWoodHaven2 brought into the 21st Century, kicking and screaming! We all have Alasdair to thank for the vast bulk of the heavy lifting to get us here, no more so than me because he's taken away a huge burden of responsibility from my shoulders and brought us to this new shiny home, with all your previous content (hopefully) still intact! Please peruse and feed back. There is still plenty to do, like changing the colour scheme, adding the banner graphic, tweaking the odd setting here and there so I have added a new thread in the 'Technical Issues, Bugs and Feature Requests' forum for you to add any issues you find, any missing settings or just anything you'd like to see added/removed from the feature set that Xenforo offers. We will get to everything over the coming weeks so please be patient, but add anything at all to the thread I mention above and we promise to get to them over the next few days/weeks/months. In the meantime, please enjoy!

The Niff-Naff Cabinet; hanging brackets and their recesses.

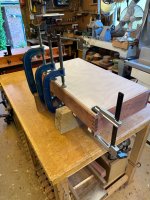
The back panel was going 'walkabout' all over the place so I had to cramp it down to the B&D Workmate for a few days:

IMG_8058.jpeg

...but this was only a temporary measure as I need to have access to the whole face to sand and finish it. I was doing a bit of serious head scratching last night trying to fathom out how to hold it flat so that I could get the Festool sander to within 3mm of the edge...then I remembered that I had some gash buttons in a drawer somewhere and they would probably do the trick if I use a chunky bit of 18mm ply. This morning I went over to Wickes in town and bought a quarter sheet (quite good stuff btw):
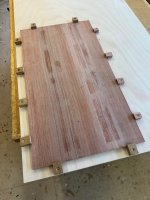
IMG_8059.jpeg

...and screwed the whole panel down proper flat. I had to shoot in one or two of the buttons to make them grip at about 3mm, but essentially the panel can now be sanded and polished - Rob
 
Last edited:
Having secured the back panel it was sanded through the grits to 320g and then masking tape applied:

IMG_8061.jpeg

...and then the surplus was removed by slicing through with a wheel gauge and peeling off the excess:

IMG_8062.jpeg

The buttons were repositioned and it was given a first coat of Rubio Monocoat:

IMG_8063.jpeg

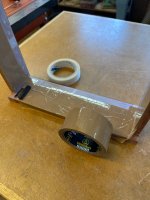
...which needs 48hrs to harden off before anything else is applied. In the meantime I decided to mask off the whole of the inside with tape to allow glue 'squeeze out' to be easily removed.

IMG_8065.jpeg

The white shiny stuff is low tack tape, used mainly for picture framing which is easily positioned exactly on the edge of the rebate and the brown tape is ordinary parcel stuff which is a bit more 'icky; I've never done this before so am a bit hesitant, but having thought if through, it ought to work:

IMG_8064.jpeg

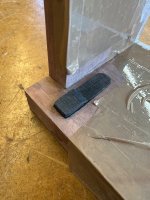
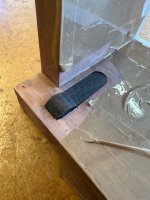
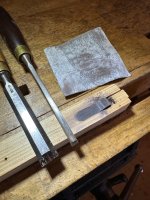
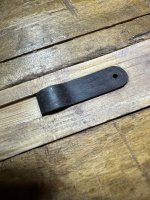
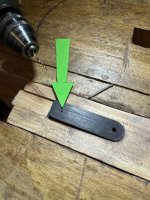
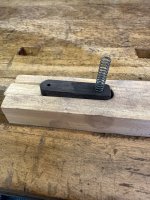
Once the recess for the spring catch had been fixed (a bit glued in and cleaned up) the original ABW one was too long (not possible to shorten) so a new one will be made (block shown) whilst the Rubio on the back panel cures - Rob
 
The ABW components are small n'fiddly but quite good fun to make. First off the blank, surprisingly, needs to be a loose though not sloppy fit into the recess as it eventually has to move up and down:

IMG_8066.jpeg

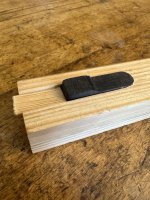
Most of the excess has been removed on the bandsaw, so the next job is to make a softwood cradle to hold it for shaping:

IMG_8068.jpeg

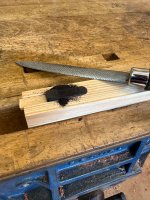
... which is relatively easy to do with a small, fine rasp:

IMG_8069.jpeg

...and now roughly to shape:

IMG_8070.jpeg

...and fitted into the recess for a trial fit:

IMG_8071.jpeg

A 'blunt' chisel, scribing gouge and sandpaper can then be used to finish it smooth:

IMG_8074.jpeg

The pilot hole for the screw is very carefully drilled dead centre:

IMG_8076.jpeg

...and then the piece is flipped over and a small pin prick is made to drill a 1mm, very shallow hole (arrowed) for a veneer pin;

IMG_8077.jpeg

The pin is tapped in lightly, clipped to around 2mm long and then it's used to mark out the slight depression (arrowed):

IMG_8078.jpeg

...where the spring will eventually be housed. Meantime, the pin is removed in the catch and a 1mm deep hole drilled to hold the the other end of the spring. As the spring is about 4.5mm diameter, a 5mm hole was drilled, bearing in mind that the spring needs to fully compress without obstruction:

IMG_8079.jpeg

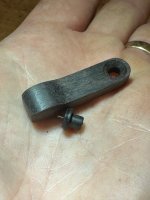
The screw hole is then drilled and coutersunk. (On the original catch, this tiny hole was revealed as it was shortened which was the reason it had to be remade):

IMG_8081.jpeg

......so that the screw (polished brass head) again isn't constricted in the hole. The catch is then detail sanded with 400g paper. The hole under the top of the carcase houses a 'button' to maintain the shadow gap:

IMG_8083.jpeg

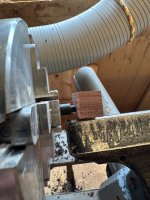
...and is turned from an offcut of round ABW. Once mounted in the chuck, I used an offcut of Bubinga with the same size hole (4.5mm) to turn a teeny tiny tenon that's a comfortable, but not a tight fit. It it's too tight, it won't come out again and I'm fubar'd!

IMG_8084.jpeg

A little chamfer needs to be turned on the button:

IMG_8086.jpeg

...to allow the door edge to ride smoothly over it. Once finally sanded, it can be parted off:

IMG_8088.jpeg

...and trial fitted into the 'ole, making absolutely sure that it's not pushed down completely:

IMG_8090.jpeg

I always use ABW for these accent details as it's incredibly hard but relatively easy to work and shape into these sorts of components. I've used Rosewood before now and Ebony, but ABW is 'número uno'. The final fitting of these two components is done right at the end when the door is offered up 'in situ' - Rob
 
Last edited:
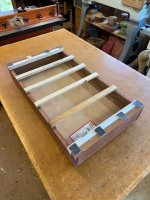
The back panel will be glued tomorrow as early this morning it just had it's second coat of Rubio Monocoat, to be followed by Oddie's Oil and wax. I've been fretting about this for a few days as this bit is fraught with difficulty as I foolishly only machined a narrow rebate and so it's difficult to exert pressure over a small area. I therefore adopted the 'belt n'braces' approach as I'll only get one shot at this to get it right, so the front:

IMG_8092.jpeg

...has glueing pads/pine bars taped in place (ds) and the label that can be seen above is:

IMG_8091.jpeg

...a board of 18mm plywood that sits directly in the rebate. Eventually there'll be 16 heavy cramps gluing the back panel in place and there won't be any sort of opportunity to remove 'squeeze out' from the inside. The glue used tomorrow will be TB3 so with any luck and a following wind it ought to be a fairly quick exercise; apply glue to the rebate, remove the tape from the panel, tap into the rebate, apply large plywood board and cramp together. As the panel wants to naturally bend, the cramps will be left in place for a full 24hrs to ensure the glue has fully cured - Rob

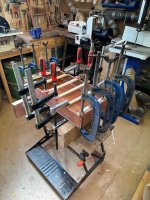
Edit - just had the inspired idea of mounting the the whole job on a couple of 130mm high bearers:

IMG_8093.jpeg

This will allow easy access to apply the cramps, a few of which are shown.
 
Last edited:
That’s good, but perhaps even better turning the whole thing upside down then you could scrape any overspill, which is also more likely using watery TB3.
Ian
The inside has been completely lined with tape so any TB3 over spill/squeeze out should, in theory, be removed when the tape gets peeled off. In theory🤞 - Rob
 
And of course I wish you well, my experiences with that tape aren’t good- sorry to tell.
I've not used this method before Ian, so we shall see what happens. I may locate the big board in place with say, four light cramps and then flip the whole thing over as you suggest; I suspect it would probably be easier to turn it over on the B&D Workmate - Rob
 
Last edited:
I expect you will have thought about this option and rejected it, but how about not gluing the back panel at all and just pinning it in place all round? That's a pretty conventional approach for plywood backs. I know the rebate is narrow but you can measure and mark accurately and angle the pins into the sides. You could also partially pre-drill at the correct angle.

Or if you really want glue as well, glue it then pin it. You'd have immediate access to the inside for clean up without any cramps in the way.
 
I expect you will have thought about this option and rejected it, but how about not gluing the back panel at all and just pinning it in place all round? That's a pretty conventional approach for plywood backs. I know the rebate is narrow but you can measure and mark accurately and angle the pins into the sides. You could also partially pre-drill at the correct angle.

Or if you really want glue as well, glue it then pin it. You'd have immediate access to the inside for clean up without any cramps in the way.
I'd considered that Andy, but I've idiotically left the rebate too narrow at 6mm wide. I'm also not sure whether the veneer pins would be strong enough to hold the panel in place whilst the glue sets, bearing in mind that it naturally wants to bow. I recollect seeing a very expensive teak sideboard in the Carl Hanson showroom in Copenhagen last year where the ply veneered back had been screwed in place; had I had my brains in working order when I machined the rebate I would have made it 12mm wide and done the same thing. As it is the panel will have a finish of two coats of Rubio Mononcoat, one of Oddie's Oil (just applied) and a coat of beeswax which I won't polish off, so that little lot ought to act as a pretty good 'resist' and the dried glue should (hopefully) lift off easily - Rob

Edit: as per Ian's excellent suggestion, flipping the job over:

IMG_8095.jpeg

...works really well when it's only held in place with four light aluminium cramps and the 'Workmate' is used as well
 
Last edited:
Ah, I'd missed that 6mm detail.

I'd do what Ian suggested, to give access from the open front.
 
Nearly there Rob (y)

I think it should be compulsory that non woodworkers read threds like this as it's the only way most will understand just how much work and skill is involed "knocking up a little cupboard." :rolleyes:
In my experience, a lot of non-woodworkers are impressed by anyone who can assemble an IKEA cabinet...
 
That went a bit better than I anticipated, so reasonably chuffed:

IMG_8101.jpeg

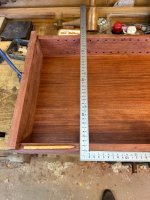
After about six hours in the cramps in a very warm 'shop, I judged the TB3 had cured sufficiently to take off the cramps. Almost all the excess glue came off with the tape, leaving a teeny tiny-bit to clear up with an acrylic glue 'takerofferer':

IMG_8102.jpeg

...sharpended at both ends on the disc sander. Using one of these things considerably reduces the chances of damage to a surface and anything it won't lift off can be carefully removed with a gurt chisel. The back looks presentable as well:

IMG_8103.jpeg

The inside needs to be tidied up a bit more but it's now within 'spitting distance' of being ready for detailing the arrises, internal/external sanding, glazing bars, hanging brackets and polishing - Rob

Edit - the term 'gurt' won't be understood by those north of Watford:ROFLMAO: but essentially it means bigly massive:ROFLMAO:
 
Last edited:
Edit - the term 'gurt' won't be understood by those north of Watford:ROFLMAO: but essentially it means bigly massive:ROFLMAO:
'Ere-abouts, the Northumbrians say "muckle". Back in Co. Derry, my contemporaries would comment: "Big wan" or: "a dacent sized wan...like"

This hyperbole especially referred to items they were in awe of, in particular, one young, strapping farmer's daughter was said to "have air brakes fitted and burned diesel...". 😳
 
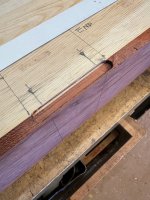
The next stage is to make the hanging brackets and their recesses. As the cabinet has 15mm sides, the brackets need to be made from 10mm wide mild steel (12mm is a tad wide), so I needed to find some suitable rh screws with smaller heads:

IMG_8106.jpeg

I didn't want to foul the shelf pins so I marked out positions for the two fixing screws (per bracket) to be midway between shelf pin holes:

IMG_8104.jpeg

IMG_8105.jpeg

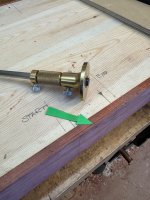
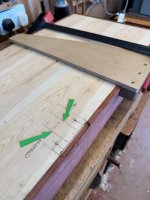
...making sure that 'top' was clearly marked; it has been known for me to install the hanging brackets at the wrong end! 'Start' and 'end' points need to be marked out, but there's also a slight step (arrowed) of about a mm:

IMG_8107.jpeg

A LN wheel gauge is set to 2.5mm and the line gauged for the edge of the recess:

IMG_8109.jpeg

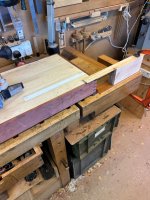
A strip of card is taped to the back to take up the difference in heights and a 'stop' is cramped to the edge of the cabinet, so that when the 'screaming monster' hits it, the cut will have finished on the line:


IMG_8111.jpeg

As you can see, it's easy enough to drop the cutter exactly on the 'start' line but you can't really see when to stop, unless the router bumps into a
bit of wood in it's way! Once all the debris has been sucked up:

IMG_8112.jpeg

...the first recess is exactly where it should be. Rinse and repeat for the other side except that the router stop is now cramped to the bench:

IMG_8113.jpeg

...but the result is identical; there are now two recess which require further machining for the screw heads as shown earlier - Rob
 
Last edited:
In my experience, a lot of non-woodworkers are impressed by anyone who can assemble an IKEA cabinet...
That's true.

a very long time ago when my wife's uncle had ordered a set of wardrobes from MFI (remember them when they sold self assembly furniture?) I got a frantic call from his wife asking if I could please sort out the mess he was in as he had bits everywhere and couldn't understand the instructions.

He was a highly intelligent man, a senior heart consultant and leader in his field and unusually for an academic had plenty of commonsense but just couldn't cope with those wardrobes. Bearing in mind his profession he probably shouldn't have been doing DIY anyway in case of hand injuries.
 
.............an acrylic glue 'takerofferer':

...sharpended at both ends on the disc sander. Using one of these things considerably reduces the chances of damage to a surface and anything it won't lift off can be carefully removed with a gurt chisel. The back looks presentable as well:

Thats something I haven't seen before Rob and a great idea especially as I have a goodly supply of Perspex. Is it 3mm thick?
 
Thats something I haven't seen before Rob and a great idea especially as I have a goodly supply of Perspex. Is it 3mm thick?
Thanks Bob; these things work with any thickness within reason (this one is 3mm), but if you've got some nice brightly coloured Perspex it's easy to find amongst all the clutter on the bench top. The clear one I currently use means I have to hunt for the bloody thing beforehand:ROFLMAO: - Rob
 
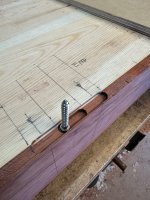
The last routing process with the hanging brackets is to machine a deeper section in the middle to accommodate the head of the screw. The section is marked out, with the router 'stop' cramped in place:

IMG_8121.jpeg

The OF1400 has an excellent micro adjustment on the fence, so the cutter needs to be nudged over a fraction to get the new slot central; best judged with the MK1 eyeball. Once the slot has been machined to a depth of 4mm, the screw head will sit comfortably inside it:

IMG_8122.jpeg

However, being a total numpty, I forgot to adjust the fence for the first slot:

IMG_8123.jpeg

IMG_8124.jpeg

...so that it wasn't centred! Nothing for it but to use a fragment of Ian's really excellent Victorian Mahogany (...and what a difference to use!!) to plug and fill the errant 'ole and re-machine it once the TB3 has cured - Rob
 
Last edited:
Thanks Bob; these things work with any thickness within reason (this one is 3mm), but if you've got some nice brightly coloured Perspex it's easy to find amongst all the clutter on the bench top. The clear one I currently use means I have to hunt for the bloody thing beforehand:ROFLMAO: - Rob

I've probably only have clear as well but it's not impossible I still have some coloured or white. If I can find any I send you a piece. I need to do a bit of digging, you know the process, move half a shed of stuff to get at what's at the back. :ROFLMAO:
 
Back
Top