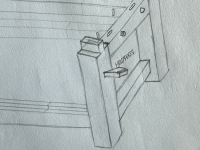
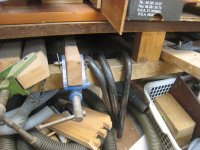
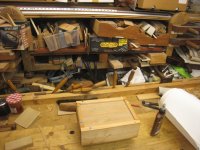
After de-clamping, the main task today was to flatten the top and get it fixed in place. It didn't sit completely flat initially, so I flipped it over and "backed out" at the point where it rocked. A liberal coat of wax crayon on the frames gave me a clue where I needed to plane:

Once it was sitting OK I screwed the apron on:

......then concentrated on flattening the top. I approached this in the same way as I would flattening a single board: first, winding sticks, then a straight edge along the length, then scrub planing, and then.....:



Every now and then I rubbed the aluminium channel on it to reveal the high spots:


When I was getting close I filled the old board, and that little gap from yesterday:

Once I had it flat (about 2 hours worth of hand planing), I re-sharpened the number 6 and scrub-planed the entirety again. If finish-scrub-planing is a thing, then that's what I did.
Now, let me tell you about something that has been bothering me for days. I've been working in an ad hoc way on the top when it was just individual boards, and the planed surface has been ridiculously slippery. Bits of wood skid around all over the place, and I have pondered long and hard how to get over this. Would a finish help? Would toothing the surface with a toothing plane, or dragging a handsaw all over it, do the trick? Mentally, I was all set to do the latter.
Anyway, the more I scrubbed at 45 degrees to the grain, the more I liked the finish it gave me. If I went 45 degrees from the grain direction, it was still a bit too smooth, but if I went 45 degrees against the grain, it gave a really, really nice texture. So, chaps and chappesses, that is how my bench is going to be:

I'll see if I can capture it a bit better than that, but it is pretty plain to see in real life. It won't be everyone's cup of tea, but hey, it's my bench.
Next on the agenda was the shelf behind the bench, and the first task was to move this socket which was in the way:


Here's a couple of pieces of "standard" grade redwood from Huws Gray in Sudbury. The "Premier" grade is better still:

Those are to suppoprt the shelf behind the bench. I took this photo just for Andy T, to show one of the advantages of pairs of bench-hooks:

Here you can see one batten screwed to the wall, and the other about to be screwed to the back of the hindmost board of the bench. The benchtop was still free to move, to allow me access for fixing this batten:

Here you can see the vice re-fitted. It was more of a schlep than you'd think, and involved going in to the house to wash my hands two or three times because oil and wood aren't a great combination:

I sat the shelf loosely in place, and will work out what goes where tomorrow:

It's starting to feel like a bench:

At the other end of the bench there is going to be a tool-well. I had rebated the back edge of the beech board previously, and today I ran a matching rebate in the under-edge of the shelf-support batten, which allowed a piece of ply to slide in:


There's a bit more work to do in that area, so we'll come back to that tomorrow.
Finally, I made a handful of buttons:

I fitted the easy ones, but ran into access issues with a few of them. They may have to wait a bit. I also screwed the apron to the legs, and tapped the wedges home. It may be a while before the bench-top comes off again.