• Hi all and welcome to TheWoodHaven2 brought into the 21st Century, kicking and screaming! We all have Alasdair to thank for the vast bulk of the heavy lifting to get us here, no more so than me because he's taken away a huge burden of responsibility from my shoulders and brought us to this new shiny home, with all your previous content (hopefully) still intact! Please peruse and feed back. There is still plenty to do, like changing the colour scheme, adding the banner graphic, tweaking the odd setting here and there so I have added a new thread in the 'Technical Issues, Bugs and Feature Requests' forum for you to add any issues you find, any missing settings or just anything you'd like to see added/removed from the feature set that Xenforo offers. We will get to everything over the coming weeks so please be patient, but add anything at all to the thread I mention above and we promise to get to them over the next few days/weeks/months. In the meantime, please enjoy!

Top Cupboards (completed)

sammy.se

New Shoots
Joined
Jun 21, 2018
Messages
168
Reaction score
15
Hi All,

Here is a write up of a couple of top cupboards I recently completed. This was my first 5 piece door / shaker type build, and only the second built-in cupboard I have ever done. (The first was a couple of solid pine doors and frame over an alcove).

Lots of lessons learned, which I will go into, but I am pleased with the end result.


The space I am building in is above an existing landing cupboard, most likely built when the (victorian) house was made.

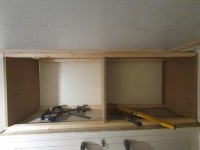
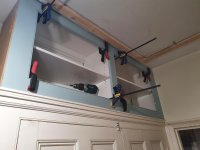
Typical of this type of house, there was not a 90 degree angle in sight, and the walls, ceiling and base were all out of square. I debated whether to build a full carcass, or just frame in the upright panels, to squeeze out those extra few cubic inches of storage, and save on material, given that the wall and ceiling were sound. I went with framing in, rather than building a full carcass:

Carcass.jpg

Each of the three uprights are different depths, because of the wonky wall.


Lessons learned:

1/ In hindsight, I should have just built a nice, square carcass. Yes, it would have cost me a bit of space and a bit of material, but the hassle of covering gaps, painting, wasn’t worth it. Next time, I will just build a carcass and it will make the whole process easier.

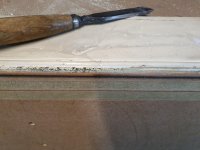
Next up, I started on the end panel. My aim was to make it match the original cupboard, made of tongue and groove solid wood:


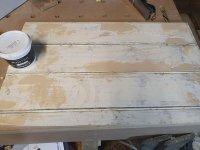
Luckily, I had hoarded erm... kept some original tongue and groove timber from an old loft hatch in the house. Perfect. So with a bit of cleaning up, filling, glueing, and sawing, I had a perfectly aligned and matching end panel:
End Panel 1.jpg


Mmmmm, this 120 year old wood smells good, and the shavings looks nice too!


End Panel 4.jpg
End Panel 5.jpg

End Panel 2.jpg
Handy Hint - Huggies baby wipes are great for cleaning glue and a lot of other things! They are unscented and mainly just water.

I used some Morrels one-part wood filler (Light oak coloured, which is what I had on hand). I like it - goes on easily and doesn’t shrink too much, and sands quite nicely)
End Panel 7.jpg


Now onto the face frames!

When I was in the US at the beginning of the year I picked up a Kreg beading and notching bit, which were significantly cheaper over there. These are the ones:

https://www.amazon.co.uk/Kreg-PRS4205-4 ... B002YIG4TC

And

https://www.amazon.co.uk/Kreg-PRS4250-4 ... 002YIG4QU/


I didn’t buy the jig - which I think is ridiculously expensive (£350!)for what it is:
https://www.yandles.co.uk/kreg-precisio ... tem/p23330

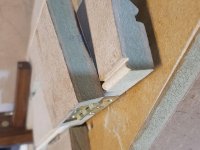
First off, testing the beading. I’m using 18mm Medite MRMDF for the face frame. It machined very well. I debated whether to have a quirk alongside the bead, or not. In the end, I decided for the quirk. The quirk on the left edge was far too big, but I settled on the one on the right - looked nicely balanced.

bead experiment 2.jpg


Lesson learned: The MRMDF took the beading very well indeed, but the beading was VERY fragile - any small knock and the MDF would just peel apart. I had to think of something to make this more durable.


Next came the notching for the stiles!
At first I just used the mitre gauge on the router table to notch the rails, but this wasn’t very stable or accurate with longer pieces:

Notching jig 1.jpg


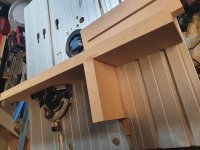
I decided I needed a full width sled, that used two t-tracks so that it holds larger rails perfectly square as it’s pushed over the notching bit. I found some scrap MDF and started building my own simple jig, (and save myself £350):

notching jig 2.jpg
notching jig 3.jpg

I added a sliding stop for accurate adjustments.
Handy Hint - the disposable Ikea paper measuring tapes are great for attaching to jigs, and other devices. Bit of Pritt Stick (which doesn’t make the paper soggy), and...:

notching jig 4.jpg

notching jig 5.jpg


What I later added (and not pictured) is some perspex over the central area, just as a guard to keep my hands away from the cutter as I move it.

Before I notched the rails, I domino’d the rails and stiles, cutting the mortices a bit deeper to account for the notch depth. The 45 degree ends of the stiles were cut on a mitre saw. It went together quite well:

frame 1.jpg
frame 2.jpg

Lessons learned: I used a 5x30mm domino - I should have used a larger one, like a 8x40m, to make the frame more rigid. I also tried pocket holes - which caused the MDF to bulge. User error I suspect, I need to practice that more.
 
Glue up time!
I do not have enough clamps or clamping squares to do the whole frame at once, so I started with the middle:

frame 4.jpg


frame 5.jpg


Then the ends:
frame 6.jpg


A bit of sanding and the joints looked good!
frame 7.jpg

One corner was not so good - so filler helped me out:
frame 8.jpg

Now, back to the bead. I decided to saturate the bead with cellulose sanding sealer, to give it some strength. A couple of coats soaked right in, and hardly raised the grain. A bit of denibbing and it was totally fine:

frame 10.jpg


Side note:
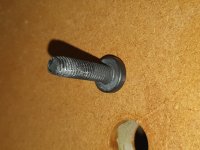
I was adjusting the fence on my Dewalt mitre saw and noticed that the bolts holding the fence were some sort of triangular bolt:

triangle bolt 3.jpg

triangle bolt 2.jpg


Does anyone know what these are called, and why they are used in this application?

Next I started on the doors.
18mm MRMDF again, since the doors are small, I didn’t need to go to 22mm thick.
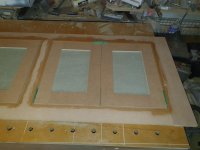
The frames are 70mm wide, and will take a 6mm panel. These were made a la @petermillard and his very helpful videos:

door 1.jpg
Door 2.jpg
Door 3.jpg
Door 4.jpg


I debated how to dimension the doors. Should I make them oversize then trim? Should I allow for a larger gap, to account for the paint?

In the end, I decided to make them to the exact size I wanted - with a 1.5mm gap.

Door 5.jpg
Door 6.jpg
 
Nice little project, Sam. Believe it or not, I've an MDF project up next, so I read this particularly carefully. Oh, and I would have done exactly the same as you and not made a carcase. I hate "wasting" material and space.
 
Mike G":2map4f0x said:
Nice little project, Sam. Believe it or not, I've an MDF project up next, so I read this particularly carefully.
Good project Sam.

"Caruthers, your services are required again for your master!" :lol: - Rob
 
Big airing cupboard double doors, Rob. I daren't take the risk of doing it all in softwood.
 
Mike G":3j7jwaaq said:
Big airing cupboard double doors, Rob. I daren't take the risk of doing it all in softwood.

Why's that, Mike ? Wood warping ? What size will they be?

Great WIP, BTW, Sammy. Like the sanding sealer trick.
 
RogerS":2kxnnw7e said:
Mike G":2kxnnw7e said:
Big airing cupboard double doors, Rob. I daren't take the risk of doing it all in softwood.

Why's that, Mike ? Wood warping ? What size will they be? ......

Exactly that, Bob. They're about 2m tall by 1500 wide (750-ish each). Heated up regularly on one side.....that's a recipe for wood movement, and when you've got meeting stiles, any movement will show instantly.
 
Mike G":ru4uae67 said:
RogerS":ru4uae67 said:
Mike G":ru4uae67 said:
Big airing cupboard double doors, Rob. I daren't take the risk of doing it all in softwood.

Why's that, Mike ? Wood warping ? What size will they be? ......

Exactly that, Bob. They're about 2m tall by 1500 wide (750-ish each). Heated up regularly on one side.....that's a recipe for wood movement, and when you've got meeting stiles, any movement will show instantly.
In mdf they're a perfect job for Domino construction; you could bang them out before your morning coffee :D - Rob
 
Dominoes. Hmm.......I've heard of them.......go on, it's on the tip of my tongue......

No. It's no good. You're going to have to remind me..... ;)
 
Mike G":361kmv8h said:
Dominoes. Hmm.......I've heard of them.......go on, it's on the tip of my tongue......

No. It's no good. You're going to have to remind me..... ;)
Bob9f has just made quantum leap! :D You could always have a 'get out of jail card' by saying it's for a 'friend'...same as the lathe :lol: - Rob
 
I've had a chance to take a more detailed look now.

Thread rolling bolts (sometime tri-lobe bolts) cut a thread in the female part usually in soft metal or plastic it's a mass production method and unlike self tapping screws have a fighting chance of being re-fitted without cross cutting a second thread and weaking the assembly.
Rather than actually cutting a thread which produces waste, the female material is simply pushed out of the way into the gaps left by the lobes.

I also like the sanding sealer method both for strength and to seal the exposed surface before paint. Even MRMDF has a softer core than the outer faces and needs the fibres sealed with something. Not sure if HDF has a constant amount of resin throughout as I've never eyeballed any in the flesh so to speak.

Nice project!

Bob
 
Woodbloke":326i4h5f said:
Mike G":326i4h5f said:
Dominoes. Hmm.......I've heard of them.......go on, it's on the tip of my tongue......

No. It's no good. You're going to have to remind me..... ;)
Bob9f has just made quantum leap! :D You could always have a 'get out of jail card' by saying it's for a 'friend'...same as the lathe :lol: - Rob

The last time a pig that unlikely flew was when Pink Floyd lost control of their inflatable pig at Battersea power station.
 
9fingers":128delg6 said:
I've had a chance to take a more detailed look now.

Thread rolling bolts (sometime tri-lobe bolts) cut a thread in the female part usually in soft metal or plastic it's a mass production method and unlike self tapping screws have a fighting chance of being re-fitted without cross cutting a second thread and weaking the assembly.
Rather than actually cutting a thread which produces waste, the female material is simply pushed out of the way into the gaps left by the lobes.

I also like the sanding sealer method both for strength and to seal the exposed surface before paint. Even MRMDF has a softer core than the outer faces and needs the fibres sealed with something. Not sure if HDF has a constant amount of resin throughout as I've never eyeballed any in the flesh so to speak.

Nice project!

Bob
Thanks Bob for the info on the bolt. That makes sense - the female material in this case is the cast aluminium bed of the mitre saw.
 
RogerS":14n1bn3b said:
Mike G":14n1bn3b said:
Big airing cupboard double doors, Rob. I daren't take the risk of doing it all in softwood.

Why's that, Mike ? Wood warping ? What size will they be?

Great WIP, BTW, Sammy. Like the sanding sealer trick.

Thanks Roger - the sealer worked a treat and make the bead much more durable.
 
Mike G":2qmdkp4r said:
Nice little project, Sam. Believe it or not, I've an MDF project up next, so I read this particularly carefully. Oh, and I would have done exactly the same as you and not made a carcase. I hate "wasting" material and space.

Thanks Mike!
I used the method Peter Millard shows in his YouTube vids, and it worked a treat first time.
It's essentially a 1/4" / 6.35mm groove cut into the rails and stiles, including the short ends of the rails, so that a 6mm MRMDF panel can slot comfortably in. Loose tongues using the same 6mm panel material are used to join the rails to the stiles. Everything is glued, since it's all MDF.

I used 18mm MRMDF for the rail and stile, since the doors in this cabinet are small. For a larger door, (e.g. if you built a 2000mm x 750mm door) then 22mm MDF - with an middle rail - might be a bit more sturdy.
 
Woodbloke":1dgq29uw said:
Mike G":1dgq29uw said:
Nice little project, Sam. Believe it or not, I've an MDF project up next, so I read this particularly carefully.
Good project Sam.

"Caruthers, your services are required again for your master!" :lol: - Rob

Cheers Mr Woodbloke
 
Next up: Hinges.

I wanted to inset the door, below the face frame by about 3mm, so that it all flowed a bit more nicely with the bead and the quirk. Following some experimentation and advice from this thread, I settled on letting the hinge in the door only, and the depth and position.


Hinge test 1.jpg
Hinge test 2.jpg
Hinge test 3.jpg
Hinge test 5.jpg
Hinge test 6.jpg


I used these hinges from Screwfix:

https://www.screwfix.com/p/butt-hinge-6 ... pack/43111

They were very good quality for the price. For the cabinets planned in other parts of the house, I will likely get some Simonswerk hinges. But for these cupboards, these hinges were perfect.


I had seen a couple of videos on how to make cheap hinges look better - ideas from Matt Eslea and Ian Parker. So with a bit of time on my hands, I gave it a go:


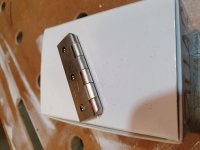
This is how they look out of the packet:

Hinge Polish 1.jpg


I chamfered the ends of the hinge. This idea was taken from Ian Parker:

Hinge Polish 3.jpg

Sanding using a 120 grit foam block:

Hinge Polish 4.jpg

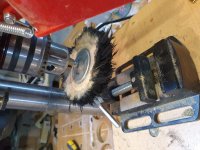
And then onto a polishing mop on the pillar drill. I used Meguirs car polish.

Hinge Polish 2.jpg

I wasn’t happy with the first polishing:

Hinge Polish 5.jpg

So I decided to use some 800 grit wet and dry, and gave the polishing another try:

Hinge Polish 6.jpg

Muuuuuch better.

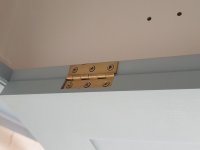
Before and after:

Hinge Polish 7.jpg

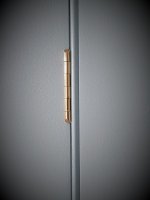
Not bad for a £1.35 hinge (not counting my hourly labour rate, which would make them worth about £4.3million haha).
 

Attachments

  • Primer 1.jpg
    Primer 1.jpg
    227.4 KB · Views: 5,898
sammy.se":2pt8rpyy said:
.......For a larger door, (e.g. if you built a 2000mm x 750mm door) then 22mm MDF - with an middle rail - might be a bit more sturdy.

I had a search through my wood racks today and I think I'll be making it out of 9mm MDF with softwood outer frames (I've got some good straight 70x32 stuff). There'll be strips of 9mm MDF glued on top to divide it all into panels, probably with stop chamfers......and not a domino in sight. I might do bridle joints, just to tease Rob. :)
 
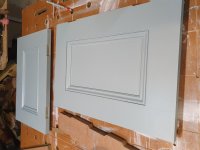
PAINTING!

I sanded the doors and frame - including edges - to 240 grit.
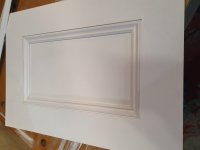
I applied a spirit based Crown primer (which I had for years) with brush and roller.

Two coats did the job, with a light 180 sanding in between, and I had no issue with the MRMDF edges (which I know is a popular topic).

Lesson learned: I need to take it more easy with the power sander. I did take off more than I wanted/needed near the edges, which was disappointing. But I know better for next time.

Primer 1.jpg
Primer 2.jpg
Primer 3.jpg

I purchased some ogee moulding from Wickes, which perfectly matched what I had on my existing cupboards and doors. I primed and then cut to fit:

moulding 1.jpg
moulding 2.jpg

I had some perfect, smooth, cuts. But for some of the cuts, one side was rough and had tear out. I don’t know why, I think I was quite consistent in my cutting method on the mitre saw.

moulding 3.jpg
 
Mike G":gz63nff0 said:
sammy.se":gz63nff0 said:
.......For a larger door, (e.g. if you built a 2000mm x 750mm door) then 22mm MDF - with an middle rail - might be a bit more sturdy.

I had a search through my wood racks today and I think I'll be making it out of 9mm MDF with softwood outer frames (I've got some good straight 70x32 stuff). There'll be strips of 9mm MDF glued on top to divide it all into panels, probably with stop chamfers......and not a domino in sight. I might do bridle joints, just to tease Rob. :)

:-)

I do like a stop chamfer.
In that configuration, would you glue the panel in, or leave floating? Seems like gluing would be ok?
 
Now Sam, those butt hinges look brilliant, but I don't hold out much hope for the screws into the side "grain" of the MDF. There's a trick with dowels to reinforce them which someone else can tell you about (I can see how I'd do it, but I never have).
 
sammy.se":1cxj13it said:
......I do like a stop chamfer.
In that configuration, would you glue the panel in, or leave floating? Seems like gluing would be ok?

That can all be glued. The outer frame will shrink from the outside, so the panel can be fixed all round.
 
Mike G":29lsk11n said:
Now Sam, those butt hinges look brilliant, but I don't hold out much hope for the screws into the side "grain" of the MDF. There's a trick with dowels to reinforce them which someone else can tell you about (I can see how I'd do it, but I never have).

Thanks Mike.
You raise a very good point. I also debated the whole 'screws into MDF edge' topic. I experimented on some offcuts (that you can see in the pics above) and I found that using 3x30mm MDF wood screws, using a 2mm pilot hole (around 25mm deep), gripped very well indeed.

Some vigorous 'testing' using the test pieces were ok. But time will tell if this will be durable.

I am treating this as a bit of an experiment, and am quite prepared to repair/replace with dowels and re-attached should the current method fail.
 
Mike G":1p1p46vt said:
sammy.se":1p1p46vt said:
......I do like a stop chamfer.
In that configuration, would you glue the panel in, or leave floating? Seems like gluing would be ok?

That can all be glued. The outer frame will shrink from the outside, so the panel can be fixed all round.

My next project is going to be similar top cupboards, but in the kitchen. I wanted to use solid pine/redwood for the beaded frames, instead of MRMDF (just for some variety and learning). I expect some movement, but will go with a 2mm gap around the doors to prevent binding. The doors will be made with MRMDF.
 
I think you might find 2mm a tad too much, particularly if there is then some additional shrinkage. I go for 2 thicknesses of Cornflakes packet cardboard if I'm painting.
 
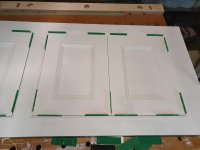
With everything primed, I re-tested the layout, with shims to check for gaps. Everything looked good so far. Even with a lot of checking-for-square as I built the frame and doors, there were some tiny variances (by tiny I reckon under 0.5mm at the worst). By the time the top coats were on, I would end up with a gap between 1mm~1.25mm. My over-sanding did expose some corners that I had accidently rounded over slightly (argh!).

I shuffled the doors around until I found a configuration that made the gaps as even as possible, and marked everything so that I remembered where they go.

Gaps 1.jpg
Gaps 2.jpg

Now I can cut the hinge mortices in the door.
I was a bit nervous, but a simple jig worked a treat.

Hinge Jig 1.jpg

I used some small offcuts of birch ply, stuck to an MDF board with super glue. I held the ply firmly against the edges of a hinge, to get a nice tight outline. I then added more pieces of ply to provide support for the router base. Next time I’ll use slightly bigger pieces.

The screws with washers go through an 8mm oversized hole in the MDF board, into the softwood fence. The oversized holes allow me to micro adjust the jig, and vary the hinge position. Once I was happy with the test cuts, a couple of woodscrews through the board into the fence prevents further movement.

The softwood fence is clamped to the door either side, and the palm router with guided trim cutter does it’s thing.


With the hinges in, I re-tested the fit and all looked good.

Hinge fit 1.jpg
Hinge fit 2.jpg
Hinge fit 4.jpg


At this point, I reckon I should have screwed the hinges to the frame and doors. I didn’t do that, I just relied on friction fitting and shims.
I think I should have done this because when the hinges are pulled in tightly with the screws, you see what the gaps will really look like once installed without shims, and I would have the chance to correct/trim the doors.

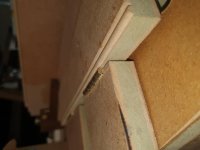
Before I start painting the top coats, I re-visited the carcass and installed some simple 6mm MDF edging to cover up the gaps. PVA and a small nail gun did the job nicely.

Carcass 2.jpg

Not very pretty, but good enough for this particular cupboard.

You’ll also see the 5mm shelf pin holes I drilled before installing the carcass. Just drilled free hand, no jig since it’s only a handful of holes on each panel.

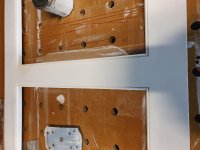
Inside the cupboard, I decided to use some white Dulux gloss I’ve had lying around. Might as well use that up. A quick stir and it still seems good (and whiffy). This over two coats of primer.

I also made a shelf for each side. 18mm MRMDF wouldn't sag in this case, since the span was small. I rounded over the edge using a palm router and roundover bit, and it gave a nice bullnose. Again, no issue with the MRMDF taking the shape, or with fluffy grain.

Shelf 1.jpg

The gloss was applied with brush and a foam roller. Some slight orange peel, but that’s ok with me - as long as the texture was even throughout, I’m happy.

The shelf pin holes needed re-drilling after painting. A slight pain, but not a big deal.


Onto the frame and door top coats.

I wanted an eggshell finish, and initially just thought of doing an off-white colour. I visited the local Crown decorating centre, and with lots of umming and ahing I bought a tin of trade acrylic eggshell, in white. I decided I was going to mix up the colour I wanted myself!!

It was a risk - chemically speaking - so I just went ahead and hoped for the best.
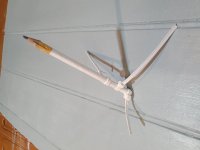
I used a small amount of Little Greene Absolute Matt Emulsion dark teal, Bedec MSP “Dark Grey” satin, and Bedec MSP “Soft Thyme” satin.

With my sophisticated mixing tool (pencil and cable ties) I whipped up a lovely Farrow & Ball looking colour, which I was happy with. It was a bolder choice than my initial off-white idea, but it would go very nicely with brass.

A quick experiment on some offcuts, and the paint seemed to take well. It also didn’t separate in the pot, another good sign.


Paint Test 2.jpg
Paint Test.jpg

With that, I started painting the frame and doors.

I’ve tried a lot of paintbrushes (and am still trying new ones), but this one has been particularly impressive at giving a smooth finish. I painted my uPVC windows with them and they gave a very nice finish. I was skeptical given the price (£3.99) but it was very good indeed:

https://leylandsdm.co.uk/seagull-handy- ... e-2in.html


I wanted an even finish, and settled on having a foam rollered finish, rather than brushstrokes. I wouldn’t quite call it ‘orange peel’... it’s a finer grained texture.

The brush was great for getting into the corners, beading and moulding, and the foam roller was used for all the flat surfaces.
(For future projects, I will be trying brush and spray finishes).

Painting 2.jpg
Painting 3.jpg

I was careful to brush and roll out the paint very evenly, and without overloading, to make sure it was an even texture. I started with corners and moulding, then rolled the flat surfaces to blend everything in.

The end panel was deliberately not sanded to a fine finish, and I brushed it to match the ‘patina’ of the existing end-panel finish. (and you can see my sophisticated mixing device here too)

Painting 1.jpg

I denibbed by hand between coats, with a well used 240 grit disc, vacuuming all dust before the next coat.

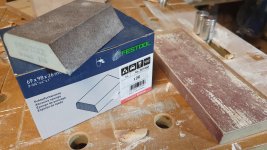
In case it’s of interest to anyone, my hand sanding tools of choice were a sanding block made with sanding belts, double sided tape and block of MDF; Mirka sanding discs for the higher grits; and these rather good Festool foam 120 grit sanding blocks - which I had bought for £4 on Prime day (normal price is £5). They are also made in the UK.

https://www.amazon.co.uk/Festool-201084 ... 01F4RPWBA/

Sanding blocks.jpg
 

Attachments

  • Hinge fit 3.jpg
    Hinge fit 3.jpg
    194 KB · Views: 7,264
:eusa-clap: :eusa-clap: Very good Sam. And finished for christmas, too.
 
The Install (final part)

With the inside of the cupboard painted, as well as the doors and face frame, it was time for the install.

First thing was to scribe the end panel and face frame to the walls.

I initially used a compass on the end panel, it didn’t go too well, but filler hides a multitude of sins.

I decided to make a quick scribe block. Super quick and easy to make, with a few different widths and a pencil sized hole, it worked really well on the face frame.

Scribe block.jpg

With the frame levelled up, I scribed it nice and snug to the wall on the right.

Install 1.jpg

Next came attaching the frame to the carcass. I debated using biscuits, dominos and in the end I decided I was overcomplicating it. I could just drive a couple screws through the horizontal batons of the carcass! So that, with lots of glue, is what I did.

Install 3.jpg

Now I can hang the doors. I had previously marked up the screw holes for the hinges in the face frame, and drilled a 2mm pilot hole. The screws are 3x30mm MDF screws. Not the prettiest, but would do very well for this cupboard.

Install 10.jpg
Install 4.jpg

With the hinges attached to the door, I offered it up to the frame and screwed them in place.
I’m aware that using screws into MDF ‘end grain’ could end in tears, but in the spirit of finding out for myself I proceeded, but prepared to repair with dowel inserts into the doors and frames should it go bad in future.

And so on, until all four doors were hung:

Install 11.jpg

Next came the door knobs.

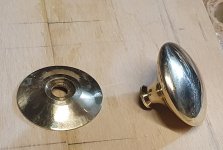
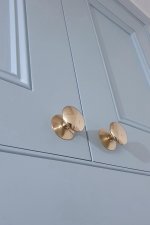
I used these 30mm brass knobs from Toolstation, which I think are excellent value for simple, solid brass knobs, at £1.17 each:

https://www.toolstation.com/victorian-brass-knob/p73544

They come in two parts.

Door Knob 1.jpg

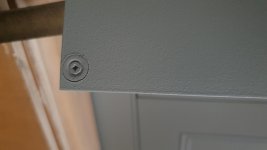
To fit, simply a hole in the door, using a simple drill guide to keep everything straight, with a countersink for the screwhead. A dab of paint to make it less conspicuous.

Drill Guide.jpg

Door Knob 2.jpg

I did find that one knob did not have a perfectly straight screw hole, which meant that the knob was a bit wonky when screwed in. A little bit of force straightened that out.

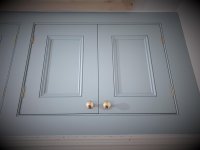
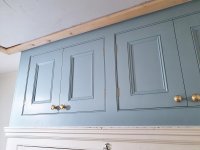
The brass goes really well with this colour, in my opinion.

Door Knob 3.jpg

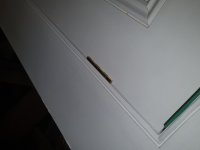
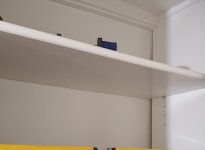
Next, the door stops and magnetic catches.

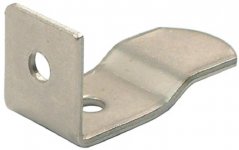
The door was inset, so I used these cranked door stops from Hafele (233.07.600):

I bought them from Solmer, in Essex. A gem of a supplier, especially for non-trades like me. They carry the usual branded cabinet hardware and lighting setups, but also some less expensive alternatives from Eastern Europe (might not be less expensive after Jan 1st, not sure).

https://www.solmer.co.uk/hardware/metal ... crank.html

door-stop.jpg

The crank did not provide enough inset depth, so I shimmed it out with some card until the doors stopped at the perfect position.

Door Stays 1.jpg

Now the magnets.

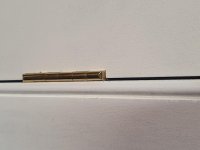
I used these countersunk neodymium ring magnets, 12mm diameter, with a 3mm hole.

https://www.ebay.co.uk/itm/20-200PCS-St ... 4352864688

They are not very strong - ok for these small doors, but anything bigger and I would use purpose made cabinet magnets, or larger magnets, or I would use a north/south magnet combination for extra grab.

Using this great value 12mm drill bit from screwfix (£2.19), I experimented on the countersink required for the magnet:

https://www.screwfix.com/p/brad-point-w ... 51mm/9820V

Magnet 1.jpg

Once I was happy, I drilled these into the door, making sure they aligned to the door stays. Another dab of paint.

Magnet 2.jpg

And that was the last part of the build!!

I’m very pleased with the outcome, but I wish I had screwed in the doors during the ‘dry fit’, before the install. With the hinges screwed in and pulled up tight, it exposed some unevenness in the gaps that wasn’t apparent when I just used the shims. Going forward, I shall make the doors slightly oversize (i.e. with zero gap), and fit them so I can create/adjust the gaps as needed.

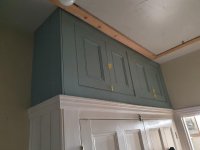
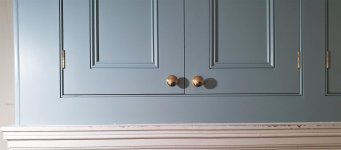
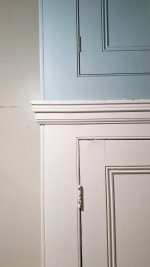
I’m most pleased with how the polished brass knobs and hinges go with the colour, and how the end panel came out - it looks like part of the original build. My aim was to make this build blend in, like it was always meant to be there.

Here are some shots of the finished article:

Finished 4.jpg

Finished 1.jpg

Finished 2.jpg

Finished 3.jpg

Finished 5.jpg

Install 14.jpg
 
Great thread, lovely cupboards. :eusa-clap:

I love the beads, I love the paint, and the fit looks good too. I'm not 100% sure about setting the doors back behind the line of the face frames, but I am 100% certain that the lower cupboard now needs repainting to match the new upper cupboard!
 
Mike G":3iiqb307 said:
Great thread, lovely cupboards. :eusa-clap:

I love the beads, I love the paint, and the fit looks good too. I'm not 100% sure about setting the doors back behind the line of the face frames, but I am 100% certain that the lower cupboard now needs repainting to match the new upper cupboard!

Thanks Mike! I appreciate your feedback.
Totally agree about the bottom cupboard - it looks a bit too shabby now!
 
SamQ aka Ah! Q!":1fvenasc said:
:eusa-clap: From one Sam to another. Well thought out, pennies looked after, execution meticulous. Top job! :eusa-clap:

Thank you very much! :-)
 
Very nice indeed mate. Great WIP, good plan, well executed and final product looks great. I'm with Mike, love the paint but you definitely need to paint the bottom to match now. Crack on good sir! ;)
 
TrimTheKing":1j7x4j93 said:
Very nice indeed mate. Great WIP, good plan, well executed and final product looks great. I'm with Mike, love the paint but you definitely need to paint the bottom to match now. Crack on good sir! ;)
Thank you!
And yes, I've created more work for myself. Where's that paint brush :-)

Sent from my SM-G973F using Tapatalk
 
Back
Top