• Hi all and welcome to TheWoodHaven2 brought into the 21st Century, kicking and screaming! We all have Alasdair to thank for the vast bulk of the heavy lifting to get us here, no more so than me because he's taken away a huge burden of responsibility from my shoulders and brought us to this new shiny home, with all your previous content (hopefully) still intact! Please peruse and feed back. There is still plenty to do, like changing the colour scheme, adding the banner graphic, tweaking the odd setting here and there so I have added a new thread in the 'Technical Issues, Bugs and Feature Requests' forum for you to add any issues you find, any missing settings or just anything you'd like to see added/removed from the feature set that Xenforo offers. We will get to everything over the coming weeks so please be patient, but add anything at all to the thread I mention above and we promise to get to them over the next few days/weeks/months. In the meantime, please enjoy!

"Traditional" router table

NickM

Old Oak
Joined
Dec 8, 2020
Messages
1,537
Reaction score
843
Location
Near Basingstoke
For a while, I've been using my table saw outfeed table as a router table. In theory it's a good space saving solution, but I'm not entirely happy with it. The 18mm ply isn't particularly flat, I struggle to get it perfectly flush with the cast iron TS (which means that the router table is not great for longer pieces) and I have to dismantle the fence to be able to use the saw.

I think I've got room to have a dedicated router table and I'll incorporate some storage in it which will help me keep the workshop tidy.

I wondered about making the new table with a plywood/pocket hole construction but I've decided instead to make it using more traditional joinery. Why? I think the main reasons are that I enjoy making joints and making furniture for the workshop this way gives me some good practice for making the things I want to produce from the workshop.

This is the rough sort of construction I'm looking at:

body.png
 
The first step was to make the frames for the two end panels.

I got the wood for each "leg" roughly to dimension with the planer/thicknesse and table saw, and then hand planed it to get a nice surface and to make sure everything was square:

IMG_0367.jpeg

It was also a good excuse to use my number 7. I think that's the oldest tool I have (using an online dating site (no, not that sort of online dating site :eusa-naughty: ) I think it's 1893-1899, although I'm struggling to see how many patent dates it has on the lateral adjustment lever so it could be older).

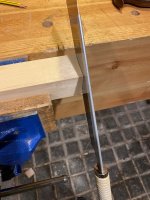
Next job was to cut them to length.First I squared up an end by knifing a line, cutting to that line and finishing with a block plane:

IMG_0369.jpeg

IMG_0368.jpeg

IMG_0370.jpeg

I then clamped the four legs (with each squared end flush) and marked the length on all four pieces:

IMG_0371.jpeg

IMG_0372.jpeg

Then more cutting and end grain planing left me with four finished legs:

IMG_0373.jpeg
 
I did the same with the rails and then marked out the shoulder lines for the tenons and used a mortice gauge to mark out the mortice (having set the pins to a 16mm mortice chisel, fractionally over one-third of the width of the rail).

To cut the shoulders, I made a wall with a chisel and then sawed down:

IMG_0383.jpeg

IMG_0384.jpeg

IMG_0385.jpeg

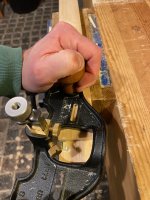
To make the cheeks, I chiselled away the bulk of the waste (I had nice straight grain so this worked really well) and then used a router plane to get down to the gauge line:

IMG_0386.jpeg

IMG_0387.jpeg

IMG_0388.jpeg

IMG_0389.jpeg

IMG_0390.jpeg

I cut the edge cheeks ended up with this:

IMG_0391.jpeg

The top rails had a haunted tenon. I cut the haunch later.
 
I strongly recommend a white melamine top.
I made mine about 4 years ago. You can rout it easily and cleanly for T tracks and mitre slots, and it cleans up a treat.
I edged it with 40mm square cherry to cover the chipboard edges.
I use my router top as a glue up table because its so flat, and I can scape off any spilt glue easily after it dries.
 
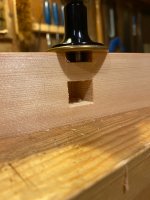
Mortices were marked and chopped out. The bottom rails were simpler as there aren't haunches for those:

IMG_0394.jpeg

IMG_0395.jpeg

I was happy with that fit. Of course, they were all just as good :eusa-liar: .

I'm never too sure how to deal with haunches. For these I decided to saw down and then chisel out. They ended up not being perfect (some gaps), but, unlike a cabinet door, they'll never be seen:

IMG_0396.jpeg
 
Next up I tackled the bottom rails which join the two side panels together. Wood prep was the same.

I decided these should have twin tenons (12mm each). As I only have one mortice gauge which I like using, I did one tenon/mortice first and then re-set the gauge and marked the second tenon and mortice:

IMG_0397.jpeg

I was a bit lazy and bandsawed the centre waste before chiselling it out:

IMG_0398.jpeg

IMG_0399.jpeg

I forgot to take a photo of the mortices being cut, but when I put it together, I realised that one of the tenons interfered with the tenon on the side rail. I decided to shorten one of the double tenons to deal with that:

IMG_0400.jpeg

Putting that lot together got me here:

IMG_0401.jpeg
 
IMG_0407.jpegI then decided to make the front top rail. This is dovetailed into the top of the leg and also into the side rails.

The layout looked like this:

IMG_0403.jpeg

Cutting that lot out gave me this:

IMG_0404.jpeg

I traced the tails out onto the other parts (having clamped the side panel to make sure everything is in its final position):

IMG_0405.jpeg

IMG_0406.jpeg

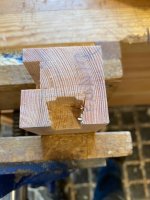
The leg is just like a normal half blind dovetail into end grain. Sawed from corner to corner:

View attachment 5

And then chiselled out the waste. For the final cuts, it helps to relieve the centre section first before tackling the corners:

IMG_0408.jpeg

The fit was pretty good:

IMG_0409.jpeg

The side rail is a bit different because it's not in end grain. I sawed from corner to corner again and then chiselled sideways (like you would with a rebate I suppose?):

IMG_0410.jpeg

IMG_0411.jpeg

The outside corner is quite weak, so when test fitting it's important to have the whole joint together because the leg supports that potential weakness:

IMG_0412.jpeg
 
This is becoming a lovely detailed WIP Nick.
Thanks for taking the effort and time to share it with us.
 
sunnybob":2g9pc0cp said:
I strongly recommend a white melamine top.
I made mine about 4 years ago. You can rout it easily and cleanly for T tracks and mitre slots, and it cleans up a treat.
I edged it with 40mm square cherry to cover the chipboard edges.
I use my router top as a glue up table because its so flat, and I can scape off any spilt glue easily after it dries.

Initially I’m going to use a melamine top from a Trend router table (little bench top one), but I will make a larger purpose built top one day. Melamine certainly seems the way to go (absent shelling out for a cast iron one).
 
All of the above brings me up to date with this being the current state of play.

IMG_0413.jpeg

I need to pause for thought at this stage. In particular, I need to think about the construction at the rear of the cabinet - e.g. how drawer runners would be supported. I need to have the section the router is in sealed off from the drawers so that needs to be factored in.
 
I made and fitted the front drawer rail. Above this will be the space for the router with small drawers either side of it, and below it will be some larger drawers.

Got a piece of wood into shape:

IMG_0414.jpeg

Then I laid out the joint. It has a single tenon which goes into the front leg and then a sort of tenon which is rebated into the back of the leg:

IMG_0415.jpeg

This is what it looks like after being cut out:

IMG_0416.jpeg

After doing both ends, I then had to lay out the joint on the leg. First I ganged the two front legs together to mark the location which will also be the ends of the mortice:

IMG_0418.jpeg

I didn't take a photo before I started chopping out the mortice and mini rebate, which gave this:

IMG_0419.jpeg

My "wheel" style marking gauge makes a handy mini router for fine tuning the depth of the rebate:

IMG_0422.jpeg

Fitted together, it looks like this:

IMG_0420.jpeg

IMG_0421.jpeg

I then reassembled the growing pile of parts to check my progress:

IMG_0423.jpeg

IMG_0424.jpeg

IMG_0425.jpeg
 
This is going to be an excellent router table; decent quality pine and crisp, accurate joinery. No escutcheons in it anywhere? :lol: - Rob
 
Yes super work, and lovely clean pine. Personally I only do a haunched m/t when I have grooved through for a panel, you could perhaps have brought all the tenon to the top of the leg (bridle joint) as it won’t be seen when the top is on and it also gives a little more glue area. Ian
Ps sorry just realised it would have messed up the dovetail on the front rail Doh!
 
I nearly didn't read this, not being very interested in router tables... but now I see it I like it! More quality joints that go together like the diagrams in a textbook.

Serious question - do you really want to give up all the satisfaction you are clearly getting from this handwork and stand beside a whizzing machine instead, admiring its stand while feeling a bit less happy about what it's making? Are you going in for commercial scale batch production or something?

It's not too late to convert this into a sideboard! :)
 
AndyT":3uor2bby said:
I nearly didn't read this, not being very interested in router tables... but now I see it I like it! More quality joints that go together like the diagrams in a textbook.

Serious question - do you really want to give up all the satisfaction you are clearly getting from this handwork and stand beside a whizzing machine instead, admiring its stand while feeling a bit less happy about what it's making? Are you going in for commercial scale batch production or something?

It's not too late to convert this into a sideboard! :)

Don’t worry Andy, I’m not going to give up on the hand tools and will still use them when I can (within reason!). However, I do find the router table really good for some things and I’m hoping it will expand my repertoire.

I’m also not sure this would make a very attractive sideboard!
 
I saw the title, and didn't bother reading the thread. Router tables aren't the most exciting thing in the world. When I did finally have a look.........my goodness, some real proper joinery, and very very neat too. Excellent stuff. :eusa-clap:

Without looking at it too closely I'm not sure if I would have done the dovetail into the long-grain. And where tenons bump into each other in a corner post, instead of shortening them (or mitre-ing), you can actually lengthen both and make a box joint of them, so a joint within a joint, if you like.

So, a note to myself: disregard thread titles, and read the first post come-what-may!
 
I’ve done a little more on this. The front frame is finished. I need to run some 1/4” grooves in the back of the horizontals which will hold drawer runners, and I also need to decide how to support the runners at the back whilst trying to make sure I can actually glue the thing together!

I’m afraid I didn’t do many photos of the latest parts. The vertical dividers are done with twin tenons. The small horizontal dividers have stopped dados so those can slide in from the rear.

Might be a hiatus for a little while as I have some non-woodworking things I need to get on with.

IMG_0445.jpeg
 
I had a bit of a hiatus on this whilst we had a few days in the Lake District (I hadn’t been before but really enjoyed the walking we did, rain notwithstanding) and a week visiting family back in Guernsey for the first time in 2 years.

The next job on this was to put in grooves and rebates in the carcass.

The horizontal pieces have a groove in the back which will hold a tongue on the front end of the drawer runners as well as a plywood “dust sheet”. The drawer runners also have grooves along their length for the ply. They’re all 6mm grooves which I did by hand.

F3DC51AA-1BB8-48D5-815C-A17FC8CAB7AB.jpeg

I also made the drawer runners but haven’t taken a photo of those.

There were larger (12mm) grooves to take the end panels and rebates for a base panel and rear panel. These were all stopped so I did them on the current router table.

I’ve also been thinking about the rear of the carcass and, in particular, how to support the drawer runners. In planning this, I need to make sure I can glue everything together!! In the end, I decided to have three vertical pieces to which I can fix the drawer runners (I’ll probably screw them at that end).

Putting all that together got me to this stage:

A3071C88-DB70-42E3-AF5D-7F3FB46EC992.jpeg

C32DDE9F-D35A-4221-BD01-9EC4BF9DDFA8.jpeg
 
I’m now at the stage where I can start flying bits together and started with the two end panels. I had some 12mm MDF left over from our bathroom renovation last year so used that for the panels with a couple of coats of paint to smarten it up a bit.

IMG_0531.jpeg

043C1EC7-7F8D-4C55-9066-05A05C064A1D.jpeg

Next job will be to glue the front frame together with the side panels. I think I then need to add the base piece before I can glue the rear together. It’s all ended up being quite complicated so the risk of gluing things together in the wrong order is quite high!

(I’ll try to fix the rotated picture next time I’m on my desktop computer.)
 
Funny how a cabinet design made to house the shrieking banshee of death can be called "traditional". For me, if it wasn't in use either as a tool or process method before the Battle of the Nile then its "modern".
:lol:


Excellent quality of work being done though, superb tight M&Ts and attention to detail
 
droogs":2s8ame1o said:
Funny how a cabinet design made to house the shrieking banshee of death can be called "traditional". For me, if it wasn't in use either as a tool or process method before the Battle of the Nile then its "modern".
:lol:


Excellent quality of work being done though, superb tight M&Ts and attention to detail

That’s why “traditional” is in quotes!

It’s the joinery which is more old school. I was going to build the router table with a ply carcass (probably pocket holes and that sort of thing), but thought I’d have more fun and learn more making it like this. Making 10 “proper” dovetailed drawers is going to be good practice!
 
I did a bit more of the glue up yesterday attaching the bottom rails and the lower pieces of the front frame. The top rails aren’t glued in yet as there are some other pieces which need to go in first. It seems to be more or less square which is good!

Most excitingly, whilst we’re having our kitchen renovated and a lot of rewiring done, I got the electrician to put a light over my bench. What a difference! He has also put a heater in. It’s more to heat me rather than the whole workshop and I think I’ll use it sparingly.

4E742BE9-CB39-412F-8CCF-EB1A2C38CED4.jpeg
 
The front frame is now glued up and completed.

IMG_0542.jpeg

Next job is to fit all of the drawer runners which will be a bit fiddly. As part of that, I also need to seal off the router compartment from the drawers to stop dust going everywhere. I'll probably add some dust extraction in due course as well.
 
Thanks chaps. Yes, I'm pleased with it. Progress is a bit slow, but I'm enjoying it so that's fine.

I'm looking forward to having a solid router table but also some extra drawer storage.
 
Excellent superb WIP, Nick. :eusa-clap:

Many thanks for posting.
 
All of the drawer runners and (bar one) “dust covers” have now been made and fitted.

It’s fairly self explanatory how it’s done. I’m going to leave the vertical rear supports unglued so I can dismantle things if I need to make any changes. They’re a tight fit and will be held in place by the rear panel so they won’t go anywhere. The central section where the router will sit needs side panels. I’m going to make them from 6mm ply but I’m a bit worried that the whole thing will act like a drum skin, magnifying the sound of the router! If it’s a problem, I can experiment with something’s no that will absorb/deaden the noise. Anyway, before I do any of that I need to make a lot of drawer guides…

IMG_0559.jpeg

IMG_0560.jpeg

IMG_0558.jpeg
 
The manner in which the software on this site analyses, processes and then displays images on this site is rather discombobulating, it keeps making me think I need new batteries in my glasses. Other than that I am liking where this is going Nick
 
Excellent progress.
Thanks for writing it all up so clearly.
 
December saw my spare time time entirely taken up with decorating our refurbished kitchen to get it finished before Christmas, so I haven't done anything on the router table until this weekend.

Not many WIP photos to show because it was pretty dull stuff, making drawer guides (I decided to be frugal and use some scraps of MRMDF for the task) and boxing in the compartment which the router will live in:

IMG_0708.jpeg

IMG_0709.jpeg

IMG_0710.jpeg

I could then fit the top. I'm using the top which came on my Trend bench top router table. As that's smaller than the unit I've made, I used a piece of MDF as a first layer. One day, I'll probably make a larger top or, if I'm feeling flush, splash out on a cast iron one. For now though, the MDF/Trend top adds a lot of weight and it's a really solid unit now:

IMG_0711.jpeg

IMG_0712.jpeg

I haven't used it in anger yet, but I think it's going to work well. I've made start on the TEN drawers I now need to make and will probably use the router table for the first time in that process (cutting slots for drawer bottoms).

I also need to think about adding some dust extraction to the router cabinet (the fence has an extraction port on it already).
 
MattS":x5t4i3cq said:
Looks good. If you've got more MDF, surrounding that Trend top would give a bit of extra surface and look neat

Thanks Matt. That's a good idea, subject to my MDF matching the thickness of the trend top. I'll have a look.
 
Back
Top