• Hi all and welcome to TheWoodHaven2 brought into the 21st Century, kicking and screaming! We all have Alasdair to thank for the vast bulk of the heavy lifting to get us here, no more so than me because he's taken away a huge burden of responsibility from my shoulders and brought us to this new shiny home, with all your previous content (hopefully) still intact! Please peruse and feed back. There is still plenty to do, like changing the colour scheme, adding the banner graphic, tweaking the odd setting here and there so I have added a new thread in the 'Technical Issues, Bugs and Feature Requests' forum for you to add any issues you find, any missing settings or just anything you'd like to see added/removed from the feature set that Xenforo offers. We will get to everything over the coming weeks so please be patient, but add anything at all to the thread I mention above and we promise to get to them over the next few days/weeks/months. In the meantime, please enjoy!

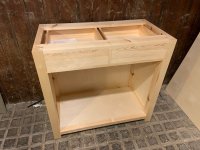
Workshop Storage Unit

I had a good crack at the drawers yesterday. I didn't take any photos but managed to get them glued up last night.

However, I popped out just now and realised that I have made a bit of an error! I'd appreciate some thoughts on the possible solutions...

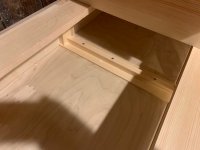
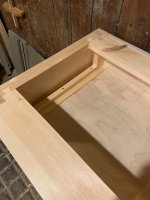
The drawers are too long. The mistake I made was to measure the depth of the carcass at the sides whilst forgetting that the hanger for the central drawer runner means there is less room in the middle. This photo shows you that I'm about 11mm short.
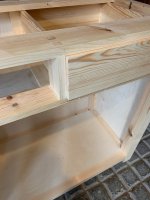
IMG_8296.jpeg

"Rats" I said...

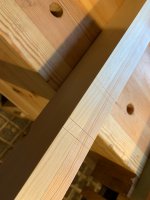
I think my best option is to pinch a bit off the front and back of the drawer. On the fronts (which are 20mm thick), I have 7mm in front of the dovetails. I suppose I could take that down to 3mm to gain 4mm. The backs are 18mm thick, so I'd have to take those down to 11mm to gain enough. Both would involve re-sawing on the bandsaw and then cleaning up.

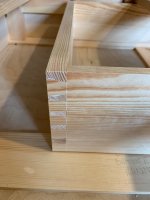
IMG_8299.jpeg

IMG_8300.jpeg

Another option would be to cut rebates out of the sides of the drawer hanger, but that's not easy to do in situ although I suppose I could have a go with a router?

Alternatively I wonder if could take the drawers apart and shorten them a bit. They're glued with ordinary titebond. It was probably far too cold to be gluing last night so that might help me get them apart. Any hope there?

Last resort is to start the drawers again...
 
Congratulations on a very a handsome job!

Incidentally, a permanent sharpening station is a real game changer. Nothing makes the internet light up like a sharpening discussion, but it's unfortunate that in all the passion it's rare to see much attention given to the nuts and bolts practicalities of sharpening, what actually makes a difference in a real world workshop?

A system where you can sharpen without compromising your workflow is, to my mind at least, far more relevant than squeezing out the last little bit of potential sharpness from each and every tool.
 
Custard":ek533w0g said:
Congratulations on a very a handsome job!

Incidentally, a permanent sharpening station is a real game changer. Nothing makes the internet light up like a sharpening discussion, but it's unfortunate that in all the passion it's rare to see much attention given to the nuts and bolts practicalities of sharpening, what actually makes a difference in a real world workshop?

A system where you can sharpen without compromising your workflow is, to my mind at least, far more relevant than squeezing out the last little bit of potential sharpness from each and every tool.

Thanks Custard. I definitely don't sharpen my tools frequently enough and I'm hoping that making it as easy as possible will rectify that.

Not sure if you saw my most recent post on this, but I'd welcome your thoughts on my over length drawer conundrum!
 
How annoying, to make a good job of the drawers but to the wrong size.

I think your suggestion could work and would be the least pain. You know how your bandsaw would perform on those cuts.

But just to add another option into the mix, this is what I would do.

First off, do have a go at dismantling the back dovetails. I've had success with a steam iron on a drawer that I glued up crooked, though that was with hide glue, not pva.

If you can't get the joints apart, you could cut square across the back of the sides, just in front of the dovetails. Then saw and chisel out what remains of the tails, leaving the back piece with its pins, pretty much as you originally cut it.

Mark from the rear pins onto the sides and cut new tails on the shortened sides of the drawers.
 
"Rats"?!

I'd have said, "Dash!" Or maybe even a, 'Blow!"

If your confident with your sawing, I'd got with a bit off both ends.
 
My first thought was similar to AndyT's - cut the whole back of the drawer off, lay out new tails on the sides, and hope the whole thing has enough flex to bend the sides outwards when fitting the new back. I'm not sure whether I'd try to chisel out the joint from the existing backs or just cut new ones, but I think that's how I'd go at it.

Of course this means shortening it by at least the thickness of the back, but a drawer 7mm too short is a lot easier to compensate for.
 
Thanks Andy, that's a good option.

I'm mainly attracted to my proposal because it will be quick and will get me back on track faster!

The annoying thing is that I was very pleased with myself for remembering to allow for the half blind dovetails when deciding how long the drawer sides needed to be! I even gave myself a bit of wriggle room but not quite enough unfortunately.
 
I should have pointed out that my bandsaw is only a tiny one and doesn't cut as deep as your drawer.

And I certainly won't mention my new idea, which is to add a decorative beading all round the bit of the drawers that sticks out, as if you'd always intended to allow extra length for that. ;)
 
AndyT":ck343b6x said:
I should have pointed out that my bandsaw is only a tiny one and doesn't cut as deep as your drawer.

And I certainly won't mention my new idea, which is to add a decorative beading all round the bit of the drawers that sticks out, as if you'd always intended to allow extra length for that. ;)

Beading would have been a good fix!

I took a deep breath and did it with the bandsaw and I'm pleased to say that all is well. I've also learned a lesson for the future.

Here are the drawers now fitted and with drawer guides installed too. I'm pretty pleased with the fit.

IMG_8307.jpeg

IMG_8306.jpeg

IMG_8305.jpeg
 
I was going to suggest ripping them across the width twice to remove a bit and then bung in a few dominos to join them up again :D

Seriously, really top job, Nick :eusa-clap:
 
I've started the cupboard doors but stupidly didn't take enough photos.

Marking out the mortises on the stiles:

IMG_8308.jpeg

On the first door, I had quite a lot of twist in the frame which was not ideal. I managed to tame it sufficiently by planing the high corners. The second one, which is gluing up now is much better.

For the hinges, I decided to go let them only into the doors. Andy T covered this in a thread he did on a bathroom cupboard (not sure if that was on here or on "the other place"). I used the description in Robert Wearing's "The Essential Woodworker" as my guide and it worked well. Again, no particularly useful photos, but here is one showing the kerfing of the hing mortise on the door. The mortise is angled because of the way the hinges are mounted.

IMG_8310.jpeg

The door also isn't a very good fit unfortunately. It's a bit short. Not sure what happened there... I can live with it, but if the second one is significantly better I might have another go at the first one.

IMG_8312.jpeg
 
Looking very good.

Would the grain pattern on the drawer fronts line up if you swapped them over?
 
AndyT":x8f70gp0 said:
Looking very good.

Would the grain pattern on the drawer fronts line up if you swapped them over?

Not sure Andy. I’m pretty sure they aren’t interchangeable though!
 
NickM":3pxpfigl said:
.....For the hinges, I decided to go let them only into the doors. Andy T covered this in a thread he did on a bathroom cupboard (not sure if that was on here or on "the other place"). I used the description in Robert Wearing's "The Essential Woodworker" as my guide and it worked well.....

I'm making 9 windows and 2 rooflights for my greenhouse at the moment, and remembered Andy's post on this. It makes absolute sense in my circumstance, where the windows are being made in the workshp, 30 or 40 metres from the greenhouse frame, which is already erected. The thought of chopping out 22 hinge sockets above my head on the frame doesn't appeal one jot, so I'll be doing all the hinge letting-in on the frames in the warmth and comfort of the workshop.
 
Mike G":2yk92kv7 said:
NickM":2yk92kv7 said:
.....For the hinges, I decided to go let them only into the doors. Andy T covered this in a thread he did on a bathroom cupboard (not sure if that was on here or on "the other place"). I used the description in Robert Wearing's "The Essential Woodworker" as my guide and it worked well.....

I'm making 9 windows and 2 rooflights for my greenhouse at the moment, and remembered Andy's post on this. It makes absolute sense in my circumstance, where the windows are being made in the workshp, 30 or 40 metres from the greenhouse frame, which is already erected. The thought of chopping out 22 hinge sockets above my head on the frame doesn't appeal one jot, so I'll be doing all the hinge letting-in on the frames in the warmth and comfort of the workshop.

That makes sense. With the method Andy and I used, there is still some chopping in on the frame, but it feathers to nothing on the front face (if that makes sense).
 
It'll feather to nothing at the back and middle as well on mine, I reckon! :)
 
I finished the right hand door and it was a much better fit than the first one.

IMG_8315.jpeg

I decided to scrap the left door and have another bash at it. First impressions are that it's a lot better. Certainly no twist in the frame. I might be able to fit that tomorrow.
 
Having scrapped the first door, I had another got and the replacement is much better. Both doors are now fitted (I just need to make a stop, which I think will incorporate a magnetic latch).

IMG_8317.jpeg

IMG_8318.jpeg

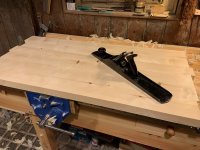
I glued up the top at the weekend and the next job was to get that flattened.

Started with a 5 1/2 with a heavy cut to get it somewhere close:

IMG_8319.jpeg

Then used a 7 to get it flat, checking with winding sticks as I went along.

IMG_8320.jpeg

IMG_8321.jpeg

IMG_8322.jpeg

The top surface had a big crown all the way down the middle so it took a lot of work to get that flat, and I had a very satisfying pile of shavings by the end.

IMG_8324.jpeg
 
I just had enough time to square and flatten an edge so that I could mark one of the ends with a knife all the way round before cross cutting it.

IMG_8325.jpeg

I then planed the end grain down to the knife line.

IMG_8326.jpeg

IMG_8327.jpeg

Hopefully I'll be able to do the other end and cut it to final width tonight. Once that's done I can go about attaching the top. It will be held on with screws through the front and back top rails and in side pieces which will double up as drawer kickers (I've yet to make those). The screw holes at the back and sides need to be slotted to allow for movement. I'm doing to have to remove the back panel and the dust covers under the drawers to get access to drill the slotted holes in the back rail because they'll need to be rebated from underneath. None of that is glued so shouldn't be a problem...
 
MattS":2qsfcv2b said:
Really enjoying watching this progress. The workshop makes a lovely back drop too!

Thanks Matt. I like the workshop (old stable). Not having a flat floor (it all gathers down into a drain in the middle) is a nuisance, but I'm very fortunate to have it.
 
Yes, my workshop does have that "pine fresh" smell!

Yesterday I finished cutting the top to length. I then used a panel gauge I made a while ago to mark the width.

IMG_8330.jpeg

I don't have a rip saw (it's on my list) so ran it through the table saw before planing.

I also planed a small round over on the top and bottom edges and corners of the top, mainly just to stop the edges getting chipped.

I then set about fixing the top to the carcass. On the front rail, it is simply screwed from underneath. On the back rail, the screw holes need to be slotted to allow for the top to move front to back. The holes also need to recessed from underneath so they don't interfere with the drawers.

I ended up using a forstner bit and chisels to make the slotted hole:

IMG_8332.jpeg

IMG_8331.jpeg

I also had to make kicker strips which fit to the sides and above the drawers. They had similar slotted holes in them to hold the top.

I used "washer head" screws so that they will hopefully slide in the slots to take up any movement. Time will tell...

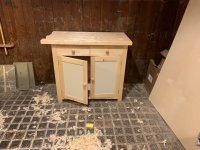
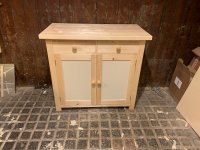
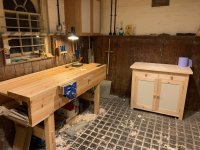
Anyway, with the top fitted, it now looks like this:

IMG_8333.jpeg

IMG_8335.jpeg

It's pretty much finished apart from drawer stops and door stops/latch and some finish. I wondered about painting the whole thing (apart from the top), but I think I'll just give it a few coats of oil to help keep it clean.

It's not a very elegant piece of furniture but I think it looks good in its workshop setting and will be solid enough for its future life as (mainly) a sharpening bench.

I've really enjoyed making it. There was lots of joinery that I haven't done before so I have learnt a lot!
 
I think that's a really good piece. Proper timber and construction. It should last for several generations - don't forget to sign and date it somewhere!

:eusa-clap: :obscene-drinkingcheers: :eusa-clap:
 
First rate, Nick. Well done. That's a lovely looking no. 7, BTW.
 
Looks amazing!

What is the book you showed at the beginning of the thread with the design / drawings? Looks a really nice book
 
BucksDad":cdqq31eh said:
Looks amazing!

What is the book you showed at the beginning of the thread with the design / drawings? Looks a really nice book

Thanks. It’s the Collins Complete Woodworker’s Manual. I find those exploded drawings useful.
 
Oh great... I'm getting that for my birthday in a few weeks. I don't think my first attempts out of that book are going to match yours though!
 
Really super piece of work, one easy way to make it look slightly more elegant if you wanted to is to put a slight ( half inch) slope on the inside of the front feet? But for a workshop it’s absolutely fine as it is. Ian
 
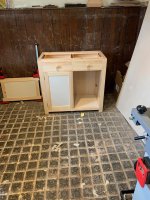
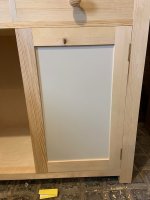
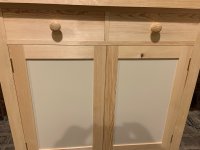
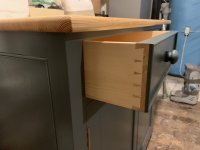
Quick follow up to this. I made another cabinet (to go in our cellar). The design is essentially the same as the one in the workshop with the following principal changes:

- Narrower corners/legs
- Thinner top
- Beading on the drawers, doors and side panels
- Painted

I think it looks smarter than the other one. I even did some narrow pin dovetails for the drawers which came out alright.

IMG_8395.jpeg

IMG_8396.jpeg
 
I could post photos of the old chipboard kitchen cupboards that I've got in my basement workshop, but somehow I don't think I'll bother...;)
Lovely work.
 
Back
Top