• Hi all and welcome to TheWoodHaven2 brought into the 21st Century, kicking and screaming! We all have Alasdair to thank for the vast bulk of the heavy lifting to get us here, no more so than me because he's taken away a huge burden of responsibility from my shoulders and brought us to this new shiny home, with all your previous content (hopefully) still intact! Please peruse and feed back. There is still plenty to do, like changing the colour scheme, adding the banner graphic, tweaking the odd setting here and there so I have added a new thread in the 'Technical Issues, Bugs and Feature Requests' forum for you to add any issues you find, any missing settings or just anything you'd like to see added/removed from the feature set that Xenforo offers. We will get to everything over the coming weeks so please be patient, but add anything at all to the thread I mention above and we promise to get to them over the next few days/weeks/months. In the meantime, please enjoy!

Mike's ext'n & renovation (solar panels)

It's stopped raining, so I've gone back to working outside. I think last time I was still doing the brick-on-edge coping:

View attachment 26951

At the same sort of time I started digging on the other side of the ramp:

View attachment 26952

View attachment 26953

Note the 2 six inch nails for setting the level of the concrete, which I duly poured:

View attachment 26954

This gave me enough brickwork to do once the foundation was dry, so I finished the coping, and started the retaining wall on the other side of the ramp:

View attachment 26955

View attachment 26956

Then it was back to the dig-lay concrete-lay bricks routine:

View attachment 26957

View attachment 26958

View attachment 26959

With the coping set, I backfilled and tidied up:

View attachment 26960

There's more coming, so anyone tempted to reply, just hold on a minute, please.
Mike, in pic #1 is that a weeping Mulberry to the right of the urn in the back border?
 
I made some pretty useful progress in the last day or three. The ramp is now paved, and so is the pation up to where it meets the ramp:

View attachment 27044

View attachment 27046

I took a decision to use only small stones up the curving ramp, and not do any cutting. I'm rather pleased with how it worked out. My wife was standing watching me when I laid out the first few stones across the width of the ramp, and she said "oooh, that's a bit of luck that they fit exactly", which tickled me somewhat.

I also made some progress in the other direction:

View attachment 27045

I worked out a rather neat way of setting up the levels. I perched some little off-cuts on some mortar, and took my time lining them all up to the correct level. This is a very great deal more difficult than you'd think on a curve. Anyway, here they are against the wall:

View attachment 27047

I carried on doing all the whole flags, and trying to randomise sizes as much as possible:

View attachment 27048

Random photo of some of our chickens:

View attachment 27049

You will have noticed a "valley" in the first photo, where two down-slopes meet and lead to the gulley. Well, at the other end of the pation there is the opposite situation: a watershed. This is a ridge, with water landing either side of it heading off in opposite directions. I decided that this time I would cut the stones in situ, so they are laid with mortar only up to the "ridge"-line (bar a temporary pile holding up a corner):

View attachment 27051

I had enough of laying slabs, so thought I would do some digging instead. The little inner curved wall of the ramp will extend to meet the new garden brick-and-flint wall. You can see the situation here:

View attachment 27053

View attachment 27054

With no good way of setting out the curve, I made a template/ pattern of the existing wall:

View attachment 27055

......then just shuffled it along a bit:

View attachment 27056

Believe it or not, it took nearly 2 hours to dig this silly little trench. I past through the site of an old wall, an old rubble pile, and a washing out location for various Readymix concrete deliveries. Anyway, I got it done and ready for concrete when the weather relents:

View attachment 27057

Note the same method of marking out levels:

View attachment 27050
Chickens are good at making a mess of garden beds.
 
I've been very wrapped up for the last 7 weeks or so with family matters, in particular a housefull of children and grandchildren. Up to 11 in the house for a few days. They've all gone now, so I thought I would catch up with the work I did running up to their arrival in July, and some from before that. Some of the order might be unsequential.

Here is a "before" of the last piece of paving, from the side door to the patio area:

isnGncK.png

And "after":

xrXAkDh.png

Unfortunately, when I built the retaining wall I allowed for stones which were 600 wide, and the ones I ended up with were 565mm wide. Hence the extra cuts. I can report that this area of paving is still unpointed.

I fitted the doors and windows into the sunroom. Firstly, here's a couple of "before" images of the temporary door, and of the window openings:


7MXQb5n.png

j3DVBxg.png

F5mU45T.png

r8An2G2.png

And then "after", with the doors and windows fitted:

Z9cu0o2.png

k1MTREz.png

cK8Roo0.png

Here's a random photo of a grass snake spotted in a compost heap:

jwTQW5U.png

A day or two later I had to cut it loose from some netting in the veggie garden, and it thanked me by smearing itself and me with a really stinky liquid which took 2 washes to get out of my clothes.

Let's catch up with exciting paving news. I continued the curved retaining wall to the brick & flint parking/ garden wall, and did a little wall mirroring the other side, so create an entrance into the garden:

HQJB4Gi.png

Then after concreting the base, I paved it:

F29xNgU.png

Originally I had planned to build a little return on the garden wall going back into the garden, as can be seen here by the brickwork at ground level which I did some years ago:


lGsDOll.png

dIfb3ye.png

wc8i1SW.png

I finished the paving up to the existing circular patio:

Qg373Fb.png

It's worth saying that the levels of all of this paving was very complex to get right. It all had to fall away from the house, and it had to also fall along its length down to 3 surface water gullies. That would be relatively easy with straight edges, but to work all that out around curves took a lot of the available brainpower.

I moved my sand heap to clear the space, and then had a delivery of reject stone, or quarry waste. This is unsorted flint which is left over after the more useful shingle has been removed. It's horrible stuff, full of clay:


hH0jKSJ.png

fRymxKW.png

At least a half, and probably three quarters, of it is completely useless for flint walls. You spend rather a lot of time opening up the heap and picking out the useable stone (in the yelklow bucket, above). And then you lay out your sting lines and just slowly get on with it. Flint walls consist of 2 flint faces with a rubble infil between. Because flint doesn't drw any moisture from the mortar, it helps to use broken bricks and other pottery crocks to act as a pozzolam to help set the mortar a bit quicker:


RWpvjbP.png

GRIGwBB.png

I course my flint, as was done traditionally. Many modern flint walls are done "randomly", with big and small stones shoved in any-old-how. Anway, slowly (6" per day) onwards and upwards:


AlIAV6y.png

Gv6k0ka.png

I changed the design of the wall after I started it, which meant adding some halved stretchers inside the piers. The first few were just planted on the face, but then when I caught up with the piers I could bond them in:


WjLOGsT.png

7TVduXT.png

I'll carry on in another post, so if you could hold off from commenting for a moment there'll be a bit of continuity.
 
A fun little job which crept up out of nowhere was to fix a leak in the sunroom wall plate. There is a knot on the outside, which leaked through to the inside. I tried first of all just filling it full of gunk:

3QRWfxO.png

UvFUoDQ.png

Being slightly effective in leak-prevention means you still have a leak. I considered a few alternatives, but its location made Dutchmen, or a pentice board, very awkward. I opted to do some leadwork:

uFGiQlJ.png

dQBqJKz.png

bSotCYd.png

yMldkmP.png

The bottom edge is retained (to prevent wind up-lift) with little clips of lead:

j1b2ZoT.png

With some low modulus mastic here and there it solved the problem.
 
Very nice stuff Mike, looking much more like the end result now.

Question on the lead, do you/have you used patination oil on that lead or do you allow it to grey and run?
 
The work and workmanship involved on this project is staggering, the sun room looks great as do the new doors and the patio and walling are second to none. I look forward to these updates and at times am dissapointed when there are none.
 
Another school day another new word, pozzolam or correctly spelt, I think, pozzolan.

Nearly 10 years since you started, this thread if not the build. Quite a journey.
 
Very nice stuff Mike, looking much more like the end result now.
Question on the lead, do you/have you used patination oil on that lead or do you allow it to grey and run?
Thanks Mark. Yes, I use patination oil. However, I was late with the oil on the flashing between the brickwork and the sole plate and it's now horribly discoloured, mainly with tannins from the oak. The only thing which seems to work is abrasion, but sand-papering lead isn't a great plan.
 
Great progress Mike. 5 years on from my own similar renovation I have barely done anything on the garden and really need to crack on.

Not relavant to my project but I'm curious about the flint walls. Is there another "product" you can get that means you don't have so much waste, no doubt for much more money? Also, whats the process for pointing up the flint?

Mark
 
Thanks Mark.

You can buy selected flints at £450+ per ton. These are supposed to be between 3 and 5 inches in size. If you want knapped flints then these are much more expensive still. I believe the only supplier in the country for both is in Norfolk. I paid £50 per ton for the quarry waste (and then found out that a friend has a quarry on his farm and has tons of flint I could have had free!).

Pointing is a bit of an art. I use the same pointing tool as for brickwork, and a pointing trowel..........and my finger. My judgement of flintwork is that the less mortar you see the better, so I get the stones as tightly together as I can.....meaning some of the joints are too small for a pointing tool. After pointing it you then brush with a soft brush in the normal way for brickwork, and then in this hot weather I either mist the wall regularly, or put damp cloths over it, to prevent it drying too quickly, as that can lead to the mortar dusting.
 
Last edited:
So what have you been doing Mike as I can't see any difference in the before and after. :ROFLMAO:

Seriously though that's impressive work, much of which like the flint detail will never be fully appreciated by those who don't know how much time and effort has gone into it. So how will you fill your time when it's finished? It will be like going to work every day then sudden retirement.
 
So how will you fill your time when it's finished? It will be like going to work every day then sudden retirement.
I've a dining table and 10 chairs to build, and 4 or 5 smaller tables, but then it starts looking a bit quiet. I've tried reviving my build-a-boat idea with the other half of the design team, but no, that's not happening. I'm going to build a small caravan at some point.
 
Shame to let go of the boat. Especially with the lead hoard already in stock.
 
I've a dining table and 10 chairs to build, and 4 or 5 smaller tables, but then it starts looking a bit quiet. I've tried reviving my build-a-boat idea with the other half of the design team, but no, that's not happening. I'm going to build a small caravan at some point.
I'd be very interested to see a wip of that. I was working as a manager for ABI Caravans at H.O. in Beverley when caravans were made like a model aircraft so brings back memories

With a self build you would likely need to get it approved and plated before you can tow it.

PS
A caravan is a bit easier than a boat, it doesn't sink if/when it leaks. :ROFLMAO: :ROFLMAO:
 
I'd be very interested to see a wip of that. .....A caravan is a bit easier than a boat, it doesn't sink if/when it leaks. :ROFLMAO: :ROFLMAO:
There'll definitely be a blow-by-blow coverage here. It's the fibreglassing I worry about......
 
I'm going to build a small caravan at some point.

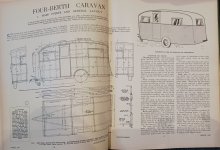
Please sir, I can help! Here's the first installment of a feature on how to build your own caravan, from the Woodworker in 1955. I can supply a nice clear scan of the rest if you like. Although it ran as a series over three issues, the complete instructions fitted into just 6 1/2 pages. No dumbing down back then!

IMG_20240815_192647944.jpg
 
A testament to your hard work and perseverance Mike not many would still be in the race.
I had forgotten about the Corbels they fit in very nicely.
I was on a fossil hunt in a clay bank on the edge of the Humber the other day and we came across some of our industrial heritage, the piers where the Humber Yawls came in to be loaded with chalk from a quarry about 1/4 mile from the river to be taken to a cement works. On loading, the flints were discarded on the beach, too late now!
But just in case people don’t know, the flints are the fossilised remains of sea sponges and some of them must have been huge judging by what we came across.
Small caravans, you might like to have a look at Dutch ones Mike. But then again I’m confident you have it all worked out
Ian
 
Rather than messy fibreglass, what could be super cool is a ribbed design in steamed laminate like an upside down boat hull, clad with aluminium emulating a classic Airstream.
 
Think of a strip-planked canoe in western red cedar with highlights in bog oak and ash, covered with a clear fibreglass. That's the look I'm going for.
 
Will weight not be an issue?
And will you go for a design that has had wind tunnel modelling?
I remember that thing you had atop a Landie.
 
Think of a strip-planked canoe in western red cedar with highlights in bog oak and ash, covered with a clear fibreglass. That's the look I'm going for.
Or perhaps use the West Epoxy boat stuff. Sounds really cool though!
Just remembered this.
Must say after looking at their website the method of construction appeared to me to be flawed, and I can’t imagine it surviving long term outdoors.
Ian
 
The sun room looks really great with the doors and windows fitted, excellent work :cool:
Can just see you in the easy chair, book, wine and a snooze.

The walls and paving are a nice finishing touch to the building.
 
Onwards and upwards.........extremely slowly.

IMG_7460.jpg

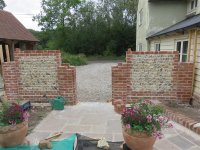
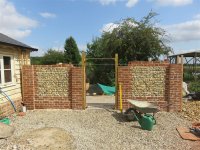
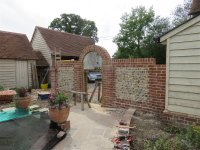
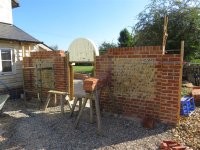
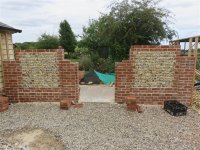
I built the flint panels first and left the piers down because then I could run string lines from one of the walls to the other. I then brought the piers up together, initial;ly with just lines and a level, but then with a bit of formwork to help speed things up:
IMG_7462.jpg


IMG_7464.jpg

I knew I kept those off-cuts of Celotex for something:

IMG_7466.jpg

IMG_7465.jpg

IMG_7467.jpg

I struck the form after a couple of hours so that I could do the pointing:

IMG_7469.jpg

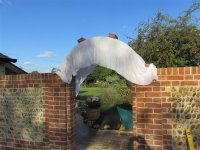
And then covered it up with a damp sheet to prevent it drying too quick in the direct sun:

IMG_7470.jpg

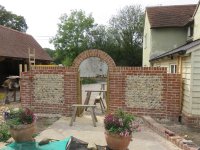
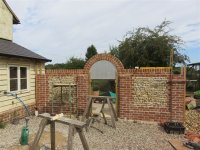
And finally, I finished off the piers. Lots and lots of cutting for the pier caps:

IMG_7471.jpg

IMG_7472.jpg

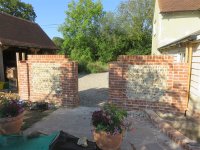
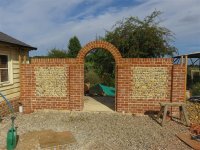
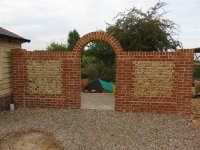
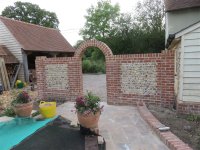
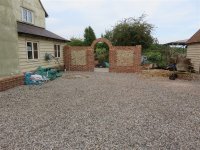
Done, at last:

IMG_7474.jpg

IMG_7473.jpgIMG_7475.jpg

The initial plan was to have a solid oak gate, but it looks like a "wrought iron" (misnomer) gate is more likely now.
 

Attachments

  • IMG_7468.jpg
    IMG_7468.jpg
    239.5 KB · Views: 11
  • IMG_7461.jpg
    IMG_7461.jpg
    291.4 KB · Views: 10
  • IMG_7463.jpg
    IMG_7463.jpg
    251.2 KB · Views: 10
It looks great Mike and in keeping with the building.
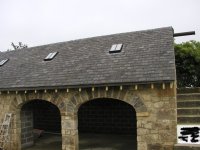
The Celotex former is a good idea, we had to use 18mm ply on our stone arch build, 2 sheets with spacers needed to support the stone and it was damned heavy. The barn is now converted into a holiday cottage.
 

Attachments

  • arch1.JPG
    arch1.JPG
    172.5 KB · Views: 20
  • 29.7.02.JPG
    29.7.02.JPG
    202.8 KB · Views: 20
Back
Top