• Hi all and welcome to TheWoodHaven2 brought into the 21st Century, kicking and screaming! We all have Alasdair to thank for the vast bulk of the heavy lifting to get us here, no more so than me because he's taken away a huge burden of responsibility from my shoulders and brought us to this new shiny home, with all your previous content (hopefully) still intact! Please peruse and feed back. There is still plenty to do, like changing the colour scheme, adding the banner graphic, tweaking the odd setting here and there so I have added a new thread in the 'Technical Issues, Bugs and Feature Requests' forum for you to add any issues you find, any missing settings or just anything you'd like to see added/removed from the feature set that Xenforo offers. We will get to everything over the coming weeks so please be patient, but add anything at all to the thread I mention above and we promise to get to them over the next few days/weeks/months. In the meantime, please enjoy!

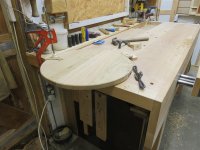
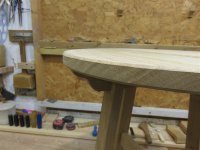
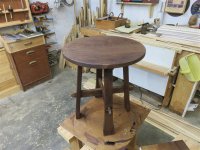
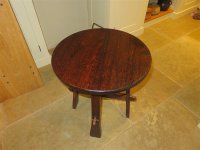
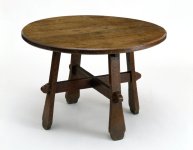
Round oak table (a la GE Street in the V&A) Finished.

It is quite a chunky chamfer, but I’d vote for a chamfer with character instead of a round over, so happy to hear you’re going to give the chamfer a try.
 
Thanks Duke.

I'm not sure on the finish, yet. My wife would like it dark, even black. I don't really want to ebonise it, but I might see if van Dyck's crystals bring it to a deep enough colour......but yeah, it's a rare piece which doesn't get multiple coats of oil/ varnish/ white spirit mix.
How about fuming it with ammonia?

Pete
 
Personally I can’t see the point of the feet shaped like that, just looks odd to me.
Rounded edges, arrises, are always my preference as it protects the edge from splintering when knocked.
Finish colour is also a personal thing. I have found a medium oak stain makes the grain details pop.
Giving it a good dose of looking at, as is, for a few days may help the decision process on all fronts.
 
Giving it a good dose of looking at, as is, for a few days may help the decision process on all fronts.

That isn't going to happen! I've got lots of other things to make.
 
Here's the original, again:

1733043225178.jpeg

My current thinking is a round-over on the top edge, and a shallow-angle chamfer on the under edge to reduce the chunky feel of the top.........but that may change by the time I make it out to the workshop. It's going to be hard to avoid sandpaper for all the arrises around the undercarriage.

Just as an aside; it's noted by the V&A as oval in shape. I wonder if this is just as a result of a circular top shrinking.
 
I've always wanted to try that, Pete, but never have. Have you done it?
I have done some test pieces many years ago and it works well, you could use it as a starting point and stain it afterwards, it makes the medullary rays stand out.

You need the good ammonia, I got mine years ago when I had an office next to the chemical lab.

Pete
 
Oh, and note the ghastly area of damage caused by errant rip-sawing a couple of days ago. It stays like that for perpetuity, hidden under the table top and behind a leg.
Oh, I reckon any forum members visiting in future will be down on the floor with torches and high definition cameras now you've pointed that out! :)
 
I started by cleaning up the table top, and chamfering the top and bottom edges:

IMG_7740.jpg

IMG_7739.jpg

Except for the area around the little infill:

IMG_7741.jpg

Finishing with a scraper plane:

IMG_7742.jpg

I worked my way though all of the pieces doing faces and chamfers, but the legs needed a lot more than that as they were left from-the-drawknife. I used all of the weaponry:

IMG_7743.jpg

I re-created one of the pictures from day one, not only to show how much has changed, but to also see how much has ended up on my firewood pile (The legs and stretchers are the wrong way around):

IMG_7744.jpg

IMG_7559.jpg

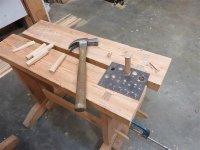
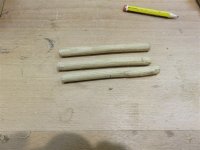
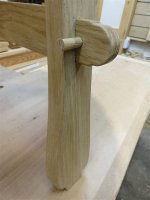
I made some 9.5mm pegs:

IMG_7745.jpg

IMG_7746.jpg

IMG_7747.jpg

Then I did a final dry assembly, just to check everything, and make a decision on whether or not to glue the table together, or just peg it, and have all the joints "dry". My wife called my idea of leaving the table permanently un-glued a conceit.........and of course she was right. Here it is dry:

IMG_7748.jpg

IMG_7750.jpg


IMG_7749.jpg

That scruffy peg-end invoked my only use of sandpaper on the job: I cleaned up the ends of the pegs on a scrap. If I had had access to sharkshin, I would of course have used that instead ;).

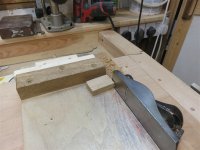
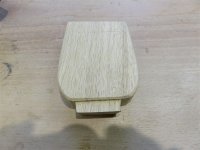
Before gluing, I made the little insert for the end of the sliding dovetail:

IMG_7753.jpg

IMG_7754.jpg

There are seldom pictures of gluing. Not only are they extremely dull photos, but there doesn't tend to be time to faff about with a camera. So, you'll have to take my word for it that I glued everything. Here's my total squeeze-out:

IMG_7755.jpg

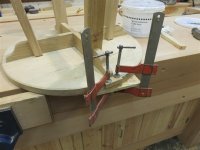
I've spent too many fruitless hours trying to remove glue from bare timber after a glue-up, so I now use an artists paintbrush, and keep glue away from the edges. The only clamps needed were for the little infill block:

IMG_7756.jpg

IMG_7758.jpg

This is what my finishing bench looks like at the moment:

IMG_7751.jpg

So, I did my van Dyck's crystal test pieces on my horses:

IMG_7757.jpg
 
Last edited:
I was too slow to comment on them earlier, but I'm glad you've flattened off the tips of the legs. And the top needs those chamfers. Personally, I would like to see it with the chamfer on the underside going back further, ie to a smaller circle than it does, but I can see that having scaled the table down, there's not much room to spare for that.

I do think a dark brown stain will make it all hang together much better than it does in the raw. You could see it as a one-man fight back against the often reported news that nobody likes old brown furniture any more!
 
I do think a dark brown stain will make it all hang together much better than it does in the raw. You could see it as a one-man fight back against the often reported news that nobody likes old brown furniture any more!

You're preaching to the converted Andy. :) I love dark oak, but this table was very much my wife's choice, and she wants it as dark as possible. Wait until you see my up-coming dining table build. It's going to be acres of dark oak.
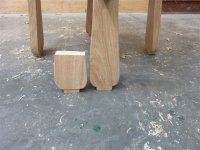
There's still a remnant "pillow" to the tip of the feet, in a nod towards the original design. That detail may or may not survive a good look at the finished table in situ. I've never liked it. And the underside chamfer may well get adjusted tomorrow. I thought I would replicate the original, and then make up my mind. I thought I would hate the pair of chamfers, but they're probably OK (particularly as I wasn't too particular about accuracy)........but I'd feel better doing as you suggest.
 
Last edited:
Today started with de-clamping, then cleaning up the Dutchman:

IMG_7759.jpg

IMG_7760.jpg

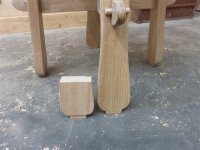
As I've said, I've never liked the feet. I band-sawed a bit of scrap into a mock foot, to see if this idea would work:

IMG_7761.jpg

IMG_7762.jpg

Not for me. So, I just cut the "pillows" off in their entirety:

IMG_7764.jpg

I then slapped on a bit of stain (van Dyck's crystals):

IMG_7765.jpg

If anyone has any good ideas about knocking back the raised grain without using sandpaper after all this water has been applied .......well, I'm all ears.
 

Attachments

  • IMG_7763.jpg
    IMG_7763.jpg
    194.8 KB · Views: 2
You could try sacking, burlap or leather. Alternatively several handfuls of shavings but do not expect miracles.
By the way the legs are much improved.
 
Mike, out of interest, what is your aversion to sandpaper? Do you consider it to be "cheating" or untraditional in some way, or do you just not like the dust? I've spoken to a few people who think that craftsman of old would have loved to have access to modern sandpaper and that they didn't use it in the past simply because it wasn't very good!

As to your options, could you give it a VERY light scraping - i.e. almost no pressure so you only remove the raised grain and not any wood/stain?
 
Plus 1 for scotchbrite type abrasive pads. Available in different grits. Or dogfish skin.
 
I think it's looking better already. Nearly there!

PS, in the absence of sharkskin (as mentioned earlier) have you considered trying horsetails? The plant, that is, not the animal part. I know they were used for scouring pots and pans. Possibly a problem with the green bits and the sap though...:(
 
Mike, out of interest, what is your aversion to sandpaper? Do you consider it to be "cheating" or untraditional in some way, or do you just not like the dust? I've spoken to a few people who think that craftsman of old would have loved to have access to modern sandpaper and that they didn't use it in the past simply because it wasn't very good!

As to your options, could you give it a VERY light scraping - i.e. almost no pressure so you only remove the raised grain and not any wood/stain?
I barely use sandpaper at all, Nick, normally, other than for finishing. Essentially just for rubbing down between coats. However, I am particularly curious this time as I am trying to build this table within the limitations of the guys who built the original 170 years ago. It's an entirely artifical constraint I am imposing on myself, and it of course prevents me from using the pan-scourer plastic stuff (Scotchbrite etc) as an alternative. My get-out-of-gaol card is that glass paper was in production from 1833, apparently, so may have been available to the joiners in Oxford who made this table in 1854-ish.
 
For an introduction to this project, visit this thread, where numerous different options for alternatives were discussed.

The design is a straight knock-off of a classic Victorian Gothic Revival piece, house in the V&A, and brought to us by AndyT. The original was quite large, but this is to be a small side table, so its proportions are inevitably going to vary. As this is the first hand-tool-only WIP I've done for a while, there are an absolute plethora of photos. For those to whom egg sucking comes naturally, feel free to skip ahead. Oh, and WARNING...........sharpening is discussed!

View attachment 30130

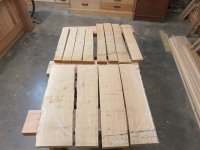
These offcuts from my recent door builds were the raw material. After laying them out and scrawling with chalk, I made my decisions and started on some woodwork. I'm not ripping reasonably straight-grained wood, when I have a hatchet to hand:

View attachment 30115

View attachment 30116

None of the boards were particularly flat, so even though 2 boards provided enough width to do the width of the top, I split them roughly in half to ease the flattening job (and for another reason we'll see later):

View attachment 30117

The astute amongst you will notice that one of the boards is not like the others, being planed and square-edged. My riving didn't work out perfectly, so I had to raid my off-cuts stock:

View attachment 30118

People tend to think of a draw knife as a crude instrument for hacking off large volumes of wood in a hurry. Whilst it can do that, it doesn't take much practice at all to be able to achieve very fine shavings and a fairly decent finish:

View attachment 30119

Nonetheless, for edge-jointing, I needed better, and out came the number 6:

View attachment 30120

For a variety of work-holding reasons, I want to keep the top square-ish for a while, so this is the table-top roughed out ready for flattening on one face:

View attachment 30121

You may or may not be able to see that I have made no attempt to make all the boards parallel-edged. Two of them taper quite markedly. I've noticed this a number of times with old "country" furniture......and it's not so much about saving wood as about saving effort.

Skip ahead if you aren't interested in flattening boards, or a bit of sharpening.

My number 6 is the premier tool for flattening boards in my workshop, and it needed revival prior to starting. I only have a single bevel on my plane irons (no primary and secondary bevels). This means I never have to re-grind. I use a honing guide for plane irons, and never for chisels (where I do have a secondary bevel). I set up the honing guide with a simple jig:

View attachment 30123


View attachment 30122

Previously, I didn't have to use the 300 grit diamond plate except for restoratrion, but the 600 plate is getting a bit tired these days. So a few seconds on 300, then 600, then 1200, and then flip it over and polish up the other side to the bevel, removing the burr:

View attachment 30124

Then onto the strop:

View attachment 30125

The biggest user of time in the whole sharpening process is setting up the plane and then walking into the house to wash my hands before beginning work.

Here are my £500 winding sticks direct from a 200 year old Japanese hermit whose family have been making these since the beginning of time:

View attachment 30126

I don't use them the same way as others, either. I sight over the near one and under the far one.....aiming to get a parallel gap. It works for me, and if your mileage varies, as Americans apparently say, then that's fine by me too:

View attachment 30127

I didn't take any photos of a pile of shavings, but I simply flattened one side (the top) in the normal way. None were flat to start with, and none took more than 2 or 3 minutes to flatten. I did clean up some sapwood to reduce the amount of planing:

View attachment 30128

They turned out OK, albeit not terribly well colour-matched:

View attachment 30129

It will become important to remember that I don't have thicknessed boards. I have no idea whether or not the other sides are even close to parallel with the top, and it won't make any material difference.

I'll jump ahead to another post now, as things get a bit clumsy with too many photos.
As I've said before Mike, that is one very nice hand tool cabinet.
 
I barely use sandpaper at all, Nick, normally, other than for finishing. Essentially just for rubbing down between coats. However, I am particularly curious this time as I am trying to build this table within the limitations of the guys who built the original 170 years ago. It's an entirely artifical constraint I am imposing on myself, and it of course prevents me from using the pan-scourer plastic stuff (Scotchbrite etc) as an alternative. My get-out-of-gaol card is that glass paper was in production from 1833, apparently, so may have been available to the joiners in Oxford who made this table in 1854-ish.
Sorry I’ve been away and missed all your build Mike, most impressed, I seem to remember that they used the sharp edge of a piece of broken glass to knock back the grain. Pretty much as a scraper I suppose.
Sure you all know this but fuming Oak came about when it was noticed that the beams in the (French) stables were a lovely shade of brown, not sure how they worked out that it was the Ammonia in the horse urine that was causing it though.
We had an unused fuming cabinet in the woodwork room at School when I was a boy but that’s the closest I’ve come to it so not much help there!
 
Last edited:
I was intrigued by Mike's comments about sand/glasspaper and its availability, so thought I'd dig a little deeper.
I found this Wikipedia entry which gives the 1833 date for John Oakey. Following the link to his biography, it becomes clear that 1833 was the date that he introduced better, mechanised methods of making sand/glass paper, compared to the established practice of making it by hand.
Grace's Guide has this 1839 advert for it:

Im1839RobNor-Oakey.jpg


The Wikipedia entry also has this intriguing reference to a much earlier date:

Cheap sandpaper was often passed off as glass paper; Stalker and Parker cautioned against it in A Treatise of Japanning and Varnishing published in 1688​

The source is given as a 1971 reprint of that early book, but we needn't go and look for a copy, as it has since been digitised and is available here:

https://archive.org/details/gri_33125009355344/page/n53/mode/1up

That link should land on page 36. I've searched and skimmed the whole text, looking for any comparison between glass and sandpaper but could not find any, even after realising that I needed to search for glafs.

I linked to page 36 because it does include this instruction, suggesting that suitable paper was not an option, and the tricky job of smoothing wood needed to be outsourced. After filling in roughnesses with a mix of fine sawdust and glue, the maker of a wooden item he was planning to decorate was advised to:

send it to a good workman or Cabinet-maker, who muft fcrape it with his Scraper.

which gives Mike a useful option if he wants it and shows that the humble scraper is quite old. But that's not quite the only way ahead for Mike. I thought I was being cheeky suggesting horsetails as a pan-scourer, but the Wiki article says that they were used, in Japan. The way to avoid covering your new table top with green smears is to boil and then dry the plants first.

I found another reference to using horsetails as a fine finishing abrasive in Roubo's book on furniture making from 1765, but that left out the boiling and drying step.

It all goes to show that if you want historical accuracy in your woodworking, don't rely on old books, and if you do, look in more than one place. ;)
 
As a weird aside, I do have a few sheets of old glasspaper. They are in my paternal grandfather's tool chest (really just a big box) with all of his tool and the glasspaper in a paper bag. I think I remember him telling me when I was about 5, that it was made of crushed glass. But this might have been reinforced by stories from my dad. I was later told by my dad that you could get a cloth backed version of coarse glass paper (there is a sheet in the box) that could also be used for polishing horse's coats for military or show purposes.
 
I applied multiple coats of my 1:1:1 oil, varnish, white-spirit mix.......1 to the underside of the top, 2 to the inside of the legs and to the cross members, 3 to the outside of the legs, and 5 to the top, allowing 24 hours or more between coats:

IMG_7776.jpgIMG_7777.jpg

IMG_7779.jpg

My wife is delighted with it, and would like another like it for the hall.
 
Looks great! I knew you'd sort out the complications.
 
Excellent! (y)
Very good WIP and the pics, final finish looks great.

I have fumed small bits of oak and beech for candle holders.
You can control the shade by time and amount of ammonia. Used an old plastic toolbox, let it stand in sun.
It draws in deep enough into the wood so can take further cutting or sanding.
 
Excellent! (y)
Very good WIP and the pics, final finish looks great.

I have fumed small bits of oak and beech for candle holders.
You can control the shade by time and amount of ammonia. Used an old plastic toolbox, let it stand in sun.
It draws in deep enough into the wood so can take further cutting or sanding.
That’s interesting I didn’t realise there was a heat element to the process, suppose it makes the Ammonia fume more.
 
Back
Top