Windows
Old Oak
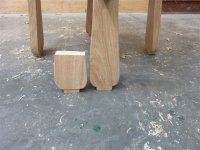
It is quite a chunky chamfer, but I’d vote for a chamfer with character instead of a round over, so happy to hear you’re going to give the chamfer a try.


How about fuming it with ammonia?Thanks Duke.
I'm not sure on the finish, yet. My wife would like it dark, even black. I don't really want to ebonise it, but I might see if van Dyck's crystals bring it to a deep enough colour......but yeah, it's a rare piece which doesn't get multiple coats of oil/ varnish/ white spirit mix.


I've always wanted to try that, Pete, but never have. Have you done it?How about fuming it with ammonia?
Pete
Giving it a good dose of looking at, as is, for a few days may help the decision process on all fronts.
I have done some test pieces many years ago and it works well, you could use it as a starting point and stain it afterwards, it makes the medullary rays stand out.I've always wanted to try that, Pete, but never have. Have you done it?
Oh, I reckon any forum members visiting in future will be down on the floor with torches and high definition cameras now you've pointed that out!Oh, and note the ghastly area of damage caused by errant rip-sawing a couple of days ago. It stays like that for perpetuity, hidden under the table top and behind a leg.




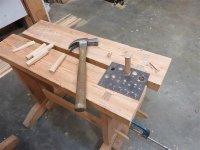
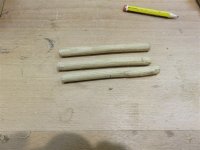

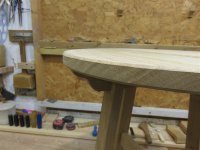
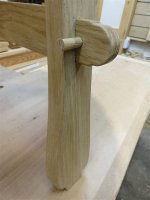
 .
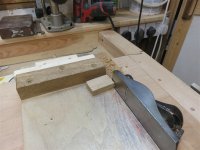
.


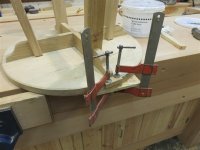


I do think a dark brown stain will make it all hang together much better than it does in the raw. You could see it as a one-man fight back against the often reported news that nobody likes old brown furniture any more!
I love dark oak, but this table was very much my wife's choice, and she wants it as dark as possible. Wait until you see my up-coming dining table build. It's going to be acres of dark oak.
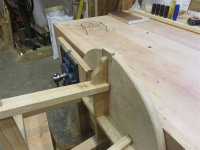

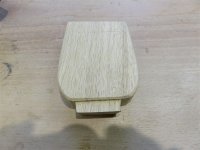
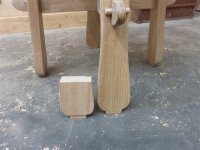

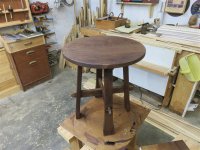

I barely use sandpaper at all, Nick, normally, other than for finishing. Essentially just for rubbing down between coats. However, I am particularly curious this time as I am trying to build this table within the limitations of the guys who built the original 170 years ago. It's an entirely artifical constraint I am imposing on myself, and it of course prevents me from using the pan-scourer plastic stuff (Scotchbrite etc) as an alternative. My get-out-of-gaol card is that glass paper was in production from 1833, apparently, so may have been available to the joiners in Oxford who made this table in 1854-ish.Mike, out of interest, what is your aversion to sandpaper? Do you consider it to be "cheating" or untraditional in some way, or do you just not like the dust? I've spoken to a few people who think that craftsman of old would have loved to have access to modern sandpaper and that they didn't use it in the past simply because it wasn't very good!
As to your options, could you give it a VERY light scraping - i.e. almost no pressure so you only remove the raised grain and not any wood/stain?
As I've said before Mike, that is one very nice hand tool cabinet.For an introduction to this project, visit this thread, where numerous different options for alternatives were discussed.
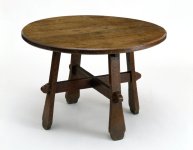
The design is a straight knock-off of a classic Victorian Gothic Revival piece, house in the V&A, and brought to us by AndyT. The original was quite large, but this is to be a small side table, so its proportions are inevitably going to vary. As this is the first hand-tool-only WIP I've done for a while, there are an absolute plethora of photos. For those to whom egg sucking comes naturally, feel free to skip ahead. Oh, and WARNING...........sharpening is discussed!
View attachment 30130
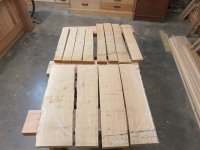
These offcuts from my recent door builds were the raw material. After laying them out and scrawling with chalk, I made my decisions and started on some woodwork. I'm not ripping reasonably straight-grained wood, when I have a hatchet to hand:
View attachment 30115
View attachment 30116
None of the boards were particularly flat, so even though 2 boards provided enough width to do the width of the top, I split them roughly in half to ease the flattening job (and for another reason we'll see later):
View attachment 30117
The astute amongst you will notice that one of the boards is not like the others, being planed and square-edged. My riving didn't work out perfectly, so I had to raid my off-cuts stock:
View attachment 30118
People tend to think of a draw knife as a crude instrument for hacking off large volumes of wood in a hurry. Whilst it can do that, it doesn't take much practice at all to be able to achieve very fine shavings and a fairly decent finish:
View attachment 30119
Nonetheless, for edge-jointing, I needed better, and out came the number 6:
View attachment 30120
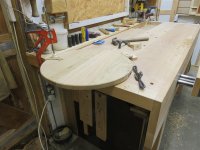
For a variety of work-holding reasons, I want to keep the top square-ish for a while, so this is the table-top roughed out ready for flattening on one face:
View attachment 30121
You may or may not be able to see that I have made no attempt to make all the boards parallel-edged. Two of them taper quite markedly. I've noticed this a number of times with old "country" furniture......and it's not so much about saving wood as about saving effort.
Skip ahead if you aren't interested in flattening boards, or a bit of sharpening.
My number 6 is the premier tool for flattening boards in my workshop, and it needed revival prior to starting. I only have a single bevel on my plane irons (no primary and secondary bevels). This means I never have to re-grind. I use a honing guide for plane irons, and never for chisels (where I do have a secondary bevel). I set up the honing guide with a simple jig:
View attachment 30123
View attachment 30122
Previously, I didn't have to use the 300 grit diamond plate except for restoratrion, but the 600 plate is getting a bit tired these days. So a few seconds on 300, then 600, then 1200, and then flip it over and polish up the other side to the bevel, removing the burr:
View attachment 30124
Then onto the strop:
View attachment 30125
The biggest user of time in the whole sharpening process is setting up the plane and then walking into the house to wash my hands before beginning work.
Here are my £500 winding sticks direct from a 200 year old Japanese hermit whose family have been making these since the beginning of time:
View attachment 30126
I don't use them the same way as others, either. I sight over the near one and under the far one.....aiming to get a parallel gap. It works for me, and if your mileage varies, as Americans apparently say, then that's fine by me too:
View attachment 30127
I didn't take any photos of a pile of shavings, but I simply flattened one side (the top) in the normal way. None were flat to start with, and none took more than 2 or 3 minutes to flatten. I did clean up some sapwood to reduce the amount of planing:
View attachment 30128
They turned out OK, albeit not terribly well colour-matched:
View attachment 30129
It will become important to remember that I don't have thicknessed boards. I have no idea whether or not the other sides are even close to parallel with the top, and it won't make any material difference.
I'll jump ahead to another post now, as things get a bit clumsy with too many photos.
Sorry I’ve been away and missed all your build Mike, most impressed, I seem to remember that they used the sharp edge of a piece of broken glass to knock back the grain. Pretty much as a scraper I suppose.I barely use sandpaper at all, Nick, normally, other than for finishing. Essentially just for rubbing down between coats. However, I am particularly curious this time as I am trying to build this table within the limitations of the guys who built the original 170 years ago. It's an entirely artifical constraint I am imposing on myself, and it of course prevents me from using the pan-scourer plastic stuff (Scotchbrite etc) as an alternative. My get-out-of-gaol card is that glass paper was in production from 1833, apparently, so may have been available to the joiners in Oxford who made this table in 1854-ish.


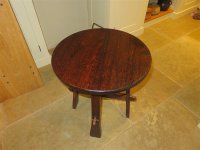
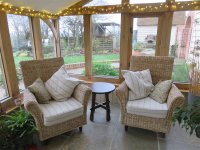


That’s interesting I didn’t realise there was a heat element to the process, suppose it makes the Ammonia fume more.Excellent!
Very good WIP and the pics, final finish looks great.
I have fumed small bits of oak and beech for candle holders.
You can control the shade by time and amount of ammonia. Used an old plastic toolbox, let it stand in sun.
It draws in deep enough into the wood so can take further cutting or sanding.
It does not need the heat, but I found it works a lot faster.That’s interesting I didn’t realise there was a heat element to the process, suppose it makes the Ammonia fume more.