• Hi all and welcome to TheWoodHaven2 brought into the 21st Century, kicking and screaming! We all have Alasdair to thank for the vast bulk of the heavy lifting to get us here, no more so than me because he's taken away a huge burden of responsibility from my shoulders and brought us to this new shiny home, with all your previous content (hopefully) still intact! Please peruse and feed back. There is still plenty to do, like changing the colour scheme, adding the banner graphic, tweaking the odd setting here and there so I have added a new thread in the 'Technical Issues, Bugs and Feature Requests' forum for you to add any issues you find, any missing settings or just anything you'd like to see added/removed from the feature set that Xenforo offers. We will get to everything over the coming weeks so please be patient, but add anything at all to the thread I mention above and we promise to get to them over the next few days/weeks/months. In the meantime, please enjoy!

Mike's ext'n & renovation (solar panels)

Easily Bob. Terribly easily. They're fairly heavy blacksmith-made pin hinges, rather than strap hinges. It was interesting.... when fitting them I trial-fitted them using just a couple of 15mm screws per hinge, to check on positioning etc, and even then there was no issue. Having 10 screws per hinge is a massive over-kill.
 
Easily Bob. Terribly easily. They're fairly heavy blacksmith-made pin hinges, rather than strap hinges. It was interesting.... when fitting them I trial-fitted them using just a couple of 15mm screws per hinge, to check on positioning etc, and even then there was no issue. Having 10 screws per hinge is a massive over-kill.

(y)

Mine weren't as substantial as that.
 
I've spent months doing leaded lights, but the process is so repetitious and un-photogenic that I'll cover it in just one post and a dozen or so photos.

I'd like to give a mention to billybuntus, who no longer posts here. He is an experienced leaded light and stained glass guy, and he gave me a bit of help before I started via PMs.

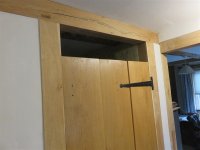
Firstly, a little woodwork. This was the opening above my downstairs loo door:

IMG_7541.jpg

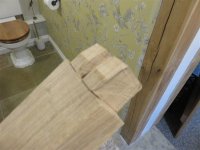
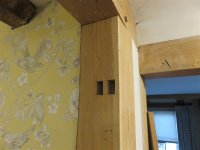
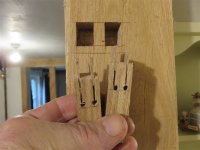
I needed to insert a door head, but obviously cant move the posts apart to enable me to put tenons on both ends. So, it was a pair of tenons on one end, and a pair of floating tenons on the other:

IMG_7542.jpg

IMG_7543.jpg

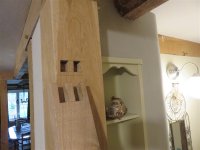
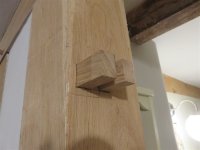
At the other end:

IMG_7544.jpg

IMG_7545.jpg

IMG_7546.jpg

Obviously you hold your breath a little with fox wedged tenons! I failed to take a photo of the door head in place, but I'm sure you get the drift.

Let me say from the outset that making leaded lights is not the most riveting DIY task I've ever set myself. There are many many hours of doing precisely the same thing over and over and over again. It is also not the most difficult task. With the right kit anyone could do it. The most difficult part is cutting glass accurately, and with basic woodworking measuring and marking kit, that's really pretty simple. You spend an awful lot of time straightening up cames ("H" section pieces of lead into which the glass [quarries] sit), cutting them to length, straightening them up where they got squished when cutting.

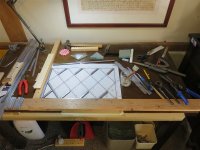
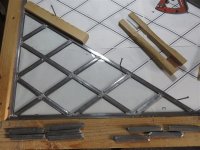
All leaded lights start with a drawing, and a batten under the lower edge and one side edge:

IMG_7505.jpg

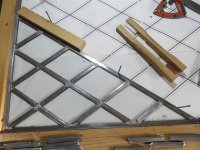
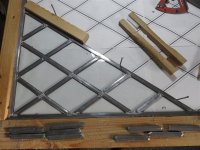
I tended to pre-cut all of the quarries (glass), and all of the lead, and then have a grand session of assembly. Soldering is the simplest and easiest of all the tasks. It's pretty hard to stuff up, frankly.

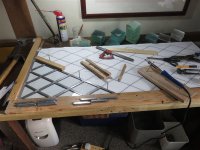
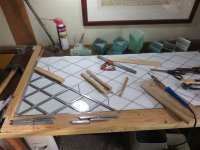
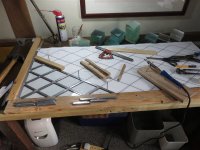
You can see in the following photo my stock of quarries at the back of the table, my straightening tool for the cames, and some of the shorter pre-cut lead pieces. You just fiddle it all together, and whack a few nails in to the table to hold it all in place whilst you solder:

IMG_7549.jpg

As a matter of curiosity, have a look at the different colours of glass in those stack at the back of the table. There's a green, two different blues, and a white. There are also 2 different thicknesses of glass......4mm and 5mm (or was it 3mm & 4mm??!). This was all stuff I found left in the various outbuildings here when we moved in, plis a bit of speciality stuff I bought especially. It made not a jot of difference! The glazing looks identical in situ. Very disappointing.

After soldering up the panels, the job moved outside. I'd been working in my study up to now, just the odd hour here and there, on a temporary table I'd cobbled together especially. Now I moved to the garage, because the rest of the process is filthy.

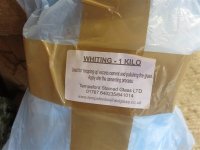
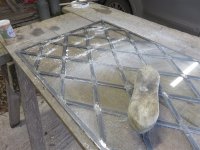
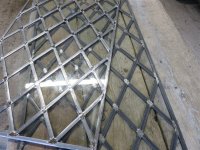
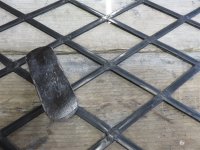
The next step after soldering is to brush a black putty in the cames. This waterproofs and stiffend the panel, sealing the gaps between lead and glass. It's a frustrating and physical task. You are trying to brush stuff carefully into the ehtirety of the lead, but the product (called Leaded Light Cement) is actually just a thinned down and coloured putty, with the texture of golden syrup. Imagine brushing that for hour after hour! You can thin it down, which makes it much easier to brush into place, but makes it harder to clean up again afterwards. The entirety of your panel is smeared with the stuff, and you spend just as much time getting it back off as you did applying it. You then swap brushes, and dust everything with whiting (turns out that's just chalk dust) which sets the cement, before another inordinately long session of brushing which cleans almost everything up:

IMG_7769.jpg

IMG_7768.jpg

You can see a before and after here, with the lower panel having been cemented, and the upper panel not:

IMG_7770.jpg

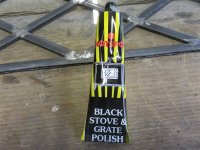
At this point you leave the cement to harden up (overnight, in theory, although with it being outside and December, I found it actually took about 24 hours), before applying miniscule amounts of another potion:

IMG_7771.jpg

And then you brush and brush and brush, with a soft shoe brush:

IMG_7772.jpg

I spent about 3 days brushing before they were ready to install.
 

Attachments

  • IMG_7555.jpg
    IMG_7555.jpg
    174.9 KB · Views: 1
  • IMG_7554.jpg
    IMG_7554.jpg
    175.2 KB · Views: 0
  • IMG_7553.jpg
    IMG_7553.jpg
    167.1 KB · Views: 2
  • IMG_7552.jpg
    IMG_7552.jpg
    166.4 KB · Views: 2
  • IMG_7550.jpg
    IMG_7550.jpg
    169 KB · Views: 2
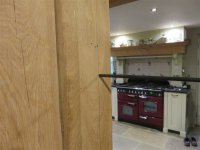
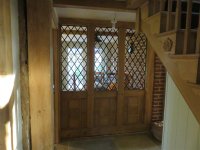
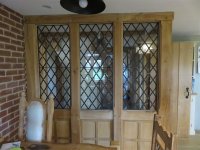
The oak framed part of our kitchen wall has been open since I built it. That meant, of course, that every time we used the toaster or grill the smoke alarm went off! So, we've been looking forward to infilling them with glazing for quite some time. I started by drilling for, and inserting, a saddle bar into each of the 3 openings:

IMG_7773.jpg

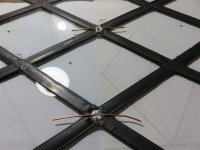
The 6mm steel rod had some of the black gunk on it just for a clour match. You then solder some wire into the appropriate place on your glazed panel:

IMG_7774.jpg

That is a damn mess because of all the chemicals you've applied to the lead, which meant that the solder didn't behave properly. (BTW, our American friends, in English English, the "L" in solder isn't silent. We say "solder", not "sodder"). Anyway...back to installation. The kitchen openings had just applied beads pinned both sides, which was fairly quick and easy, and the wire is twiched around the saddle bars. I'm delighted with the results:

IMG_7781.jpg

IMG_7782.jpg

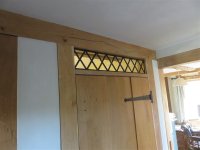
The borrowed light above the toilet door aslo turned out well, I think:

IMG_7780.jpg

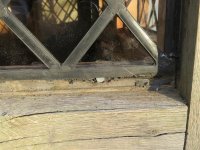
But the thing I've been looking forward to the most was with windows around the porch. These took me 4 or 5 hours to install today. They're bedded on putty (the black cement mentioned previously, thickened up with a generous amount of whiting), and supported on 4 or 5 clout nailsalong the underside holding them up to their required position:

IMG_7785.jpg

I've run out of putty, so the bead strips on the outside willk have to wait until next week. Still, it looks grand to me:

IMG_7783.jpg

IMG_7784.jpg


One of the most attractive things about leaded lights, in my view, is that they are clearly hand-made. There is just enough wonkiness about them to know that it isn't the fakery of "lead" strips stuck onto a sheet of glass. You need to be careful enough when constructing them, but not hyper-critical.
 
I've spent months doing leaded lights, but the process is so repetitious and un-photogenic that I'll cover it in just one post and a dozen or so photos.

I'd like to give a mention to billybuntus, who no longer posts here. He is an experienced leaded light and stained glass guy, and he gave me a bit of help before I started via PMs.

Firstly, a little woodwork. This was the opening above my downstairs loo door:

View attachment 30681

I needed to insert a door head, but obviously cant move the posts apart to enable me to put tenons on both ends. So, it was a pair of tenons on one end, and a pair of floating tenons on the other:

View attachment 30682

View attachment 30683

At the other end:

View attachment 30684

View attachment 30685

View attachment 30686

Obviously you hold your breath a little with fox wedged tenons! I failed to take a photo of the door head in place, but I'm sure you get the drift.

Let me say from the outset that making leaded lights is not the most riveting DIY task I've ever set myself. There are many many hours of doing precisely the same thing over and over and over again. It is also not the most difficult task. With the right kit anyone could do it. The most difficult part is cutting glass accurately, and with basic woodworking measuring and marking kit, that's really pretty simple. You spend an awful lot of time straightening up cames ("H" section pieces of lead into which the glass [quarries] sit), cutting them to length, straightening them up where they got squished when cutting.

All leaded lights start with a drawing, and a batten under the lower edge and one side edge:

View attachment 30680

I tended to pre-cut all of the quarries (glass), and all of the lead, and then have a grand session of assembly. Soldering is the simplest and easiest of all the tasks. It's pretty hard to stuff up, frankly.

You can see in the following photo my stock of quarries at the back of the table, my straightening tool for the cames, and some of the shorter pre-cut lead pieces. You just fiddle it all together, and whack a few nails in to the table to hold it all in place whilst you solder:

View attachment 30687

As a matter of curiosity, have a look at the different colours of glass in those stack at the back of the table. There's a green, two different blues, and a white. There are also 2 different thicknesses of glass......4mm and 5mm (or was it 3mm & 4mm??!). This was all stuff I found left in the various outbuildings here when we moved in, plis a bit of speciality stuff I bought especially. It made not a jot of difference! The glazing looks identical in situ. Very disappointing.

After soldering up the panels, the job moved outside. I'd been working in my study up to now, just the odd hour here and there, on a temporary table I'd cobbled together especially. Now I moved to the garage, because the rest of the process is filthy.

The next step after soldering is to brush a black putty in the cames. This waterproofs and stiffend the panel, sealing the gaps between lead and glass. It's a frustrating and physical task. You are trying to brush stuff carefully into the ehtirety of the lead, but the product (called Leaded Light Cement) is actually just a thinned down and coloured putty, with the texture of golden syrup. Imagine brushing that for hour after hour! You can thin it down, which makes it much easier to brush into place, but makes it harder to clean up again afterwards. The entirety of your panel is smeared with the stuff, and you spend just as much time getting it back off as you did applying it. You then swap brushes, and dust everything with whiting (turns out that's just chalk dust) which sets the cement, before another inordinately long session of brushing which cleans almost everything up:

View attachment 30695

View attachment 30694

You can see a before and after here, with the lower panel having been cemented, and the upper panel not:

View attachment 30696

At this point you leave the cement to harden up (overnight, in theory, although with it being outside and December, I found it actually took about 24 hours), before applying miniscule amounts of another potion:

View attachment 30697

And then you brush and brush and brush, with a soft shoe brush:

View attachment 30698

I spent about 3 days brushing before they were ready to install.
Amazing Mike, you really get stuck into different projects. Great result!
 
Very neat.
And the next job?

That down pipe.
The entire house is going to be re-rendered in the spring. I've not done any of the downpipes anywhere on the house, because they'll all be coming off for the re-rendering.
 
The entire house is going to be re-rendered in the spring. I've not done any of the downpipes anywhere on the house, because they'll all be coming off for the re-rendering.

Mike, out of curiosity, why re-render the whole house?
Is this a once off or does it have to done every couple of years like a grass thatch roof?
 
Because the existing render has failed, Phil. It's cracked at all the junctions between the carrier-boards. And no, render is usually a once-in-centuries job.
 
Thanks for the sharing how you made the leaded windows, fascinating to see. Did you use glue with the fox wedged tenons or just rely on mechanical hold? I assume the latter.
 
Thanks for the sharing how you made the leaded windows, fascinating to see. Did you use glue with the fox wedged tenons or just rely on mechanical hold? I assume the latter.
Just a mechanical hold into the post, (ie the fox tenons), but I glued the other ends into the door head.
 
Any idea why the render has failed?

Mark
Yes. It was applied too thin and too wet, and then dried too quickly at the edges of the wood-wool boards where the "end grain" sucked the moisture out of the mix quicker than the middle of the panels did. Lime can be awkward to work with, and my plasterer got it wrong. We'll be applying, I think, 2 additional coats as well as some scrim, but the hard work is going to be in preparing the existing smooth top coat to take more coats of lime....and for that, I'll be getting a specialist out from the supplier to get his opinion.
 
Last edited:
Well its good you know the reason, but it does sound like a lot of corrective work. Hope it all goes smoothly the second time.

Mark
 
I've spent months doing leaded lights, but the process is so repetitious and un-photogenic that I'll cover it in just one post and a dozen or so photos.

I'd like to give a mention to billybuntus, who no longer posts here. He is an experienced leaded light and stained glass guy, and he gave me a bit of help before I started via PMs.
i still lurk.... :)

Looking good, less is more when soldering. Just touch the joints once firmly with a decent heat iron and move on. Dont drag it around.

If you make up a board (chipboard with two battens at right angles from botom left corner) you'll find it easier to keep the panel tight and square.

I can see you had gard work soldering the lead came for rebar supports after polishing. Just use a small wire brush to clean the lead back to metal, solder with tallow, let it dry, clean it again with your wire brush then re-blacken.

Its a messy old affair and no shorcuts. You get quicker at it the more you do. Hats off to you once again for giving it a go. Looks really well.
 
Last edited:
Thanks BB, and thanks for your help before I started. The soldering iron that Tempsford Glass sold me had the same small tip that come with normal soldering irons, normally used for soldering electric wires together. That surprised me, and meant I had to move a pool of solder around so work any joint, but particularly the big joints where cames crossed. I assume that pros have an iron with a big broad tip which covers the whole joint.
 
Last edited:
Thanks BB, and thanks for your help before I started. The soldering iron that Tempsford Glass sold me had the same small tip that come with normal soldering irons, normally used for soldering electric wires together. That surprised me, and meant I had to move a pool of solder around so work any joint, but particularly the big joints where cames crossed. I assume that pros have an iron with a big broad tip which covers the whole joint.
That's what I was pondering as the tip on your iron looked too small to me given the heat sink provided by the cames. But, clearly, I was wrong. Super job and WIP, by the way.

The outside lights...did you apply patination oil or was there no need because of the other coating you put on ?
 
No, they're not oiled. That "black" provides the protection the lead needs. It's rather harshly black at the moment, but apparently it will weather down to a more graphite-grey colour fairly soon.
 
I have wanted to try this for a while but need to find the right project to do it on. This is a very straight forward and informative post on how leaded lights are made and i think will be referred back to a couple of times. They look fantastic with the oak framing and style of the house.
 
I have wanted to try this for a while but need to find the right project to do it on. This is a very straight forward and informative post on how leaded lights are made and i think will be referred back to a couple of times. They look fantastic with the oak framing and style of the house.
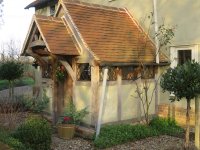
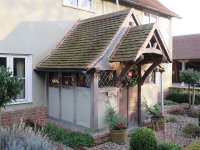
If you do decide to give it a try, Alasdair, I'd suggest you make yourself something like this.
 
This must be one of the finest porches in the country!

I've never seen or noticed the tiled joint between a roof and wall in place of leading, looks great. Is it common and I've just never noticed it?
 
This must be one of the finest porches in the country!

I've never seen or noticed the tiled joint between a roof and wall in place of leading, looks great. Is it common and I've just never noticed it?


Thanks Matt.

A tiled junction like that was a standard detail in this neck of the woods up until the 19th century. I can't remember, but there's probably a line of lead soakers hidden underneath, just for belt-and-braces sake.
 
Thanks BB, and thanks for your help before I started. The soldering iron that Tempsford Glass sold me had the same small tip that come with normal soldering irons, normally used for soldering electric wires together. That surprised me, and meant I had to move a pool of solder around so work any joint, but particularly the big joints where cames crossed. I assume that pros have an iron with a big broad tip which covers the whole joint.
I'd of happily posted you my iron to use if id known. Its a 200 watt iron with a 1/4 tip. Youve done well considering the handicap. You can buy wider tips, i think i recall my original smaller iron coming with an annoyingly skinny bit.
 
No, they're not oiled. That "black" provides the protection the lead needs. It's rather harshly black at the moment, but apparently it will weather down to a more graphite-grey colour fairly soon.
The trick to get it graphite is a decent soft shoe brush which has seen a bit of action with the grate polish. Apply sparingly and buff firmly but with fast action almost skimming over the lead came for a few minutes. It knocks the really black colour off and goes to a lovely graphite.
 
The trick to get it graphite is a decent soft shoe brush which has seen a bit of action with the grate polish. Apply sparingly and buff firmly but with fast action almost skimming over the lead came for a few minutes. It knocks the really black colour off and goes to a lovely graphite.
That's an accurate description of what I did. I buffed and buffed and buffed.......and rubbed down afterwards with a cloth. I bought the grate polish from a local woodburbner place, and they offered me the choice of 3 different brands. They said they were all different, with one of them being a bit more "watered down" (really?), and one a bit more of an abrasive. I made my choice based on the fact that it was in the smallest tube, as I knew I'd hardly use any of the stuff. Maybe it is just that the brand I bought is excessively black. My wife tells me it smells quite strong.
 
Superb work as ever Mike.

A slightly tangential question if I may - is that an angled piece of roof tile secured with mortar where the porch roof meets the wall in lieu of flashing?
 
Are you going to have to strip all that render off Mike? Tremendously big job if so. My mother had to have that done and the young man who did it cut slots with an angle grinder first and then chipped it off with a demolition drill and a big blade. Took ages. I think hers must have been cement render though - it was on my grandmothers house. Maybe lime render is softer and easier?
 
Superb work as ever Mike.

A slightly tangential question if I may - is that an angled piece of roof tile secured with mortar where the porch roof meets the wall in lieu of flashing?
Matt asked me about it a few posts back, Robert, but the answer is essentially yes. It's a local traditional detail (it may be widespread around the country, but I can only really speak for here). I may have put lead soakers behind (belt and braces) but I can't remember.
 
Are you going to have to strip all that render off Mike? Tremendously big job if so. My mother had to have that done and the young man who did it cut slots with an angle grinder first and then chipped it off with a demolition drill and a big blade. Took ages. I think hers must have been cement render though - it was on my grandmothers house. Maybe lime render is softer and easier?
I'm almost certain not, Adrian. I need to remove the limewash, as it has tallow in it which would affect the adhesion of the next layer, but it pressure-washes off fairly readily. I suspect we will then need to rough up the surface of the render to accept the next coat, but the plasterer and a rep from the lime company will have to tell me exactly what to do there.
 
A very nice job Mike and quite different to what we normally see on a woodwork site.
 
I'm almost certain not, Adrian. I need to remove the limewash, as it has tallow in it which would affect the adhesion of the next layer, but it pressure-washes off fairly readily. I suspect we will then need to rough up the surface of the render to accept the next coat, but the plasterer and a rep from the lime company will have to tell me exactly what to do there.
Will be very interested to see what is decided. Presumably where it all butts up against oak framework, that (the render) will need to be cut away to get a good seal next time around. I'm interested because I've got to render (or get my plasterer to do it) a small building next year and I'm currently researching what to do for the best. It will need a scratch coat (onto cement board mainly) and a finish coat of some sort.

I'm surprised that the tallow will jet wash out reliably. I thought tallow was made out of grated kidney fat and then melted into hot lime during the slaking process, hence will be all through the top coat. Surely the purpose of adding tallow is to make the lime render more waterproof? Jet wash resistant?
 
Last edited:
I'm surprised that the tallow will jet wash out reliably. I thought tallow was made out of grated kidney fat and then melted into hot lime during the slaking process, hence will be all through the top coat. Surely the purpose of adding tallow is to make the lime render more waterproof? Jet wash resistant?

The tallow is in the limewash only, not in the render....and the limewash hasn't bonded terribly well with the lime render. It isn't completely straight forward to pressure-wash off, but it does come off, albeit slowly. I've done a test patch on the back wall.
 
A very nice job Mike and quite different to what we normally see on a woodwork site.
If you go back through this 10 year long thread, Mark, you'll find all sorts of stuff which doesn't normally pop up on a woodworking forum! :)
 
Back
Top