One of my grandfathers was an engineer. He died when I was only 13, so my memories of him are limited. But I do remember him saying that he used to stand at a bench filing commutators, and that fits with census records of employment in the 1920s at a central London company that made electrical machinery. In an earlier census he was described as a Turner and Fitter. I wish I had asked him more about his working life!
That's all by way of a long-winded excuse for some of my interest in older ways of metalworking, before everything was done with machine tools.
So I was very pleased when I saw @toolsntat at the last David Stanley auction and he gave me some of his surplus treasure. My haul included a surface gauge, a tap wrench and a couple of old style die stocks.
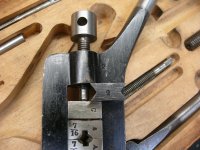
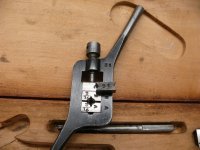
The die stocks looked like this:

but after a soak in some citric acid + washing soda rust remover, followed by a gentle rub with rubberised abrasive, they soon looked like this:

Andy thought they would complement my old treadle driven lathe, and he's right.
As far as I can see from catalogues and old books, this style, with a pair of hardened dies sliding inside an iron frame, were in general use around the middle of the nineteenth century.
Charles Holtzapffel has a very long and detailed section about screw cutting tools in volume 2 of Turning and Mechanical Manipulation, published in 1847, which I recommend to anyone who really wants to see the detailed aspects of the various designs available then, or just enjoys diagrams like this:

The earliest commercial illustration I have found is this rather crowded one from the Timmins catalogue of 1845

and here's a similar engraving from the 4th edition of the Sheffield List, around 1855:

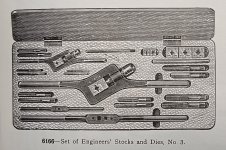
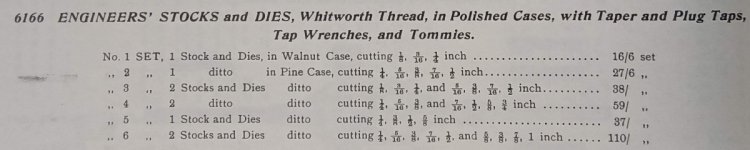
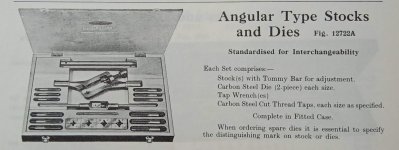
But the design shouldn't be dismissed as just Victorian - it lived on for more than a century - a recognisable version was still listed in Buck and Hickman catalogue in 1964

and even in 1971:
My two have a roughness about them which might mean that they were at least partly hand made, forged and filed, not drop forged and milled, but that's just a guess. Although the stocks are different lengths, the dies are a nice standard 1/4 inch diameter and 20 threads per inch.
After reading a bit about how to use them and a relaxing half hour trying them out on a bit of 1/4" steel rod, this is what I have learned.
They are easier to get started on the work than circular dies are. There's a bit of a taper on one side. You position the dies with the taper on the end of the work and tighten up the adjustment screw to clamp it quite tightly. The edges of the dies then start to cut a shallow thread. As the thread starts to form, you tighten the screw again.
Some of the threading action is from the leading edges but much of it is a done by swaging/rolling the metal to shape. There's less swarf than you get with a circular die and no real need to reverse direction in order to break the chips. (The construction and cutting action are symmetrical though, so reversing does tidy up the thread a bit.)


However, I did end up with a thread which was too wide in the diameter to fit a commercial 1/4" BSW nut. By tightening up the setting and running the thread again, I managed to get a nice tight fit.
I also tried a bit of copper rod:

On the copper you can see a distinctive central line on the crests, which I think is characteristic of a rolled thread. (It's visible on my Record G-cramps, which have an Acme thread form.)

I think I have convinced myself that the adjustability is an advantage, in that if I ever need to make threads fit tighter than ordinary nuts and bolts do, I could. I know that there is some adjustment available on my collection of split dies but with this tool it's probably slightly easier to make a piece, then adjust it to fit just right. I expect that a proper engineer would work to dimensions and refer to a detailed data chart but I am happy to approach this sort of thing the same way I would with a dovetail or a mortise and tenon and sneak up on the level of fit I want.
So, if you come across any of these, please don't dismiss them as crude or obsolete just because they don't relate to metric standards. The pioneering Victorian engineers thought in great detail about the work they were doing and the tools they used.
And if anyone recognises the partial trade mark on the smaller one, please tell!

That's all by way of a long-winded excuse for some of my interest in older ways of metalworking, before everything was done with machine tools.
So I was very pleased when I saw @toolsntat at the last David Stanley auction and he gave me some of his surplus treasure. My haul included a surface gauge, a tap wrench and a couple of old style die stocks.
The die stocks looked like this:
but after a soak in some citric acid + washing soda rust remover, followed by a gentle rub with rubberised abrasive, they soon looked like this:
Andy thought they would complement my old treadle driven lathe, and he's right.
As far as I can see from catalogues and old books, this style, with a pair of hardened dies sliding inside an iron frame, were in general use around the middle of the nineteenth century.
Charles Holtzapffel has a very long and detailed section about screw cutting tools in volume 2 of Turning and Mechanical Manipulation, published in 1847, which I recommend to anyone who really wants to see the detailed aspects of the various designs available then, or just enjoys diagrams like this:
The earliest commercial illustration I have found is this rather crowded one from the Timmins catalogue of 1845
and here's a similar engraving from the 4th edition of the Sheffield List, around 1855:
But the design shouldn't be dismissed as just Victorian - it lived on for more than a century - a recognisable version was still listed in Buck and Hickman catalogue in 1964
and even in 1971:
My two have a roughness about them which might mean that they were at least partly hand made, forged and filed, not drop forged and milled, but that's just a guess. Although the stocks are different lengths, the dies are a nice standard 1/4 inch diameter and 20 threads per inch.
After reading a bit about how to use them and a relaxing half hour trying them out on a bit of 1/4" steel rod, this is what I have learned.
They are easier to get started on the work than circular dies are. There's a bit of a taper on one side. You position the dies with the taper on the end of the work and tighten up the adjustment screw to clamp it quite tightly. The edges of the dies then start to cut a shallow thread. As the thread starts to form, you tighten the screw again.
Some of the threading action is from the leading edges but much of it is a done by swaging/rolling the metal to shape. There's less swarf than you get with a circular die and no real need to reverse direction in order to break the chips. (The construction and cutting action are symmetrical though, so reversing does tidy up the thread a bit.)
However, I did end up with a thread which was too wide in the diameter to fit a commercial 1/4" BSW nut. By tightening up the setting and running the thread again, I managed to get a nice tight fit.
I also tried a bit of copper rod:
On the copper you can see a distinctive central line on the crests, which I think is characteristic of a rolled thread. (It's visible on my Record G-cramps, which have an Acme thread form.)
I think I have convinced myself that the adjustability is an advantage, in that if I ever need to make threads fit tighter than ordinary nuts and bolts do, I could. I know that there is some adjustment available on my collection of split dies but with this tool it's probably slightly easier to make a piece, then adjust it to fit just right. I expect that a proper engineer would work to dimensions and refer to a detailed data chart but I am happy to approach this sort of thing the same way I would with a dovetail or a mortise and tenon and sneak up on the level of fit I want.
So, if you come across any of these, please don't dismiss them as crude or obsolete just because they don't relate to metric standards. The pioneering Victorian engineers thought in great detail about the work they were doing and the tools they used.
And if anyone recognises the partial trade mark on the smaller one, please tell!