• Hi all and welcome to TheWoodHaven2 brought into the 21st Century, kicking and screaming! We all have Alasdair to thank for the vast bulk of the heavy lifting to get us here, no more so than me because he's taken away a huge burden of responsibility from my shoulders and brought us to this new shiny home, with all your previous content (hopefully) still intact! Please peruse and feed back. There is still plenty to do, like changing the colour scheme, adding the banner graphic, tweaking the odd setting here and there so I have added a new thread in the 'Technical Issues, Bugs and Feature Requests' forum for you to add any issues you find, any missing settings or just anything you'd like to see added/removed from the feature set that Xenforo offers. We will get to everything over the coming weeks so please be patient, but add anything at all to the thread I mention above and we promise to get to them over the next few days/weeks/months. In the meantime, please enjoy!

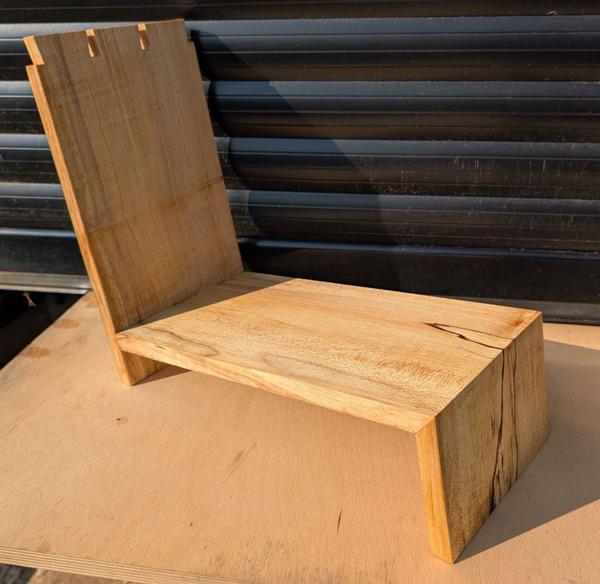
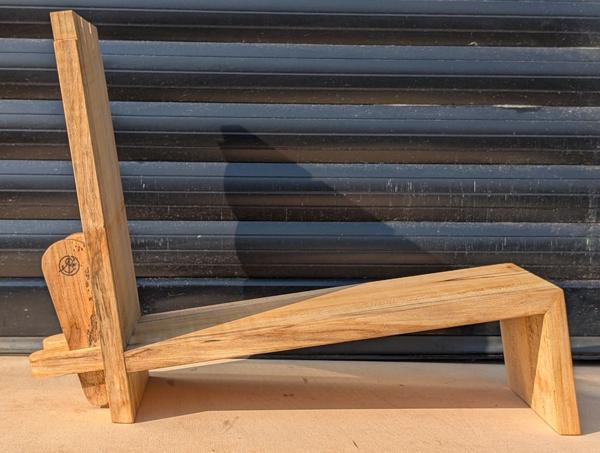
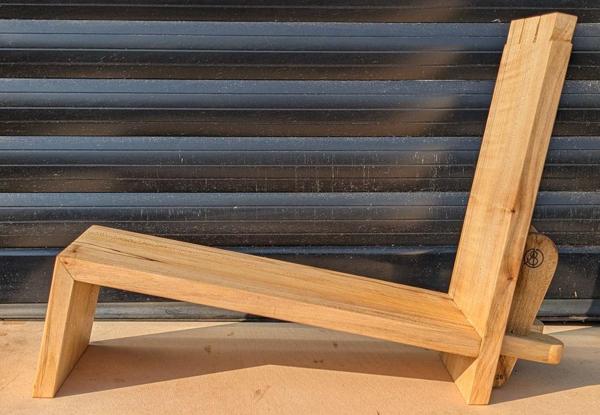
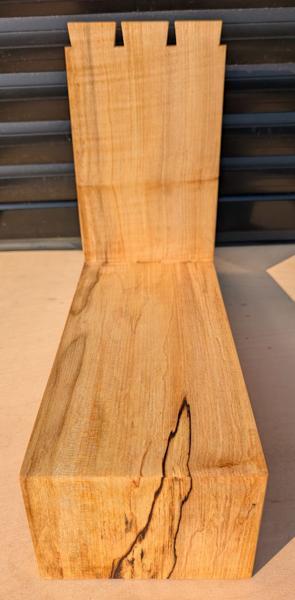
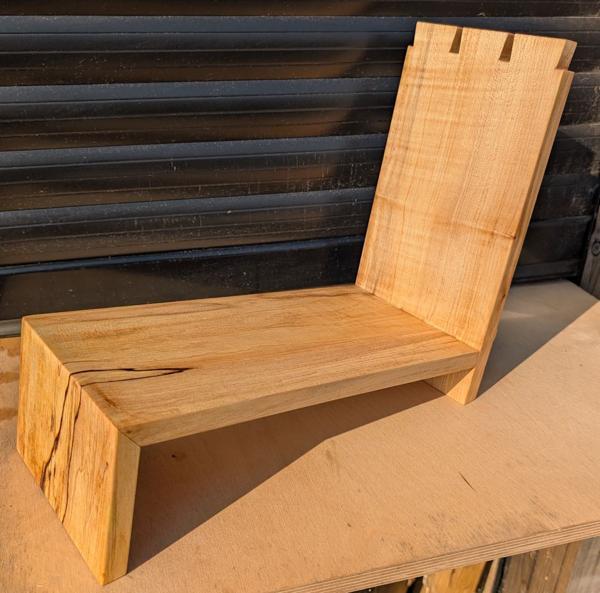
A small project with a difficult joint

Brilliant!

I'd never have guessed, but that's a really good excuse for the effort you've put into it.

Two observations spring to mind from this entertaining thread. One is that, although I will never get a 3D printer, it's good to hang around with talented folk who find so many uses for them.

The other is that I only have eight of the same books - but I'm sure there are some more overlaps in our libraries that don't fit!
 
Yes, as it is. Perhaps put your logo on both sides of the wedge so it can be seen, manufacturers don’t hide their names!
That joint turned out very well indeed Al, bit surprised you don’t put glue on all of the Dovetails though, it’s bound to be stronger, I saw a test of end grain gluing and there wasn’t much difference really.
Ian
 
Brilliant!

I'd never have guessed, but that's a really good excuse for the effort you've put into it.

Two observations spring to mind from this entertaining thread. One is that, although I will never get a 3D printer, it's good to hang around with talented folk who find so many uses for them.

The other is that I only have eight of the same books - but I'm sure there are some more overlaps in our libraries that don't fit!

Thanks Andy. Yes I'm sure there are plenty of other one we've both got (including the two you gave me that I seem to recall you had two copies of!).

I suspect there will be less overlap if/when I post a photo of the books that'll be on there more permanently :)
 
Yes, as it is.

Thanks (that definitely makes it easier!

Perhaps put your logo on both sides of the wedge so it can be seen, manufacturers don’t hide their names!

Hmm, interesting thought. I'll ponder on that one.

That joint turned out very well indeed Al, bit surprised you don’t put glue on all of the Dovetails though, it’s bound to be stronger, I saw a test of end grain gluing and there wasn’t much difference really.

I imagine it would help a bit, but I (obviously) have no idea how much. I used to slather glue everywhere I could see but then watched two of David Charlesworth's videos (the drawer making one & the secret mitre dovetail one) and he's much more picky about where the glue goes, with the aim being that all the face grain contacting surfaces are glued but no glue gets squeezed out on the inside of the joint. Ever since I watched them I've tended to do the same with dovetails. They haven't come apart yet!

He goes slightly further than I do by only gluing the top 2/3rds of the pins and with slightly watered down glue (this is all from memory, so take with a pinch of salt). The premise is that the glue in the top 2/3rds gets pushed down (by the tail) to cover the bottom bit. I sometimes do the top 2/3rds thing but have never gone as far as watering down the glue.
 
Great little project, Al, and a superb write-up as always.

I put glue in the endgrain part of a joint, not with any great care, and not because it provides strength. I do it because it can act as a gap filler, and thus reduce any room for movement should the joint ever come under any strain.
 
Great little project, Al, and a superb write-up as always.

Thanks Mike

I put glue in the endgrain part of a joint, not with any great care, and not because it provides strength. I do it because it can act as a gap filler, and thus reduce any room for movement should the joint ever come under any strain.
The gap filling thing is an interesting thought and one I don't think I would have considered.

Not that my woodwork ever has any gaps of course, no sir! 🥸🤥🤣
 
Incidentally, one of the things I really like about only putting glue on the sides of tails & pins is how much quicker it is. For gluing a box together it only takes a few seconds to do each board & I find the overall process less stressful as a result.

I suspect I'd still slather it on willy-nilly for anything taking a really high load but it's nice doing the bare minimum for lighter duty things.
 
Incidentally, one of the things I really like about only putting glue on the sides of tails & pins is how much quicker it is. For gluing a box together it only takes a few seconds to do each board & I find the overall process less stressful as a result.

I suspect I'd still slather it on willy-nilly for anything taking a really high load but it's nice doing the bare minimum for lighter duty things.
All I ever do now is to lightly smear the tails n'pins...sometimes just the tails. If the joints fit well that's really all you need to do; I do the same for dominos; just a very light smear and even then it's amazing how much 'squeeze out' there is. I don't understand the concept of 'gap filling':ROFLMAO: - Rob
 
Agreed and an unusual and effective solution for a book rack. If I could offer one idea and that's to make the wedges slightly less chunky, say 12mm where they pass through the tenon?

I think it's a bit late to change that now, but thanks for the suggestion anyway.

Also, what's the purpose of the shovetails on the offset vertical please...unless I've missed somat? - Rob

Purely decorative. I wanted something to add a bit of interest to the top of the upright (rather than just having a flat top which might look a bit dull) and since I'd hidden the dovetails in the mitre joint I thought I'd put some on display up top instead.
 
I think it's a bit late to change that now, but thanks for the suggestion anyway.
Something to bear in mind for the next time you use a tusk tenon construction. I've done a coupla projects with this sort of joint and in my very 'umble opinion, they look more effective if they're a bit 'slimline' and in a contrasting accent timber, say a bit of ebony of ABW. None the less, the project as shown in the pics is a gud'n and your colleagues at work should be suitably impressed:D - Rob
 
Wow, great work! Such a cool joint. The only hidden joinery i have tried is the one on Japanese shoji screen corners. I made 3 practice joints before getting one that closed up and looked decent
 
If anyone's interested in David Charlesworth's approach to gluing, I've found that a relevant extract from one of his videos is on youtube. I couldn't find a youtube-available similar extract of the drawer making one (which goes into a bit more detail of his justification if memory serves me correctly), but it gives the general idea:

 
Ian (@Cabinetman) suggested I put my logo on the front wedge as well so it can be seen. I pondered on that idea overnight and decided to go for it.

I brought the second wedge in, used some magnets to clamp it in place on the 3D printer's bed, spent some time tweaking angles to make sure it would be vertical when fitted and then hit go.

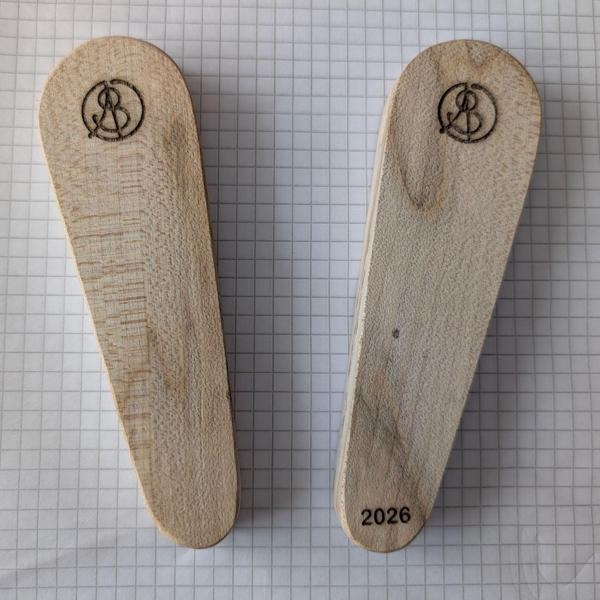
Unfortunately, I completely messed up the "tweaking angles" bit, copying the orientation of the rear wedge despite the fact it should have been mirrored. When placed like this on the sheet of paper, the two logos should be aligned:

2026-07-08-01-oops_600.jpg


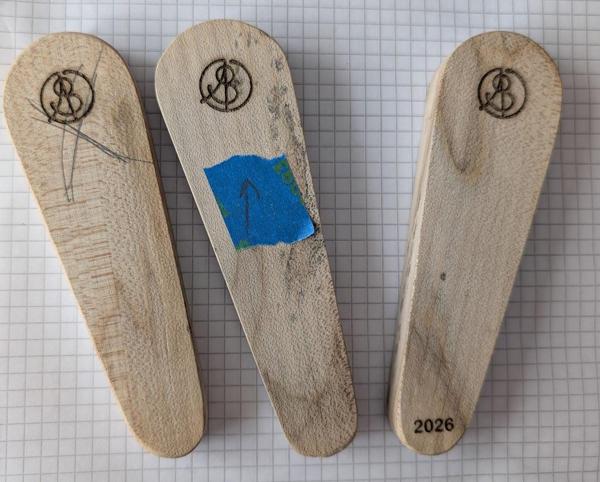
"Fiddlesticks" quoth I (or words to that effect). There was no way I was going to be able to live with a logo on the wonk like that, so I just bit the bullet and made a new wedge. This time I used the same method as on the rear wedge and added a piece of masking tape with a pencil line (drawn in situ) showing which way's up:

2026-07-08-02-make-another-one_600.jpg


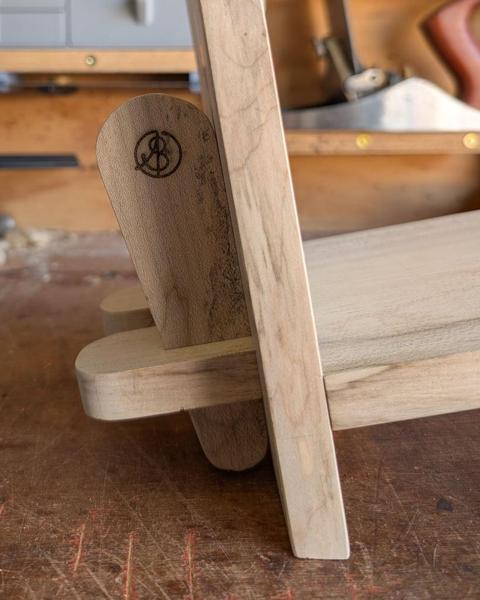
Test fit to confirm I got it right this time:

2026-07-08-03-better_600.jpg


Phew.

Since taking that photo I removed the wedges, shimmied it apart enough to get at the sides of the tenons that'll be inside the joint, added a little glue and then pushed it back together. A little glue was also added to the edge of each wedge where they touch the upright and then they were tapped home. The glue (Titebond 1) seemed to be skinning over in seconds (perhaps due to the heat?) so I had to work quite quickly but there wasn't much to glue and wasn't much to assemble. The wedges do duty as clamps so it was one of the simplest glue-ups I've ever done.

Once the glue has set, I'll tidy up all the edges (probably just with some 240 grit sandpaper) and then give it a few coats of Mike's Magic Mix.
 
.....then give it a few coats of Mike's Magic Mix.....

You'll lose the blondeness of the wood. I used Rustins Plastic Coating on the stuff I made from spalted sycamore, but a water-based varnish, maybe with a whitener in it, would also work well. I mean, use the 1:1:1 if you want, but be prepared for it to go a bit yellowy/ orange.
 
You'll lose the blondeness of the wood. I used Rustins Plastic Coating on the stuff I made from spalted sycamore, but a water-based varnish, maybe with a whitener in it, would also work well. I mean, use the 1:1:1 if you want, but be prepared for it to go a bit yellowy/ orange.
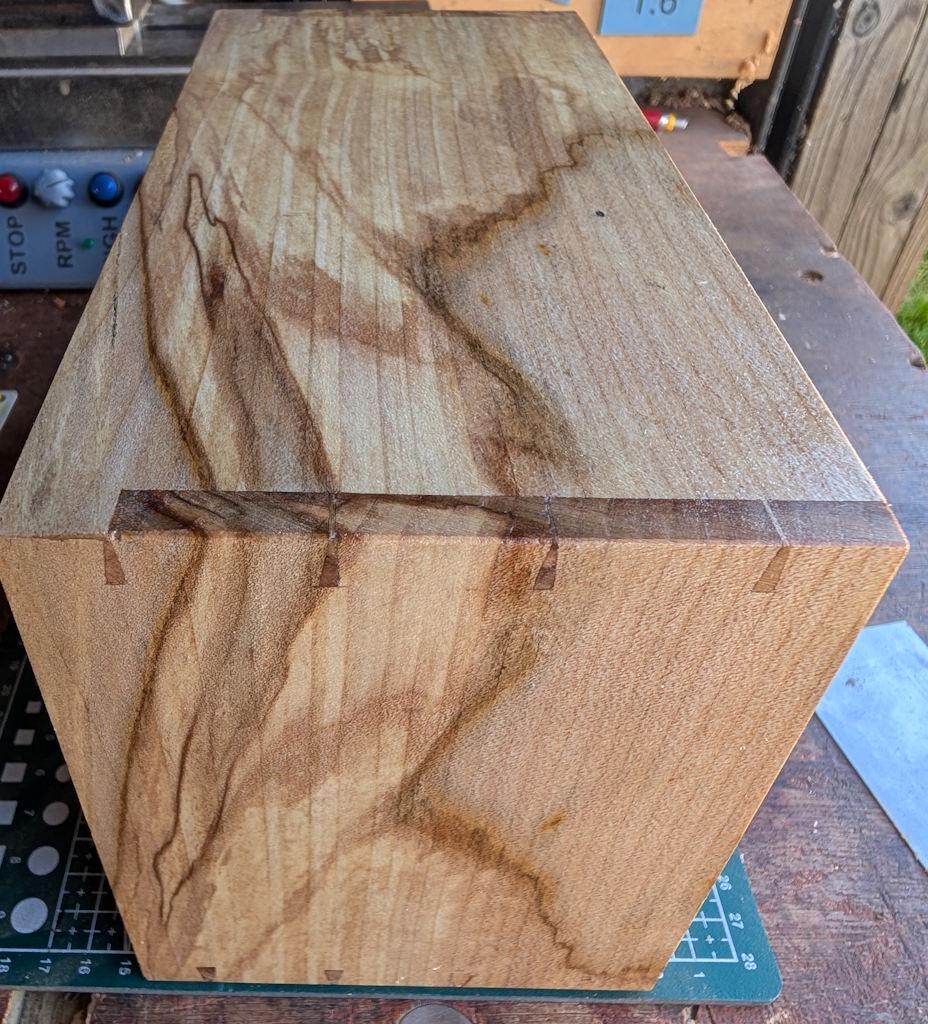
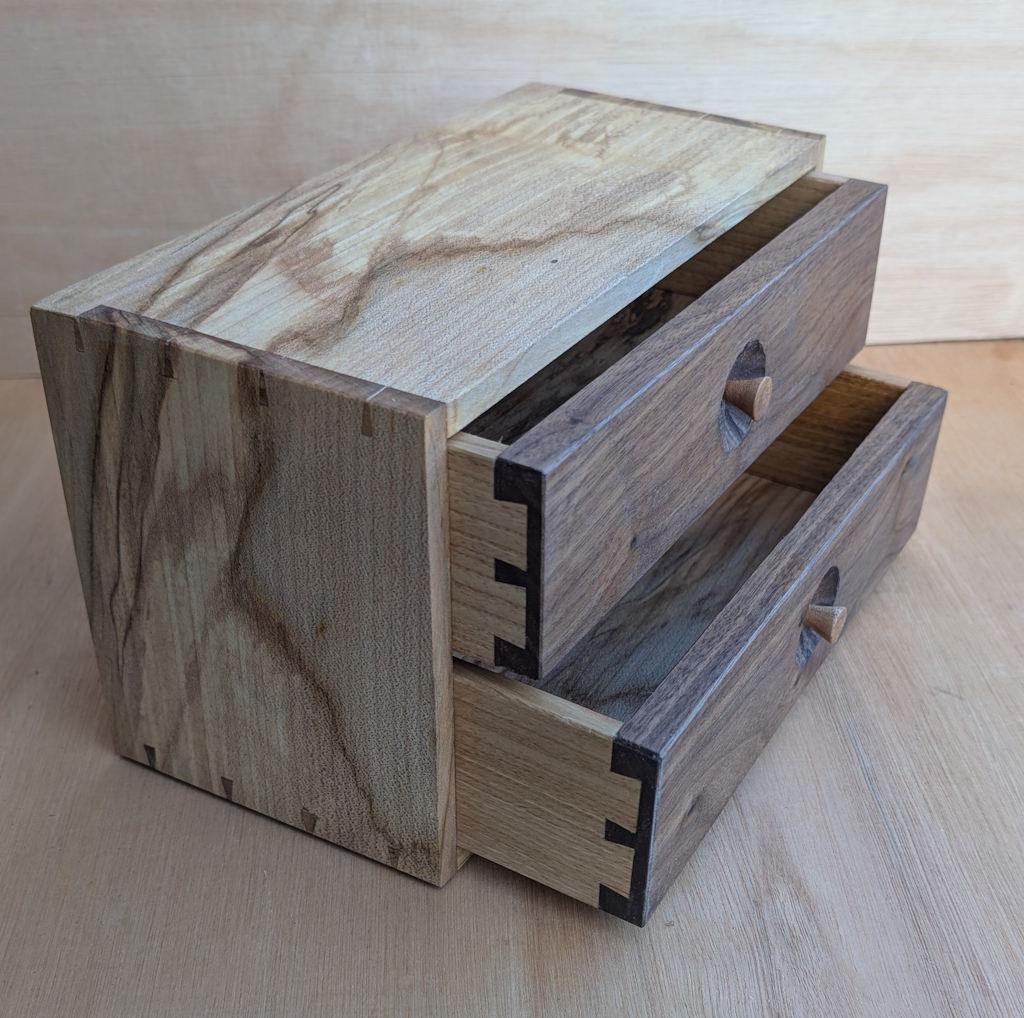
I'm quite happy with it going a bit darker. These two were both Sycamore (from the same timberyard) finished with Mike's Magic Mix:

2025-12-20-18-flowing-grain-closeup.jpg


2025-08-25-05-assembled.jpg


The box specifically...

2025-12-20-12-finished-box-with-drawers-open-and-waterfall.jpg


Lives on my desk at work (along with a walnut tea caddy) so with the bookshelf being finished in MMM it should fit quite well in my opinion.
 
Great. I'd forgotten those projects. I just didn't want you to end up with something you weren't expecting.
 
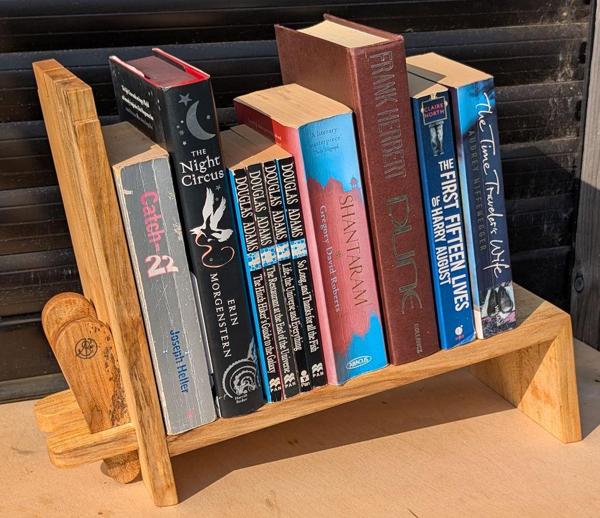
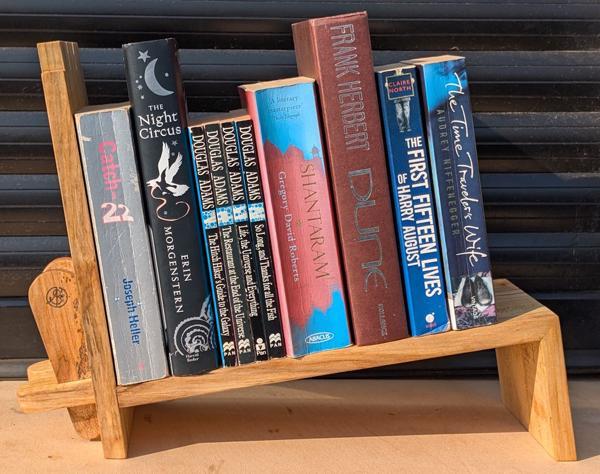
After the glue had set, the bookcase got finished with Mike's Magic Mix and then I took a few photos from various angles. Firstly, with a few novels on just for the sake of a fully-loaded photo while it was still at home:

2026-07-10-angled-with-books_600.jpg

2026-07-10-straight-on-with-books_600.jpg


Then a few photos of it sitting empty:

2026-07-10-front-angled-view_600.jpg


2026-07-10-front-view_600.jpg


2026-07-10-rear-view_600.jpg


2026-07-10-grain-view_600.jpg


2026-07-10-rear-angled-view_600.jpg


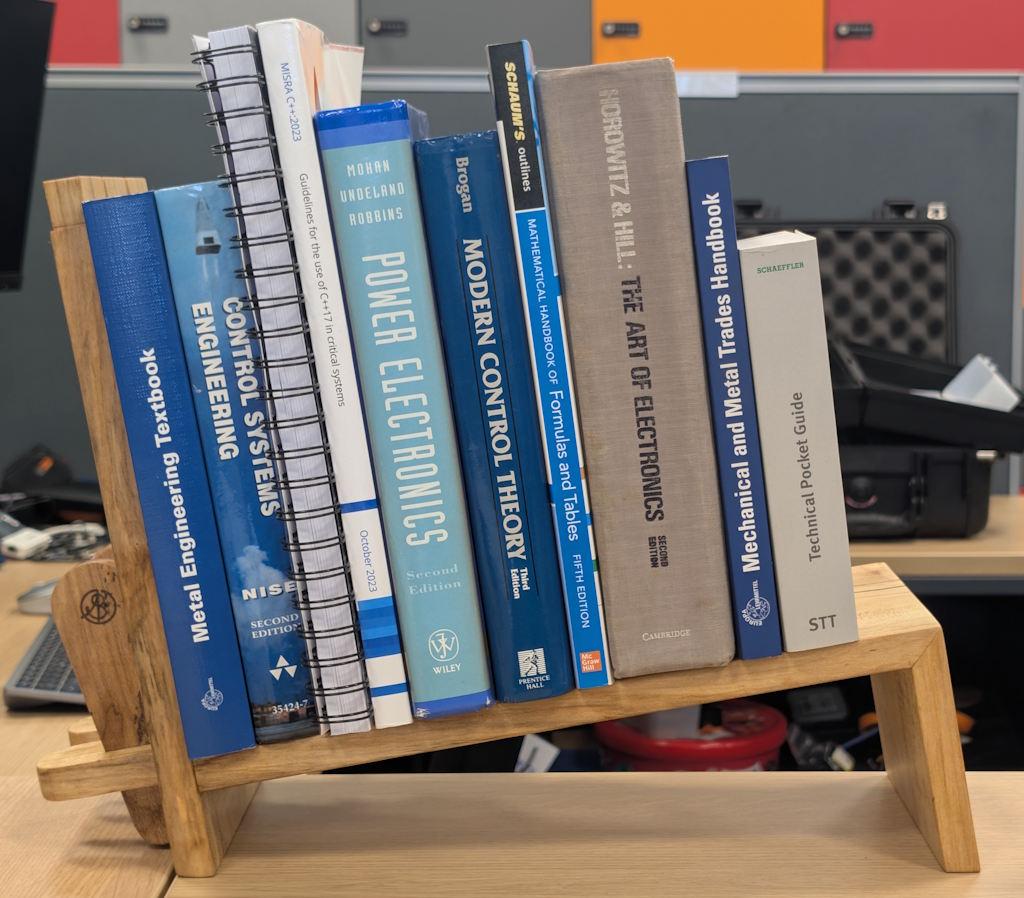
Finally, a photo of it in its final resting place and loaded up with the reference books that will live on it long-term.

2026-07-13-in-situ.jpg


I'd bet there is slightly less overlap with @AndyT's bookshelf than there was in the photo with all the woodwork books!
 
I'd bet there is slightly less overlap with @AndyT's bookshelf than there was in the photo with all the woodwork books!
Almost total!

But it really looks the business, lovely job. Your workspace must be getting very distinctive and personal.
 
Wonderful. And what an eye for detail you even adjusted your logo so that it was vertical in situ rather than centred on the wedge.
 
You need more books Dr Al. :cool: That is just playing about.
If I had any more books I'd need a bigger house. There are a **lot** more than go on that little desk shelf. Several of our bookshelves are two books deep & there are more in boxes in the attic. One of our plans for the next house is at least twice as many bookshelves.
 
You can blame the Europeans for that. I've never understood why they put the writing on the spine such that it would be upside-down when the book is face-up on a table.
Yep all our French books are that way around. They drive on the wrong side of the road too of course.
 
If I had any more books I'd need a bigger house. There are a **lot** more than go on that little desk shelf. Several of our bookshelves are two books deep & there are more in boxes in the attic. One of our plans for the next house is at least twice as many bookshelves.
At least you've got some essential reading there Al; THGTTG is mandatory on almost any bookcase - Rob
 
Back
Top