• Hi all and welcome to TheWoodHaven2 brought into the 21st Century, kicking and screaming! We all have Alasdair to thank for the vast bulk of the heavy lifting to get us here, no more so than me because he's taken away a huge burden of responsibility from my shoulders and brought us to this new shiny home, with all your previous content (hopefully) still intact! Please peruse and feed back. There is still plenty to do, like changing the colour scheme, adding the banner graphic, tweaking the odd setting here and there so I have added a new thread in the 'Technical Issues, Bugs and Feature Requests' forum for you to add any issues you find, any missing settings or just anything you'd like to see added/removed from the feature set that Xenforo offers. We will get to everything over the coming weeks so please be patient, but add anything at all to the thread I mention above and we promise to get to them over the next few days/weeks/months. In the meantime, please enjoy!

An oilstone box

AndyT

Old Oak
Joined
Nov 23, 2020
Messages
3,876
Reaction score
1,799
Location
Bristol
Name
Andy
A holiday weekend with cloudy weather and the promise of rain - so my thoughts turned to the workshop. It was time to combine two welcome gifts and play with some old tools.

Over a decade ago, a neighbour kindly left a log of wood on our doorstep. I didn't know much about seasoning and converting wood, so it's really just been sat in a corner of the basement since then. It's dried out, with a split all the way down it, but with a bit of effort it can yield nice timber. ( I made a saw handle from a piece of it some time ago.) I don't know exactly what it is but I think it might be some sort of cherry. I know that it was a garden tree and there are hundreds of Prunus species grown as ornamentals.

Also, my generous friend Peter gave me a nice little oilstone, which needs a box.

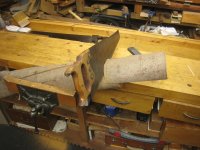
So I dragged the log to the bench and sawed a bit more off:
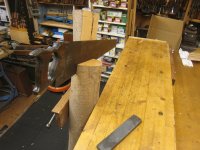
IMG_0003.JPG

A Record 52½ does give a good grip!

IMG_0004.JPG

This was followed by some trimming on my electric bandsaw, which probably counts as an antique to some people, as it was made in Leicester in the 1970s...
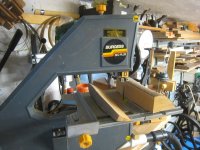
IMG_0005.JPG

I soon had a piece that I thought would be just big enough, if I could work around that bit of sloping bark.
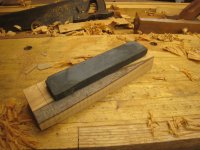
IMG_0007.JPG


This is the sort of project where it's not necessary to use any numerical measurements; you can do the whole thing by eye or by direct comparison, which I prefer.

The next step was to cut it to length, then rip it in two.
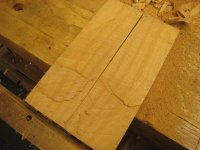
IMG_0009.JPG

Not my neatest ever sawing, but I had just enough wood left after planing those two reasonably flat.
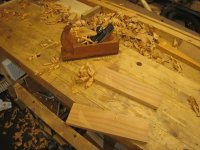
IMG_0010.JPG

Now, if you look at old books or old oilstone boxes, the normal approach seems to have been to use a thicker piece of wood, so you can bore a lot of holes to get rid of most of the waste. I've made one or two that way before and didn't want to repeat myself. I did want this box to be quite slim, so it can fit on the shelf with the others, and because I had already cut the wood. So a different approach was needed.

Having drawn around the stone and marked out with a chisel safely inside that line, I started off just chiselling, a bit like fitting a very thick hinge. You must bear in mind that when I approach this sort of little project, I enjoy exploring different approaches, even if they are not the best. This was very slow. :(
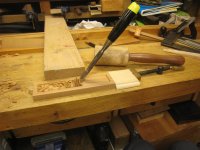
IMG_0011.JPG

I remembered that a gouge can be quicker than a chisel, like a heavily cambered plane is quicker than a smoother.
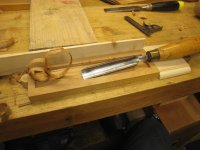

IMG_0013.JPG

That was more productive. I had soon increased the depth enough to swap to a router to get things level and smooth.

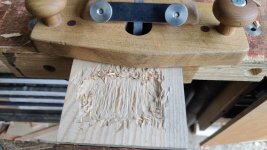
At first, I used the ever-popular (and now very expensive) Stanley 71, which you can see abandoned in the background here. With its right-angled cutter, it needs a lot of room; I was bumping against the sides too much.
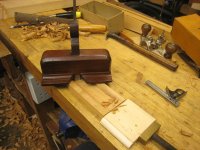
IMG_0016.JPG

This old user-made "old woman's tooth" router was better. The shape was good for bridging the gap. Adjustment was easy too - just a tap down on the iron to advance it, then a tap on the wedge to secure it. But it was still a bit slow and it was quite hard to pull when taking long-grain cuts. I remembered that I had a second example and managed to find it.

I think this is a good illustration of how variable user-made tools can be. Viewed side by side you can see that the other router has a much less steep cutting angle and is significantly deeper front to back. So if you try one of these excellent tools and don't like it, don't write them off; just try another one, or make your own.
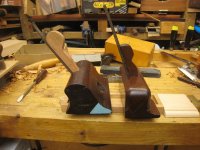
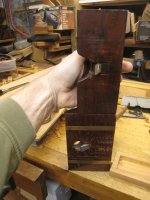
IMG_0022.JPG


IMG_0023.JPG

On this job, those differences were significant, and I was able to make much better progress.

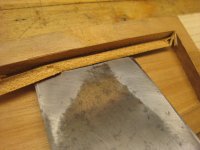
As I neared my target depth, I paused to chisel away the safety margins I had left and cut right up to my pencil lines. For the final adjustments I used a Record 2506 side rebate plane. For the first time ever, this was a job where it was useful to be able to remove the nose piece and plane right into the corner!
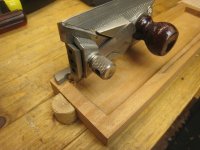
IMG_0019.JPG

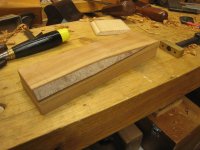
I soon reached this happy stage where the stone fitted snugly into what will be the base, leaving me ready to work on the top, in the next exciting instalment!
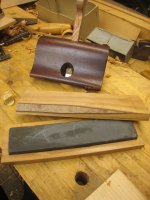
IMG_0024.JPG
 
Last edited:
A holiday weekend with cloudy weather and the promise of rain - so my thoughts turned to the workshop. It was time to combine two welcome gifts and play with some old tools.

Over a decade ago, a neighbour kindly left a log of wood on our doorstep. I didn't know much about seasoning and converting wood, so it's really just been sat in a corner of the basement since then. It's dried out, with a split all the way down it, but with a bit of effort it can yield nice timber. ( I made a saw handle from a piece of it some time ago.) I don't know exactly what it is but I think it might be some sort of cherry. I know that it was a garden tree and there are hundreds of Prunus species grown as ornamentals.

Also, my generous friend Peter gave me a nice little oilstone, which needs a box.

So I dragged the log to the bench and sawed a bit more off:

View attachment 26405

A Record 52½ does give a good grip!

View attachment 26406

This was followed by some trimming on my electric bandsaw, which probably counts as an antique to some people, as it was made in Leicester in the 1970s...

View attachment 26407

I soon had a piece that I thought would be just big enough, if I could work around that bit of sloping bark.

View attachment 26409


This is the sort of project where it's not necessary to use any numerical measurements; you can do the whole thing by eye or by direct comparison, which I prefer.

The next step was to cut it to length, then rip it in two.

View attachment 26410

Not my neatest ever sawing, but I had just enough wood left after planing those two reasonably flat.

View attachment 26411

Now, if you look at old books or old oilstone boxes, the normal approach seems to have been to use a thicker piece of wood, so you can bore a lot of holes to get rid of most of the waste. I've made one or two that way before and didn't want to repeat myself. I did want this box to be quite slim, so it can fit on the shelf with the others, and because I had already cut the wood. So a different approach was needed.

Having drawn around the stone and marked out with a chisel safely inside that line, I started off just chiselling, a bit like fitting a very thick hinge. You must bear in mind that when I approach this sort of little project, I enjoy exploring different approaches, even if they are not the best. This was very slow. :(

View attachment 26412

I remembered that a gouge can be quicker than a chisel, like a heavily cambered plane is quicker than a smoother.


View attachment 26413

That was more productive. I had soon increased the depth enough to swap to a router to get things level and smooth.

At first, I used the ever-popular (and now very expensive) Stanley 71, which you can see abandoned in the background here. With its right-angled cutter, it needs a lot of room; I was bumping against the sides too much.

View attachment 26414

This old user-made "old woman's tooth" router was better. The shape was good for bridging the gap. Adjustment was easy too - just a tap down on the iron to advance it, then a tap on the wedge to secure it. But it was still a bit slow and it was quite hard to pull when taking long-grain cuts. I remembered that I had a second example and managed to find it.

I think this is a good illustration of how variable user-made tools can be. Viewed side by side you can see that the other router has a much less steep cutting angle and is significantly deeper front to back. So if you try one of these excellent tools and don't like it, don't write them off; just try another one, or make your own.

View attachment 26415


View attachment 26416

On this job, those differences were significant, and I was able to make much better progress.

As I neared my target depth, I paused to chisel away the safety margins I had left and cut right up to my pencil lines. For the final adjustments I used a Record 2506 side rebate plane. For the first time ever, this was a job where it was useful to be able to remove the nose piece and plane right into the corner!

View attachment 26418

I soon reached this happy stage where the stone fitted snugly into what will be the base, leaving me ready to work on the top, in the next exciting instalment!

View attachment 26417
Good tutorial !
 
Excellent, Andy. Now, how do you keep your oilstone flat? I was brought up with an oilstone, and whilst I have Japanese waterstones and diamond plates and Scary Sharp, my oilstone is my first go-to.
But I know that my stone is slightly hollow. Not awfully so, but definitelt no longer flat. So how do I get it flat without spending a week sitting on the pavement with it (and the nearest pavement is 10 minutes drive away)?
 
Excellent, Andy. Now, how do you keep your oilstone flat? I was brought up with an oilstone, and whilst I have Japanese waterstones and diamond plates and Scary Sharp, my oilstone is my first go-to.
But I know that my stone is slightly hollow. Not awfully so, but definitelt no longer flat. So how do I get it flat without spending a week sitting on the pavement with it (and the nearest pavement is 10 minutes drive away)?
(Assuming my best Jacob voice.......)

Why do you want it flat? If it's hollow, it's easier to get a camber on your plane irons.

Seriously, he said that to me once, and whilst it's true, it also makes it difficult to sharpen wider chisels properly, because cambers aren't always that welcome on say 1-1/2" chisels. I resort to an old oilstone for my scrub planes, because it's easier to get a good camber for the very reason young Jacob mentioned.
 
Last edited:
Your first hag's tooth router, Andy, is the outlier (in my view). It's blade looks impractically steep. I'd need a good reason to not have a bed angle of about 45 degrees.

When I get a moment to just fiddle about in the workshop, I have in mind a roughing hag's tooth router, with a seriously cambered, even semi-circular, blade. That would be an experiment, to see if it would hog off a reasonable amount of material in fairly short order. One would then follow up with a more orthodox version to smooth things off.
 
Not wanting to get sidetracked into discussing sharpening... I am sure that there are many ways to maintain an edge. ;)

Responding to Mike's suggestion, I think a "roughing router" could work. It should be easy enough to slot a suitable gouge into a hole in a block of wood and try it out.

On the other hand, as my gouged chips got longer and thicker, I was being careful about grain direction. I made sure I was going towards a stopping cut I'd made first and I was raising the cutting edge towards the end of the cut, to make sure I didn't go too deep. That sort of adjustment needs the bare tool and a mallet.
 
I'm thinking more of a thumbnail round on the end of a flat blade. A very bold camber, if you like. A router plane version of a scrub plane.
 
I'm thinking more of a thumbnail round on the end of a flat blade. A very bold camber, if you like. A router plane version of a scrub plane.
Ah, that could work. Someone needs to try it!
 
Your first hag's tooth router, Andy, is the outlier (in my view). It's blade looks impractically steep. I'd need a good reason to not have a bed angle of about 45 degrees.

It likely comes into its own when working harder woods with contrary grain patterns, like Sapele with its interlocking grain which makes getting a reasonable finish quite difficult. With the higher cutting angle, you will be more scraping to depth rather than ripping up the grain with the lower cutting angle.
 
When I made my version of Paul Sellers' router plane, I made two blades for it. It would be simple to regrind one of them to have a rounded tip. It might be quite handy for roughing out the dovetail housings on the shelf unit (although that's cross-grain, which probably doesn't benefit as much from a rounded tip?). I might give it a go later.
 
Last edited:
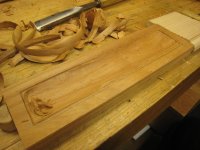
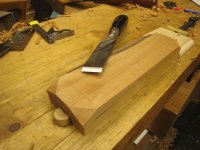
With the base finished, I could turn my attention to the lid.

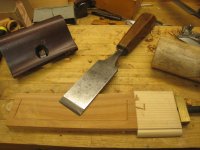
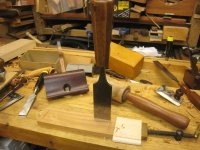
I had already drawn around the stone on the inside face, so the first step was to mark out a safe cut line inside that pencil line. I didn't bother showing this step on the box, but I do think that if you only have one 2" wide chisel, this is a good time to get it out and enjoy using it.

Mine is this fine old one:

IMG_0025.JPG


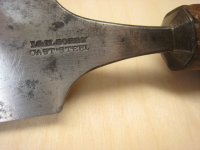
It's marked I & H SORBY CAST STEEL:

IMG_9019.JPG

This is a well-known, long-lived trademark. According to Geoffrey Tweedale, it was first registered by John Sorby Junior and his brother Henry in 1827. Ownership of the firm and its marks passed to Lockwood Bros in 1844 who continued to use it and re-registered it in 1877. In 1932 the name was sold to Turner, Naylor and Company who had became a subsidiary of William Marples, who kept the Sorby name in use through much of the twentieth century. (The letter I definitely stood for John, not Isaac as has been commonly thought.)

It's obviously very hard to say when a chisel was made, but this looks early to me and likely to have been hand forged and ground. The handle is tapered with eight unevenly sized facets but falls comfortably into the hand when not standing up on its own.


IMG_0026.JPG

The other chisels visible in this project are by Footprint and date to some time in the 1960s. I believe they were a special mail order offer to readers of the Woodworker.

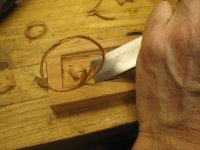
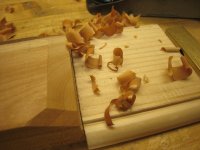
For excavating the waste I used a gouge again, but this time it was a Pfiell carving gouge with a deeper shape than the Marples joiner's gouge I used before. It seemed to work better for this, with nice thick curls being quite easy to cut.

IMG_0028.JPG

I could then just tidy up the shallow edges

IMG_0029.JPG

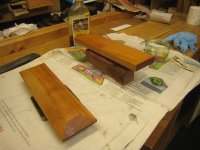
rout to depth, and pare back the safety margins, revealing a nice bit of spotty grain, photographed for your pleasure but doomed to remain unseen.

IMG_0031.JPG

With the lid fitted onto the stone, the next step was to mark out for the bevels. I used a pencil gauge for this, choosing lines that would eliminate the bark while leaving just enough thickness of wood.

IMG_0032.JPG

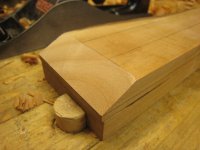
Next, I chiselled away the corners, to show me the angles I would be aiming for with the plane.

IMG_0033.JPG

I was surprised how well this went, but I guess it's just what happens when a bit of nice tight-grained timber meets a good sharp edge.

IMG_0034.JPG

IMG_0035.JPG

That was all done with a perfectly ordinary Stanley no 4.

I'll pause there as I seem to have hit a system problem by making this post "too long to be processed".
 
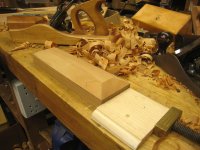
For the long bevels, I used my nice old Marples hybrid jack plane. A smart combination of light weight and easy adjustment. These were produced very briefly, from about 1961 to 1969. For the dedicated tool spotters here, do look at Roger Ball's labour of love Marples site, especially here https://williammarplesandsons.com/prefabricated-planes/ for more info.

IMG_0036.JPG

After that, I eased off the internal arrises with a bullnose plane and the external ones with a Stanley 60. Then it was time for a little oiling

IMG_0038.JPG

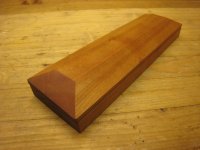
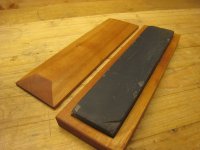
and here's the result:

IMG_0039.JPG

IMG_0040.JPG

Thanks again to Peter for the stone and Philip for the wood. 👏👏👏

And thanks to you for reading this far!
 
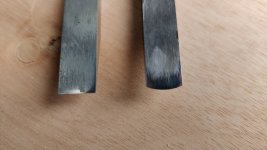
I had a very brief play this morning and ground a camber on the end of one of the router plane blades. Here it is next to its twin (which is desperately overdue a sharpen):

cambered_edge.jpg

I grabbed an offcut of ash and attacked it with the router plane. It seemed to cope very well with hogging off lots of material (although the mouth kept clogging with all the big chunks I was removing). The finish it left was very very rough (not helped by the fact that I didn't bother to mark out limits with some chisel cuts: I just hacked at the offcut largely at random):

rough_finish.jpg

If I had to remove a lot of material quickly, I think it would probably work, but I'm not sure I'd choose to use it over a chisel (or a pillar drill). I guess it would be more instructive to try it when I have something more tangible to do that would benefit from it, rather than just playing with an offcut.
 
Sorry but making that hollow is one job I would be more than happy to use a tailed router for. Would take but a few minutes.
 
Here it is next to its twin (which is desperately overdue a sharpen):
I'm afraid I have had to inform the chisel police. No doubt they'll be at your door any moment. I suggest you remedy the condition of that chisel promptly, and they might just take pity on you.......
For the long bevels, I used my nice old Marples hybrid jack plane. A smart combination of light weight and easy adjustment. These were produced very briefly, from about 1961 to 1969. For the dedicated tool spotters here, do look at Roger Ball's labour of love Marples site, especially here https://williammarplesandsons.com/prefabricated-planes/ for more info.

View attachment 26449

After that, I eased off the internal arrises with a bullnose plane and the external ones with a Stanley 60. Then it was time for a little oiling

View attachment 26450

and here's the result:

View attachment 26451

View attachment 26452

Thanks again to Peter for the stone and Philip for the wood. 👏👏👏

And thanks to you for reading this far!
Nice little project and write up, Andy.

Is that a double-sided stone? Because if so, not bevelling the top would have meant you could use it either way up without handling the stone. If you want a stone without a big chip off the corner, I've got a couple kicking around that you could have the choice of. (Is "of" a preposition? If so, a preposition is something one should never end a sentence with).
 
I'm afraid I have had to inform the chisel police. No doubt they'll be at your door any moment. I suggest you remedy the condition of that chisel promptly, and they might just take pity on you.......

It's not a chisel, it's a dedicated cutter for a router plane that I rarely use (the Veritas one works better), so hopefully I'll be able to fob off the chisel police by telling them it's outside their jurisdiction!

Nice little project and write up, Andy.

Is that a double-sided stone? Because if so, not bevelling the top would have meant you could use it either way up without handling the stone. If you want a stone without a big chip off the corner, I've got a couple kicking around that you could have the choice of. (Is "of" a preposition? If so, a preposition is something one should never end a sentence with).
"Ending a sentence with a preposition is something up with which I will not put" as Mr Churchill is reputed to have put it.
 
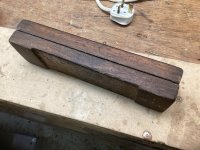
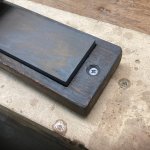
Just two suggestions that might be of interest
Forming a 3mm deep “foot”at each end of the base improves stability in use.
The use of a cs screw with just 1mm projecting through the base gives a good grip on the bench.
 

Attachments

  • IMG_1388.jpeg
    IMG_1388.jpeg
    219.2 KB · Views: 4
  • IMG_1390.jpeg
    IMG_1390.jpeg
    261.8 KB · Views: 4
Is that a double-sided stone? Because if so, not bevelling the top would have meant you could use it either way up without handling the stone.
That's a good point. I just chose the flatter side and put it uppermost. No idea why... ;)
If you want a stone without a big chip off the corner, I've got a couple kicking around that you could have the choice of.
That's a generous offer, but I'll pass, in favour of someone less well provided for already.
Just two suggestions that might be of interest
Forming a 3mm deep “foot”at each end of the base improves stability in use.
The use of a cs screw with just 1mm projecting through the base gives a good grip on the bench
Good points. I didn't really leave myself room for either of those methods. I've previously used another trad idea, panel pins in the base, nipped off short, which works well.

I was thinking I'd glue on some rubber feet if needed.
 
I'm intrigued to hear of pins and screw-tips to hold the box in place on the bench. I've only ever used mine in the vice.
 
Thanks Andy, that was a lovely piece of wood, makes a job like that so much more satisfying.
Mike, all these years, no, ALL THESE YEARS!!! And it’s never occurred to me to turn the box over!
I suppose the panel pin points would have to be on both lids though.
 
Not sure what you mean, but the pins are normally just under one end of the base. They work but don’t last very long. My original idea was that the screw could easily be replaced, however, the hardened screw seems to be hard enough to last decades!

P
 
Not sure what you mean, but the pins are normally just under one end of the base. They work but don’t last very long. My original idea was that the screw could easily be replaced, however, the hardened screw seems to be hard enough to last decades!

P
There is no base. Or, rather, there are two bases. My box is the same either way up.......the "lid" is identical to the "box". You put it one way up to use the coarse side, then put the "lid" back on and flip everything over to use the other side, without ever having to touch an oily stone.
 
There is no base. Or, rather, there are two bases. My box is the same either way up.......the "lid" is identical to the "box". You put it one way up to use the coarse side, then put the "lid" back on and flip everything over to use the other side, without ever having to touch an oily stone.
Ah, yes. I have one like that, but it's a horrid plywood thing from the days when I knew no better, so it doesn't get a photo on here.
 
A word of caution on the pins and screws to stop the box from slipping, i worked with an old joiner who did this and one day when fitting ash panneling in a house he whipped out the stone to quickly sharpen his chisel, laid it on the sheets covering the expensive hardwood floor and promptly gouged a deep scratch across it, cue two weeks of removing work already fitted and lifting nearly half the floor in the billiard room that i had spent six weeks on (floor had a border following the room with an inlay running 300mm around the perimeter of the room) to lift enough to replace the damaged boards meant around 40% of the floor had to lift. I was not a happy chap.
 
A word of caution on the pins and screws to stop the box from slipping, i worked with an old joiner who did this and one day when fitting ash panneling in a house he whipped out the stone to quickly sharpen his chisel, laid it on the sheets covering the expensive hardwood floor and promptly gouged a deep scratch across it, cue two weeks of removing work already fitted and lifting nearly half the floor in the billiard room that i had spent six weeks on (floor had a border following the room with an inlay running 300mm around the perimeter of the room) to lift enough to replace the damaged boards meant around 40% of the floor had to lift. I was not a happy chap.
You would have thought "an old joiner" would have known better, how frustrating! That floor sounds incredible! Do you have any photos?
Ian
 
You would have thought "an old joiner" would have known better, how frustrating! That floor sounds incredible! Do you have any photos?
Ian
Sometimes old joiners are the worst, complacency sets in when you do something day to day and people start to care less and less with the focus on just getting finished rather than getting up and walking to a stool or temp bench to sharpen.


The floor was a few years ago and, in a room, big enough to house a full-size snooker table and library about 20m wide by 40m long (place was enormous). I stated out flooring that room which had a band and inlay around the perimeter, once 1/3 of the way across it was lifted to take the band and inlay out two double doors and into a sitting room and hallway which were done the same way. The band and inlays really slow down the fitting of the floor as every corner has to be stepped together to allow the grain to follow the wall it also has to lay from one corner in a diagonal pattern to allow all the tongue and grooves to fit together (every board was T&G’d into the inlay on the end grain). This meant that lifting any board meant large areas had to come up to relay.


Unfortunately, it was before the mainstream use of cameras in phones so I don’t have any photos.
 
Back
Top