• Hi all and welcome to TheWoodHaven2 brought into the 21st Century, kicking and screaming! We all have Alasdair to thank for the vast bulk of the heavy lifting to get us here, no more so than me because he's taken away a huge burden of responsibility from my shoulders and brought us to this new shiny home, with all your previous content (hopefully) still intact! Please peruse and feed back. There is still plenty to do, like changing the colour scheme, adding the banner graphic, tweaking the odd setting here and there so I have added a new thread in the 'Technical Issues, Bugs and Feature Requests' forum for you to add any issues you find, any missing settings or just anything you'd like to see added/removed from the feature set that Xenforo offers. We will get to everything over the coming weeks so please be patient, but add anything at all to the thread I mention above and we promise to get to them over the next few days/weeks/months. In the meantime, please enjoy!

Ash bed WIP - Finished!

How tall are you Andy?
I am 6’2” and my feet can often be found poking through the turned “slats” at the end of my ancient shop bought pine bed.
On the subject of slats have you thought about those on the base? Quite a few sheds over here sell sprung beech slats for that purpose. When I enlarged my twins beds last year I bought old metal bed frames off ebay for next to nothing and reused the beech slats. I found the fixings to hold the ends loose in the frame without them falling out on Amazon I think.
 
Andyp":aqv7f548 said:
How tall are you Andy?
I am 6’2” and my feet can often be found poking through the turned “slats” at the end of my ancient shop bought pine bed.
On the subject of slats have you thought about those on the base? Quite a few sheds over here sell sprung beech slats for that purpose. When I enlarged my twins beds last year I bought old metal bed frames off ebay for next to nothing and reused the beech slats. I found the fixings to hold the ends loose in the frame without them falling out on Amazon I think.

Only 5'10" so average is good, thanks and toes are no problem!

And you're right about the slats. On another (simpler, single) bed that I made I did indeed buy slats from Ikea, better and cheaper than buying the materials.
This time round, my cunning plan is to re-use the existing slats from our current, 1980s pine bed, which are structurally ok. I'll also re-use the long rails to make the supports for the ends of the slats. I might re-use the bolts. I shall only be chucking out the really un-salvageable bits!
 
Taper? Dunno. I'm not sure I would taper mine at all.

Setting out the slats......I don't think I would have worked it out. I would have started at the centre, and put the centre of a slat on that, then done "hit-'n-miss" (ie gap = slat width) out to the outside. If that didn't work out perfectly, I'd have swapped the centre slat for a gap. One or the other is guaranteed to work. Your way works perfectly well too, but harking back to woodworkers of yesteryear, many would have had no maths at all, and would have had to rely on my method, or on a pair of dividers and repeated trial & adjustment.

As for bare-faced vs shouldered. Well, I actually don't think shoulders would be that difficult. Cut the bottom shoulders square and prepare the tenon, dry fit the outer frame as you have done already, and then lay the slat in place with the shoulder hard up against the bottom, and mark the top shouler with a knife. Your only difficulty is transferring that mark to the other side. The mortises could be cut whilst the top piece was still straight, so they're pretty straight-forward. If you need any wiggle room, then just cut your tenons under-width by a gnat's. Sideways one way and the joints get tighter, and sideways the other and they get looser. As Alf alluded to a week or two back, hand tool woodwork isn't meant to be a slow way of achieving a machine-made look.
 
Thanks Mike.

I agree - I was just surprised/pleased that the numbers came right - and might still use dividers on the actual layout step.

Your description matches the one that I am imagining - maybe I am spending too much time thinking, but what else could I do while away from home for nearly three weeks?

And "hand tool woodwork isn't meant to be a slow way of achieving a machine-made look" is a really good slogan to remember. A useful nudge!
 
My twopenuth is shouldered – I can imagine if it was me, making a right mess otherwise, mind you it only really applies on the bottom rail I suppose.
Not sure about having the gaps the same width as the slats, A bit of variation might be a little more interesting? Of course you could actually go completely bonkers and start off with narrow slats at the outside and wider ones in the centre with the gaps changing as well. No maybe not lol
 
Cabinetman":1ckkoiqj said:
......Not sure about having the gaps the same width as the slats, A bit of variation might be a little more interesting? ........

Yep, perfectly fair enough. I'd walk over to the scrap bin and pick out a piece of something a bit narrower, and using that as a spacer, lay out a dozen slats on the bench to see what that looked like.
 
I think this is looking very crisp. Amazing for the working space you have ! I generally end up dinging things shuffling them around to make space.

I would worry about going for barefaced joints. If you are planning to make the mortices then cut the curve, in most places any bruising of the mortice corners will be removed, but what will be revealed ? Will the mortice left when you've cut the curve be crisp, clean, tight and square ? I'm not confident I could do that.

I imagine the curve is so shallow as to not really be noticeably different to a straight line, but angled ? Getting the lengths exactly right will take care; I guess a slightly gappy shoulder at he top won't be seen too easily ?
 
Shoulders on the top of the headboard and shoulders on the bottom of the foot board.

Headboard, You will be looking up as you are lying down so you will see the top of the slats and the pillows/matress will hide the bottom.

Footboard You will see the bottom joint when you are standing and the top will be hidden.

Next question...

Pete
 
Thanks guys, all your comments are welcome, even the invitation to go bonkers! (As so often, where a build is for shared use, the design details are shared decisions, and equal spacing is what we have decided.)

I've now done a little experiment and have decided to go with shoulders everywhere - both ends of the bed, top and bottom, front and back. It is indeed easier to cut a scribed shoulder than a perfect mortise. There's no need for machine-friendly methods and it doesn't matter how long it takes (which will be quite a long time, I predict with confidence).

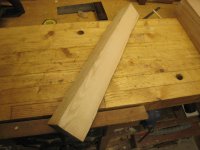
Here we have a wedge shaped bit of scrap ash, about the same thickness as the rails, with a split at the end and a curved line to stand in for the curve on the finished piece. Also a planed down slat which is actually a little bit narrower than the size I want, or what you might also call a "mistake". They'll do for a trial run.
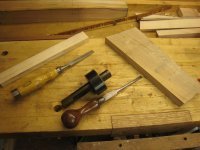
IMG_7810.JPG

I sawed the tenon shoulders and split the cheeks, then evened them up with the router. The tenon is half an inch thick so there's only an eighth of an inch to remove. This bit of ash is beautifully straight grained and cooperative.

IMG_7811.JPG

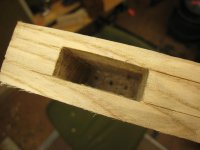
Here's a mortise ready, which as alert readers will spot, seems to have been cut with the wood in the vice. :oops: In my defence, I don't normally do that unless it's (a) on a bit of scrap and (b) the scrap is awkwardly wedge shaped.

IMG_7812.JPG

and indeed, it fits ok, though the mortise is too shallow at the present.
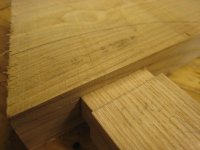
IMG_7813.JPG

I realised that at the deepest point of the curve, the mortises need to be rather deep for their width, deeper than I could easily make them by chiselling in the tough ash. I decided to bore them out, like I did earlier. For the real thing I can get some extra accuracy by using the bench drill again, but for this experiment I just used a brace and bit and my nice depth stop again.

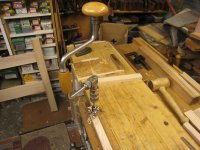
IMG_7814.JPG

IMG_7815.JPG

and here's a deeper hole

IMG_7816.JPG

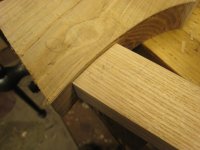
I then cut along the curved line on the bandsaw and tried the newly exposed joint. It fits, but the tenon is longer than it needs to be
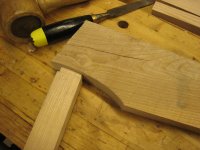
IMG_7817.JPG

I trimmed a bit off. To pursue the experiment to its logical end, I then cleaned up the curve with a nice little boxwood spokeshave
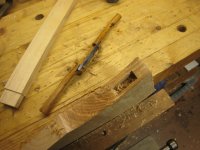
IMG_7820.JPG

and scribed the shoulder all round

IMG_7821.JPG

I then pared back to the line

IMG_7822.JPG

and tried the fit: near enough for something that will be hidden by pillows or bedding ;)

IMG_7823.JPG

and here's the other side, showing the edges slightly eased
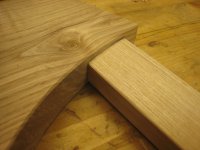
IMG_7824.JPG

So, it looks achievable. A few fresh thoughts will occupy me for a while:

- This took all morning; with 30 scribed joints plus 30 straight joints, I think I can speed up a bit.
- I can definitely gain some speed by not posting photos of all the identical joint making that will follow after this thinking phase is done!
- The tenons don't need to be very long for the joints to be firm.
- If I'm going to bore out most of the waste on these joints, I reckon I can rely on the holes to get the alignment right and skip the initial mortising in the bit that gets cut off. I can mark the mortise sides after cutting the curve and just chop down straight onto the bench.
- As long as the joints don't rattle, I wonder if I need to glue them at all? Leaving them dry would make the glue-up much simpler - four wet joints instead of 34. I could keep the slats in a straight line by temporarily clamping them between two boards. I can also cut quite generous chamfers on the ends of the tenons.


I still need to decide exactly how the long rails will join into the completed head and foot assemblies. It will probably be concealed bolts and barrel nuts holding stub tenons in place, with something to hide the bolt heads.

To be continued!
 
As you say Andy the mortices don’t need to be deep which got me thinking, another way of doing it on the not very seen much underneath on the curved rail, would be to run a groove along the curve and then infill between the slats a little bit like on a staircase Stringer between the balustrades. Just a thought, Ian
Ps if you made the groove the same width as the slats it would save you cutting all the tenons and the curved shoulders.
Pps you could use the bit of wood you cut to form the curve to make the infill parts so that they would match – devious or what!
 
Cabinetman":mcdjnphy said:
As you say Andy the mortices don’t need to be deep which got me thinking, another way of doing it on the not very seen much underneath on the curved rail, would be to run a groove along the curve and then infill between the slats a little bit like on a staircase Stringer between the balustrades. Just a thought, Ian

:text-+1: :text-goodpost:
 
Marking the shoulders the way you did in your photos, Andy, necessarily means using a pencil. I think I'd be tempted to place the rail on top of the slat and scribe directly, using a knife.

Back to the setting out....The other possible approach to have a think about is to set out from the outside (the corner posts) and work your way into the middle using whatever gap you are happy with. When you get to near the middle, make one over-width central "slat" (actually more like a splat) which might be 2,3, 5 times as wide as the rest. This could be pierced or otherwise shaped if you so desire, and would maintain the same gaps to the other slats. It's only an aesthetic decision.
 
Mike G":3qnmwdoo said:
Marking the shoulders the way you did in your photos, Andy, necessarily means using a pencil. I think I'd be tempted to place the rail on top of the slat and scribe directly, using a knife.

Then you are marking the slat from the back edge of the rail rather than the front. Which means the curved edge of the rail had better be quite square to the faces - not as guaranteed with hand tools as machinery. Though I imagine Andy has a choice of nice compass planes to show us shortly ..?
 
Well, I can see that a knife would work if it was following a convex curve, but in this case it needs to follow a concave curve, where the breadth of a blade would get in its own way. I could just use a pair of dividers to scratch a line, but a freshly sharpened pencil worked ok in the experiment.

And Tony, I was indeed thinking that I could have a rare opportunity to use my only adjustable compass plane...if that doesn't work, I can probably find a few alternative spokeshaves... ;)
 
Sheffield Tony":32l6mqwh said:
Mike G":32l6mqwh said:
Marking the shoulders the way you did in your photos, Andy, necessarily means using a pencil. I think I'd be tempted to place the rail on top of the slat and scribe directly, using a knife.

Then you are marking the slat from the back edge of the rail rather than the front. Which means the curved edge of the rail had better be quite square to the faces - not as guaranteed with hand tools as machinery. Though I imagine Andy has a choice of nice compass planes to show us shortly ..?

Well, that's only a matter of adjustment.......either of the curve, or of a shoulder. And is there really a front and a back? Even if there is, then just flip the rail over and do it the other way up.
 
AndyT":39rkjr7t said:
Well, I can see that a knife would work if it was following a convex curve, but in this case it needs to follow a concave curve, where the breadth of a blade would get in its own way.....

Well, traditional marking knives aren't the only way. ;) Mine comes to a point, and thus can manage both inside and outside a curve:

8ZxxY44.png

That image is to show the knife, not it cutting a curve. I realise a piece of cereal packet cardboard doesn't count.
 
Mike G":xzemqcvc said:
Well, that's only a matter of adjustment.......either of the curve, or of a shoulder. And is there really a front and a back? Even if there is, then just flip the rail over and do it the other way up.
Not sure that works on a curve, it would end up slanted the wrong way. And the trouble with adjustment is you have rather many to get gap free at once. Can't afford to overshoot !
 
I don't understand your point, Tony. You mark out whichever face of the slat you want by placing the appropriate face of the the rail over it and scribing with a knife. When you've completed your tenon, you make any adjustment necessary. You get the opportunity to do multiple adjustments, if necessary, because you do this end of the slat first. And if your curved face really is a way out of square, simply use a bevel gauge instead of a square when transferring the marks to the other face.

Incidentally, that's pretty much what I expect I would do if the rail were straight, only I'd put a small dot with the point of the knife and then mark properly with a square.
 
The slat shoulder being at an angle, it can only go in one way around. if you stack them and scribe, you mark (say) the front face of the slat from the BACK edge of the curved edge of the rail. So if you have finished the curve by hand and not got the curved edge perpendicular to the sides, it may show. But perhaps I worry too much. Well, in general I do ...

If the bottom rail is straight rather than curved, the idea of doing all the top ends first then maybe dry-fitting them and scribing a straight line across for the bottom shoulders sounds like a good one.
 
I'd just like to say that I really do appreciate discussion at this level of detail. I can't think of everything on my own and non-woodworkers are no help - they seem to sail through life unperturbed by any of it!
 
Sheffield Tony":2deg4k7q said:
The slat shoulder being at an angle, it can only go in one way around. if you stack them and scribe, you mark (say) the front face of the slat from the BACK edge of the curved edge of the rail. So if you have finished the curve by hand and not got the curved edge perpendicular to the sides, it may show. .....

Oh I see. Well, I covered that with the use of a bevel gauge: simply take an angle at the location of the slat and use that to mark out the short edge shoulders, and thus locate the ends of the shoulders on the other face. Make the tenon and then adjust the shoulders to fit. Or.......make sure you get your edges square! It's not hard.
 
Yes, you are probably right Mike. As I said earlier, on that gentle curve, over the width of the slat, the deviation from a straight line will be tiny - you could probably get away with just a straight (but angled) shoulder. Better number them all carefully though !
 
Still a lot easier to sink them all into a groove full width full thickness, no shoulders at all, then infill between, paring the infills is the only tricky part but if you get the grain going the same way all the time it’s not going to be a problem. It might not be traditional hand working but it’s certainly the way I would do it, it will save hours of work. Ian
 
Over the last few days I have made some progress on the slats, now I know how many I need and how wide they will be (15 of them at each end, 1⅝" wide and about 10 or 16 inches long). When I bought the ash, I did some very rough estimates and thought there would probably be enough left to cut all the slats. There was, just, so I think I don't need to buy any more wood or mix in different offcuts of ash from other projects.

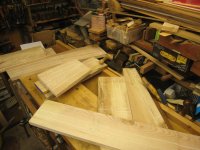
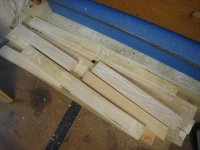
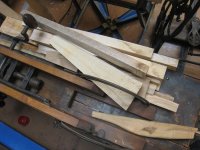
Here's a heap of the left over bits and pieces, with chalk marks in place, avoiding any splits or other defects.

IMG_7825.JPG

I cut these to rough size on the table saw, mostly about a quarter of an inch wider than they need to be. Unfortunately, most of the wood is about 32mm thick, when I only need 19mm, so there will be quite a lot of thickness to get rid of.
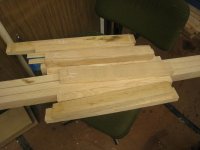
These are the longer bits for the head:

IMG_7826.JPG

and for the foot

IMG_7827.JPG

and the left overs

IMG_7828.JPG

There was a lot of counting and re-counting going on and I think I managed to cut one or two spares.

For the preliminary grunt work of wasting away the surplus thickness, I used my Bosch electric plane, hooked up to the workshop vac. It's good for this sort of thing, despite being noisy. The shavings all disappear nicely and it's a lot less work than hand planing the whole lot. It is however very crude and loves to take a chunk out as the tool leaves the wood - experience with a hand plane does not help at all.

IMG_7833.JPG

Unfortunately, my first go was a bit over-enthusiastic, leaving a skinny bit of wood that won't pass for being ¾" thick :evil:

IMG_7837.JPG

Never mind, it's a lesson to be more careful.

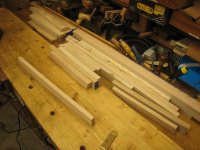
After the power tool fun, and several fresh vacuum cleaner bags, I had this tidier pile of parts, which I can assure you is NOT the same as the earlier piles.

IMG_7834.JPG

so it was time for plenty of this sort of thing

IMG_7839.JPG

and this

IMG_7838.JPG

Of course, there was plenty of another, closely related activity. I won't get myself banned by going into much detail, but there are some clues in this photo, which I offer just as a way of saying that it took up a noticeable proportion of the time spent:

IMG_7829.JPG

I'll just say that I don't care how anyone else does it but it's inescapably important and needs to be done about as often as an artist re-shapes the tip of their pencil. ;)

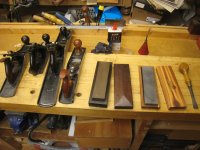
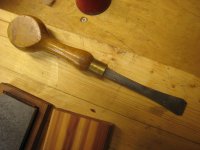
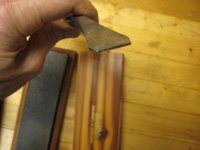
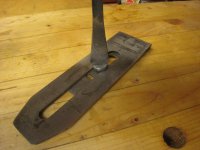
What I will say though is that I see too many people on YouTube, who ought to know better, undoing the cap iron screws on their planes with titchy screwdrivers that don't fit. That's a really bad idea, with the risk of damaging the screw head, slipping or even injuring your hand. Please, rest the iron on the bench or in the bench hook and use a screwdriver that fits. I made this one from a brace screwdriver bit and a salvaged handle and it works really well.

IMG_7830.JPG

IMG_7831.JPG

IMG_7832.JPG

And back on track, here's this morning's production so far, all smooth enough and straight enough. Exciting stuff, eh?! ;)

IMG_7840.JPG
 
Looking good Andy, I bet you’re glad that the slats weren’t 4 feet long having to plane all that off them, I’m one of the slapdash brigade I suppose, I’ve only ever used the lever cap to screw it down with, thinking about it I'm surprised that the chrome/ front edge hasn’t been damaged in 48 years of doing that on my goto number four. Ian
 
I'm surprised too!

I certainly have seen some manky looking lever caps though, so I've resisted temptation, but I can see that if you're working away from the bench, you do what you need to do.

And of course, I need a big screwdriver for my old wooden planes as well.
 
Andy, you disturbed some electrons!!

Were you not tempted to rip those over-thick strips down on your bandsaw, rather than using the electric plane? Just because I have a woodburner, I would most certainly have gained kindling rather than a bag of shavings.

Nice to see somene else using chalk. I think woodworkers are conditioned to use a pencil, but removing chalk marks is so much quicker and easier than removing pencil marks, and they're so clear and obvious in comparison too.

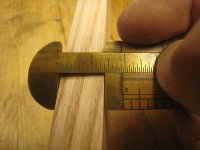
I love that rule-thingy with the sliding brass piece you've got for measuring width. I just need to find one that's metric. :lol:
 
Mike G":3v9b8vsv said:
Andy, you disturbed some electrons!!

Nice to see somene else using chalk. I think woodworkers are conditioned to use a pencil, but removing chalk marks is so much quicker and easier than removing pencil marks, and they're so clear and obvious in comparison too.

I was wondering where to get some chalk from (I still have a tiny bit from my teaching days) when I suddenly realised that my garden is full of the stuff (and great nodules of flint :evil: ) I now have severial nice lumps in my bench drawer.

AndyT":3v9b8vsv said:
And of course, I need a big screwdriver for my old wooden planes as well.

Veritas do a rather natty little affair for undoing plane iron screws. I'm really surprised that Mike G hasn't got one :lol: - Rob
 
Ah yes, electrons. I've never said that power tools are bad and I don't think they are. There's a bit of a trend at present for over-romanticising hand tools, but I don't want to be an extremist. What I show is just my own way, which suits me, at my stage in life.

Mike, it's funny you should mention the bandsaw. I did try using it to rip off the excess width and now have a collection of slim bits too potentially useful to throw away...

IMG_20220306_100103_DRO.jpg

But I forgot to photograph it at the time, so simplified the rambling write-up by leaving it out. It worked ok, but I really need to order some more coarse bandsaw blades.

As for the little boxwood caliper, metric workers just need to turn it over

IMG_20220306_100250_DRO.jpg

It's ideal, I think. No batteries, accurate and clear.

As for chalk, I bought mine from our local toyshop, but pound shops often have it too.

Rob, that dinky Veritas offering looks handy, but why buy a tool if you can make one for nothing? ;)
 
AndyT":kfp2uzq3 said:
Mike, it's funny you should mention the bandsaw. I did try using it to rip off the excess width and now have a collection of slim bits too potentially useful to throw away...

Steam bent lamp shade perhaps as next project ?
 
Sheffield Tony":2wxf40ay said:
AndyT":2wxf40ay said:
Mike, it's funny you should mention the bandsaw. I did try using it to rip off the excess width and now have a collection of slim bits too potentially useful to throw away...

Steam bent lamp shade perhaps as next project ?

Remembering the awful lamp shades from the recent woodworker bake-off show, I think a few years' supply of glue spreaders and paint stirrers is much more likely!

Back at the bench, I am happy to report that some more pleasant hours have passed and I have now planed all 15 slats for the head end, to thickness and to width. The foot end are planed to thickness only, so another day or so will be needed for them.

It's hard to translate peaceful workshop time into exciting photos, so these will have to do.

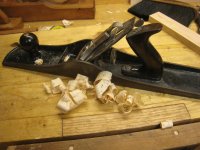
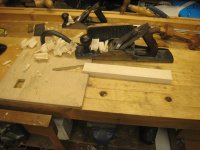
Although equipped with an assortment of planes, for bringing these bits to width I soon settled in to a simple routine. Getting one edge straight was done with my Stanley No 7, set fairly coarse and with the cap iron away from the edge. That means I got a little tear-out but could take shavings thick enough to make a difference. Here it is, with some shavings from a particularly twisted area of grain. You can see how the curliness reverses and that there are some holes torn out:

IMG_7846.JPG

Here's the wood that those shavings came from:

IMG_7843.JPG

To tame it so it looks like this...

IMG_7844.JPG

...some people might think you need an expensive, fancy plane. But the tool I keep on coming back to is this one:

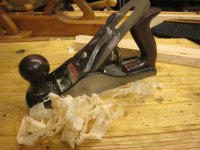
IMG_7845.JPG

a completely common, unmodified Made in England Stanley No 4, with plastic handles and the original iron. You've probably seen it before as it's one of my favourites. I bought it, new, at Barnitts of York in about 1978. It does what I need it to. I don't dispute the assertion that earlier Stanley planes are good, but you don't have to read much online before you find someone spouting off that anything from Stanley after WW2 is not worth having. I offer this as a little bit of evidence to refute that oft-repeated rubbish. Stanley were still making good honest planes within living memory.

I decided that I quite like doing a repetitive job like this, as I can watch myself getting better at it, finding little efficiencies. One thing I decided today was that it's not always a good idea to do your planing in the vice. It takes just that little bit too long to release the wood and check for squareness and straightness, making it easy to carry on just a bit too far.

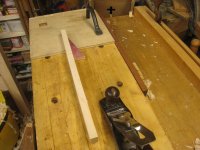
I much preferred using this simple notch and wedge arrangement on the top of the bench.

IMG_7847.JPG

IMG_7848.JPG

The wedge is purple to stop it getting lost.

(The only trouble is, I need to reach over the vice to get to that end of the bench, and it sticks out just a bit too much. I think I need to make a fresh hole or two so I can mount the notch in the middle of the bench. Stay tuned for developments!)

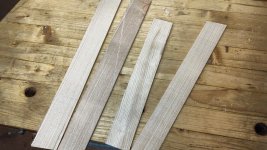
And so, after a day, this is what I have to show for myself - 15 sticks, straight, smooth and flat enough (I think). It's almost a shame that they don't all need to be glued together. ;)

IMG_7851.JPG

I need to lay them out and decide which one goes where, to get a reasonable arrangement. Some have nice lively grain, others are very plain. Then I need to number them very clearly, without needing to plane them again to get marks off. And repeat for the foot end.

Then I can cut the mortises, then the tenons on these slats, so it all fits together. What could possibly go wrong?!
 
AndyT":14kifipu said:
.....the tool I keep on coming back to is this one:

View attachment 3

a completely common, unmodified Made in England Stanley No 4, with plastic handles and the original iron. You've probably seen it before as it's one of my favourites. I bought it, new, at Barnitts of York in about 1978. It does what I need it to. I don't dispute the assertion that earlier Stanley planes are good, but you don't have to read much online before you find someone spouting off that anything from Stanley after WW2 is not worth having. I offer this as a little bit of evidence to refute that oft-repeated rubbish. Stanley were still making good honest planes within living memory.......

I couldn't agree more. I bought my number 4 in roughly the same year, new, from a hardware shop (remember those?). It's a cracking little plane, despite the plastic handles (since replaced, as the back handle broke) and plastic depth-setting knob. My only criticism is that there is some sort of coating on the cap iron which is peeling a bit.
 
Absolutely agree about not putting it in a vice to plane it Andy, it’s really good practice to just plane it up against something, it helps to keep your planing technique right, in fact clever though your jig is you could, I’m sure do it without easily enough.
Stanley Nr4, the only plane I ever use, it is really surprising just how flat it will plane wood- even for preparing long planks for jointing, never had all those other longer planes and can’t say I’ve ever missed them. Ian
 
AndyT":2rfi3vms said:
a completely common, unmodified Made in England Stanley No 4, with plastic handles and the original iron. You've probably seen it before as it's one of my favourites. I bought it, new, at Barnitts of York in about 1978. It does what I need it to.
My work office is just round the corner from Barnitts - it's still an amazing rabbit warren of a shop with a decent hardware section. I bought my first set of decent chisels from there :)
 
BigMonka":ris4jqzp said:
AndyT":ris4jqzp said:
a completely common, unmodified Made in England Stanley No 4, with plastic handles and the original iron. You've probably seen it before as it's one of my favourites. I bought it, new, at Barnitts of York in about 1978. It does what I need it to.
My work office is just round the corner from Barnitts - it's still an amazing rabbit warren of a shop with a decent hardware section. I bought my first set of decent chisels from there :)

Good to know. Pity about Stubbs though. That was a proper tool shop!
 
Cabinetman":cpglg47v said:
Absolutely agree about not putting it in a vice to plane it Andy, it’s really good practice to just plane it up against something, it helps to keep your planing technique right, in fact clever though your jig is you could, I’m sure do it without easily enough.
Stanley Nr4, the only plane I ever use, it is really surprising just how flat it will plane wood- even for preparing long planks for jointing, never had all those other longer planes and can’t say I’ve ever missed them. Ian

Today's session bears that out.

I did persist with the plywood planing stop, which I found I could use further over without even drilling any new holes.

IMG_7854.JPG

But there was no real need for the wedge and as you say, keeping it simple is good, and the no 4 was used on every piece. The more of this repetitive planing I do, the more I care about little efficiencies and just being able to pick up the work and check it for straightness etc matters more than having it secured to the bench. And on one piece, with some attractive grain, I found that I really did need to plane one side of the face in one direction and the other the opposite way. With the wood loose, it was no trouble to reverse it after each stroke.

At the end of the last session I had a set of slats suitable for the head of the bed, planed to width and thickness but not yet cut to length.

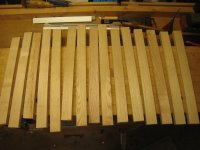
When I experimentally laid them out as a set (closer together than they will be, obviously) they looked like this:

IMG_7852.JPG

It's probably hard to see in the photo, but in real life it's painfully clear that the slats either side of the central one are a different colour and have a different character to the rest. They were cut from some of the kiln dried wood from Yandles. I'm quite happy using it for the long side members, which will largely be in shadow and concealed by bedding anyway, but putting them side by side looks like a mistake.

Luckily, I had plenty of offcuts such as this one

IMG_7853.JPG

which I don't need for anything else and are suitable for converting.

So, I had another happy morning dragging stuff around the workshop and spraying dust everywhere with the table saw, until I had another little stack of rough sawn parts.

After a few more hours of happy planing, they looked like this, much more suitable.

IMG_7855.JPG

It was an easy decision to make, to reject the wrong-looking bits, despite the effort I had already put into them. I didn't need to ask on here first; if I had, I'm sure you'd have all said to do it again properly.

I think it's something I have learned from other forum discussions and I'm grateful for the many thousands of sensible, helpful posts that I have read over the last few years.

Anyway, after some fiddling about, this is the current draft arrangement of slats, trying to make a harmonious arrangement of what grain patterns there are. I may need to change it again to get the other end of the bed right, but that will need a few more sessions yet.

IMG_7856.JPG

One day soon, I will get on to cutting some joints and such exciting stuff, but I do need to warn you now that spring and early summer are getting filled with absent-from-workshop interruptions to the flow, so please don't be surprised if I don't keep up this relentless pace. ;)
 
Back
Top