• Hi all and welcome to TheWoodHaven2 brought into the 21st Century, kicking and screaming! We all have Alasdair to thank for the vast bulk of the heavy lifting to get us here, no more so than me because he's taken away a huge burden of responsibility from my shoulders and brought us to this new shiny home, with all your previous content (hopefully) still intact! Please peruse and feed back. There is still plenty to do, like changing the colour scheme, adding the banner graphic, tweaking the odd setting here and there so I have added a new thread in the 'Technical Issues, Bugs and Feature Requests' forum for you to add any issues you find, any missing settings or just anything you'd like to see added/removed from the feature set that Xenforo offers. We will get to everything over the coming weeks so please be patient, but add anything at all to the thread I mention above and we promise to get to them over the next few days/weeks/months. In the meantime, please enjoy!

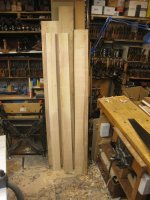
Ash bed WIP - Finished!

On the finish question, I've added sanding sealer to a tenth sample and given the others a second coat.
I've masked off a stripe of each treated area. They are now all propped up in the window and I'll report back when I can see a difference, calibrating against ISBNs (International Standard Biscuit Numbers ;)).

I phoned Wentwood, who confirmed that all my boards are air dried, down to about 12%.
I shall weigh them all, rearrange the stack to allow better airflow and monitor what happens. At the moment, the boards all feel seasoned and give a nice clear note when struck, not just a damp thud.

I don't think they will shrink enough to fit easily into the workshop though - I'll need to be inventive until they are shorter than the bench.

But I have made a single bed and full sized doors on there before now, so I stand a chance, if I keep it tidy.

One of our first projects when we moved in was a set of shelves for the kitchen, like the top half of dresser. It was all glued up, on the bench, ready to install, when I thought about measuring the clearance on the steps up from the basement. Fortunately, it cleared, but with less than an inch to spare!

This bed will come apart into easy sections.
 
AndyT":3shp5ebz said:
Picking up on some of the other comments and previous projects, thanks again for all of these.


John - one thing I need to decide is whether to have a mattress-depth gap at the top, like you have, or add another cross-rail, or bring the slats all the way down. Now that you have used yours for a while, how do you find it? Is the gap useful for bed making or do you wish it had been filled in a bit?

;)

Sorry for the delay Andy, I've been on R and R at my brother's in Cornwall - weather terrible but I'm refreshed.
The photo is a bit deceptive. The gap between the top of the mattress and the rail is about 30mm and so hardly big enough to get your hand through but fitting the bottom sheet is easy enough - I thought it unnessessary to extend the slats down to the bottom rail.
The long rails are 150 x 28mm, the head and foot rails are 75 x 28mm, the legs are 60 x 60mm and the vertical slats are 50 x 20mm in Oak with the centre ones 75mm wide in Utile as is the rest of the bed - intended this extra width as a cotrast but should have been twice that width to look right.
Hope this helps and god luck with the build.

John
 
Andy,

out of interest, have you worked out how much this bed is going to weigh? I've only ever made a small cupboardy thing out of ash and I've always been surprised by how hefty it is.

I wonder if bed frame + mattress etc. might add up to an awful lot. I know that one doesn't habitually shove beds around but every now and then you end up hoovering under them.

Andy.
 
Andy Kev.":1r1yt3n8 said:
Andy,

out of interest, have you worked out how much this bed is going to weigh? I've only ever made a small cupboardy thing out of ash and I've always been surprised by how hefty it is.

I wonder if bed frame + mattress etc. might add up to an awful lot. I know that one doesn't habitually shove beds around but every now and then you end up hoovering under them.

Andy.

That's a good question Andy.

If I ever walk round shops looking at furniture, I find I really don't like the stuff that is very chunky. Boards that are 50mm thick where 15mm would be plenty, table legs that would support a farm gate, etc. Some recent stuff which makes a play of being recycled can be like this - scaffold planks need to be sturdy, small stools much less so.

So, in general, I'm aiming at dimensions which are pretty close to the pine bed we have at the moment, with a bit of upgrading.

That means that the legs will be about the same section - about 65mm. But I think the long rails are a bit undersized and I will be making them deeper, about 100mm x25mm rather than 75 x 25mm. Ash should be a bit stiffer anyway, and that little increase will make a big difference. I don't want to lose space under the bed though, so won't be going any deeper. Much of the extra can be on top, where it will make a deeper "tray" for the mattress.

I've not done any calculations but I am confident it won't be out of the range of traditional bed construction, just a bit more than the pine. That said, most of the weight at present is in the pocket sprung mattress, which is fairly new and is not changing.

And it will definitely come apart into pieces that we can carry up stairs, through doors etc.
 
I'll weigh the bits later and compare with the old pine.

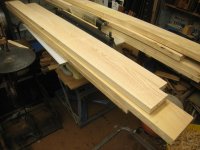
At the moment I'm letting the wood settle for a while, which coincides with other domestic distractions. I have weighed all the planks, so I can see if they are still losing moisture. I might find some time before Christmas to make a start but I don't know when.
From discussions about putting machinery upstairs, I've no worries about overloading - suspended floors generally survive crowds of heavy people ok.
 
My 4' bed is made from Utile and a bit of Oak, and Beech for the mattress slats and it's easy enough to move about. Not sure how the weight of Ash compares with Utile.

John
 
colour comparison.jpg

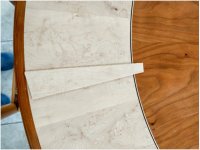
Sorry to be coming in a little late to this discussion. This birds-eye maple was given one very thin coat of Osmo Raw (which contains a little white pigment) and then two coats of Osmo Top Oil. The loose piece is a piece of scrap, newly sanded before being treated in the same way, 6 months after the original was treated. There was no discernable difference in colour. Two years on, the maple is very slightly creamier, but by no means yellow.
 
Thanks for all the input on finishes and colour. I think I know what I will do, but I'll wait until later in the build to decide.

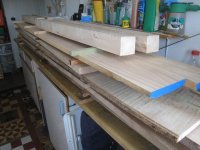
Meanwhile, the stack of wood has been quietly sitting there. I had to shift it all onto the bench for a while, so some work could be done on the house. I think you'll see why I didn't do any work on it when all the wood was in the workshop:

IMG_20211025_150037_DRO.jpg

But that's all done now and I have had the pleasure of rebuilding the stack again:

IMG_7674.JPG

Really attentive readers may spot that I roughed out all four legs, but there's another change as well.

After several sessions going through this lot with a cutting list and marking out which pieces I could get out of each board, I realised that I didn't have quite enough wood. Some boards looked big but had too many defects to yield more than a single piece.

So I decided to make my first trip to Yandles. And it was just as I expected; a really wide range of boards, planed on one side, clearly priced, and as much time as you want to sift through the stacks for the right boards for your project. Hence the two new bits with the blue ends which will be the long rails on either side.

And although the shopping experience was lovely, I do have two little misgivings. One is that they only had ash in inch or two inch boards. Most of what I have already is ex 1¼". So these two may be a bit thin. I'm telling myself that I can fix that by making them 4½" deep rather than 3½". Also, I'll glue the old rails onto the backs, to support the ends of the slats, so the whole construction will be stronger than before.
The other thing is that this is probably the kilned ash that Rob warned me about... :eusa-naughty:

However, in my defence, I did avoid a few boards which were noticeably much lighter than the rest, and I can tell myself that the work to be done on these is pretty minimal - saw, plane, cut two stub tenons - so even if it is a bit recalcitrant, I expect to manage it.

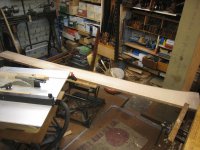
Well, that's a lot of rambling words without any woodwork, so here are a few photos of how I spent this morning. What they don't really convey is the effort of twisting these long bits of wood through two doorways and up a step to get them in to my very full, far from spacious workshop without smashing the lights.

You'll recognise the usual steps by now - crosscuts on the Workmate, because that's what fits in the room and can be wedged level on the sloping floor. Rip cuts on my cheap and basic Axminster tablesaw from the late 90s, which can just about work if it's lined up so the timber goes corner to corner.

IMG_7677.JPG

IMG_7679.JPG

IMG_7681.JPG

IMG_7683.JPG

And so, after a pleasant work-out, I now have most of a set of parts. These are all oversized, but much easier to handle. I think they are all dry enough to carry on with, but will leave them a little while to make sure.

IMG_7684.JPG

At present, I'm still intending to hand plane this lot. I tell myself that it's like choosing to go for a walk - yes, I could get to the destination quicker by driving, but my aim is to enjoy the journey. If it's all too much, I know I can take up any of several kind offers of help with machining.
 
AndyT":329v5ork said:
So I decided to make my first trip to Yandles. And it was just as I expected; a really wide range of boards, planed on one side, clearly priced, and as much time as you want to sift through the stacks for the right boards for your project. Hence the two new bits with the blue ends which will be the long rails on either side.

And although the shopping experience was lovely, I do have two little misgivings. One is that they only had ash in inch or two inch boards. Most of what I have already is ex 1¼". So these two may be a bit thin. I'm telling myself that I can fix that by making them 4½" deep rather than 3½". Also, I'll glue the old rails onto the backs, to support the ends of the slats, so the whole construction will be stronger than before.
The other thing is that this is probably the kilned ash that Rob warned me about... :eusa-naughty:
You'll find it's quite nice stuff to plane, and most of the boards are very white and very clean...you might even get a bit with some olive it it. It's also quite reasonably priced, which is always a bonus. It's really nasty though, if you need to do some hand cut joinery (aka 'shovetails') which involve chisel work across the end grain. Chopping/sawing through cast iron might be a little easier.

Conversely, I've just finished hand planing some fantabulous air dried, rippled English Ash which has the consistency (as we discussed) of a very hard cheese, which sounds odd, but it's the best way I can describe it - Rob
 
Another day, another update! Can I keep up this breakneck pace? Probably not, but it's nice to have a project on the go again, and one which may well take quite a while.

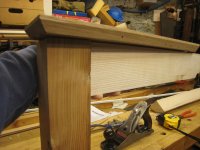
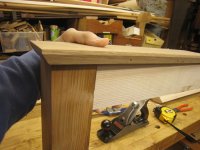
One thing I forgot to say was that I don't have a full size drawing of this bed; we'll see whether that comes back to bite me later on. However, many of the dimensions, as I have mentioned, are set by the old bed, so I can re-use some of the parts. What's harder is knowing exactly how big to make everything. I'm aware that a few mm can be the difference between something looking harmonious and it just looking clumsy. So I did spend some time experimenting with dimensions of the legs, the cross rails and the chamfered capping piece that goes across the top.

Here we have the results of that time: a bit of fence post, planed down to 2 5/8" square, with a scrap of ash at 3½" wide and a bit of oak, ¾" thick with a 60° bevel.

IMG_7675.JPG

IMG_7676.JPG

What do you think? I decided on two things, both reversible. One is that the top rail needs to be thicker, probably 7/8", the other is that it's really critical that it sits forward of the top of the leg. In other words, the chamfer mustn't meet the vertical surface of the leg; it has to be set forward of it. So my capping rail has to be thicker and wider than the offcut of oak seen here.

My first job this morning was to tackle the two boards which will make the side rails. These are not far off the required size.

Thickness is ex 1" and I should be able to keep that up to about 7/8" - an advantage of hand planing, I believe - what's the minimum cut you could make with a planer or a thicknesser?

IMG_7687.JPG

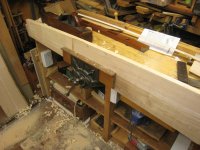
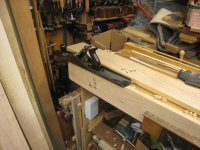
The challenge is the length. These are just over 8' long, about the same as my bench, which has very little spare space at the ends. I'm not complaining - I built it that way - and I take full responsibility for the working conditions. :)

There's just room for the plane iron to clear the left hand end without hitting anything:

IMG_7690.JPG

but the right hand end does need me to grasp the front knob and plane on the pull stroke:

IMG_7691.JPG

You'll notice that the far end is resting on a spare bit of wood cramped under the bench, but encouragingly, these boards barely deflect when being planed.

Next I selected the best bits of each one and trimmed them down to the proper length, plus a bit. Not sure why I didn't do that first!

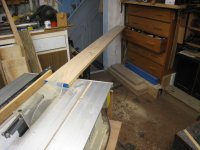
Then it was time for some more comical, corner to corner table sawing. Here's the infeed side:

IMG_7692.JPG

and here's the outfeed:

IMG_7693.JPG

I am very safety conscious when using the table saw, so as well as needing time to move it, I need to wedge it level and make sure that there is room all round. I'm not saying this to recommend my way of working - with hindsight, I'd have been better off buying a bigger bandsaw - but it's really just my way of showing how machine woodworking isn't a quick way of working if you do it in a small, crowded space.

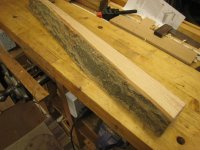
The only other thing I got done was to debark all the useful looking offcuts. I did this because the outer layers are where you'll find any flight holes and I wanted to minimise the risk of any pests emerging and finding a new home, or of SunnyBob burning the house down as a precaution on one of his trips back to the UK. :)
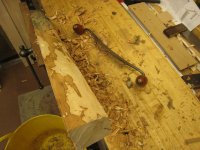
I ripped most of the bark off on the table saw, but for the thick bits I found that the quickest, easiest way was to use a drawknife.

There's enough in this lump to make a few hammer handles, or legs for a low bench, so it's worth keeping.

IMG_7697.JPG

The drawknife is a French one, bought on eBay, new old stock.

IMG_7698.JPG

I don't know who made it, but I think it might have come from one of the many companies that used to be concentrated along the river Tarn, not an area famous for its striped wildlife, but where is?

IMG_7699.JPG

And in a further demonstration that Sheffield was never the only source of good tools, I finished off with a modern day scrub plane that I believe to be made by Pinié in the Czech Republic, one of the very few contemporary volume manufacturers of wooden planes:

IMG_7702.JPG

Next time - some more planing and maybe a digression or two!
 
AndyT":1lxj0y8t said:
Another day, another update! Can I keep up this breakneck pace?
Thickness is ex 1" and I should be able to keep that up to about 7/8" - an advantage of hand planing, I believe - what's the minimum cut you could make with a planer or a thicknesser?

Steady Andy, I'm getting giddy with all this pace.

About all I can contribute is that I can usually take off 0.3mm with my four post thicknesser but prefer to limit to 0.5mm per cut to ensure no tell tale marks from the drive roller so taking off 1/8" I'd do two 1mm passes one on each side followed by two 0.6mm passes to finesse each face. Machine planing can be very precise don't you know and a well set up machine produces no snipe and no discernible ripple.

Bob
 
I'm impressed with your ability to make absolutely the most of the space. I have a similar problem, although you can plane to the end of the piece, the plane throws all the shavings into the cupboard ! :lol:

The longest piece I've prepared yet was 1.7m for a bath panel.
 
If I were closer, I'd offer you use of my workshop. Yours is just a tad inconvenient for anything longer than a few feet.

I've got to hand plane some 2.5m boards shortly for my dining table, which is some 700 or 800mm longer than my bench. I'm currently pondering on the various alternatives, none of which include propping it on the open drawer of a chest of drawers. :lol:
 
Andy’s next project?

A bigger wirkshop. :)

With the level of care you are putting in so far the bed is gonna be a good ‘un.
 
AndyT":22yg14vw said:
And in a further demonstration that Sheffield was never the only source of good tools, I finished off with a modern day scrub plane that I believe to be made by Pinié in the Czech Republic, one of the very few contemporary volume manufacturers of wooden planes:

View attachment 2

Next time - some more planing and maybe a digression or two!

Andy, Andy, Andy...

a purchased roughing plane. What are you thinking about.

Make one yourself

Roughing Plane 14.jpg

Keep up the good work. Beds always seem to me to offer some marvellous scope for carving, or silly bed posts.

We have one of these.

Venetian bed.jpg

I wouldn't know how on earth to start making it though. Other than a lathe I suppose.
 
Thanks for the encouragement everyone, it really does help. Even the bed design with the narwhal tusks at the corners!

But the only way the workshop can get bigger is if I dig through into the neighbours' houses or if I get rid of all the tools - neither of those is going to happen. I'd have to get rid of my other scrub plane, which is user made (just not by me).
 
Hi Andy, pesky worms will also be found in the sapwood not just the bark. And just to depress you, I built my bed from kiln dried American Ash a couple of years ago and within a few months they emerged from one stile of the headboard (all heartwood), my workshop is as dry as a house, did they survive kilning? Did they munch their way in after kilning? But supposedly they don’t like dry wood. Don’t know but it’s bloody annoying. Ian
 
Thanks for the warning, Ian. I do have some pale filler, just in case!
 
Now that the bits of wood fit on the bench, progress has calmed down to something more orderly. Not much to show for it though!

Years ago, when the top of my bench was a chunk of kitchen worktop, I sometimes used to lay a strip of flooring grade chipboard on the top, held by the bench stop and a batten in the vice. This gave me a nice flat surface and I fitted strips of ply as stops. It is still the quickest easiest way I have to arrange the bench for this sort of planing job. There's nothing to get in the way. The work can be picked up and turned over or round without undoing clamps.

IMG_7708.JPG

I did almost all of the planing with just two Stanley planes - the 5½ and the 4½ - two of my most useful and reliable planes.

They soon took me from sawn

IMG_7709.JPG

through this stage with a few stray saw marks

IMG_7710.JPG

to this which is smooth enough, bar that pesky bit of reverse grain at the tip which will probably get sawn off.

IMG_7712.JPG

I expect this is more detail than some people would want - but it filled a pleasant morning and really wasn't very hard work. I don't need to reduce the dimensions of any of these boards, just get them smooth.

I now have a stack of wood half-done

IMG_7714.JPG

and some free kindling / biodegradable packing material.

IMG_7713.JPG

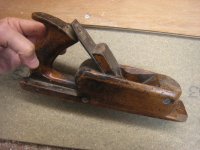
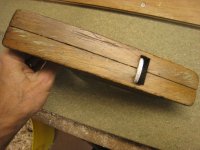
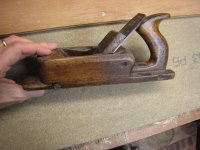
And especially for Tiresias, I managed to find my other scrub plane. I reckon it's home made, using the method shown by Charles Hayward in his wartime book on making tools, where you saw a block of wood in half so you can cut the mouth of the plane easily, then fix the two sides back together.

IMG_7715.JPG

IMG_7716.JPG

IMG_7718.JPG

Well worth 99p on eBay and even I don't need a third one!
 
Dr.Al":2ygqysld said:
AndyT":2ygqysld said:
I expect this is more detail than some people would want

Definitely not more detail than I want. I'm loving every bit of this thread, so please don't abridge it!
Me too!

I enjoy the detail of your threads Andy, don't change 'em.
 
Agreed. The more detail the better! I’ve got some self milled ash drying so I’m keen to see how this goes.
 
AndyT":whrzcatc said:
........I expect this is more detail than some people would want..........

Not for a second. That's what woodworking is: taking care of the details.
 
Thanks all for the licence to go into detail - I'll do my best!

I did a bit more planing on Tuesday but that was just the same as I've already shown.
And I'm not doing any today, as someone stuck a needle in my arm yesterday and it's a little bit tender. ;)

So, putting arms to the back of our minds, lets have a look at the legs.

You've already seen the original plank. Ex 3", with big splits at either end. I had to saw it in two to get it home.

IMG_7659.JPG

And here are the the legs I cut out of it, on top of the stack of bits.

IMG_7674.JPG

I cut them well over length and ripped them to 3". I then planed them a little just to clean up the saw cuts. Then I left them in our well-ventilated, unheated utility room. I've read plenty of advice about letting newly-cut timber acclimatise slowly before making it up. They have stayed in there unmolested.

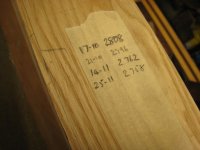
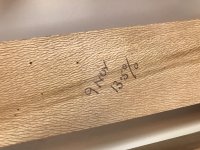
I don't have a moisture meter but these are all under 5kg so ok to weigh on the kitchen scales, and that's what I have been doing, whenever I think about it, noting the weight of each one on a bit of masking tape.

IMG_7721.JPG

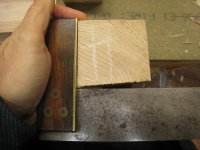
They are all losing a little bit, fairly slowly. They have stayed reasonably straight, but are definitely showing the sort of shrinkage pattern often illustrated in textbooks, where a square billet becomes prismatic:

IMG_7720.JPG

That's a right angle at the top left, but I think you can tell that the others aren't!

Fortunately, the minimum dimension at the moment is still a smidgeon above the 2⅝" that I am aiming at.

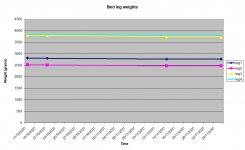
How much longer will it be before the shrinkage stops? I don't know, but seeing as I am sitting at a PC I might as well draw a graph of the story so far, five and a half weeks in:

bed leg weights 25-11.jpg

Does that look about right? Will I need to stick extra bits on as these dwindle away to matchsticks? Stay tuned! :)
 
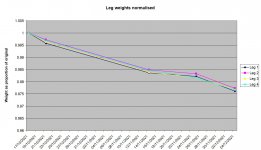
Maybe consider normalising your data to the starting weight of each piece ie divide each result by its starting weight and the plotting with a y axis maxima of say 1.05?

Would be easier to see what is going on and spot anything unusual going on for leg to leg?

Just a thought

Bob
 
9fingers":258pzpsl said:
Maybe consider normalising your data to the starting weight of each piece ie divide each result by its starting weight and the plotting with a y axis maxima of say 1.05?

Would be easier to see what is going on and spot anything unusual going on for leg to leg?

Just a thought

Bob

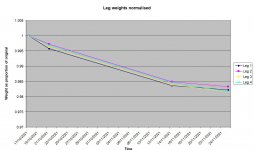
That's a challenge! I think I can follow that suggestion, but it does remind me how long it is since I used Excel or thought about any of this sort of stuff. Is this what you mean Bob?

bed leg weights normalised 25-11.jpg

It does (reassuringly) show that the rate of weight loss is less than it was in the first week. Many thanks, Bob.
 
Excellent Andy.
It's years of practice at work having to present research results in an optimum way to illustrate a particular trend.

It's the shape I'd expect and gradually the curve will likely become asymptotic to a terminal value representing the mean humidity in your storage space.

Bob
 
AndyT":36ki3bco said:
How much longer will it be before the shrinkage stops?

Just to go slightly off topic Andy, you could be in the the long haul. These two bookmatched bits of London Plane are secondary conditioning next to SWIMBO's fossil cabinet. They're for a display case and will eventually be used in the glazed door, similar to SWIMBO's elm cabinet:

IMG_6220.jpeg

In this particular instance, it's absolutely crucial that the wood is as dry as a dry thing and won't warp or twist as it could result in a badly fitting door and/or a shattered pane of glass. They've been there now for at least three months but one bit is stubbornly refusing (or so it appears) to give up it's moisture:

IMG_6222.jpeg

That was tested with the Ax moisture meter (https://www.axminstertools.com/brennens ... tor-950995) which is a pretty good piece of kit, but I think I'm going to have to leave both bits there for a while longer.

That said, I don't think you need to get your ash anywhere near 6-7% MC and I would be happy with around 10%.

Apologies for the hijack - Rob
 
Interesting, thanks. I really appreciate a relevant digression like this.

I can see that you really don't want wood framing thin glass to distort at all.

It may be a bit late to suggest it, but I wonder what it would look like if you plotted total weight alongside measured moisture content, over time. I'm wondering if they would always show the same rate of change. Or maybe there's a difference because of how the weighing method gives information averaged over the whole piece, while the meter gives a sample reading at one location. (Or do you take several readings and average them?)

Perhaps I'll get Richard Jones' book for Christmas this year and find the answer in there!
 
AndyT":ypqrizk4 said:
Perhaps I'll get Richard Jones' book for Christmas this year and find the answer in there!
I have it; it's a good and informative read but quite hard going - Rob
 
Cabinetman":20zxr6a7 said:
Well after a little diversion down the maths rabbit hole, had you thought about adding a bit of decoration? May not be your cup of tea, this is the foot end of my Ash bed. Ian

Well, I think that looks rather stylish, and I hope I could do something similar without messing it all up. However, I shall need to consult with the other user of the bed, and I expect she will be less keen. :(
 
Hello Andy
I’ve been following your thread with great interest, as SWMBO and I have recently been talking about me building a double (or maybe king size) bed to replace our existing divan. Thanks for your very informative account!

Now this may seem like a stupid question, but what will be the dimensions of your double bed? I appreciate that a double mattress measures 1900 x 1350 mm (6’ 3” x 4’ 6”). Are you using these dimensions, adding any ‘wiggle room’, or working to the size of an existing mattress?

Many thanks
Les
 
Nice to see you back here RouterMonster.

I'd suggest buying your mattress before finalising the dimensions if the mattress is to sit into a recess* in the base.
The chamber maid will thank you for a little extra room to slide a hand in to raise the mattress corner when fitting sheets.

*I made an ottoman style storage bed a while back and decided on a flat platform for the mattress to lie on and it shows no sign of sliding around.
Some details here https://www.thewoodhaven2.co.uk/viewtop ... 62&p=61372

Bob
 
Routermonster":3d9to0e0 said:
Hello Andy
I’ve been following your thread with great interest, as SWMBO and I have recently been talking about me building a double (or maybe king size) bed to replace our existing divan. Thanks for your very informative account!

Now this may seem like a stupid question, but what will be the dimensions of your double bed? I appreciate that a double mattress measures 1900 x 1350 mm (6’ 3” x 4’ 6”). Are you using these dimensions, adding any ‘wiggle room’, or working to the size of an existing mattress?

Many thanks
Les

Thanks for asking - this is just the sort of detail I've been thinking about.

We have a very nice mattress, standard double size, that we will be keeping. On the current bed, this is just right on the length, but a little bit narrow and leaves some of the supporting boards visible along the sides. So I plan to keep the same length as the existing, but lose an inch in the width. This should fit in with another part of the design, which is to re-use the existing pine side rails as internal slat supports, inside the new ash sides. So the length of the new side rails can't be longer than the old ones and might as well be the same.

The side rails and cross rails are set into the upright legs at suitable positions for mortices to go in the legs. That makes the free space for the mattress a little bit bigger than the lengths of the rails.

In my design, that means that the space for the mattress will be 53½" wide and 75½" long, or 1359 x 1918mm. Most of the width of the rails is below the level of the mattress, so the "tray" in which it sits is only about an inch deep. At this point it's all about compromises between the height of the top surface, the depth of the mattress, the width of the side rails and the space underneath for existing storage boxes.

All these numbers will get checked again before any wood is cut!

And in other news, for anyone wondering when there will be any progress on this and whether I have been asleep all the time...

I've needed to move the stack of timber again, and have re-weighed the legs again. I really don't want them to go out of square after cutting to finished size, so I'm not rushing ahead while they are still losing weight.

Here's an updated graph, showing that they have lost more moisture, at a slightly faster rate, maybe because of the cool dry weather over most of the elapsed time since the last measurements.

bed leg weights normalised 04-12.jpg

I'd like that graph closer to horizontal at the end!
 
Bob and Rob - thanks!

Andy - thanks for your latest update. You’ve mentioned rail thickness and space for under-bed storage - that’s a ‘dimension’ question I forgot to ask. How high are your storage boxes?

An issue for us concerns the size and weight of our sprung double mattress. SWMBO insists that we turn it regularly (- either side-to-side or end-over-end). We manage because we can slide it off our divan base, but it would be a different matter lifting it over a bed with a footboard. Hmmm - we may need to investigate single mattresses side by side.

Les
 
Andy - are those weight reductions in a heated house, or an unheated space?
 
Back
Top