• Hi all and welcome to TheWoodHaven2 brought into the 21st Century, kicking and screaming! We all have Alasdair to thank for the vast bulk of the heavy lifting to get us here, no more so than me because he's taken away a huge burden of responsibility from my shoulders and brought us to this new shiny home, with all your previous content (hopefully) still intact! Please peruse and feed back. There is still plenty to do, like changing the colour scheme, adding the banner graphic, tweaking the odd setting here and there so I have added a new thread in the 'Technical Issues, Bugs and Feature Requests' forum for you to add any issues you find, any missing settings or just anything you'd like to see added/removed from the feature set that Xenforo offers. We will get to everything over the coming weeks so please be patient, but add anything at all to the thread I mention above and we promise to get to them over the next few days/weeks/months. In the meantime, please enjoy!

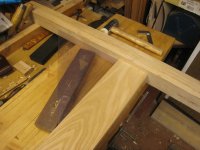
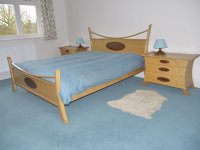
Ash bed WIP - Finished!

Cabinetman":3o8pwnca said:
Looking very neat Andy, what decoration if any are you doing on the leg tops, I always like to plane the flat that’s left with a super sharp very fine plane to put a shine on the end grain. Ian

The plan is to have a board, laid flat covering the tops of the legs and the top edge of the horizontal rail. This will be quite wide, chamfered underneath.
 
Pete Maddex":3vsg0xp4 said:
I have a few woodcock chisels and my favourite one is more like a pairing chisel it is very thin almost like it’s a warn down or been snapped off and reshapened. Pete

It's impressive how skilled the old Sheffield grinders were. According to descriptions by people like Ashley Iles and Ken Hawley, they worked without jigs or tooling, getting their results by eye and skill. This meant that they could swap from one size or style to another, according to what was being ordered, without delay. That enabled manufacturers to offer a much wider range of patterns and sizes than we'd see today.
 
AndyT":6x0fxx4k said:
I want to do a lot of easing of the joints (so there's room for glue)

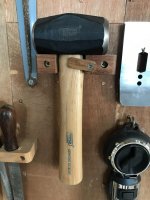
This is something I don't understand Andy; there's no need to 'ease' any joints. All you need is a layer of glue that's a molecule thick between two surfaces and it'll do the job. If you really do feel that a joint(s) is too tight, I'd advise planishing the tenon with a hammer to squish the fibres down a fraction; as soon as the glue hits it it'll expand again and you'll have a really tight joint.

Apparently, this is the reason that one surface of a Japanese 'geno' hammer is slightly convex as it's meant for this very purpose - Rob
 
Thanks for picking up on that Rob. I guess I was merging two thoughts. One issue is that although the joints slide ok at both ends of the slats when assembled separately, there's a bit of tightness on some when constrained at the opposite end.

The other thing is my worry that when I apply the water based glue, it will swell the wood slightly. I think this happened on a bookcase build once. The joints were ok dry, but getting everything together at once needed a degree of panic and bigger hammers than planned.

So the idea of hammering the tenons does appeal, or perhaps I should add hot water to raise the grain, then pare back?
 
I guess it might depend on what glue you plan to use ? The liquid hide glue seems to allow parts to slip together nicely. Titebond 3 for me seemed to make the wood swell before it was assembled leaving a fraught job to assemble. Particularly bad if - as Andy has here - you have a lot of pieces to glue / manoeuver into position in one go.

Looking good Andy.
 
Definitely the liquid hide glue, for the longer open time. But that's what I used on the troublesome bookcase too.
 
AndyT":10u4t8rt said:
... a degree of panic and bigger hammers than planned.

So the idea of hammering the tenons does appeal, or perhaps I should add hot water to raise the grain, then pare back?
Try hammering the tenon on a gash joint Andy; it's really surprising how much it can be squished and once the glue is applied, it'll expand again. If you're after the ultimate 'tapometer' then these:

IMG_6925.jpeg

...come very highly recommended. SWIMBO bought me this a while back and it was as cheap as the proverbial chips (about a tenner, possibly a tad more). A favourite tool of the late and very great Alan Peters and if it was good enough for him, it's good enough for a chosen spot in anybody's 'shop :D - Rob

Edit - somewhere on my InstaG page there's a video of a Japanese geno hammer squishing a tenon!
 
Andy, I am in awe of your hand skills. I have a TUIT bed in my head. Been there for the last decade or so, not a million miles away from your design. But one of the many reasons that it has never been realised is the difficulty of making the curved shoulders of the M&T joints perfect. The temptation is to keep the underside of the top rail straight and just have the curve on the top, but yours is much more elegant, and a lot harder, to boot. :eusa-clap: :eusa-clap:
 
Don't worry Rob, I have a "selection" of hammers in different styles and sizes ;)

And Steve, it's very nice of you to say that, but there are lots more opportunities for errors before I can say it's finished... My last workshop session consisted of writing out a lengthy list of operations to do to the ends, before I move on to anything else. The order will get a bit critical when I have to dismantle the old bed to get access to parts that are going to be re-used... I'd like to minimise the length of time when we just have a mattress on the floor, especially as final assembly can only be done in the bedroom - there's not a big enough space anywhere else in the house.
 
I also have been at the pre-contemplative stage of a bed build for longer than I'd care to admit. This is setting the bar dangerously high for my liking.

I've seen folk using parallel jawed tools like stilson's or those fancy knipex ones to crush tenons a smidge. I'm not sure I have the dexterity to do it with a hammer (perhaps I need another hammer!)

I once did a similar glue up on a garden bench. I was using PU glue because it was an outdoor thing and so got the benefit of lubricating the joints and long open time, but the cleanup wasn't half tedious and I was worried that the foam would defeat my clamping arrangements. When I replace the bench I will probably use epoxy- best of both, but perhaps not in this heat.
 
More progress from the snail!

I said I was thinking about chamfering the long edges to make everything nicer to the touch. I did a few experiments, as there are so many different ways to go about it.

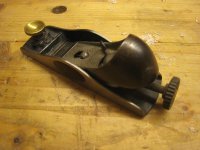
The simplest way is to just take a set number of passes with a little plane, held carefully at the correct angle. Out of all my little planes, one of the most practical and pleasant to use is this little Stanley block plane. It's a 60½ and according to one of those plane dating sites (!) it's a little over a century old. Still plenty of life left in it.
IMG_8003.JPG

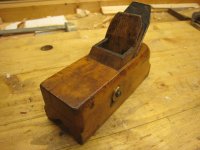
But then, for chamfering, isn't the best tool going to be a chamfer plane? You've possibly seen this one before.
IMG_7997.JPG

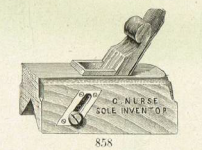
Old books describe this as being "Nurse's pattern" and indeed, it appears in their 1902 catalogue proudly marked "C. Nurse Sole Inventor"
Nursechamfer.png

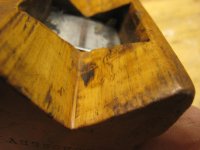
Mine is unmarked and probably user-made. The open box is attached to a steel sole and slides up and down to set the size of the chamfer. Unfortunately, with the sole and iron up as far as they will go, like this
IMG_7998.JPG

the chamfer it cuts is a bit bigger than I want:
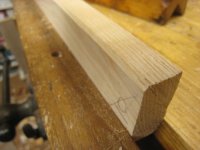
IMG_7999.JPG

Another option is the scratchstock. This is a relatively sophisticated example a friend made for me, with nuts and machine screws to clamp it together, and a double-ended adjustable fence.
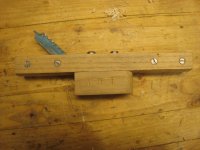
IMG_8000.JPG

With a bit of ground down hacksaw blade lurking right in the corner
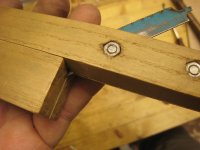
IMG_8001.JPG

it will cut a smaller chamfer, more the size I want and it should give me completely consistent results:
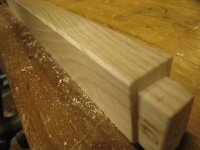
IMG_8002.JPG

More of that later, meanwhile let's cut some more wood and see if we can avoid all these digressions into tools from my collection...

For the long rails that will connect the head and foot, I have two boards of Yandles' kiln-dried ash, a scant inch thick, which are sort of planed on one side. I cut them a bit over width on the table saw, leaving some surplus in case they shrank any more. They haven't shrunk, which is a good thing, but I do need to remove about 9mm from the width.

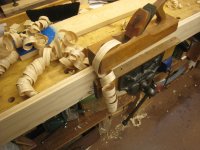
Having straightened the opposite edge and marked the width, I set about the first board with a jack plane.
IMG_8016.JPG

This is one of my favourites, an Emir brand razee pattern. Exactly the same as I used in school woodwork lessons in the 70s and probably about the same age as me. Emir were a branch of the German maker ECE, established in 1932 but continued as a separate company. They used to make a wide variety of woodwork, upholstery and bookbinding tools and supplied colleges and schools. They went out of business a year or two ago.

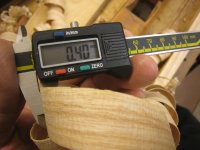
It's a bit smaller and lighter than other jack planes, designed for young muscles and therefore also suitable for tired older ones. These shavings are about as thick as I can comfortably cut in this ash. They are 0.4mm thick, or 15.5 thou if you prefer.
IMG_8017.JPG

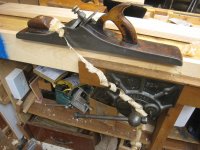
After a pleasant bit of exercise, interrupted only to take photos, I had got the board down to width and could swap to a jointer to get the final surface straight and smooth.
IMG_8026.JPG

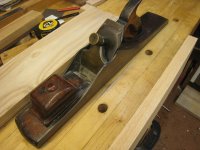
This one's a bit special - it's by Bayfield of Nottingham. I've looked into the previous owners and reckon it was probably bought new in the 1890s, then used by two generations of carpenters/joiners in south east London.
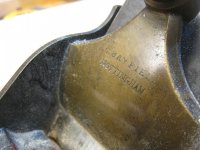
IMG_8009.JPG

IMG_8008.JPG

It's heavy, which does help it sit steady on the work; all I needed to do was to push it along.

These edges lined up nicely - it's almost a pity that I don't need to glue them together!
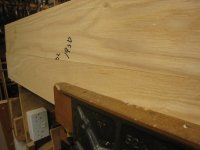
IMG_8010.JPG

Back onto the woodworking. Some of you may be wondering why I didn't just saw a bit off, rather than doing all that planing, and so was I. One problem was that I couldn't just stand this piece up in the vice and cut it - there's possibly enough space for a fretsaw at the top, but that's all!
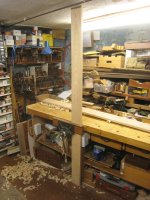
IMG_8021.JPG

I didn't want to move things round to use the table saw. My bandsaw would make the cut ok but again I'd need to shift too much around to make space. I can't easily rip flat on the bench, as having the offcut on the left just feels the wrong way round, and it's too high anyway.

So as usual for jobs like this, it was Workmate time.
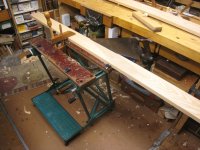
IMG_8022.JPG

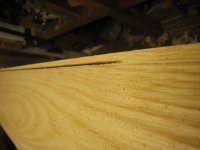
This wasn't as hard as I thought. Only about 10 minutes, including set-up and photo taking. I stayed as close to the line as I dared
IMG_8024.JPG

leaving me a long thin lath which is sure to come in useful, and only a little bit to plane off.

The backs of these boards won't show at all. Indeed, all except the top inch or so will have one of the softwood sides from the existing bed glued onto it, to support the slats. As bought, they were very rough. I don't want to lose any thickness and don't need to make them perfectly smooth, just flat enough.

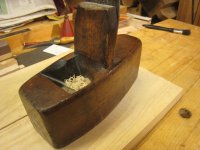
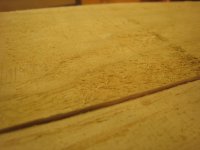
The kilned ash is much dustier to work than the rest, which is all air-dried. Rather than use an ordinary plane, I tried my toothing plane again. It worked really nicely, almost like a hand-powered belt sander - I could work in any direction.
IMG_8031.JPG

It took a very short time to go from this
IMG_8029.JPG

to this

IMG_8030.JPG

which I think will do.

Next time, there should be some more mortise and tenon joints to agonise over, and maybe even some thoughts about how to join the corners together.
 
Very tidy, Andy and a great WIP, thanks. I admire your patience.
 
I do enjoy your WIP's Andy. I'm not a hand tool person to the extent that you are but the detail you go into is (for me anyhow!) interesting and enjoyable.

Thank you.
 
Thanks all for the encouragement - I shall continue with the same level of detail!

Round here, it's peak season for home improvements. Within a fifty yard radius, our neighbours are enjoying/enduring a loft conversion, a full window replacement, a basement makeover, chimney repairs and a garden wall demolition/rebuild. It's somewhat noisy, with routers, sanders, angle grinders, big hammers and a lot of dust. So I was quite happy to retreat to the workshop for a session tackling some of the little subtleties that I mull over from time to time.

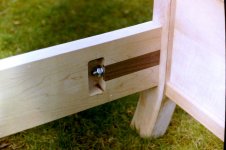
To join the long side rails to the head and foot, I decided to use the same sort of system as the bed I am replacing. That's long bolts through the legs, going into cross-dowels in the rails. It works ok and "just" needs some accurate hole drilling. However, the old pine bed had big visible screw heads and washers on the outside surfaces. On the new one I want to conceal the bolts behind removable decorative plugs. That means I can't use big flat screw heads and the hex head bolts I have bought only have a tiny bearing area under the heads. I need to use some washers. I have M6 washers, which come out to 10mm diameter, but that still looks too tiny and although ash is much tougher than pine, I really don't want to crush the wood. So I spent quite a while looking at options and doing some experiments.

IMG_8049.JPG

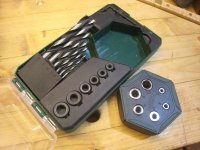
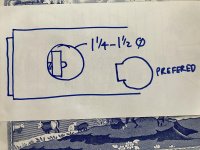
I ended up with an M6 washer plus an M8 washer, in a 5/8" diameter flat bottomed hole, going down to a 6mm hole. The 5/8" counterbore needed to be made with a bit that would cut a nice clean hole. First off, I tried a flat bit. This gave a good clean cut but was too big. Apparently, older bits were sized to cut a clearance hole for a bolt of the named diameter, so a 5/8" flat bit actually makes a noticeable bigger hole. And a 7/16" is too small.
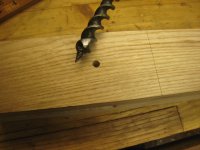
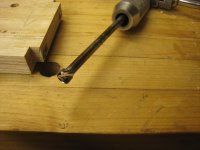
But later American bits cut holes that match the marked size, so I used a nice Jennings bit instead, with the depth stop you saw a few months ago. Here I am experimenting in some of the spare length on one of the legs, which I have still not trimmed to their final size.

IMG_8036.JPG

Because that sort of bit depends on a leadscrew to pull it into the work, I had to make the big hole first, then the 6mm one. Locating a drill bit in the centre was ok and straight enough. I remembered that I have a cheap little Parkside set of drill bits, depth stops and a well-designed guide block. For a job on this scale it felt just right and saved quite a lot of time rearranging everything to get a drill stand over the workpiece instead. One of those rare occasions when a cheap impulse buy tool is actually quite good.

IMG_8053.JPG

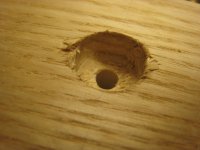
I did try drilling the 6mm hole then plugging it so I could use the Jennings bit, but without success. I even tried using a solid nose bit. That certainly will enlarge an existing hole quite nicely, but since it doesn't score the surface, I did get unacceptable tear-out. That would be ok on a workbench, but not on a piece of bedroom furniture.

IMG_8046.JPG

IMG_8047.JPG

Where was I? Still boring on...

Anyway, I managed to sort out an order of work that seemed ok. I spent a long time very carefully marking the positions of the holes, checking that I had the various mirror-image parts round the right way and that I was measuring from the right reference surfaces or lines.

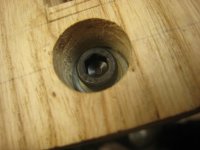
And as evidence, here's an exciting picture of a screw head nestling safely down a suitably sized hidey hole

IMG_8040.JPG

and here's a the other side, reasonably straight and square.

IMG_8044.JPG

Having got everything accurate enough and the holes drilled, I did go over them again with a 6.5mm drill. I know that some slop is necessary for getting a piece like this assembled and I don't want to have to get under the bed with a hammer at all.

Incidentally, I did use a battery powered drill/driver to make the 6mm holes. It meant I could hold the guide block with one hand and the drill with the other. I may not use them much but I don't have any militant objection to electric tools!

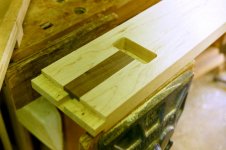
With the holes made, I could go on to cut away the reference surfaces I had just used and make some shallow mortises in the legs, where the ends of the rails will sit, pulled up tight by the hardware. I had already cut the rails to length, marked the tenons (blind on one side) and sawn the shoulders. To get the tenons the right size, I chiselled off the waste, like I did on the little vertical slats,

IMG_8062.JPG

then finished off with a shoulder plane.

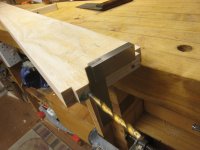
Working on much bigger pieces of wood than usual does bring a few challenges to those of us with small workshops. If there's no room to stand something up vertical in the vice, you just have to cut horizontally for a change.

IMG_8063.JPG

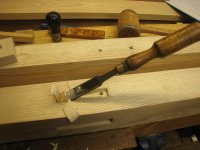
Cutting the mortises was enjoyable - the air dried ash seems to hit a sweet spot, being tough but also predictably workable. I could chip away happily,

IMG_8061.JPG

and also chisel along the grain, without wayward splits.

IMG_8054.JPG

But I see what Rob meant about the kilned stuff - it's ok, but nothing like as pleasant; I'm glad I am only making four of the simplest possible joints in it.

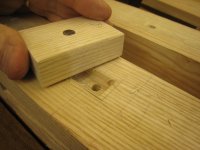
As these little mortises are only shallow, I wanted the depth to be accurate, so I used the technique shown in Ernest Joyce's book discussed here back in February on page 6 of this epic, and made a special depth gauge. It's an offcut with a nail through it, filed to the right length. Any high spots get scratched, so you know where to cut next.

IMG_8056.JPG

IMG_8057.JPG

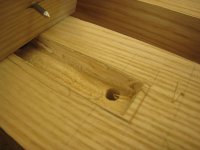
And as I have probably also said before, an old fashioned home made router (not by me, made by a professional) is the ideal tool for cleaning up the depth.

IMG_8060.JPG

And after all that, here's a result; the first of four similar joints between side rail and leg. Phew!

IMG_8064.JPG
 
+1 to all the people saying they love the detail. I'm really enjoying this.

Any particular reason you didn't just pick a penny washer for under the cap screw head rather than an M6 & M8 pair? I know you can get them in 18 mm diameter for M6; there might be 16 mm (5/8" ish) ones available too.
 
Dr.Al":1il3gytw said:
+1 to all the people saying they love the detail. I'm really enjoying this.

Any particular reason you didn't just pick a penny washer for under the cap screw head rather than an M6 & M8 pair? I know you can get them in 18 mm diameter for M6; there might be 16 mm (5/8" ish) ones available too.

Well, I did briefly consider:

- using some big penny washers I already have, but distracting myself into making a little arbor and then turning them down a bit - they are about 25mm diameter, but I only have a few mild steel ones and the rest are stainless so harder to work...

- making some from scratch

- going shopping

but I do have my limits! So I kept it simple and used what I already had. But now that you mention it, sitting here at the PC, I've had a look and you're right of course. "Form G" - 18mm diameter 6mm hole - but they would be a bit big. Maybe when I have had a go at making the decorative plugs - which exist only as a vague idea, not drawn or experimented with - I'll need to upscale a bit.
 
Andy, I realise that it's a bit late now, but the way I have done this in the past is to embed the nut into the leg and insert the bolt from inside the rail. The nut can either be inserted and plugged from the inside, or inserted from the outside face and veneered over. By neneering over with a book-matched piece, both legs can look identical.
Her's one I made earlier. A lot earlier...
Finished in situ.jpg

40 assembled joint.JPG

I can't find a pic that shows it, but the leg is a solid maple core with a stainless embedded nut M12, then veneered over with 2mm black veneer, then a bookmatched layer of maple. The black veneer ends up looking like stringing.

Rather than a bolt, there is a length of M12 studding inserted into the leg from inside, then a washer and nut are added in a recessed pocket in the rail. It ends up all being invisible and the bed is rock solid even under, erm, stress (I would imagine).
 
Well that looks a neat solution Steve, and a very elegant design too! But I think I have committed myself now.

However, what is also relevant is to ask if you can remember if you had a stub tenon on the end of your rail, and how big it was? I'm hoping 3/8" / 9mm is a reasonable compromise between not enough to do anything and cutting away too much leg. (I'll also be adding something on to the ends of the inner rails, after I get them off the current bed, so they will be sharing some of the weight bearing duty.)
 
Now, who was it saying that they liked the level of detail? This is for you - normal people may prefer to skip, or just look at the pictures, but I think this sort of operation shows the sort of ways of working that I have fallen into. It's not quick, it's not the most efficient, but it lets me explore the tools that I have and their strengths and weaknesses. And when there are only four rails to join to four legs, even if I stop and take photos it still gets done after a while. I must make it clear though, that none of what I write here is meant to show how anyone else ought to make anything - it's all just a record of my own wanderings around the big amusement park of woodworking, poking into some of the darker corners even if it means I miss the main attractions.

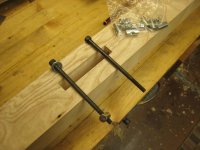
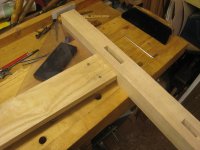
I'd got to the stage where I had made the mortises in the legs and drilled counter-bored holes for the bolts. I had cut the stub tenons and fitted them into the mortises. I just needed to make holes for the bolts into the ends of the rails, intersecting with holes for the cross-dowels.

I had thought about making some sort of guiding jig for this job, but for just eight holes I wasn't keen. Instead I chose a method which would let me be a little bit inaccurate at first, then correct those inaccuracies until everything fitted.

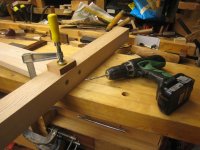
First off, I selected a rail and a leg (with lots of checking that I had the right pieces, the right way round) and clamped them to the bench, with the joint assembled and checked for square. I then put a 6mm lip and spur bit into the battery drill, poked it into the 6mm holes and drilled in as far as I could, doing my best to hold the drill straight and level.

IMG_8078.JPG

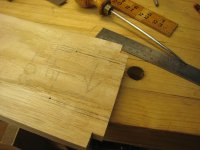
These 6mm holes will get deepened and widened, but first I needed to mark their positions. I dismantled the joint and put a 6mm drill bit into a hole at the end of the rail. Then with a small square I marked where the edge of the drill was and squared a line onto the back of the rail.

IMG_8079.JPG

The holes will be about ¼" diameter so to get the centre line I measured ⅛" across and drew a second line. Then I measured 55mm back from the end of the tenon and squared across for the centres of the cross-dowels.

IMG_8080.JPG

Hands up anyone who's spotted anything wrong there?


I'd marked with an awl where I was going to make the dowel holes, but on the wrong line. Fortunately - mostly because I was pausing to take these photos - I spotted it. Here's the corrected version:

IMG_8081.JPG

I drilled the holes for the dowels with this ordinary, modern 10mm HSS Forstner bit in the battery drill. Freehand is fine, but I was really concerned about the depth of the holes. The dowels are 20mm long and the wood is only about 23mm thick. I didn't have a depth stop that would fit this bit, with its shaft about 10.55 diameter. Fortunately I had this lump of metal with a close-fitting hole in it, kept in a box of potentially useful odds and ends. It didn't take long to drill and tap for a locking screw.

IMG_8082.JPG

Did I mention that I really didn't want to drill right through the rails of the bed? The power drill and modern Forstner bit got me most of the way, and with the right size hole, but I needed to go closer than this:

IMG_8086.JPG

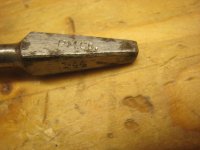
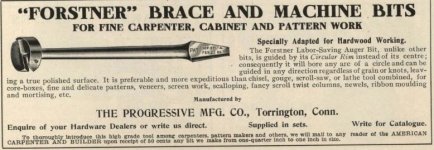
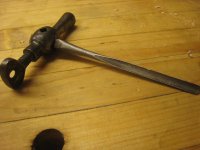
My answer was to use this, a rather old bit from the Progressive Manufacturing Company of Torrington, Connecticut:

IMG_8093.JPG
IMG_8096.JPG

As you can read in this 1906 advert, the original design was guided just by the rim, with no central point

Forstner1.jpg

Here you can see how that flat tip gets me an extra mm of usable hole depth (but no fancy scroll twist columns, sorry!)

IMG_8095.JPG

So, with careful measuring, boring just one or two turns of the brace, repeat measuring, repeat boring, I was able to extract wood just a little at a time

IMG_8087.JPG

until the holes were the right depth, without bursting through the fronts at all. What a relief! I did need to carve away the difference between ⅜" and 10mm so the dowels didn't get stuck, but that was easy enough.

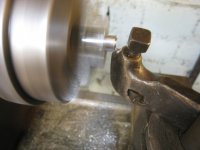
That's not the end of it though. Because the wood for the rails is a bit skinny, and sometimes my holes were less than perfectly aligned, on most of the joints I needed to shorten the dowels from their standard 20mm length to about 18mm. I thought I might need to do that when I bought them, but I also knew I had the ideal quick and easy way to shave metal away - a few minutes treadling on the lathe, as seen in this action shot:

IMG_8071.JPG

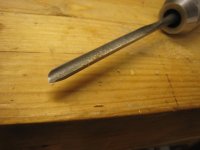
The last operation was to enlarge the bolt holes in the dowels so that they bolts are an easy fit. This was also an opportunity to try and correct any slight misalignment so that the bolts would find the dowels easily when the bed is being assembled. To enlarge the existing holes I found that a shell bit was ideal.

IMG_8085.JPG

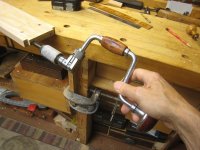
I could use it in a brace

IMG_8084.JPG

but I also tried this little bit handle, which I hadn't used before. I found it gave me even more control, letting me "carve" away selected wood to straighten the holes.

IMG_8090.JPG

It's not a tool anyone is going to need very often, but if you've got one you may as well try it.

And there's the result: an enlarged hole, straight enough for use

IMG_8088.JPG

and a joint where the dowels and bolts go in easily and everything pulls up square.

IMG_8091.JPG

I didn't tighten any of these very much, and won't do so until the empty mortises have tenons safely glued into them. I'll need to drill through those tenons, but that will be easy. And it would have been almost impossible to do all this fitting if I had already assembled the head and foot pieces - I'd have had a big, unwieldy lump standing up on the bench, just like the one in front of it ;) .
 
Super detail thanks Andy, I was assembling old American four posters the other day and their method is pretty crude compared, quick sketch to follow, the nut was a square one about 3/4 of an inch across each flat and the only thing that stopped it turning was that the face of the bed rail was drilled exactly the right depth, I have added my preferred method of trapping the nut- in that instance, but not a patch on yours. Ian
59179D86-07EE-45C6-BB04-AF3AA2919228.jpeg
 
Oh yes, Ian, I can see what you mean. They must be using that crude design just to make it easily machinable, avoiding a few seconds with a chisel to improve on it, not because it's a sensible design at all.

(I've seen knock-down furniture where the "nut" is a slice off a cylinder, so it sits in a round hole but can't rotate. But that would cost a few cents more than a standard nut!)

Edited to add: a bit like the nuts included in this set

https://www.direct-fittingsuk.com/bed-b ... 5772-p.asp

which might have been a better option in the first place!
 
I've been thinking about finishing this bed.

Don't worry - I don't mean running out of woodwork to do, just deciding what varnish or similar to apply to it.

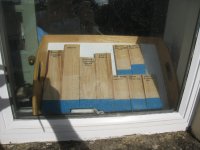
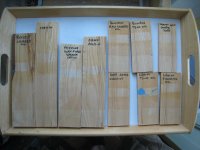
Long time readers with good memories may remember that way back last October I planed up some offcuts and applied all of the clear finishes I could find in the back of the cupboard. I taped over the bare wood so as to show any darkening effect and propped them all up in a south west facing window.

IMG_7673.JPG

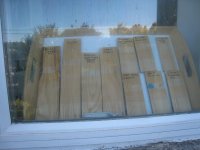
Nearly six months on, this is how they look.

IMG_8097.JPG

That's an attempt at an equivalent photo but it's obviously a sunnier day and the reflections don't help. (Nor does the filthy window.)

Here they are indoors, still by natural light.

IMG_8098.JPG

Each sample had tape over bare wood at the bottom and also over the varnished wood on the upper half. The boundaries between varnished and bare are not marked but are all meant to be a straight line near the middle. (Btw, 3M blue masking tape is good stuff and was easy to remove after this long time on all except the Tung oil, which may prove that the oil was still a bit sticky when I put the tape on.)

I reckon that if you look at the upper stripes (varnish but no daylight) there's very little difference in colour. Looking at the un-taped areas of finish + daylight, the samples with the linseed oil and shellac have darkened the most. The variations on Danish oil are much of a muchness. The main source of any colour change is going to be because of UV light, not the finish, and we're happy with that. The bed can be pale for a few years then gradually catch up with the other ash furniture nearby.

Thinking about ease of application and durability as well as the colour, I think the front runners are the Polyvine varnish (a water-based polyurethane) and the Osmo Poly-X.

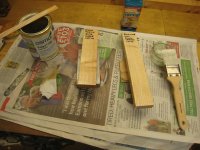
To try and help make up my mind and stop dithering, I took a couple of the spare slats that I ended up not using when I decided on the placement of each one. I treated them as I plan to do. This was a quick sanding with 120 grit Abranet, then chamfers planed along the arrises.

IMG_8102.JPG

The Osmo instructions suggest sanding to 120 for floors but 150-180 for furniture. I'll look at the surface and feel it carefully but I can easily add an extra sanding step if I need to.

This picture is really just a way of making a note - it's hard to tell, based on one photo of wet finishes.

IMG_8105.JPG

But which would you choose? Is this a time when both answers are good? The Polyvine is quicker to dry and cure but it might raise the grain more than the Osmo. There's less odour with the Polyvine too, so it probably wins on ease and speed of use. I think both will need two coats at least, maybe more on the outer surfaces.

And would you finish the slats before glue-up? I was going to, but I think it will be easier to have them all held tidily in place.

Any suggestions / observations / fresh ideas are welcome!
 
My way of working is either apply the finish before cutting the joints and in that way the finish acts as a glue mask because only exposed wood is to be glued or
Apply finish conventionally at the end of the project.
However I do realise that yours and my methods are poles apart :lol:

Furthermore I’d have been kipping in my bed for months!

Bob
 
Can't help you on the choice, Andy, but I would definitely finish the slats before assemble. They may not be held in place, but you could drill a hole through the tenon and hang them up to dry.
S
 
Interesting experiment Andy, for me it’s Poly varnish every time, tried Polyvine but found Johnstone’s to be better and cheaper but that was a few years ago.
As Steve said, particularly the slats with all those vertical meeting wider horizontal surfaces do them first, like the idea of drilling them.
I have a "washing line" across my workshop ceiling with lots of hooks made from coat hangers. Ian
 
AndyT":3gtehcfo said:
I've been thinking about finishing this bed.

Thinking about ease of application and durability as well as the colour, I think the front runners are the Polyvine varnish (a water-based polyurethane) and the Osmo Poly-X.

Any suggestions / observations / fresh ideas are welcome!
In an attempt to aid your decision making process and alleviate any unnecessary dithering :D (not that I ever do :eusa-liar: ) this:

IMG_0144.JPG

IMG_0145.JPG

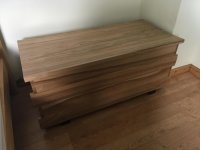
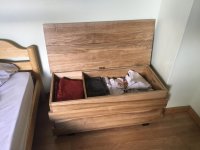
...is my Alan Peters 'knock off' blanket chest (SWIMBO has her own :D ) in Olive Ash, made around three years ago (this is the one with the hand planed concave lid) finished in that Polyvine wax varnish stuff. The beauty of it is that is as tuff as old boots and you can apply three or four coats within 40mins ('specially in this heat). The chest was finished as described, rubbed down with 0000 grade wire wool and then waxed - Rob
 
Do you have anything you have finished with the Polyvine, and used / lived with for a few years ?

I don't trust modern water based paints or varnishes. Setting aside the problems of them not flowing properly and being difficult to maintain a wet edge to avoid brush marks, every one I have tried absorbs oils or something from being handled and slowly goes sticky.

If you know otherwise, it would be nice not to have the solvent smell. I have both the bathroom door to strip and repaint, and my shoe rack to re-varnish because of rubbish water based finishes which have gone sticky.
 
Thanks all, it's really helpful to have your input.

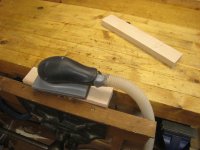
I've just been and looked at my sample slats. The Osmo is still damp and odoriferous. The Polyvine is hard and dry and inoffensive. The surface looked even, though I had deliberately been a bit careless when applying it. The grain had risen a little bit, so I put a sheet of P600 Abranet on the vacuum pad. Two passes along each face and it's smooth and lovely. A few seconds work, but clearly much easier with a slat on the bench, without having its end trapped where I can't get at it.

So I'll finish the slats first, then assemble the ends.

There's more to do after that of course, but it's good to be able to plan ahead a little.

Oh and to answer your question, Tony, about the long term survival. There's Rob's chest of course, but do you remember I made a set of pine boxes back in 2017? I wrote them up on UKW - https://www.ukworkshop.co.uk/threads/do ... ms.108475/

I used the Polyvine on them. They've been in continuous use in a charity shop since then and when I last checked were holding up very nicely, so I am confident that I won't need to be refreshing the finish. And the absence of smell will be a big advantage.
 
AndyT":157gnil9 said:
The Polyvine is hard and dry and inoffensive. The surface looked even, though I had deliberately been a bit careless when applying it. The grain had risen a little bit, so I put a sheet of P600 Abranet on the vacuum pad. Two passes along each face and it's smooth and lovely. A few seconds work, but clearly much easier with a slat on the bench, without having its end trapped where I can't get at it.
That's exactly how I applied it Andy; I sloshed it on with a Liberon lacquer brush, de-nibbled between each coat with some worn 320g and then sloshed on another coat. If fact, if memory serves (always doubtful these days) some bits of that chest received a lot more than three coats...maybe six! The final coat was left for a few hours to go really hard before final cutting back with 0000grade wire wool and then waxing. The finish is as good now as when it was applied several years ago - Rob
Edit: the instructions on the bottle(s) advise applying the mat and satin finishes one after another, but I can't remember which way round it is :eusa-doh:
 
Steve Maskery":jwzguu8i said:
Which particular Polyvine product are we talking about here plesae?

Sorry I should have put the full name in the text - it's lurking in the background in the photo. Polyvine wax finish varnish satin finish.
I must admit I was a bit bemused by the product naming when I bought it. I don't think it contains any wax, but it's supposed to look like a wax when applied.

And I have a feeling that it might not come in a blue bottle any more.

I checked, it's slightly differently presented now, in a white bottle, but I think this is the same stuff

https://www.axminstertools.com/polyvine ... 0ml-701573
 
AndyT":3pyq3mf6 said:
And I have a feeling that it might not come in a blue bottle any more.

I checked, it's slightly differently presented now, in a white bottle, but I think this is the same stuff

https://www.axminstertools.com/polyvine ... 0ml-701573

Just to clarify Andy, 'satin' is blue and 'dead flat' is in the white bottle (just checked in the 'shop) Looks like they've swopped the bottles around though! - Rob
 
AndyT":2018ik6k said:
Rob, I think your blue bottle might just be an old one, like mine - there's a printed date on mine. The maker's website only shows white bottles.

https://polyvine.com/index.php/en/produ ... sh-varnish
I think so Andy, mine are several years old (same as yours) and are nearly empty. Good stuff none the less and I've been very impressed. I'll certainly invest in another couple later on- Rob
 
After rather a lot of agonising over details, I've been hiding from the heat and making a little more progress on sanding and chamfering the slats.

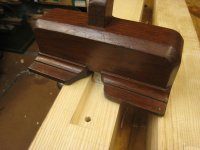
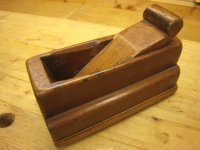
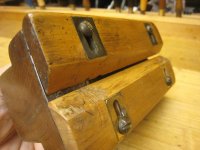
Having rejected Mr Nurse's plane as not working on tiny chamfers, I dug out my other old one. It's not quite what the old book lists as the Melhuish pattern - whoever made this one favoured movable fences on both sides. But they close up tight enough, and I want the consistency that a fenced plane will give me.

IMG_8099.JPG

IMG_8100.JPG

First, I sanded the slats, like I did in my experiment, using 120 grit Abranet and the vacuum cleaner. I realised that, with hand sanding, I'd normally judge my progress by the amount of dust I had made. But with this method, there's no dust at all. That makes it a bit odd - it feels as if you're not removing anything - but you are of course. I soon found myself developing a rhythm of doing the same number of strokes on each surface, in the same order. This helps a lot with a repetitive job and makes sure of not missing anything out. I was careful to keep all the bits stacked up by number.
For the chamfering, it was the same sort of routine. I was holding the slats against a couple of pegs in the bench, positioning the plane the same way, and taking just two shavings from each arris.

IMG_8107.JPG

IMG_8108.JPG

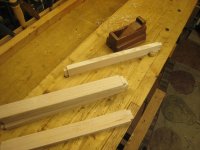
I've now done both sets of slats, for the head and foot of the bed. I didn't use a washing line, just some bits of scrap to let them rest on their tenons.

IMG_8109.JPG

I'm really happy with this varnish. It goes on very easily, dries smooth and looks good. I've been using a Polvine brush which is quite thin but holds just enough and has the right strength of bristles to brush it out efficiently.

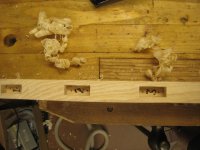
Buoyed up by success with the slats, I also started on the end rails. These just needed a bit of a clean up to remove any markings or rough spots.

On the straight one I just planed:

IMG_8110.JPG

On the curve, I used a cabinet scraper:

IMG_8113.JPG

Before removing the pencil marks I made sure I could still see which slat went where

IMG_8111.JPG

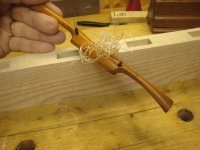
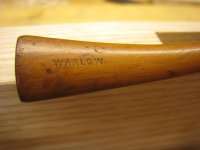
To chamfer the long curve, I needed something freehand but with a bit of delicacy about it. Time for a beautiful little boxwood spokeshave, only 7½" long. This one is also marked "Warlow" - the same Bristol ironmonger that sold the saw I have been using on this project.

IMG_8114.JPG

IMG_8115.JPG

(Incidentally, this size would have been listed in the catalogues as 1½", as that's the length of the iron. According to the excellent booklet on the subject by the late Ken Hawley, spokeshave irons went from 1" up to 6" long.)

Sadly, Warlows are no longer in business, though one of their old shops still bears the name:

warlow.jpg

but happily, Bristol design is just across the road, for anyone needing to stock up.

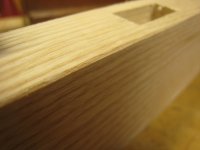
That's all the progress for now; I'll leave you with an artfully posed shot of the sort of detail that will always be covered up by bedding or pillows when this thing is finished ;)

IMG_8116.JPG
 
Back
Top