• Hi all and welcome to TheWoodHaven2 brought into the 21st Century, kicking and screaming! We all have Alasdair to thank for the vast bulk of the heavy lifting to get us here, no more so than me because he's taken away a huge burden of responsibility from my shoulders and brought us to this new shiny home, with all your previous content (hopefully) still intact! Please peruse and feed back. There is still plenty to do, like changing the colour scheme, adding the banner graphic, tweaking the odd setting here and there so I have added a new thread in the 'Technical Issues, Bugs and Feature Requests' forum for you to add any issues you find, any missing settings or just anything you'd like to see added/removed from the feature set that Xenforo offers. We will get to everything over the coming weeks so please be patient, but add anything at all to the thread I mention above and we promise to get to them over the next few days/weeks/months. In the meantime, please enjoy!

Bench extras

Lurker

Old Oak
Joined
Nov 26, 2020
Messages
3,339
Reaction score
671
Location
Loughborough
Rather than hijack cabinet man’s thread.

I am happy with my bench and most of the aids that I have in addition.
Was wondering if you have any good ideas or links for others that we could all share.
I will try to post a few of mine, which obviously I copied from elsewhere.

I saw a while ago a idea were a length of wood was fitted inside the bench tool tray to help with planing.
But can’t remember how the rise and fall works, I could come up with my own but would like to see how it was done by others. Hopefully someone will know what I am rabbiting on about!
 
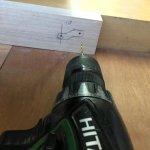
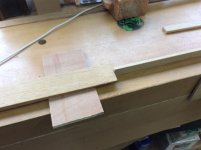
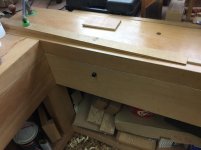
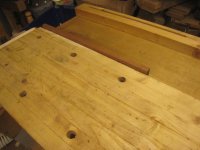
Hi sorry I hadn’t seen this, I did post this stick a few months ago but I can’t find it using the search system so I’ll re-do it a bit for you. This is a planing stick I retrofitted in the well on my bench. It’s all self-explanatory really, the only difficult bit is making sure the bolts and everything lineup which is done by drilling a pilot hole through the stick and marking the back of where it is to fasten onto. Ian
BC25A399-11D0-4050-80CC-D39DD09CAA23.jpeg
46AF7FBB-909D-45E8-9378-7838C8127B3C.jpeg
A8035B10-0F4A-4EAF-A352-B3977C596D3D.jpeg
453E41E3-023E-4FD3-9220-31EA6F1E5F63.jpeg
 
Brilliantly simple. I shall equip my bench with one of those as soon as I can!
I thought I could half-remember a reversible lift-out strip which either fitted flush in a groove or stuck up above it, but your design is better as it can be so easily retrofitted.
Many thanks for sharing.
 
Thank you that’s very kind, there is another photo I should have put on, drilling that first pilot hole, fairly obvious but you have to drill the higher one Doh! And remember to thinkabout the thickness of your drill when planning where that hole will be. Ian
473D0483-E469-4E6B-A349-05527C32600A.jpeg
 
I have a similar thing on my bench. When I made it the top was made from 4" x 1 1/2"x 7' on edge maple strips and I kept one of the boards loose at glue up and secured the bottom of the maple to a shhet of 18mm ply with a couple of slots in under where the loose board would be . This was then replaced with an oak strip 4 1/2"" wide. This was then trimmed to have a couple of asymetric lugs that matched the slots. When the board is removed and rotated 180 deg it is put back with and gives me a small 1/2" lip about 12" in from the edge of the bench
 
droogs":jobpt2jk said:
I have a similar thing on my bench. When I made it the top was made from 4" x 1 1/2"x 7' on edge maple strips and I kept one of the boards loose at glue up and secured the bottom of the maple to a shhet of 18mm ply with a couple of slots in under where the loose board would be . This was then replaced with an oak strip 4 1/2"" wide. This was then trimmed to have a couple of asymetric lugs that matched the slots. When the board is removed and rotated 180 deg it is put back with and gives me a small 1/2" lip about 12" in from the edge of the bench
Any chance of a photo or two please, would appreciate it for my future bench build . Thanks Ian
 
My other bench extra is an unusual planing stop, the configuration of my L-shaped bench means I can’t have the sort that pushes up through the surface of the bench so I had to improvise with a Long wedge shaped piece of oak held with a holdfast, it didn’t have to be this long but it was an off cut and it just stuck and I’ve got used to using it now, and I find it quite handy as I can move it about so I’m not restricted to planing in the same position all the time and as it has a 2 to 3 mm thick edge I can plane quite thin pieces up against it or with something underneath it to lift it up I can plane quite chunky things. Charles Schwartes advocates a toothed metal top to planing stops as does Mike Siemsen but I don’t find it necessary at all, and I think not having the wood held makes me better at planing, it’s all to do with feedback from the wood through the plane to my hands. Ian
C8D8A0CE-97DE-4206-B91E-5E6BEA3E1273.jpeg
714AD25B-730A-44B8-AB69-731DEDC0AFFD.jpeg
0C53EB71-DF50-465F-B675-5F3814F34F73.jpeg
 
I like that. The ideal offcut becomes the habitual way of working!
 
I said I would add a planing stop, inspired by Cabinetman's idea and now I have.

It's on a somewhat smaller scale, just at the left hand end where it will be most needed. A strip of salvaged mahogany with a pair of wingnuts. They go on some bits of M6 studding, set into threaded inserts.

IMG_7489.JPG

IMG_7490.JPG

As we were warned, there's not much depth for drilling hole and my tool well is narrow as well as shallow. Fortunately, there was room for a brace:

IMG_7488.JPG

I also added a longer stop on the left hand end, for times when my existing bench stop is too small. This is a bit chunkier, using some M8 dowel screws into nylon plugs in the end grain.

IMG_7483.JPG

Instead of wingnuts I used pronged t-nuts into bits of oak which are quick and easy

IMG_7485.JPG

I just cut straight slots on these two, thinking that the clever ramped slot is only needed on a longer stop. Here's a posed shot showing how the two might be used together:

IMG_7491.JPG

Thanks again to Ian for suggesting this. I'm sure they will both be useful.
 
I like the two together, a good combination, I just hadn’t thought deeply enough when I came up with the "up and over" slots, yours are simpler and will probably be easier to use, mine need a tap on the end to make them move— till they wear in hopefully. Ian
 
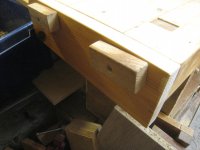
First photo is upside down and second is sideways.
Not sure how to fix. I am annoyed as I thought I had this photo malarkey cracked.

I turned the photos round but they have still come out the same :cry:
 
Photos sorted for you ;)

I am not sure about the rotation problem but using the “place in line” option would have inserted the images without the awful white box.

Better luck next time. ;)

The image rotation problem will get sorted, bear with us.
 
Cabinetman":2mr5dazl said:
Thank you that’s very kind, there is another photo I should have put on, drilling that first pilot hole, fairly obvious but you have to drill the higher one Doh! And remember to thinkabout the thickness of your drill when planning where that hole will be. Ian

Could you use just a straight slot at an angle instead?
 
Back
Top