• Hi all and welcome to TheWoodHaven2 brought into the 21st Century, kicking and screaming! We all have Alasdair to thank for the vast bulk of the heavy lifting to get us here, no more so than me because he's taken away a huge burden of responsibility from my shoulders and brought us to this new shiny home, with all your previous content (hopefully) still intact! Please peruse and feed back. There is still plenty to do, like changing the colour scheme, adding the banner graphic, tweaking the odd setting here and there so I have added a new thread in the 'Technical Issues, Bugs and Feature Requests' forum for you to add any issues you find, any missing settings or just anything you'd like to see added/removed from the feature set that Xenforo offers. We will get to everything over the coming weeks so please be patient, but add anything at all to the thread I mention above and we promise to get to them over the next few days/weeks/months. In the meantime, please enjoy!

Display Unit WIP - DUN

Lurker":szhzghva said:
When you started on about gauge blocks a few months ago, I dismissed it as a gewgaw, but this WIP has convinced me otherwise.
I must have a rootle through my metal stash and make a set.
There's no faffing with them L and it makes setting up routers etc a doddle as a gauge or spacer block removes all the guesswork. I re-discovered them recently as you know and have wondered why I didn't use them much. I mentioned them to Tim Styles at Ax before Christmas and they'll be available later on made in stainless steel - Rob
 
Dr.Al":3ngualru said:
Jo blocks type, so rather more accurate than is needed for woodwork (sub-150 nanometre tolerance is probably overkill for a lump of ash!).

Verbal drive by! :D
 
Woodbloke":31dd3ex3 said:
There's no faffing with them L and it makes setting up routers etc a doddle as a gauge or spacer block removes all the guesswork.

As an option, I use drill bits to set my depth stops on routers, Domino machines and any thing else, they come in handy storage box as well.
 
As requested - "load of tosh" :D

Also, I was given a set of those spacers back in the day, and found them hopeless for stacking to a desired height (as I required at the time) - until I realised each one still had the nubbin of brass in the middle when they hadn't been entirely parted off cleanly. Once that was dealt with, they were quite handy. Hope the new sets won't have any such worries.
 
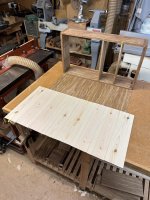
There are a couple of bits n'pieces that I can do on this unit prior to the hinges, one of which is the veneered back panel. I only had one 40mm thick board of Brown Oak to get all the pieces from, so the veneers were cut from those slithers of material that were left over. Fortunately, with careful cutting and even more careful thought, I cut sufficient (with one bit spare...I call it 'arry :lol: ) and even managed to book match a 'candle flame' which will be positioned in the middle of mug display area:

IMG_0409.jpeg

The rest of the leaves were slip matched to obtain a reasonably pleasing pattern. I then sawed up some pine for the backing veneers:
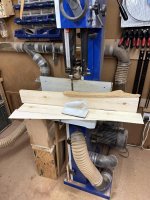
IMG_0412.jpeg

...which were then cut in half:

IMG_0414.jpeg

All veneers were then stuffed through the Jet 16-32 drum sander to bring them down to 2mm thick. I then sorted out a lump of 5mm ply, veneered in teak that I've scavenged from an old bookcase I'd made at least thirty years ago. This too was run through the drum sander to remove the finish and most of the teak:

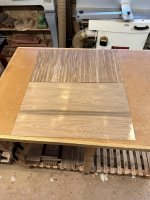
IMG_0421.jpeg

IMG_0422.jpeg

The various leaves of veneer were shot in a matching pair at a time. As they were only short, there was no need for 'Big Woody' and the super long, super sophisticated veneer shoot:

IMG_0425.jpeg

To join the leaves I first need to clamp a lump of pine to the assembly table. This gives something to pull against when stretching the masking tape over the joint. I use two types of tape, the first is a very tacky, über-stretchy 'Scotch' tape but there are plenty of others to choose. This pulls the joint up righty-tighty but if it's slightly convex (ie it 'rocks;) then a wiffle of a shaving from the offending edge(s) ought to make it straight again. The ordinary el-cheapo tape finishes off the joint:
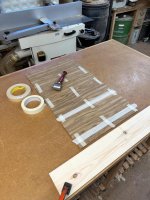
IMG_0426.jpeg

IMG_0427.jpeg

..and I always use a roller to make sure that the tape is well and truly stuck. The gluing stuff was then assembled with a water pot into which the spreader was dropped after use:
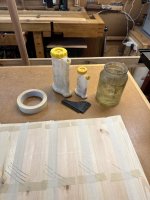
IMG_0428.jpeg

Each 'lay up' has a smear of glue applied to the joining edges by laying it over the edge of the assembly table:
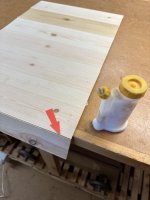
IMG_0429.jpeg

...after which the glue is applied to each side of the ply base in turn, ensuring that there's a sufficient margin of waste all round. I always tape the corners as well to prevent or limit the veneer lay ups going 'walkabout' as the vacuum is applied:

IMG_0430.jpeg

When veneering both sides together, it's absolutely vital that the base board inside the bag is well waxed; any squeeze out from the job will mean that it becomes really, really difficult to get it out!!

I usually also use a 'lecky under-blanket heater and one of kids old duvets:
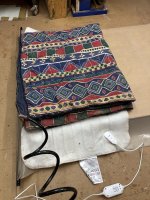
IMG_0431.jpeg

...to make sure the job's nice n'toasty, which speeds up setting time for the glue (Everbuild D4)

It came out the bag after a couple of hours and had taken on a very slight 'bow':

IMG_0432.jpeg

...and once the tape had been removed and the edges trimmed on the bandsaw:

IMG_0433.jpeg

...it was clamped to the bench to make it's flat (holdfast block) and planed with a very finely set BU smoother. The 80g loading on the drum sander does a good job but leaves a significant scratch pattern which is a bit too much for a card scraper to remove. However, as the veneers are 2mm thick it's a doddle to plane them out and then finish with the scraper. An ROS will eventually be used on the back to clean up the pine.

The finished panel (planed and lightly scraped):
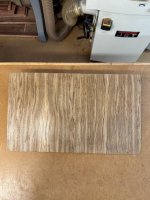
IMG_0436.jpeg

...is now ready to be sanded (240g) and eventually fitted to the cabinet. This is a fairly convoluted process but I've done it now so many times it's almost second nature, but the 'game changer' is the drum sander :eusa-dance: - Rob
 
That candle flame is nice. Could do with one on the back of one of my instruments.
 
If anyone is looking for a single take-away lesson from this thread, I would suggest looking closely at Rob's approach to veneering. He's put the effort in and equipped himself with a good bandsaw, a sander, a vacuum bag and an edge shooting board. And now he can casually use up small pieces of special timber to lift pieces like this out of the ordinary.
 
AndyT":15yt6ar8 said:
If anyone is looking for a single take-away lesson from this thread, I would suggest looking closely at Rob's approach to veneering. He's put the effort in and equipped himself with a good bandsaw, a sander, a vacuum bag and an edge shooting board. And now he can casually use up small pieces of special timber to lift pieces like this out of the ordinary.
Thanks Andy. The shooting board is only my bog standard thing that I use on the bench. I have a much longer shoot for bigger stuff and an a very long wooden shooting plane (Big Woody) - Rob
 
The main problem here is that Rob is in a different league from most of us. :lol:

I've never tackled veneering in any serious way (a few guitar heads were veneered but they are small). I doubt I ever will without a proper vacuum press and a suitable flat bed sander. I actually find it surprisingly difficult to cut accurate thin pieces on my bandsaw, once I get taller than about 5". I expect it's a technique thing and would value some tips Rob on how you go about re-sawing to produce veneers.
 
I will be starting woodwork this year - when I get my workshop finished :D

Very nice! Lots of tips for me to pickup as a beginner, why did you bandsaw the tails but not the pins?
 
BucksDad":bgbtz8x4 said:
I will be starting woodwork this year - when I get my workshop finished :D

Very nice! Lots of tips for me to pickup as a beginner, why did you bandsaw the tails but not the pins?

The tails are perpendicular to the bandsaw blade so it's easy, but the pins would need to be cut at an exact slope to match each individual tail and this is much easier to do sawing by hand than setting up a machine.
That said, if memory serves, the late David Charlesworh did actually concoct a jig to saw out dovetail pins - Rob
 
AJB Temple":1s1cwqup said:
The main problem here is that Rob is in a different league from most of us. :lol:

I've never tackled veneering in any serious way (a few guitar heads were veneered but they are small). I doubt I ever will without a proper vacuum press and a suitable flat bed sander. I actually find it surprisingly difficult to cut accurate thin pieces on my bandsaw, once I get taller than about 5". I expect it's a technique thing and would value some tips Rob on how you go about re-sawing to produce veneers.
Thanks Adrian. Bandsaw set up is of course crucial and a sharp blade helps but surprisingly you can keep on producing decent veneers with one that's only half sharp, but the feed rate regardless of the state of the blade needs to be slow....really, really glacier like slow. As soon as you try and speed up, the blade tends to do all sorts of weird things so a sloooooooow rate of feed is key. I also have the Ax Diamond Ground 12mm 3tpi blade at max tension and release it at the end of the working session. I have three fences for different widths of veneer; small, the supplied aluminium fence and a tall one for veneers up to 250mm wide. The small and large fences can be bolted onto the ali fence. The blade needs to be square to the table as does the fence and I use an Ax 'Bandsaw Buddy' to check that the fence is dead parallel to the blade; if it's not, you won't saw an even thickness veneer as you'll encounter blade 'drift'.
Although not essential, I always plane the face/edge which is against the fence/table as you've now got two true sides, so the process for each veneer is to initially plane the material square, cut a veneer then back to the p/t to produce another datum face. It may be a little wasteful of material, but it does give you a fighting chance of producing an even thickness veneer so I think the loss of material on the p/t is worth it. I do a test cut on some scrap and set the thickness at the table so say 2.5mm or a little more; the sawn face is then drum sanded to finish at 2mm or thereabouts - Rob
 
One of the things that Krenov used extensively was his unique design for a stylish and subtle door catch. Commercial ones that I've seen can be very clunky and are the sort of things you'll find to hold a kitchen cabinet door closed and so are totally unsuitable for a little cabinet like this. All of the cabinets with a door that I've made have one of these catches, but in this form, I've included a cunning little 'upstand' which limits the closure of the door. This is one I made some time ago for another cabinet:

IMG_0462.jpeg

...and I invariably make them out of something hard n'nasty like ebony or African Black Wood. I started out on this one by marking out the 35mm long rectangle and sourcing a suitable lump of 8mm thick ebony, a couple of screws and a spring:

IMG_0437.jpeg

The router fence was set up next:

IMG_0439.jpeg


...and the housing machined to a depth of 2.5mm:

IMG_0440.jpeg

The little curved bit at the back of the upstand was machined on the router table:

IMG_0441.jpeg

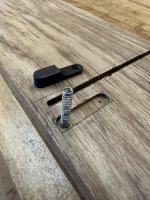
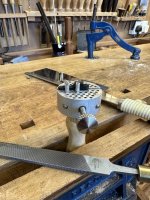
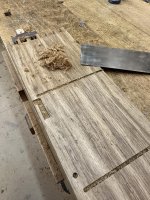
The new door catch was separated from the blank using the bandsaw and a 2.5mm deep slot routed into a bit of gash pine. The catch was offered up into the slot and I used a variety of files :shock: and sanding boards to make it level with the pine (and hence the interior of the cabinet) Hard exotics like ebony and ABW are much easier to detail shape with metalwork tools such as a variety of small files:

IMG_0442.jpeg

IMG_0443.jpeg

The end underneath the door was then rounded over on the disc sander until it was a snug fit in the pine offcut:

IMG_0444.jpeg

The other end was then rounded over and finished with sanding sticks etc until it dropped snuggly into it's stopped housing:

IMG_0446.jpeg

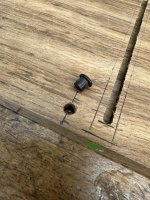
...after which the adjustment screw hole was drilled and coutersunk:

IMG_0448.jpeg

At the other end of the stopped housing, a shallow hole was drilled to contain one end of the spring:

IMG_0449.jpeg

...which will eventually be snipped to provide a little bit of 'upthrust' against the underside of the door. The amount of said 'upthrust' is regulated by the brass adjustment screw. Krenov regales the tale in one of his books of how he used to source suitable springs. Apparently, he found that biro springs from Bic pens were ideal (I find them a bit weak) and used to go into the Swedish equivalent of WHS and buy a half dozen at a time, whereupon in front of an astonished assistant, he would proceed to break them in half, extract and pocket the springs and then dispose of the broken bits of debris in the waste bin :lol:

The section of the catch to the immediate left of the red arrow:

IMG_0452.jpeg

...will be underneath the door and so the bulk of it was removed with a saw, the catch being held in this very handy little holder jobbie that I got from the 'old firm' some years ago:

IMG_0464.jpeg

...and that's as far as I can go until the door is actually fitted. Then it's a case of gradually fettling the catch until the right degree of 'closure' is obtained.

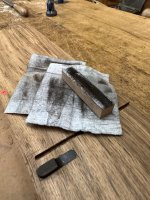
When I do these cabinets, it's inevitable that there's an accumulation of a myriad amount of small odds n'sods which will unquestionably go 'walkabout' :eusa-whistle: unless they get stored in a 'baccy tin:

IMG_0450.jpeg

...and that's a good a reason as any for having a tool well on the bench :D - Rob
 
Dr.Al":2k8hjxmf said:
That's a nice design of catch: I haven't seen one of those before.
Thanks Dr. Al; you won't 'cos I invented it! :lol: - Rob
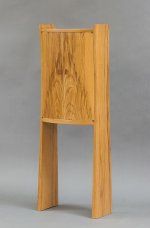
Edit - I should say it's subtly different to JK's (which I've tried) and my one seems to work better (for me at least)
 
So it’s friction between the bottom of the door and the black catch that keeps the door shut? Nice, and probably a much more pleasing action and sound than magnets or ball catches etc.
 
Cabinetman":2ru685b8 said:
So it’s friction between the bottom of the door and the black catch that keeps the door shut? Nice, and probably a much more pleasing action and sound than magnets or ball catches etc.
Correct; the strength of the spring (and how long it is) determines how much force and hence friction is generated on the underside of the door. All that's required is just enough to hold it in place and no more - Rob
 
Well, there's another idea in this WIP well worth ̶s̶t̶e̶a̶l̶i̶n̶g̶ emulating, especially for anyone else who has accumulated an assortment of old piano keys and other assorted scraps of exotic wood too precious to throw away... Thanks Rob :eusa-clap:
̶
 
Thanks for the resaw tips Bob. There are two things there that will help me: extra tall fence and planing again between cuts. Neither had occurred to me.
 
Nice work (again!) Rob.

AndyT":1jbmj1y5 said:
If anyone is looking for a single take-away lesson from this thread, I would suggest looking closely at Rob's approach to veneering. He's put the effort in and equipped himself with a good bandsaw, a sander, a vacuum bag and an edge shooting board. And now he can casually use up small pieces of special timber to lift pieces like this out of the ordinary.
No wish to detract from the work or the comment but there's at least a couple of grands worth of kit there. I've been on the lookout for a small drum sander for years and apart from being like hens teeth the better ones are nearly always close to a grand.

I find the absence of a sander and a bag make it quite limiting (for me anyhow) to do anything other than small box type sections of veneering.

It's a very good tutorial for small panel veneering though.
 
Stuart":hogzpjrg said:
Nice work (again!) Rob.

No wish to detract from the work or the comment but there's at least a couple of grands worth of kit there. I've been on the lookout for a small drum sander for years and apart from being like hens teeth the better ones are nearly always close to a grand.

I find the absence of a sander and a bag make it quite limiting (for me anyhow) to do anything other than small box type sections of veneering.

It's a very good tutorial for small panel veneering though.
Thanks Stuart. I've accumulated that kit over a number of years and of course it does make it easier and a lot more convenient but you don't actually need to vacuum veneer if you've got the right sized cauls and plenty of clamps. A small, decently set up band saw will produce veneers of 150mm or so and it's possible to glue to glue a sawn veneer(s) onto the substrate (but not recommended). The thing that really does make a vast difference is the drum sander (to which I've recently fitted an Abranet Max 80g loading) as it evens out all the inequalities in the sawn veneered surface; to me it's worth it's weight in gold and I'd have no hesitation in buying another - Rob
 
It's clear that for preparing thinnish wood a drum sander is excellent. I would love one. But for the past two years I have hardly been in my proper workshop as 95% of my work is house renovation and I am too lazy to walk back and forth to the shop (end of waterlogged garden) so most of my stuff is in the ex kitchen in the house. If I ever retire, and give up building stuff, I will seek one out and try to do some finer work again (I fear I have largely lost the knack).
 
Rob, I thought that veneer had to be applied to both sides of the substrate but as I follow this I think you have only done one face? ( It’s entirely possible I’ve not followed the post correctly as I’m not I. The UK at the moment and can only follow on my phone). Isn’t this going to make it prone to warping?

Cheers

Ps Cracking thread!
 
Blackswanwood":1kk9y6c4 said:
Ps Cracking thread!

:text-+1:


Blackswanwood":1kk9y6c4 said:
Rob, I thought that veneer had to be applied to both sides of the substrate but as I follow this I think you have only done one face? ( It’s entirely possible I’ve not followed the post correctly as I’m not I. The UK at the moment and can only follow on my phone). Isn’t this going to make it prone to warping?


Company I did contract work pressed veneer at one of their factories.

This was on 9’ x 6’ PB or MDF

Single face was prone to warping, especially on the thinner boards, so generally a very cheap backer was glued on the back.

Obviously depending on where it will be used, it was either expensive double face or then the single with a backer.
 
Woodbloke":31j3zta2 said:
drum sander……………..I'd have no hesitation in buying another - Rob

When you do can I have the old one. :) :)


Only kidding. I have enough veneers of just the right size ;) to last my limited demand for a long while to come
 
Woodbloke":27ehs3qd said:
Stuart":27ehs3qd said:
Nice work (again!) Rob.

No wish to detract from the work or the comment but there's at least a couple of grands worth of kit there. I've been on the lookout for a small drum sander for years and apart from being like hens teeth the better ones are nearly always close to a grand.

I find the absence of a sander and a bag make it quite limiting (for me anyhow) to do anything other than small box type sections of veneering.

It's a very good tutorial for small panel veneering though.
Thanks Stuart. I've accumulated that kit over a number of years and of course it does make it easier and a lot more convenient but you don't actually need to vacuum veneer if you've got the right sized cauls and plenty of clamps. A small, decently set up band saw will produce veneers of 150mm or so and it's possible to glue to glue a sawn veneer(s) onto the substrate (but not recommended). The thing that really does make a vast difference is the drum sander (to which I've recently fitted an Abranet Max 80g loading) as it evens out all the inequalities in the sawn veneered surface; to me it's worth it's weight in gold and I'd have no hesitation in buying another - Rob
Sorry if it came across as having a ‘dig’ Rob, - I most certainly wasn’t. I too have built up a collection of ‘stuff’ over the years.

The really sad fact is I used to have a drum sander but a downsize meant some very difficult decisions on what had to go. The sander and my most beloved table saw were among the casualties. If I find one of the smaller ones at anything approaching a reasonable price I’d swoop like a vulture!
 
Blackswanwood":1rlfn600 said:
Rob, I thought that veneer had to be applied to both sides of the substrate but as I follow this I think you have only done one face? ( It’s entirely possible I’ve not followed the post correctly as I’m not I. The UK at the moment and can only follow on my phone). Isn’t this going to make it prone to warping?

Cheers

Ps Cracking thread!
Nope, on this occasion I did indeed do both sides at the same time; hence my comment about making sure that the baseboard is really well waxed. Even so, it developed a slight 'bow' when it came out of the bag but had I only glued one side, the bow would probably have been far greater. If you're very lucky and the woodmangling gods are smiling on you, it'll come out flat, but that rarely happens, 'specially with thin stuff (this back finished at 8mm)

Stuart":1rlfn600 said:
Sorry if it came across as having a ‘dig’ Rob, - I most certainly wasn’t. I too have built up a collection of ‘stuff’ over the years.

The really sad fact is I used to have a drum sander but a downsize meant some very difficult decisions on what had to go. The sander and my most beloved table saw were among the casualties. If I find one of the smaller ones at anything approaching a reasonable price I’d swoop like a vulture!

Not at all Stuart, t'were a fair comment :D . I think for me the drum sander would be the last thing to go if I had to downsize - Rob
 
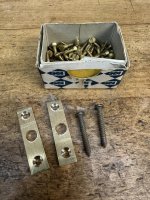
The penultimate thing(s) to make prior to the hinge fitting is a pair of hanging brackets. There are plenty of ways to do this (French cleat, 'keyhole' directly into the wood etc) but I've gone for a pair of brackets in 3mm thick brass, simply as a had a bit in my metal offcuts box:

IMG_0467.jpeg

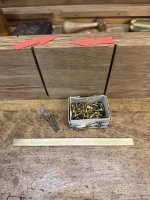
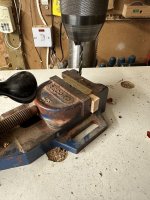
The position of each was marked on the back edge of the sides (red arrow) and I found a box of suitably sized brass countersunk screws tother with a pair of rh screws for going into the wall. The two bits were marked out, cut to length and the hole centres punched, whereupon they were drilled in the drill press:

IMG_0468.jpeg

I did initially try and do this little exercise in stainless steel, but it's evil stuff :evil: to try and drill, let alone countersink, so I found the brass which is much more amenable to work with:

IMG_0469.jpeg

The recesses in the back edges were made in exactly the same way as the end grain grooves in the shelves, that's by dropping them directly onto the cutter and shuffling 'twixt the two fence stops. With that done the recess underneath for the screw head was cut with chisels and the brackets fitted into the slots:

IMG_0472.jpeg

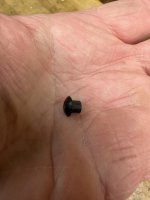
To finish them off, each of the brackets was polished on some w/d paper down to about 1000g, as were the countersunk screw heads. The very last little widget to be made on the lathe was a teeny tiny:

IMG_0473.jpeg

IMG_0474.jpeg

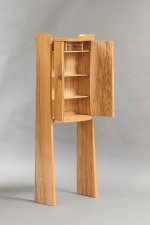
...spacer in ebony, which is fitted and then fettled on the underside of the top. It counteracts any 'upthrust' from the spring and keeps the shadow gap even all the way along. In theory, it should be the same thickness as the distance between the two leaves of the hinge. Having done that, there's not a lot to do until I get hold of the hinges. In the meantime, I've been pondering on just how bloody difficult this:

a (5).jpg

a (6).jpg

...would be to make. The compound curved doors look 'interesting' :eusa-whistle: - Rob...whose got a couple of perfick 60mm thick Olive Ash boards :D
 
Cabinetman":2vdfoc72 said:
Not easy, as they are fairly small in width you could make them out of solid...
Absolutely; I've just finished reading his account in 'The Impractical Cabinetmaker' and have decided to boot that one into the long grass :lol: - Rob
 
Aren't you supposed to be making a medieval chest with linenfold panelling? ;)
 
Cabinetman":d9fwaebw said:
Oh go on you know you want to, did he say how he made the doors? Convex sole plane out of solid is my guess.
The doors have compound curves so are a 'bit tricky' :eusa-whistle: to make. He gives a details of the methodology but it's not easy, 'specially the hinging and the 'shut line' between the doors and carcass.

AndyT":d9fwaebw said:
Aren't you supposed to be making a medieval chest with linenfold panelling? ;)
That was also a plan Andy, but I think that one's been booted into the long grass as well :( - Rob
 
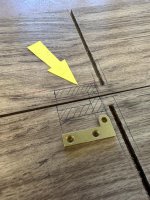
Now that SWIMBO has ordered her hinges from CHT and they've been delivered, I can crack on with this little job. Next up is to accurately mark out the positions of the hinge leaves on the carcass (arrowed) such that they are just inside the vertical divider:

IMG_0567.jpeg

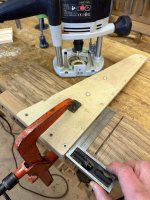
The leaf thickness is now set on the router to 3mm using the Ax gauge blocks:

IMG_0568.jpeg

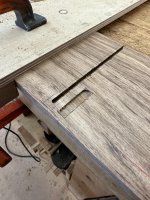
....and a test slot machined in some gash pine:

IMG_0569.jpeg

It's absolutely crucial when setting in these hinges to ensure that the top of the leaf is level with or slightly below the surface of the wood as a fraction will be removed at the cleaning up stage. If they're set in too high, the shadow gap 'twixt the door and the carcass will be too much, so it's worth while being very careful with the doc of the router.

Once the doc is set, the slots were machined:

IMG_0570.jpeg

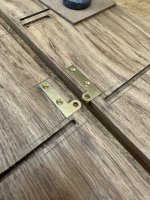
...followed with a bit of nifty chisel work to get the hinges to fit:

IMG_0571.jpeg

At the top of the door on the underside of the carcass, there's a tiny ebony spacer which regulates the shadow gap and the 5mm hole for it was the next thing to drill:

IMG_0572.jpeg

After that, the internal surfaces of the main carcass are cleaned up and polished prior to gluing. The Brown Oak was very finely skimmed with a smoother before starting work, so all that's required is a light pass or three with card scraper to remove the pencil and pen marks. The feathery shavings were all that was removed; no need for a smoother as too much would be taken off. I never clean up the material on the dovetails or the joints won't fit!

IMG_0573.jpeg

After scraping came a light pass with worn Abranet 180g:

IMG_0574.jpeg

...with all dust being extracted, so there's virtually nowt clogging the grain.

The joints are then masked off and I always use the ss roller to ensure that each bit's well stuck:

IMG_0575.jpeg

With all that done, I've used a polishing rubber to apply the first of four coats of MMM:

IMG_0576.jpeg

Each coat will be de-nibbled with a bit of worn 600g Abranet, after which the surfaces will be waxed - Rob
 
Woodbloke":2tdzf7zj said:
......The leaf thickness is now set on the router to 3mm using the Ax gauge blocks:

View attachment 8....

Why? Why not just stick one of the hinges in the router depth stop? Why use a proxy?
 
Back
Top