• Hi all and welcome to TheWoodHaven2 brought into the 21st Century, kicking and screaming! We all have Alasdair to thank for the vast bulk of the heavy lifting to get us here, no more so than me because he's taken away a huge burden of responsibility from my shoulders and brought us to this new shiny home, with all your previous content (hopefully) still intact! Please peruse and feed back. There is still plenty to do, like changing the colour scheme, adding the banner graphic, tweaking the odd setting here and there so I have added a new thread in the 'Technical Issues, Bugs and Feature Requests' forum for you to add any issues you find, any missing settings or just anything you'd like to see added/removed from the feature set that Xenforo offers. We will get to everything over the coming weeks so please be patient, but add anything at all to the thread I mention above and we promise to get to them over the next few days/weeks/months. In the meantime, please enjoy!

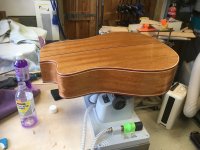
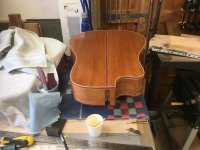
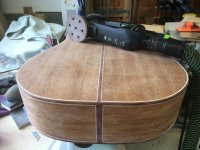
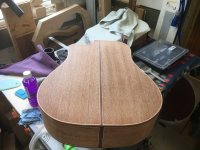
Dreadnought SS Guitar (Demo Time)

Looks scary but then so did a lot of steps you have done along the way.

Looking good.

is 'lonely' an autocorrect typo?
 
Looks scary but then so did a lot of steps you have done along the way.

Looking good.

is 'lonely' an autocorrect typo?
Haha! Thanks, Robert. The auto spell on the new software is just too quick for me! 😀
 
Malc, this looks great. I'm shortly going to be doing a similar exercise of shaping a curved profile into a tapered part - being the legs on my table project. The only additional obstacle I have is that the legs are curved. (This reminds me that I need to do a lot of updates on my table thread. The truth is that I've been spending too much time in the workshop to be able to visit TWH2 very much recently. I guess that's a good thing!)
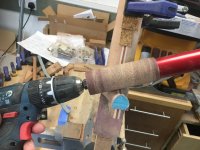
 
Malc, this looks great. I'm shortly going to be doing a similar exercise of shaping a curved profile into a tapered part - being the legs on my table project. The only additional obstacle I have is that the legs are curved. (This reminds me that I need to do a lot of updates on my table thread. The truth is that I've been spending too much time in the workshop to be able to visit TWH2 very much recently. I guess that's a good thing!)
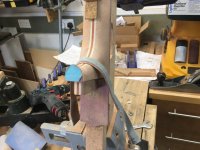
Thanks, Nick. Hmmm. I'm lucky that the neck is straight and so it's a simple process, but still needing accuracy, to join up. I'm not sure how I would approach a curve other than entirely by hand with profile templates to check against.
 
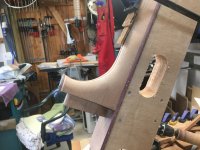
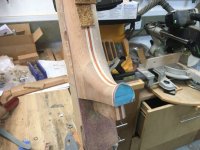
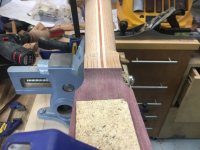
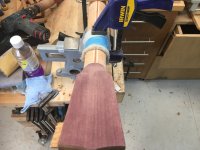
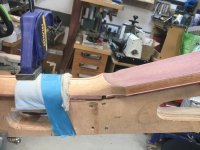
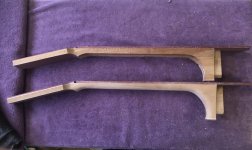
Time to carve the heel and the volute.

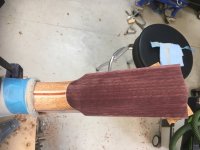
Although I didn't photograph the process, I first carve the shape of the end of the heel. Then I carved away the square edges between the heel and the neck with a chisel flat side up. I then hogged out much of the waste with the rolling pin sander.

8926FCA4-AD00-4205-87D3-BFF442DC364B.jpeg

Does a brilliant job of getting down to where….


B0DFDDCC-034F-489E-833C-9BC133807850.jpeg


…I change over to the 'shoeshine' sanding method.

ECF07864-C2EF-41ED-8929-81E67BFEF2D0.jpeg

I'm quite pleased with the result.

AC7E5AE4-FC31-49FF-997F-B43951DEC962.jpeg

The curved shapes of the joins help me ensure both sides are the same shape as I sand.


147C64AF-F000-47B7-B6D0-36C579C97A34.jpeg


Next on to the volute.


40182E0D-E739-4983-97A0-41263F2A0CD5.jpeg


Chisel and shoeshine only this time. I make up shock absorbers so if I overrun with a chisel I don't damage the finished of the neck.

7BD74712-3313-4ED4-97A0-DB3CDA3A48AD.jpeg


That turned out quite nice, too.

C5AD9823-427F-45EF-8603-AFBA3310889A.jpeg


Could help wafting a bit of meths over the surface to se what happens to the grain.


F2205045-8DC1-4CA4-A27F-7D061B9BD6CF_1_201_a.jpeg

Finished article.


88E3B47E-860A-47D8-B319-3F04A828451C_1_201_a.jpeg

A bit like the mugshots I used to take in the old job. :)


921267DD-67EA-4388-8A29-CE8E1B8459F4_1_201_a.jpeg

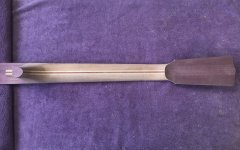
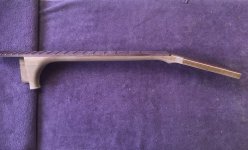
Neck blank for comparison.

433EC57C-2658-49D4-9AFA-8FB95924FC69.jpeg

Yes, I think so.

223B73D5-D70E-4EAB-9E0F-641BE2521850.jpeg
 
Last edited:
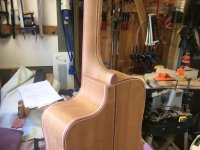
Rinse and repeat the same process for the cutaway model.


66CC1038-F65A-4065-A6F7-81B822BED79B.jpeg

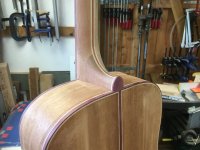
Looks nice on the body.

That African mahogany is so nice to work, and especially to sand.

13099708-066A-4B13-AC2D-FF3D4C8BA9C8.jpeg

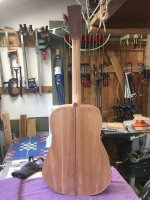
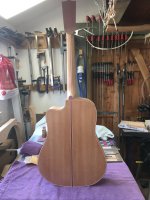
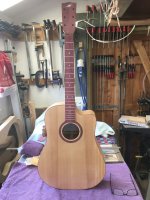
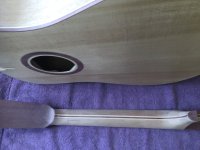
Looks nice against the back, but the heel is off centre.

D1110D6E-E813-4692-9925-B0D2FA5BC827.jpeg

Proportions look right.


4571C821-0C26-4BAA-9B39-FA0BAA70F662_1_201_a.jpeg

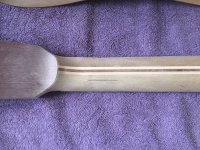
But, see the little dark line……..


4BC8C53E-6B5D-4BCB-A5AA-A8EE44CAF220_1_201_a.jpeg


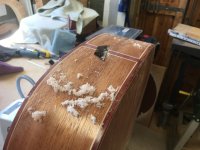
…it's a piece of carbon fibre reinforcement rod showing through. Dash it, I said. I definitely got something wrong building the neck up.

Would you buy an instrument that sounded great but showed that on the neck? You can't feel it, everything is very smooth.
 
Rinse and repeat the same process for the cutaway model.


View attachment 26821

Looks nice on the body.

That African mahogany is so nice to work, and especially to sand.

View attachment 26822

Looks nice against the back, but the heel is off centre.

View attachment 26823

Proportions look right.


View attachment 26824

But, see the little dark line……..


View attachment 26825


…it's a piece of carbon fibre reinforcement rod showing through. Dash it, I said. I definitely got something wrong building the neck up.

Would you buy an instrument that sounded great but showed that on the neck? You can't feel it, everything is very smooth.
Depends on the price, I suppose..
 
Sorry. If it were me I would remake the neck. It is not properly aligned perfectly and now is clearly compromised. I definitely would not buy it and as a maker I would not let it out of the workshop either. It's a lot easier to re-make a neck than a body (especially if you can get the fretboard off intact, and as a luthier why compromise your reputation. Bad news, but not a major disaster. A
 
That's so annoying after all the work you've put into it. If you've got the materials to make a new neck, I think that's probably the route to go down.

Is it possible to get the fretboard off? Can you bandsaw through the neck and then clean up the underside of the fretboard or is the truss rod in the way? Failing that, perhaps you could get the truss rod out from the back before sawing the fretboard off.

I hope you can get it sorted.
 
it's a shame that the carbon rod is showing, personally like Adrian I'd have to re-do the neck, especially if you plan on selling it, I think mistakes are a good thing because hopefully this won't happen again and you learnt from it.
 
Thank you, all, and I've come to a decision.

The problem boils down to me not accurately aligning the M&T jig when I set it up for the mortise on the body. That is what is offset by about 0.75 mm.

I then centralised the neck and fretboard to the soundboard by adjusting the heel, remember the 'flossing' with abrasive strip. I also found that the fretboard even with the alignment pins, was about just under half a millimetre misaligned to the neck at gluing/clamping which distorts the alignment view to the discerning eye.

If i were to make a new neck, there would still be alignment issues because to the mortise.

I've had a look over the body and neck, and there are cosmetic flaws on both, but the headstock, fretboard and body are all in a straight line with a straight edge over the centre line. So this will still be a very playable instrument, whatever the visual flaws.

I will continue to build it and probably keep it for myself to play, but have learned in the process.
 
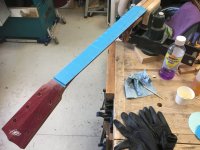
Time to prepare for pore filling. The necks have been sanded to 320 grit, and the masking tape, blue for the use of, (anyone done a post on blue masking tape? ;) ) which doubles as masking for pore filling and for nitrocellulose lacquer finishing.
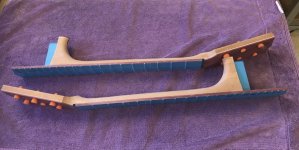
5CD241E1-CBCB-4364-A483-8AE74622C117_1_201_a.jpeg

Do you like the alternative use of ear plugs? They stop the lacquer building up on the edges of the holes.

I shall be using epoxy resin for pore filling. It is cheaper and provides a better pore surface for the lacquer than just spraying with zillions of coats of lacquer to fill the pores. I will probably use two resin coats and sand back to wood each time before spraying.

The bodies have been sanded to 240 grit and I will go to 320 when they're ready for pore filling.
 
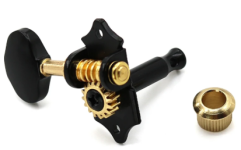
They look like classical guitar MH. Do the buttons unscrew? - this could be your chance to make some lovely ebony ones ;)

Until recently I had a guitar with a set of Schaller Grandtune on that were very similar to those but with a nickel shaft I think. They were quite smart. Yours will look excellent.
 
You furniture chappies have it so easy referencing from a side or an edge. ;) Me, I have to reference from the, and there is only one, centre line, even when it isn't visible!
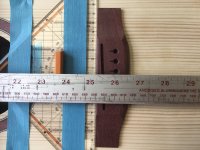
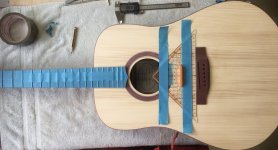
I've just spent a couple of days removing dings and dents accumulated on the soundboard. I had sprayed it with cellulose sanding sealer to give it some protection while working, but no matter how careful I think I am in the workshop, it still collects little dents.

Anyway, my solution for them was using my late M-i-L's iron on regulo 9 and a soaking wet cotton bud, resting the wet bud on the ding and carefully rolling it back and forward with the iron letting the wood swell back to it original level. I was quite chuffed with how well it worked.

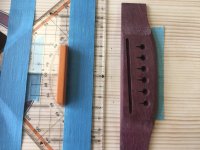
To prepare the soundboard for finishing, even before final sanding, I have to mask the areas of the fretboard overhang and the bridge which do not get glued until the body is completely finished, so there is bare wood for them to be glued to.

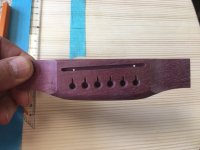
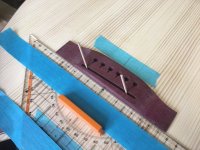
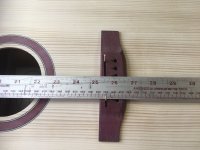
First I have to locate the bridge for the scale length of this instrument which is 645.2mm (or 25 1/2"). That is the distance from the nut to the second string position on the saddle, the white bit that fits in the slot in the bridge. So I have to stick my centro set square on the centre line.

F4B41476-4861-44CE-83B6-3E818A27111E_1_201_a.jpeg

Where the ruler from the nut shows the scale length at the second string on the bridge.

8B211799-40C3-4D03-BB09-198A0B1BB496_1_201_a.jpeg


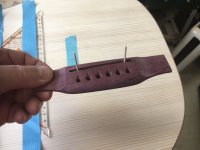
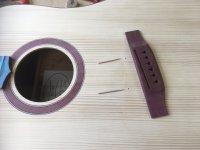
Once that is set and won't move, I drill two holes in the saddle slot, a tad smaller than the diameter of a cocktail stick.

A8343BC4-DA6E-44FD-BE09-6A9414C88B8D.jpeg

Smaller, so they don't fall through.

9307EE33-17E6-416B-B8B0-8B6A411805FD_1_201_a.jpeg

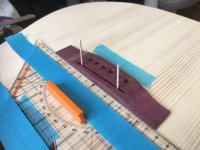
I then replace the bridge in it's final location and...


DB3553F6-949E-4379-B6C9-C1F665A03A2F.jpeg

Press the points of the sticks into the sound board to make a …...


5CF51DB2-6CD0-4872-A227-282D7DFB8A3C_1_201_a.jpeg


…couple of little dents.


E4BBB93F-7168-437D-88EC-F58418439591_1_201_a.jpeg


So that I can drill a couple of 1.5mm holes to accept the points of the sticks.


0D047AEB-0353-45A5-A9A1-9744B88F94A5.jpeg


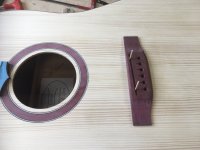
Now, if I remove the bridge, it should always go back in the same place.

22BD4AE5-7481-484F-8ECE-91ABB94458AA_1_201_a.jpeg


And just to make sure….


19B53C93-4EA8-4A81-AB30-C7896C1B0805_1_201_a.jpeg


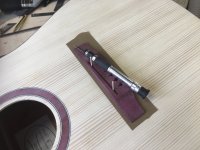
So now, to make the bridge shape so it doesn't get lacquered, I use parcel tape.

EBA36C40-970B-421D-8A2E-DC245F69CAAE_1_201_a.jpeg


This bit is nerve-racking trying hard not to let the weight of the blade cut through into the wood.

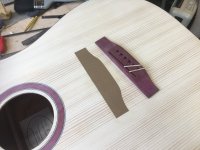
00D1F895-FAFF-4FC7-AA6E-F7DD37BEB0C7.jpeg


Phew!

A26B4C19-AF22-4F11-8FAF-25E8C02DB4CD_1_201_a.jpeg


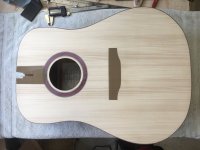
I also did the same with the fretboard overhang earlier.

That's one instrument's soundboard prepared. I'll give it one more coat of sanding sealer and sand back with 320 grit, once I have pore-filled the back and sides.
 
Malc, You said earlier you will pore fill with epoxy - have you found one that sands down well? I used casting resin spread thinly over my desk surface and the result was a very smooth finish that has lasted well but it was a pain to sand as the pads kept getting clogged.

I need to refinish a coffee table sometime and it will need filling.

Still enjoying watching your progress and still impressed with your dedication to quality.
 
Malc, You said earlier you will pore fill with epoxy - have you found one that sands down well? I used casting resin spread thinly over my desk surface and the result was a very smooth finish that has lasted well but it was a pain to sand as the pads kept getting clogged.

I need to refinish a coffee table sometime and it will need filling.

Still enjoying watching your progress and still impressed with your dedication to quality.
Thank you, Robert.

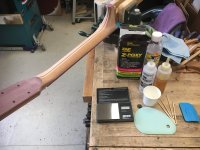
I use Zap Z-Poxy Finishing Resin and I weigh the resin and hardener to get the ratio accurate because I use such small amounts. I apply it with a kitchen silicone bowl scraper so it gets squeegied into the grain. The trick is to squeegee hard across, not with, the grain leaving very little on the surface to sand back to wood. This might need to be done two or three times depending on the depth of the pores. Some people use old credit cards, and some rub with a tiny wad of cloth, but the process is to press hard into the pores across the grain, rather than applying to the surface as a whole. This process uses very little resin, so I never mix up much at a time.
 
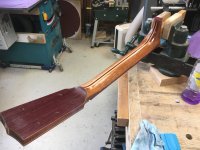
In the above post I've described the method and materials I use for pore filling. I started with one neck.


2032B908-073F-48AC-8ABB-4DB7C74619A1.jpeg

I measured out 2 grams each of resin and hardener.


CDBD1D74-E566-4A96-8408-E50373EB74F0.jpeg

Beginning to get an idea of finished colours.


4C63BF0F-ECC6-4694-A748-BF2200443777.jpeg

Towards the end of the process, I probably remove more resin than I actually applied. This makes it much easier to sand back to wood.

I will probably apply two coats to each of the components, sanding back to wood in between.
 
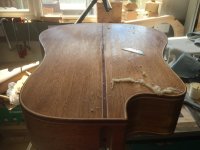
Both necks have been sanded back to wood, so it's time to start on the bodies.

35F6774C-9999-4175-9474-E4065062BA54.jpeg

Beginning to see the difference between the unfinished and finished colours of the wood.

Spot the Ikea silicone bowl scraper. :)


443A600F-51B0-473B-A27C-579E464CA182.jpeg

The Purpleheart looks more purple (purpler?) than it does in the image.

9E126470-1F4C-4A76-B2B7-9F0362539C30.jpeg

I succumbed and wiped the Purpleheart rosette with meths to get an idea of how it will look. Sorry I didn't photograph it, but it will look nice.


09CFBCF6-81CF-4E0B-8298-B6AEEE3898EA.jpeg

The combination of back and sides looks nice.


803365E8-784F-43CA-9240-700BD5742971.jpeg

I'll leave it there overnight and if it's cured enough start sanding back tomorrow.
 
Is there any chance that the purple dye in the meths enhances the purple in the wood? Over here meths is sold au naturel, alcool à brûler.
 
Is there any chance that the purple dye in the meths enhances the purple in the wood? Over here meths is sold au naturel, alcool à brûler.
I have no idea, Andy, but I don't thinks so. It flashes off quickly. I believe our dye goes back to the days when it used to be drunk. I've read it makes it identifiable and it has other additives that make it bitter, bad tasting and poisonous.
 
Epoxy cured; time to reduce back to wood.

CE7603A4-4B29-41DD-9483-8ADE2CBE3F90.jpeg

If it's still scraping white, then it's not down to wood yet.


125CF94E-8BAF-4369-BC74-83676E93A08D.jpeg


HD Stanley blades are my go to scraper for this sort of job.


64923109-EB13-4C02-B84E-4884BD2AFF90.jpeg

Sanding to 240 grit.


F54EC148-A1BA-439E-AF14-89B366990F18.jpeg


Sanded to 320 grit.

This African Mahogany has been quite good and pore filled in one coat. Time to protect it now while I work on the other body.
 
Both necks have been sanded back to wood, so it's time to start on the bodies.

View attachment 27032

Beginning to see the difference between the unfinished and finished colours of the wood.

Spot the Ikea silicone bowl scraper. :)


View attachment 27033

The Purpleheart looks more purple (purpler?) than it does in the image.

View attachment 27034

I succumbed and wiped the Purpleheart rosette with meths to get an idea of how it will look. Sorry I didn't photograph it, but it will look nice.


View attachment 27035

The combination of back and sides looks nice.


View attachment 27036

I'll leave it there overnight and if it's cured enough start sanding back tomorrow.
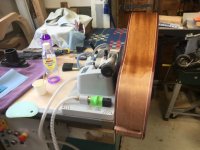
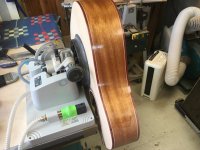
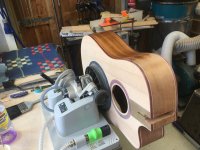
That suction cup machine is interesting , is it a standard piece of equipment for Luthiers?
 
That suction cup machine is interesting , is it a standard piece of equipment for Luthiers?

Not sure, Duke. But I saw this vacuum clamp advertised second hand and bought it. Holds the instrument bodies brilliantly. It rotates in 2 axes. And it sucks itself on to the bench. Absolutely ideal for this part of the build without damaging or marking the body.
 
Waiting for outdoor temperatures to warm up to above room temperature so I can spray outside under the deck roof.


F9D4F8A4-399D-4480-AB78-A316CF919741.jpeg
 
Do you try to keep an even RH in your shop Malc ? Apologies in advance if you have covered this already. I sense you need alot of patience through an instrument build.
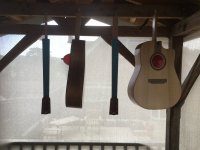
Thanks, Duke.

I do try to keep it even. I have a domestic dehumidifier running 5 hours a day keeping it at around 45%. Yesterday, working with the door open and the dehumidifier off, it dropped to 39%. We don't usually have large changes in humidity, but it's nice to keep it even, and to bring any new wood I bring in to the level of the rest of my stock.

I don't have a spray booth, so I hang dust sheets around the edge of the deck roof to keep breeze and dust down a bit when spraying, but still need the air, lacquer and workpieces all to be above room temperature for a decent finish. because of this, I have to plan my build projects to terminate just as the outdoor temperature goes up to around 20C. That ends up at 2 per year.
 
…but this time in the pop up spray booth on the deck.


14D09CEB-701B-4E07-AB1C-F397DE690092.jpeg


Three coats so far of 50/50 nitrocellulose/thinners. 3 more per day with 600 grit gentle rubbing back each morning. Then a few days rest, the three final coats before two weeks of curing, and then rubbing up through the grades.

I'm no expert at spraying, but I've bought an LVLP spray gun and I do find it easier to lay on the lacquer. But still nowhere near as smooth as the YT videos!
 
…but this time in the pop up spray booth on the deck.


View attachment 27292


Three coats so far of 50/50 nitrocellulose/thinners. 3 more per day with 600 grit gentle rubbing back each morning. Then a few days rest, the three final coats before two weeks of curing, and then rubbing up through the grades.

I'm no expert at spraying, but I've bought an LVLP spray gun and I do find it easier to lay on the lacquer. But still nowhere near as smooth as the YT videos!
What are you doing in your shop between curing times.?
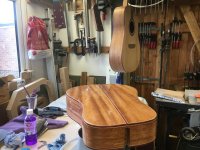
 
What are you doing in your shop between curing times.?
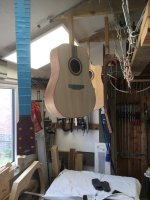
Well, last year, I got the cnc machine down from the rafters and started programming the components for these two instruments. This year, we've got family stuff happening, so I haven't got anything planned at the moment.
 
Back
Top