• Hi all and welcome to TheWoodHaven2 brought into the 21st Century, kicking and screaming! We all have Alasdair to thank for the vast bulk of the heavy lifting to get us here, no more so than me because he's taken away a huge burden of responsibility from my shoulders and brought us to this new shiny home, with all your previous content (hopefully) still intact! Please peruse and feed back. There is still plenty to do, like changing the colour scheme, adding the banner graphic, tweaking the odd setting here and there so I have added a new thread in the 'Technical Issues, Bugs and Feature Requests' forum for you to add any issues you find, any missing settings or just anything you'd like to see added/removed from the feature set that Xenforo offers. We will get to everything over the coming weeks so please be patient, but add anything at all to the thread I mention above and we promise to get to them over the next few days/weeks/months. In the meantime, please enjoy!

Elevating stand for my new thicknesser

Bob - absolutely spiffing , when its finally finished will you be treating us to a video of the beast in operation ? . If not I might have to drift over and see it in the flesh ( by appointment of course ) .

Steve
 
tracerman":2uev7ja4 said:
Bob - absolutely spiffing , when its finally finished will you be treating us to a video of the beast in operation ? . If not I might have to drift over and see it in the flesh ( by appointment of course ) .

Steve

There is a possibility of either/both, Steve. It is not exactly exciting to watch but there is the novelty factor of seeing it stop by itself I suppose.

Bob
 
Brilliant, and to prove I read and understand the whole thing I think you need to correct a slight error...... :D

The control box is fixed to the rear wall of the stand. in this way I don't need any safety interlock to stop the controls being operated when the planer is under the bench. This happens naturally as i can reach the buttons until the stand is rolled out from under the bench and neither can I roll it away until it lowered.
Uses the KISS principle :lol:
 
Andyp":kln7vrow said:
Brilliant, and to prove I read and understand the whole thing I think you need to correct a slight error...... :D

The control box is fixed to the rear wall of the stand. in this way I don't need any safety interlock to stop the controls being operated when the planer is under the bench. This happens naturally as i can reach the buttons until the stand is rolled out from under the bench and neither can I roll it away until it lowered.
Uses the KISS principle :lol:


Well done Andy, you have passed my "deliberate" comprehension test. :eusa-clap: :lol:
Original text now edited!

Bob
 
Thanks Erich!

After the last post I thought there was little more to do but odds and ends have kept me out of mischief for another few days.

I bought a magnetic reed switch from the bay- the sort that are used to alarm doors and windows. The idea is to slow the motor right down when the machine is within the last cm or so of travel. I wanted to minimise the inertia so that it does not run on at the top of its travel.
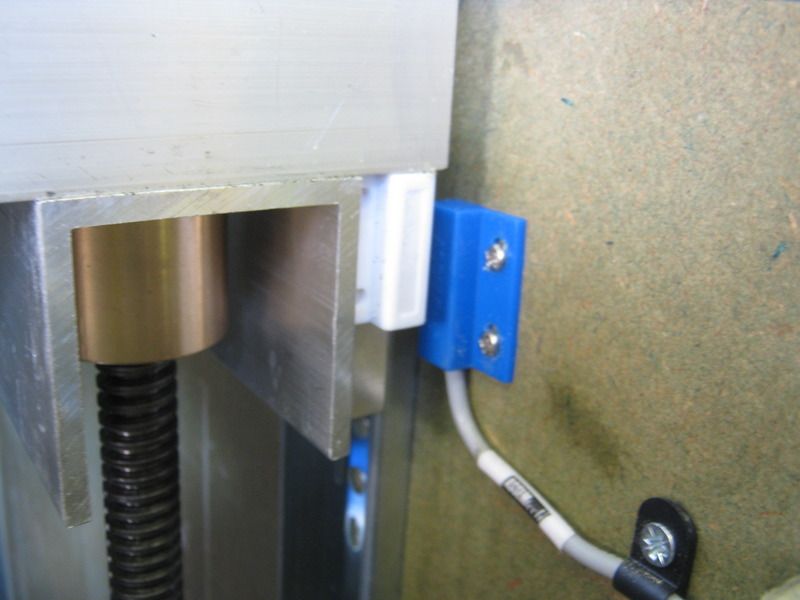


The white piece is the magnet which attached to the carriage and the blue piece is the reed switch which closes when the magnet is nearby.

This video shows it in action. The extra noise from the motor is because it is being switched on and off rapidly. I'm quite pleased with the result.

[youtube]IemoatIHmHM[/youtube]

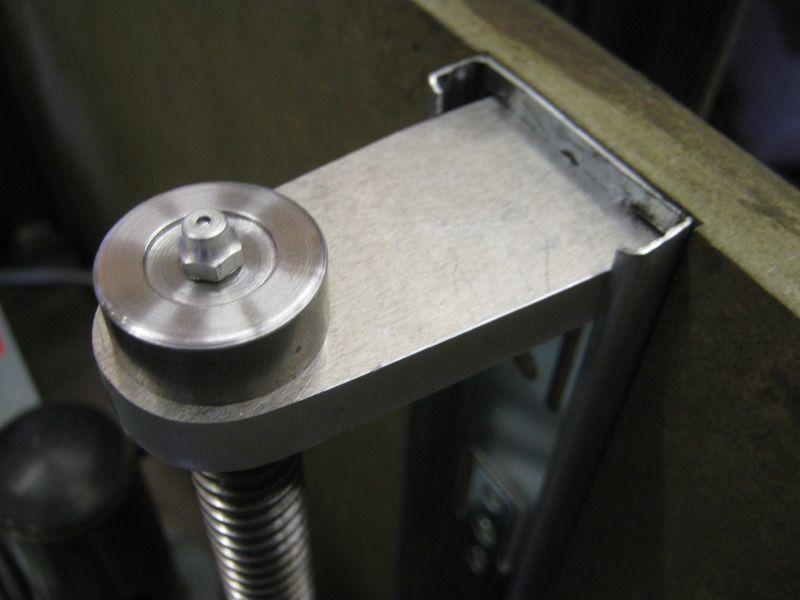
The next job was to tidy up the top ends of the jackscrews. Due to a small design change after I had ordered the screws, they were about 5mm too long.
A good tip for trimming metal in situ is the use a small angle grinder with one of the very fine kerf cutting discs. These are around 1mm thick to only the minimum amount of metal is turned to dust and so a lot less heat is generated and the surrounding metal is largely unaffected compared to a standard 3-4mm disc.

I wrapped rags around the screw to keep the abrasive off the rest of the threads.

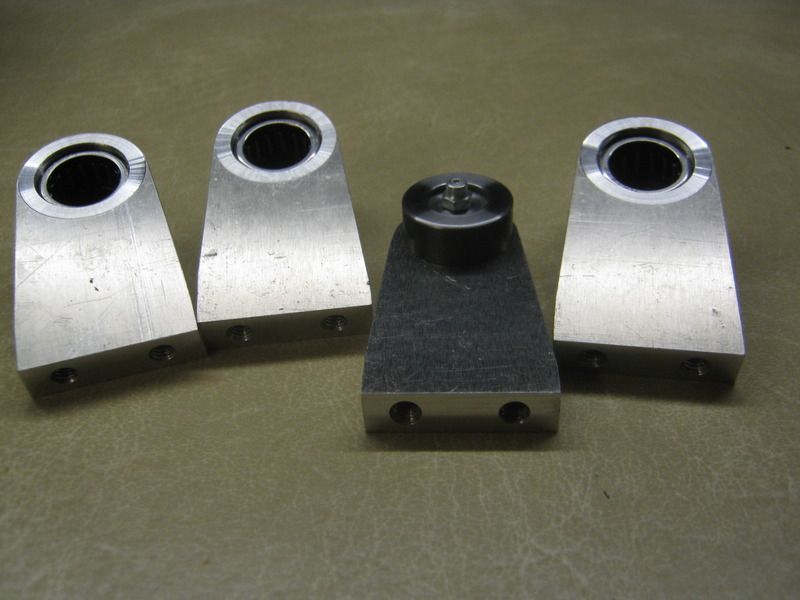
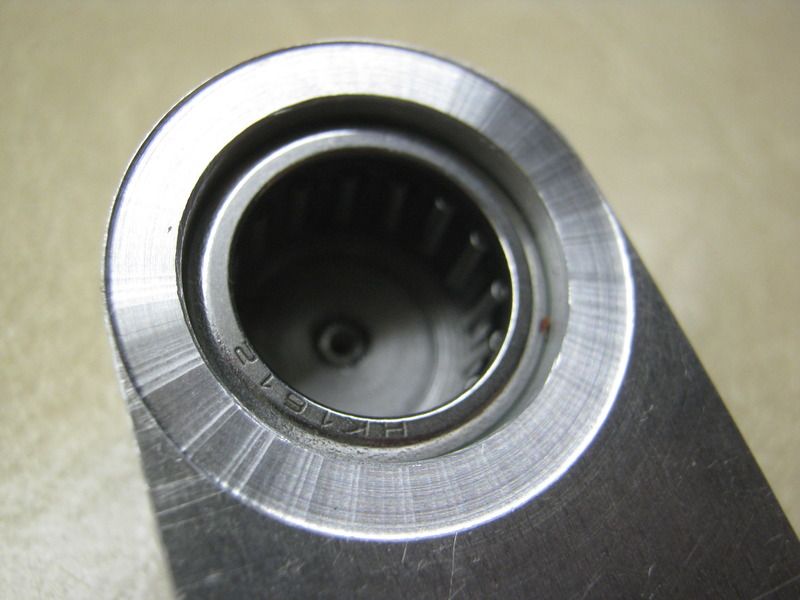
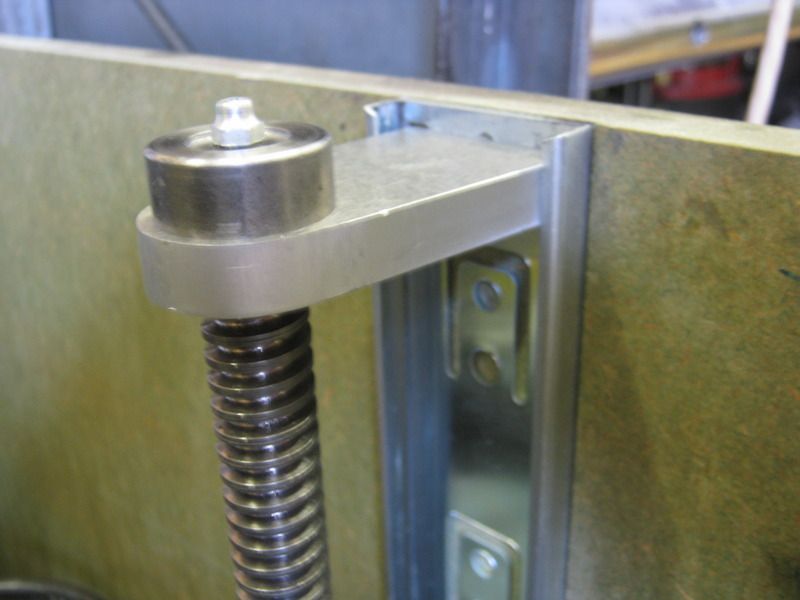
The next few shots are of the bearing caps. Each has a needle roller bearing fitted into an aluminium bracket and a cap fitted on with an oil nipple in the top. The oil will go via the bearing onto the screw, run down the thread and onto the sprocket and hence onto the roller chain and lubricate the idlers and hopefully some will even run into the motor gearbox. well that is the plan anyway.


The next thing to sort out was the supply voltage. The motor is designed for 60Hz operation being a US machine and so the operating voltage which is 240v at 60Hz needs to be reduced in proportion to the frequency. Ideally 200v. I'm using a transformer which will drop it to between 210 and 205v which is near enough and the motor runs much cooler.
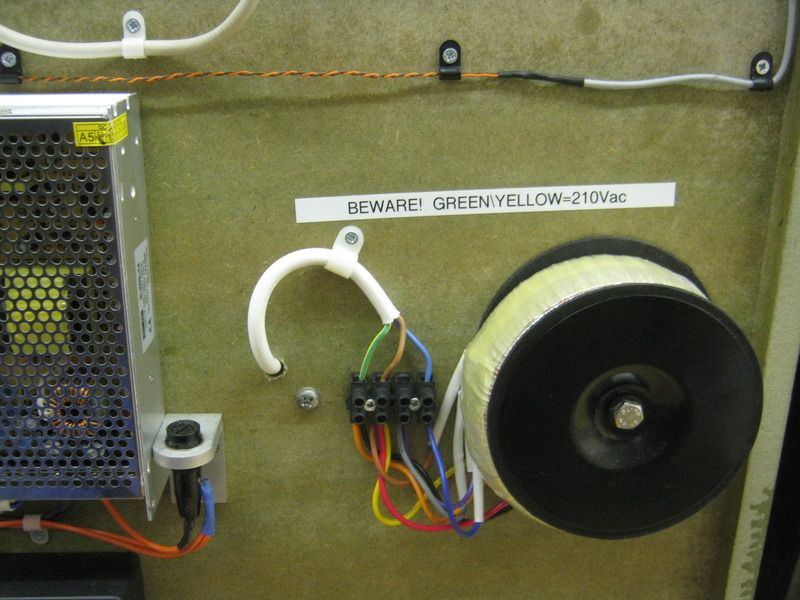


I only had some normal mains cable but needed three cores Live, neutral and 210v so the green and yellow wire normally intended for earth gets used for power instead and so I've added a warning label!

The original machine only had an on/off switch, no NVR or motor protection so that was soon put right.
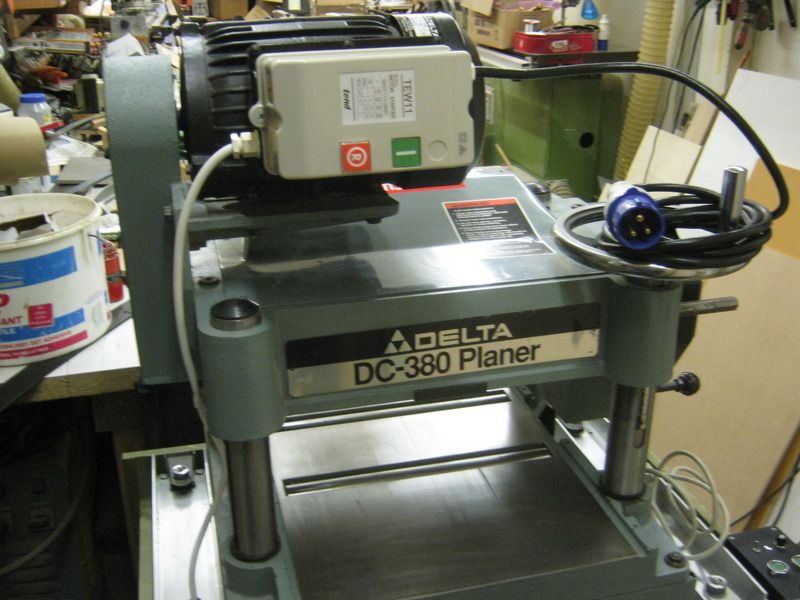


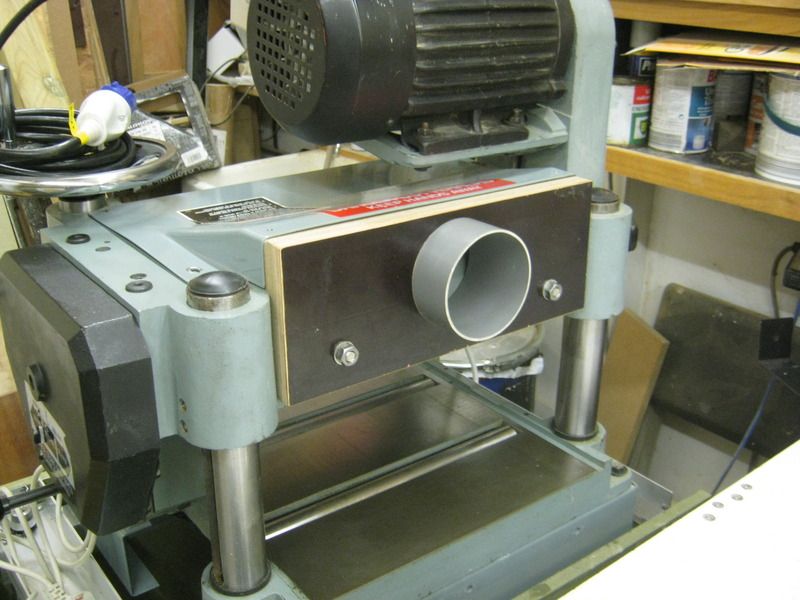
Next I needed an adaptor to 100mm dust collection hose.

A few pieces of mdf and ply glued together, shaped with the band saw and bored to a honeymoon fit on a stub of 100mm pipe.
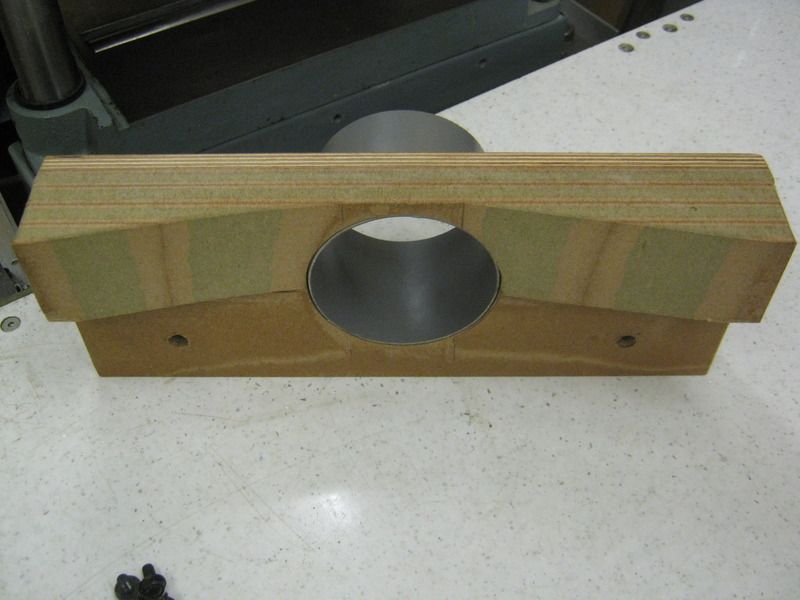
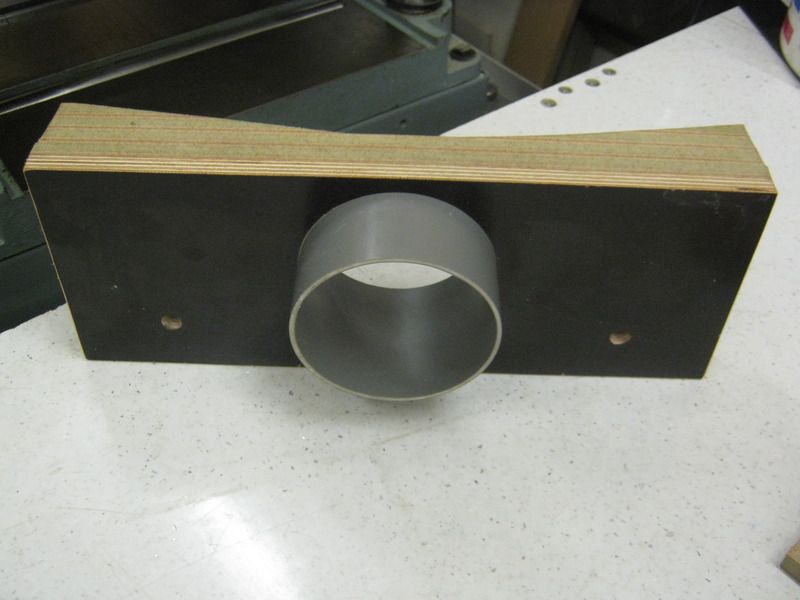


And fitted to the machine


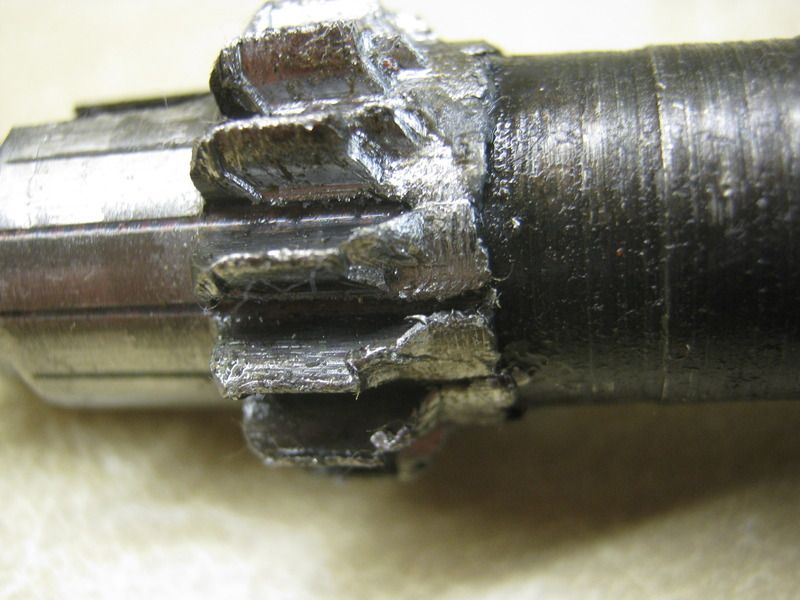
I had a few mechanical issues to sort out. The gearbox had a slight oil leak and in the process of draining the gearbox, a lot of metal came out. This clearly needed further attention. Inside to my horror I found a gear with most of its teeth worn away. What had clearly been happening was that in use the drive was slipping out of gear and the previous own had been re-engaging the gears under load.
Fortunately, I found one US dealer still holding stock of this gear and who unlike the others, was prepared to send one to UK. total cost $30 including post and took about a week.

I was able to find the fault. A tiny spring loaded ball in a shaft should hold the gear shift in one speed or other or in neutral. The spring was weak so I popped in another one from the scrap spring box and the job was a good-un. A new oil seal, ordered Friday arrived Monday morning together with a litre of EP gear oil. Application of a smear of silicone sealant on the gasket faces and the gearbox is now perfectly sealed.

The lesson from this is don't just put up with something jumping out of gear, investigate and sort it out. I'm feeling exceptionally lucky to have been able to buy a spare gear for a machine that is out of production. You might not be so lucky. So sort out little problems before they become major disasters - like a planer with no power feed!

I did not take any photos of the gearbox work as I had oily hands most of the time but here is the abused part.

overall
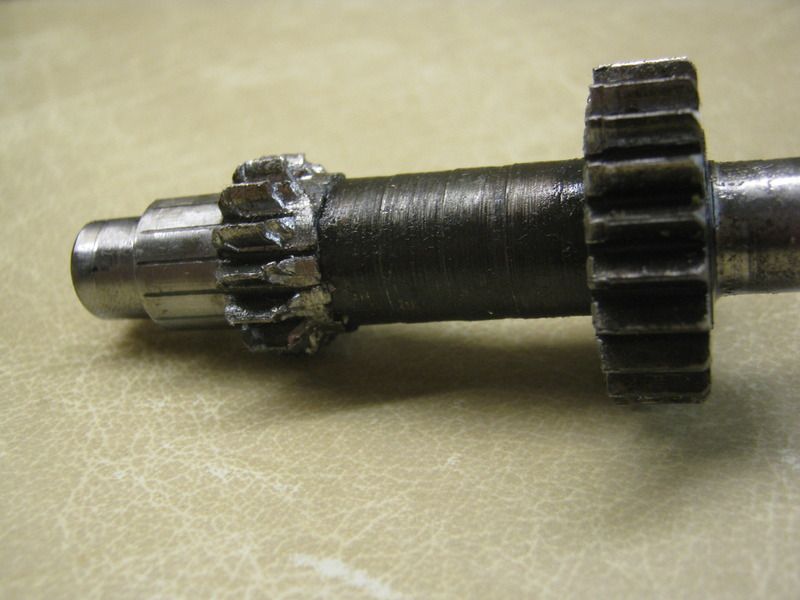


close up - Not a pretty sight.


Now to make some shavings and set the planing function up.

Hopefully soon my DW 733 will be up for sale including my tip over storage stand.

Thanks for reading this far!

Bob
 
Nice work, Bob, and well photographed and written, too. That gear is a mess. Surely that was at least noisy before?

As for doing maintenance in time.........Zen and the Art of Motorcycle Maintenance, by Bob Persig.
 
Mike G":1l4pr1dx said:
Nice work, Bob, and well photographed and written, too. That gear is a mess. Surely that was at least noisy before?

As for doing maintenance in time.........Zen and the Art of Motorcycle Maintenance, by Bob Persig.

I think I would have noticed it as a change if I'd been used to the machine but difficult to tell over the other noises on an unfamiliar machine. Also the sound was possibly damped by the oil as that gear is below the oil level.

Bob
 
:text-goodpost: Awesome work Bob and as Mike said an exemplary write up :eusa-clap:

If only there were still such things as evening classes, it got me to thinking that in addition to doing one in matters electrical I would also like to learn more about matters mechanical. Sadly it seems evening classes are a thing of the past.

Terry.
 
Thanks Terry. I'm glad you enjoyed following it.

I have to agree that there seem to be a dearth of practical evening classes especially at the engineering end of the spectrum.
I'd be happy to try and help with your quest for knowledge either through the forums, direct mail or face to face. I have no formal qualifications in mechanics or electrical/electronics but have just learned as I've gone along. My degree was in computing and cybernetics 1970s vintage so that was no help. I've always been curious and determined to learn from practical experience.

One of my objectives in posting here is the hope that some of my enthusiasm for subjects might rub off and give confidence to others that stuff can be done and that there is always a way to achieve what you want.

Bob
 
Beautifully engineered and designed, Bob.

I have a metalwork 'O' level certificate somewhere but all I can seem to remember is bending over bits of tin metal and soldering! Nothing at your level of expertise.
 
RogerS":1wqhvnlc said:
Beautifully engineered and designed, Bob.

I have a metalwork 'O' level certificate somewhere but all I can seem to remember is bending over bits of tin metal and soldering! Nothing at your level of expertise.

Thanks Roger.

No metalwork training/qualification at all here. All learned by having a go!
My Grammar School had 1 woodwork teacher and workshop but was strongly biassed to academic work and anyone showing any vague academic skills (in my case >25% in a French test and sent to learn German!) only got one year of woodwork and no metalwork facilities at all. I had to wait until near retirement to take it up again.

Bob
 
I would expect nothing less from you Bob. [emoji122]

Having worked in a college some years ago, I can comment on the lack of evening classes. Colleges used to be funded to provide a wide range of courses, I started by teaching basic electronics in the evening, the system changed while I worked in the college and colleges where turned into corporations that had to show a profit, that makes running evening classes that are not part of a day release course almost impossible. The fees would have to be so high that most people who would be interested could not justify going on them. It makes me sad to see the destruction of the system that provided a well use resource.
 
My school did woodwork and metalwork which lead to a combined "O" Level but it was all pretty basic stuff.
We also did Technical Drawing as a separate lesson which is pretty rare today I think, as it's generally wound up in CDT?
I started on a brick laying evening course a few years back, which only lasted one session, as the minimum number of participants wasn't reached.
Nothing like that around here anymore.
Most classes are in art, languages and exercise.

Rod
 
My older and somewhat errant brother was instrumental in getting the woodwork workshop shut down prior to me arriving at the secondary school. So no practical education at all, and it shows :D
 
Back
Top