• Hi all and welcome to TheWoodHaven2 brought into the 21st Century, kicking and screaming! We all have Alasdair to thank for the vast bulk of the heavy lifting to get us here, no more so than me because he's taken away a huge burden of responsibility from my shoulders and brought us to this new shiny home, with all your previous content (hopefully) still intact! Please peruse and feed back. There is still plenty to do, like changing the colour scheme, adding the banner graphic, tweaking the odd setting here and there so I have added a new thread in the 'Technical Issues, Bugs and Feature Requests' forum for you to add any issues you find, any missing settings or just anything you'd like to see added/removed from the feature set that Xenforo offers. We will get to everything over the coming weeks so please be patient, but add anything at all to the thread I mention above and we promise to get to them over the next few days/weeks/months. In the meantime, please enjoy!

Garden Arbour/Windbreak, Finished

AndyP

Moderator
Staff member
Joined
Jul 22, 2014
Messages
14,313
Reaction score
1,876
Location
14860 Normandy, France
I thought I should start a proper WIP for this after a few Q&As in the General Woodwork board.

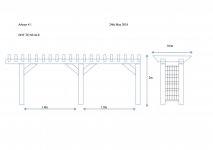
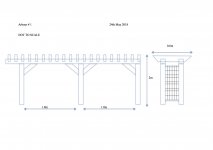
Here is the plan, sadly no CAD here :oops:
Arbour.jpg
Posts and top rails 70x70mm, Braces 45x70mm, roof boards will be decking boards planed down to remove the ribbing. Trellises 25mm square.

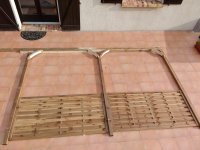
At the back between the two bays will be two standard width fence panels 1.8m wide 1.8m tall like this:-

22020801.jpg


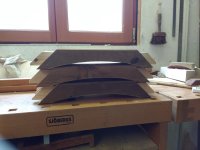
I have started by making a template for the braces. This one is 70cm on the longest edge and is too large. I will have to make another at about 40cm. Top edge will remain straight.
IMG_20180531_142012848~2.jpg

Hope to get a start on the braces this weekend.
 
I'm interested in how the knee braces turn out.

I need to have some for my intersecting roof.
 
Andyp":243w34aq said:
Malc2098":243w34aq said:
I'm interested in how the knee braces turn out.

I need to have some for my intersecting roof.

I hope you are not expecting a master class. :)


:D Nope, an apprentice class like mine will be!
 
Are you intending this to cast a shadow over your seating area as at 0.6m O/A wide it’s not really wide enough to sit under?

Rod
 
Rod":2jq7w2f0 said:
Are you intending this to cast a shadow over your seating area as at 0.6m O/A wide it’s not really wide enough to sit under?

Rod

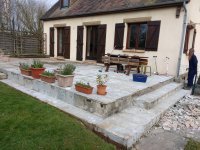
No Rod, this is not for shade just to stop the wind at the west end of the terrace. Perhaps I am confusing the terminology. In my mind an arbour is just a fancy trellis, normally an arch for walking under etc. For casting shade it would be called a pergola as was suggested in my How to Shade a South Facing Terrace thread. The pergola idea was vetoed by the missus as being too large and would take away too much light from the living room. For shade we are staying with parasol and mobile base.

The old one can just be seen to the far left in this photo.
IMG_20180322_100116847.jpg
 
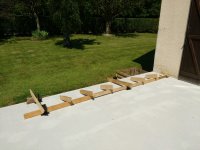
In order to get a feel for how many and what size the roof boards need to be I set some offcuts out on the terrace. I have an awful imagination so laying things out like this really helps.

IMG_20180603_113930762.jpg

IMG_20180603_113949850.jpg

IMG_20180603_114020759.jpg

The boards will have a nicely curved ends not straight as in the 2nd image.
 
Bill,
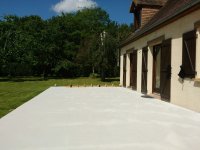
Terrace to be tilled.....soon. Post supports will go on top of tiles. I had wondered if those post supports could be tiled over. Will discuss with tiler.
 
It is fast approaching a year since I started this thread. :oops:

Arbour.jpg

Yesterday I bought the 7x7cm x 2.4m timber for the posts, braces and top beams so I have to get started soon. Also the climbing rose I planted in the autumn is growing so fast it will need something to attach too soon.

I was wondering if I could keep the braces the same width as the posts and beams. If I do this then the recess for the mortice will have to be the whole width of the timber. Like this :-
Image not mine.
52a3a8fe-2396-41a3-85b9-dbd0d9f122bf


I see as being a lot quicker and easier for me to achieve but would welcome any thoughts.
 
I see your drawing lets the braces in a short way.

I think I have seen the braces half thickness and let into halving type recesses across the whole width of the post, or even full thickness braces but half let into halving recesses.

I've got to sort something out similar for the knee braces on the intersecting roof to my workshop, so I shall be watching with interest.
 
Had some help this morning so I thought some 3 dimensional visualisation was required and as I don't do CAD we mocked this up instead.

IMG_20190406_124648422_HDR.jpg

There will be another curved top half panel on top and repeated in the space on the right where the posts will be bolted to the wall.

Top beam is actual height but will extend further to left. Which scarf joint to use undecided. Although I think I will position the scarf between the wall and the RH post.
Design consultant thinks the braces are long enough. I am not sure.
 
Might be my eye, but I think the length of the brace is not quite in proportion and might need to be a bit longer, purely from a visual, not a structural, perspective.
 
Just explain about an enhancement to her excellent ideas. :lol: :lol:

On a similiar structure I think my braces meet the horizontals at 25% along the length.

Also the curved waste part I cut off was glued onto the top edge of the brace to enhance the curved appearance

Bob
 
8 Braces cut and tenons made. Faces nibbled on the mitre saw and tidied with chisel. Edges freehand on band saw. Curves cut freehand on bandsaw too.
IMG_20190415_095102168.jpg
These were meant to be 2" longer than the template but a slight misjudgement led them to be just 1" longer :oops: She will never notice :)

I also had a go at marking a wedged scarf with horizontal faces:-
IMG_20190415_105336907.jpg
Nibbled on the mitre saw and tidied by hand again. Needs a little fettling but I see no reason why this would not be suitable.
I would like to find a 4m length of suitable timber but have failed so far and even if I found some I would struggle to get it in the car so a scarf of some sort will have to be done.

Next job is to cut the tenons on top of the 6 posts as this can be done before cutting them to final length. Then the really critical stuff will start, the scarfs and getting all the mortices in the right places.
 
RogerM":6ig320r4 said:
Looking good Andy. I'm liking that scarf joint!

Woodbloke":6ig320r4 said:
RogerM":6ig320r4 said:
Looking good Andy. I'm liking that scarf joint!
Same here Rog, very oriental :D - Rob

Thanks. It really is very tight and strong even with those slight gaps. Although getting the wedges the right height so that they fit snuggly bit don't force the joint apart is critical.
I now have to work up the courage to make one where the two pieces to be joined are 2.4m long.
 
I laid bits out on the terrace to see where the scarfs would sit. RH post will be screwed to wall.
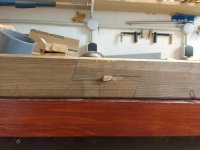
Due to Roger’s cock-up fairy paying a visit I screwed up the fancy wedged scarf that I tried earlier and chickened out trying to do it again so went with simple laps. These are just glued at the moment but screws or pegs will be added later.
The scarf cock-up meant that the beams will be a little shorter than planned but no big deal. The longer beam is yet to be trimmed.
B368CA5C-EF53-40D0-A116-8B51B8E7B7FA.jpeg

4F5537DD-3FA8-4D1A-8BF4-54432B6EAD95.jpeg


BTW nobody noticed that despite having a template I still managed to cut all of the tenons on the braces wrong :oops: so these will need to trimmed before I can mark out the mortices. I do not think that slightly small tenons will cause a problem.
 
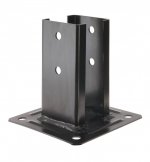
These are the fixings I will be using for the 7x7cm posts.
post fixing.jpeg
I know reservations were raised about the possibility of water being trapped at the top of the fixing but budget and availability constraints won out.

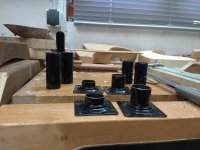
In order to keep the posts of the ground and at the same time not having the whole weight of the structure resting on the S/S bolts I cut up some metal chair legs to attach to the posts ends. For some reason that escapes me at the moment I decided to cut these feet rather than the posts to account for the slope of the terrace.
IMG_20190507_094410054.jpg

IMG_20190509_113102416.jpg
 
After a couple of weeks shifting this:-
22052013-4F4D-498E-883D-2F02DABD5577.jpeg

To here:-
4E07B408-2E3A-45C2-82F4-2A68AB5879C8.jpeg

Having first moved what was there to here:-
98266396-5439-4003-A7B2-00107CD33BF2.jpeg

Anyway started to mortice today, the posts I could do on the bench with only having to move the morticer once.
822B982D-DD18-44AF-AD00-E2B3A3FD6CD4.jpeg

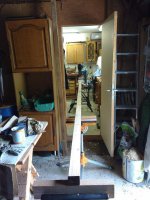
The top beams had to poke through the door.
BBCF4F2B-2E56-4B7E-92E4-CB8F3F0E8002.jpeg

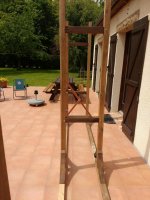
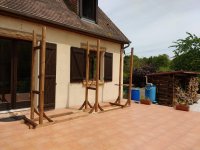
Then it was out on the terrace to mark out the mortices for the braces.
676C108F-2472-41DC-A79E-61F0D3AE154E.jpeg

Still have half of them to do and dril the holes for the pegs. So far Roger’s Cock-up fairy only visited once, a mortice on the wrong side of one of the posts. I will show the repair later. It can just be seen on the left of the last image.
 
Looks good upside down.

IMG_20190522_131654431-1.jpg

IMG_20190522_131717042-1.jpg

The pegs are undersized just to hold things in place while I make sure everything is square and true.
A bit more painting to do, Cuprinol, then reassemble in place, mark holes, drill, glue and bolt.
 
Looking the business Andy. Following this one with interest as I have something similar in mind for our place.
 
I cant teach you anything re the construction methods. All pretty straight foward.

Things I have learnt already

1) Pay close attention to where any scarf joint will sit. My problems caused by a cock up trying to make a fancy scarf left me a little short of timber. Should have KISSed from the start.
2) Not adding horizontal braces to join the uprights that will eventually bolt to the wall was a mistake. I had run out of wood and did not want to buy another 2.4m just for 36”. I have since temporarily screwed some scrap braces which will hold everything more rigid during final assembly.

Managed to slop some cuprinol on everything over the past two days so should be able to erect at the weekend ready for marking and drilling the holes. Very nervous about that.

Oh and I think my fence panels may need a few milimeters trimmed off the width.
 
I wanted some trellis for the middle of the frames.

So I dismantled an old fence panel saving all the SS screws, ripped the slats into 3 and voila.

5FBB342C-3BE3-4E67-B49C-EE7DE7DBF2C8.jpeg

9116D589-8F14-47B9-BEB9-DDD379FD4003.jpeg

Nothing more satisfying than repurposing something.
 
9fingers":3btocdz7 said:
Andyp":3btocdz7 said:
Nothing more satisfying than repurposing something.

Even if it is the Queen's English :lol:

Looking good Andy!

Bob

I’ve spent so long here now I can’t even see the problem, but then I failed english O-level :oops:

Should have it finished and ready for inspection by the end of the summer.
 
It's sure looking good!

Very satisfying type of project this, I did a simple one years ago in a suntrap corner and it really breaks up a plain decking area, I made the top pieces too thin and one or two have warped, so will have to correct them or replace.

One thing for it that I am contemplating is a sort of horizontal blind on top with some type of (camouflage?) netting to break up the hot sun ( yes, we do occasionally get some in Yorkshire) to pull out if needed.

This all reminds me of the Scarborough gift shop owner who, when a customer said "do you have a windbreak?" replied " windbreak son, I don't even have time for a tea Break!".

Bob
 
Is it my eyes......? There is a cross piece which sort-of almost maybe lines up with the post below it on the far side, but is a bit further away on the near side. Or am I seeing things?
 
Mike G":2idi48ml said:
Is it my eyes......? There is a cross piece which sort-of almost maybe lines up with the post below it on the far side, but is a bit further away on the near side. Or am I seeing things?

I saw that too, the horizontal doesn't line up over the post, by what looks like 20mm or so.
 
Back
Top