• Hi all and welcome to TheWoodHaven2 brought into the 21st Century, kicking and screaming! We all have Alasdair to thank for the vast bulk of the heavy lifting to get us here, no more so than me because he's taken away a huge burden of responsibility from my shoulders and brought us to this new shiny home, with all your previous content (hopefully) still intact! Please peruse and feed back. There is still plenty to do, like changing the colour scheme, adding the banner graphic, tweaking the odd setting here and there so I have added a new thread in the 'Technical Issues, Bugs and Feature Requests' forum for you to add any issues you find, any missing settings or just anything you'd like to see added/removed from the feature set that Xenforo offers. We will get to everything over the coming weeks so please be patient, but add anything at all to the thread I mention above and we promise to get to them over the next few days/weeks/months. In the meantime, please enjoy!

Mark's Workshop/Garage

TrimTheKing":2bsrg1vs said:
Mark

My recent experience of similar for my workshop is that I specified the window opening sizes on the plans that were passed then decided I was going to replace all the windows and doors in my house and that I could recycle some of the better condition windows for use in the workshop.

These are a slightly different size than the plans, and at the same time I decided I wanted to add a velux into the roof which wasn't on the plans. I called up the planning officer and explained the situation, she had a look at the plans and agreed that the window size change was negligible and positioning the same, and the velux overlooked the highway but no neighbours, and because it's in a vaulted ceiling I couldn't see out of it anyway, so she just asked me to fill in a 'non material change' request which was a formality to ensure that the changes were added into my PP file for completeness, but to go ahead with the changes.

HTH

Cheers
Mark

Trim... You really are the king! Perfect, just what I wanted to hear! Thank you Mark :eusa-clap:
 
I can't believe I'm doing this... But I think I'm going to change my basic design :shock: I've been looking at flat roofed timber buildings and they really are ugly, well maybe it's not that they're ugly it's that timber buildings with dual pitched roofs look so much better!
Yes, I have concerns aboutt building something too high but I think if I built something with a flat roof to reduce the height marginally, I would eventually regret it. I'm going over the 2.5m permitted development height either way so it's not like a pitched roof will change an awful lot.

Mike, if you read this can you give me your thoughts on my earlier dimensions, pretty please? -

spearos":3m91z28c said:
Unless I'm mistaken to have enough clearance above a Land Rover (for raising the vehicle), with a vaulted roof I am looking at an eaves height of 2.3m. Which, with a 24° pitch gives an overall height of ~3.3m and I would have an internal height of around 2.55m on the 'low side' of where the vehicle would sit.
This is calculated with 150mm rafters - would that suffice?

Time for another cutting edge drawing:


If I go down this route, Onduline corrugated roof sheets initially, with the intention of replacing them with something more durable down the line. Anyone have any experience of Onduline corrugated sheets?
 
Yep, my last workshop had an Onduline roof. Don't bother with any colour other than black, because they all turn black anyway. With enough support they make a durable reliable and pretty cheap roof. Do make sure you have at least the minimum support the manufacturers recommend.

I'll have a look for the drawing I did, Mark. Are you going for asymmetrical side hung doors now?
 
22.5 degrees is a useful pitch to remember. It is the lowest pitch suitable for slate. I don't think there is much to be gained from going above that unless you are wanting to use tiles, and so need to be in the 30 degree plus range, depending on type. At 22.5 degrees, your ridge is going to be approx. 3.4m (to structure). A 2400 door opening looks just a little tight to me. I'd suggest 2700 to be comfortable. Your headroom (2550) is available over the entire width of the car. In fact, even at 22.3 degrees, your theoretical headroom is about 2700 over the width of the LR roof, so you could raise it some 750mm off the floor.
 
Mike G":24g3vqjz said:
Yep, my last workshop had an Onduline roof. Don't bother with any colour other than black, because they all turn black anyway. With enough support they make a durable reliable and pretty cheap roof. Do make sure you have at least the minimum support the manufacturers recommend.

I'll have a look for the drawing I did, Mark. Are you going for asymmetrical side hung doors now?

Thanks Mike. Onduline looks like a good choice, to me, it's just it does have some bad press. However perhaps that's down to not following the manufacturer's fitting instructions - I have looked at the downloads for fitting instructions and would follow them to the tee.
Useful pointer ref. colour :eusa-clap:
Yes, asymmetrical doors would be the way forward I feel.

Mike G":24g3vqjz said:
22.5 degrees is a useful pitch to remember. It is the lowest pitch suitable for slate. I don't think there is much to be gained from going above that unless you are wanting to use tiles, and so need to be in the 30 degree plus range, depending on type. At 22.5 degrees, your ridge is going to be approx. 3.4m (to structure). A 2400 door opening looks just a little tight to me. I'd suggest 2700 to be comfortable. Your headroom (2550) is available over the entire width of the car. In fact, even at 22.3 degrees, your theoretical headroom is about 2700 over the width of the LR roof, so you could raise it some 750mm off the floor.

Yes 2400 door width will be tight but then any wider and what I gain will be obstructed behind the garage in the block that blocks part of my rear boundary (see page 1) - what am I missing?
Is the 2700 headroom based on the wider door? Because of above mentioned obstruction it would be pretty much impossible to get the LR more central within the workshop?
I'm not trying to be clever, just trying to understand your idea(s) :)
 
Hope this helps:

N7qVRJS.png

Look carefully. You'll see a raised LR in light grey.
 
Thanks Mike! That's brilliant! At a guess (from what I've read on here) I'll be looking at 150mm rafters and a substantial ridge beam/board if I want a vaulted ceiling? Need to do some reading vaulted roof construction...

I've been playing with Sketchup and have managed to get a handle on the basics. I'm trying to establish just how far I can have the vehicular access door to the right (viewed as Mike's drawing) - Ideally I'd like room for storage to accommodate 600mm deep crates.
 
Rafter depth is more often driven by the depth of insulation (and ventilation) than by structural requirements. In this instance, I suggest 200 deep rafters, so that you can use 150 deep mineral wool (its 140, actually), and have 50mm clear above that for ventilation below your breather paper, battens, and Onduline. I'm assuming you are going to line the INSIDE of the roof with OSB.
 
Thanks once again Mike. 200mm rafters it is! The plan is for the inside of the roof to be clad in OSB.

I managed to do some reading (googling) on vaulted ceilings over the weekend. I understand a vaulted roof requires a substantial ridge board/beam to take 50% of the roof weight (25% onto each wall plate), and this component needs adequate support to transfer the load to the foundations (concrete slab in my instance).
What concerns me is that for my workshop layout it means that directly below the ends of the beam/board is a large opening (the vehicle door). Does this simply mean the 'lintel' above the door will need to be substantial as well? Or perhaps even some sort of 'A frame' with each leg spreading the load onto beefy door jambs?
 
spearos":1e90nh1j said:
..... I understand a vaulted roof requires a substantial ridge board/beam to take 50% of the roof weight (25% onto each wall plate), and this component needs adequate support to transfer the load to the foundations (concrete slab in my instance).
What concerns me is that for my workshop layout it means that directly below the ends of the beam/board is a large opening (the vehicle door). Does this simply mean the 'lintel' above the door will need to be substantial as well? Or perhaps even some sort of 'A frame' with each leg spreading the load onto beefy door jambs?

Yep, that lintel over the door needs to be beefy anyway just to span that opening, but as the gables are a complete truss the vertical post can be designed away. To reduce the size of the ridge beam we could put a "principal truss" in the middle of the building if that suited, which would have a tie, or a raised tie. My workshop has a hybrid roof, where some is trussed with raised ties, and some of it vaulted with a structural ridge beam (AKA a ridge purlin). There is always a solution to suit individual varying requirements.
 
Mike G":3brthd4u said:
Yep, that lintel over the door needs to be beefy anyway just to span that opening, but as the gables are a complete truss the vertical post can be designed away. To reduce the size of the ridge beam we could put a "principal truss" in the middle of the building if that suited, which would have a tie, or a raised tie. My workshop has a hybrid roof, where some is trussed with raised ties, and some of it vaulted with a structural ridge beam (AKA a ridge purlin). There is always a solution to suit individual varying requirements.

I get it! Or, at least think I do!! :eusa-think:

Basically it's two big triangles either end! - a case of connecting the end rafters with a tie/bottom chord? And if I'm correct this tie wouldn't need to be too big a piece of timber as it would be in tension?
While we're talking about size :? Would you be able to give me a size for the ridge purlin, with and without a principle truss? Would doubled up 8x2s be ok for the lintel?

I've just read your workshop thread for the umpteenth time and pretty much all the information you've just given me is there. I really should 'consult' your thread more often!!
 
It's even simpler than that, Mark. The usual technique is to build the walls to plate height all around, then build the roof, then bring the gables up underneath the end pairs of rafters. This means the plate acts as the tie, so long as it is continuous and there is a proper fixing between the rafters and the plate. Then, just for the sake of belt-&-braces, the OSB ties everything together anyway, removing any chance of spread.

A pair of 8x2s is fine for the lintel. Remember, they need supporting on "cripple" studs (or, indeed, they can sit on top of the wall plate). People often forget the latter option.
 
Thanks once again Mike. I really appreciate you taking the time (and your patience) explaining things to me, and freely sharing your extensive knowledge. Top, top man :text-thankyoublue:

I've been reading the roofing part of your build. Would I be right in saying that the raised ties on your build are primarily there to give you overhead storage? - It appears to me that what you explained in your last post is pretty much how you built the gables on your workshop, and therefore the ties aren't necessarily needed?

I've also read a bit of Dan's thread and I note that he used a 9"x3" ridgebeam for a 7.2m span, so I assume this would be adequate for my ~6.5m span?


I'm surprised I'm already on page 4 for my 'build' (and probably boring everyone) and yet I've only covered the design! However hopefully it will prove useful to someone, someone inexperienced like myself who would like to know about their options and things to think about.... Possibly! :shock:
 
Mark - Progress seems excellent - It took me a while to plan the roof bits as I wanted as little in the way as I could. Just for clarity my roof is about 6.3m long i think, and i used 9x2's. I bought them in 7.2m lengths and cut the ends off. I know you can use shorter lengths and scarf or bolt together but i felt that was a skill i had yet to master and it was too important to make a mess of... :D
 
Dan0741":2lfg2am8 said:
Mark - Progress seems excellent - It took me a while to plan the roof bits as I wanted as little in the way as I could. Just for clarity my roof is about 6.3m long i think, and i used 9x2's. I bought them in 7.2m lengths and cut the ends off. I know you can use shorter lengths and scarf or bolt together but i felt that was a skill i had yet to master and it was too important to make a mess of... :D

Thank you Dan.

Yes, a scarf joint is also something I'm not too keen on attempting! There's enough to get my head around without complicating things further, when it would be quicker and less stressful to just take the hit with the additional cost.
Just like to add that I was inspired by your build, the part when you were just about to start on the roof and everything was pretty much bang on mm perfect :eusa-clap: I hope to be as thorough as you and be in a similar situation as I near the end of the framing stage.
 
spearos":2iuzf46v said:
......Would I be right in saying that the raised ties on your build are primarily there to give you overhead storage? - It appears to me that what you explained in your last post is pretty much how you built the gables on your workshop, and therefore the ties aren't necessarily needed?......

No. I didn't have a continuous ridge beam. It wasn't the gables taking the load of the structural ridge, it was some of the intermediate trusses, which therefore needed a tie.
 
Mike G":2cy5qe9k said:
spearos":2cy5qe9k said:
......Would I be right in saying that the raised ties on your build are primarily there to give you overhead storage? - It appears to me that what you explained in your last post is pretty much how you built the gables on your workshop, and therefore the ties aren't necessarily needed?......

No. I didn't have a continuous ridge beam. It wasn't the gables taking the load of the structural ridge, it was some of the intermediate trusses, which therefore needed a tie.

Arghhhhh! :eusa-doh: When I asked this question I was thinking of just the larger roof on your workshop (and I didn't make this at all clear - apologies)
The gable on your bigger roof is effectively a truss using the wall plate as the bottom chord, the other truss on this roof (at the join to the smaller part of the building) has a meaty bottom chord (principle tie?) that as well as spanning the 'opening' into the smaller part of the building it also provides a 'base' for the more traditional 'king post' that supports the ridge on the smaller roof.
So, the ridge beam on the big roof is supported at either end by two trusses hence my questioning of the ties?
 
spearos":1c3rw3qd said:
Arghhhhh! :eusa-doh: When I asked this question I was thinking of just the larger roof on your workshop (and I didn't make this at all clear - apologies)

No, I knew that, and my answer stands. I don't think I have a continuous ridge beam on that roof*. The element of the ridge beam which is structural spans the gap between the two trussed sections of roof.

The gable on your bigger roof is effectively a truss using the wall plate as the bottom chord, the other truss on this roof (at the join to the smaller part of the building) has a meaty bottom chord (principle tie?) that as well as spanning the 'opening' into the smaller part of the building it also provides a 'base' for the more traditional 'king post' that supports the ridge on the smaller roof.
Correct

So, the ridge beam on the big roof is supported at either end by two trusses hence my questioning of the ties?

No. As above, it doesn't span from end to end of that roof*. Even if it does, the only part of it that is doing any structural work is that part of it which spans across the gap between the two trussed parts of the roof.

*Turns out I was wrong, and I do have a continuous ridge beam, but it is only a structural ridge beam across the gap (where there are no ties), and thus doesn't need to be beefy.
 
Much of it was luck, but I was careful. Mainly because i found out early its easier to do things accurately once rather than the alternative. :D
 
Mike G":13vwhq8l said:
The gable on your bigger roof is effectively a truss using the wall plate as the bottom chord, the other truss on this roof (at the join to the smaller part of the building) has a meaty bottom chord (principle tie?) that as well as spanning the 'opening' into the smaller part of the building it also provides a 'base' for the more traditional 'king post' that supports the ridge on the smaller roof.
Correct

Woohoo! :lol: Look at me using roofing jargon and almost sounding like I have half a clue! :lol:


Mike G":13vwhq8l said:
*Turns out I was wrong, and I do have a continuous ridge beam, but it is only a structural ridge beam across the gap (where there are no ties), and thus doesn't need to be beefy.

Understood.

What I was trying to eventually get at, where I was going with this (admittedly I am responsible for meandering off) is that for my structural ridge beam (for a vaulted ceiling) can my gable design be similar to the gable under your big roof - obviously with timber sizes changed where necessary?
 
Dan0741":6pbei1my said:
Much of it was luck, but I was careful. Mainly because i found out early its easier to do things accurately once rather than the alternative. :D

Don't be so modest Dan! You've reminded me of a motivational poster thingy, I'll add it when I remember/find it....
 
spearos":3ugznwnr said:
.......What I was trying to eventually get at, where I was going with this (admittedly I am responsible for meandering off) is that for my structural ridge beam (for a vaulted ceiling) can my gable design be similar to the gable under your big roof - obviously with timber sizes changed where necessary?

Sort of. ;) :lol:

Given the loadings on a ridge beam are almost entirely vertical, (if the walls were forced apart by the un-tied rafters the ridge beam would be dragged directly downwards) one has to resist that vertical force. Now, this is most easily done with a post. However, if we are relying on the rafters at the gable (as we would be at the gable above the lintel over the big door opening) to hold the ridge beam up, we need a suitable junction between the rafters and the ridge such that an elephant sitting on the ridge board at that end wouldn't push the ridge down out of connection with the rafter ends. There are lots of ways to achieve this. One of them is to have an upside-down birdsmouth, so that the ridge beam physically sits on part of the rafter. Unfortunately, given your timber sizes, this wont work.

What I suggest is this:

XsbrXKf.png

Bolt a piece of 195x45 hard up underneath the ridge beam at the gable rafter location.

Further, as you don't want to be throwing load onto the lintel below, the end rafters should be doubled up, and nailed together (alternately top and bottom edge, max 500 C's). This is going to complicate your OSB lining somewhat.

The other end can be dealt with as per mine, with a post under the ridge beam. This should be directly above a stud in the wall (in other words, when you set your wall out, you need to put a stud exactly in the centre). The rafter only need be a single pair, not doubled.
 
Ok then ladies and gentlemen, more advice needed... please!

I want to finalise dimensions in order to make drawings and submit my planning application however there is (hopefully) one last grey area - the verge and eaves details.

Verges
I'm fairly confident with my proposed construction/dimensions of these, but would appreciate some feedback to ease my mind!
End rafters sitting flush with wall frame, battens & barge boards on outside face of rafters to give 50mm overhang from cladding (FE boards). Onduline verge pieces to finish.

Eaves
Problem here is keeping the building over 1m from boundary both sides (mentioned earlier in thread). Yes I could make building slightly narrower but I'd rather not.This leaves me with ~150mm either side.

Despite all the answers from Google I have to presume the 1m from boundary to be exempt from building regs covers the most 'sticky out' part of the building (including gutters), so one option would be flush eaves? I'm thinking with a fascia that overlaps the top FE board slightly?
Other option is a small overhang and perhaps mini guttering?

Thoughts please?
 
spearos":30g8on4h said:
Dan0741":30g8on4h said:
Much of it was luck, but I was careful. Mainly because i found out early its easier to do things accurately once rather than the alternative. :D

Don't be so modest Dan! You've reminded me of a motivational poster thingy, I'll add it when I remember/find it....

Here it is Dan -

33841609561_c2e1f0f2cf_b.jpg


The standard of your build is certainly not down to luck! :text-bravo:
 
I'd like to think that the planning dept would not be so picky regarding a few extra mm due to guttering.
In fact they are possibly not even looking at mundane issues such as surface water drainage?
The height of the gutter is likely to be much higher that the top of any fence and if you need to argue, the distance between the edge of a gutter and the top edge of the fence will be greater than the 1m.

Bob
 
That's the pragmatic answer, Bob, until there is a dispute. Then they get the micrometers out, and they measure horizontal distance to the boundary, which is taken as an infinite vertical "wall" of thickness zero.
 
Very kind :D

But the wind blowing your way helps too. (so to speak :shock: )
 
Little, well big update, update - planning application submitted last night! :shock:

Hopefully I've done my homework and have done a good job... Time will tell...
 
Thanks everyone! Really hope I don't get any issues!

Andyp":mqty0wmt said:
How long will you have to wait fir the all clear?

I believe the council aims to reach a decision within 8 weeks. I also think that if the neighbours respond promptly and favourable, this can speed things up.
 
I'm not sure of the exact process, but the public notices have to be published for a fixed time.

So, mine was 8 weeks exactly.
 
Some councils won't actually start the clock ticking for a week or more, a period they use to examine the application and see if they can find something wrong.
 
Hello everyone! Remember me? :lol: Hope you're all well.

An update well over due I think!

Planning permission granted! :eusa-dance: I was actually surprised to receive approval in early July. It was all straight forward with only one issue. The block plan that I hand edited for my proposal wasn't to scale - I didn't follow the instructions for printing. Easily put right though.
In my experience I echo what others have said about anyone thinking about applying for planning permission - go for it, it's not that difficult and there's loads of usual info/help out there.

Progress since though has been slower than I had hoped! Young kids, holidays, finding a life balance all limiting the amount of time I've had to crack on. However things are moving along, I have constructed a temporary 'shed', removed old garage and fitted some gates. The thing I underestimated though was how much stuff I had in the old concrete garage, and the time it took to sort through it all!
A few pics :

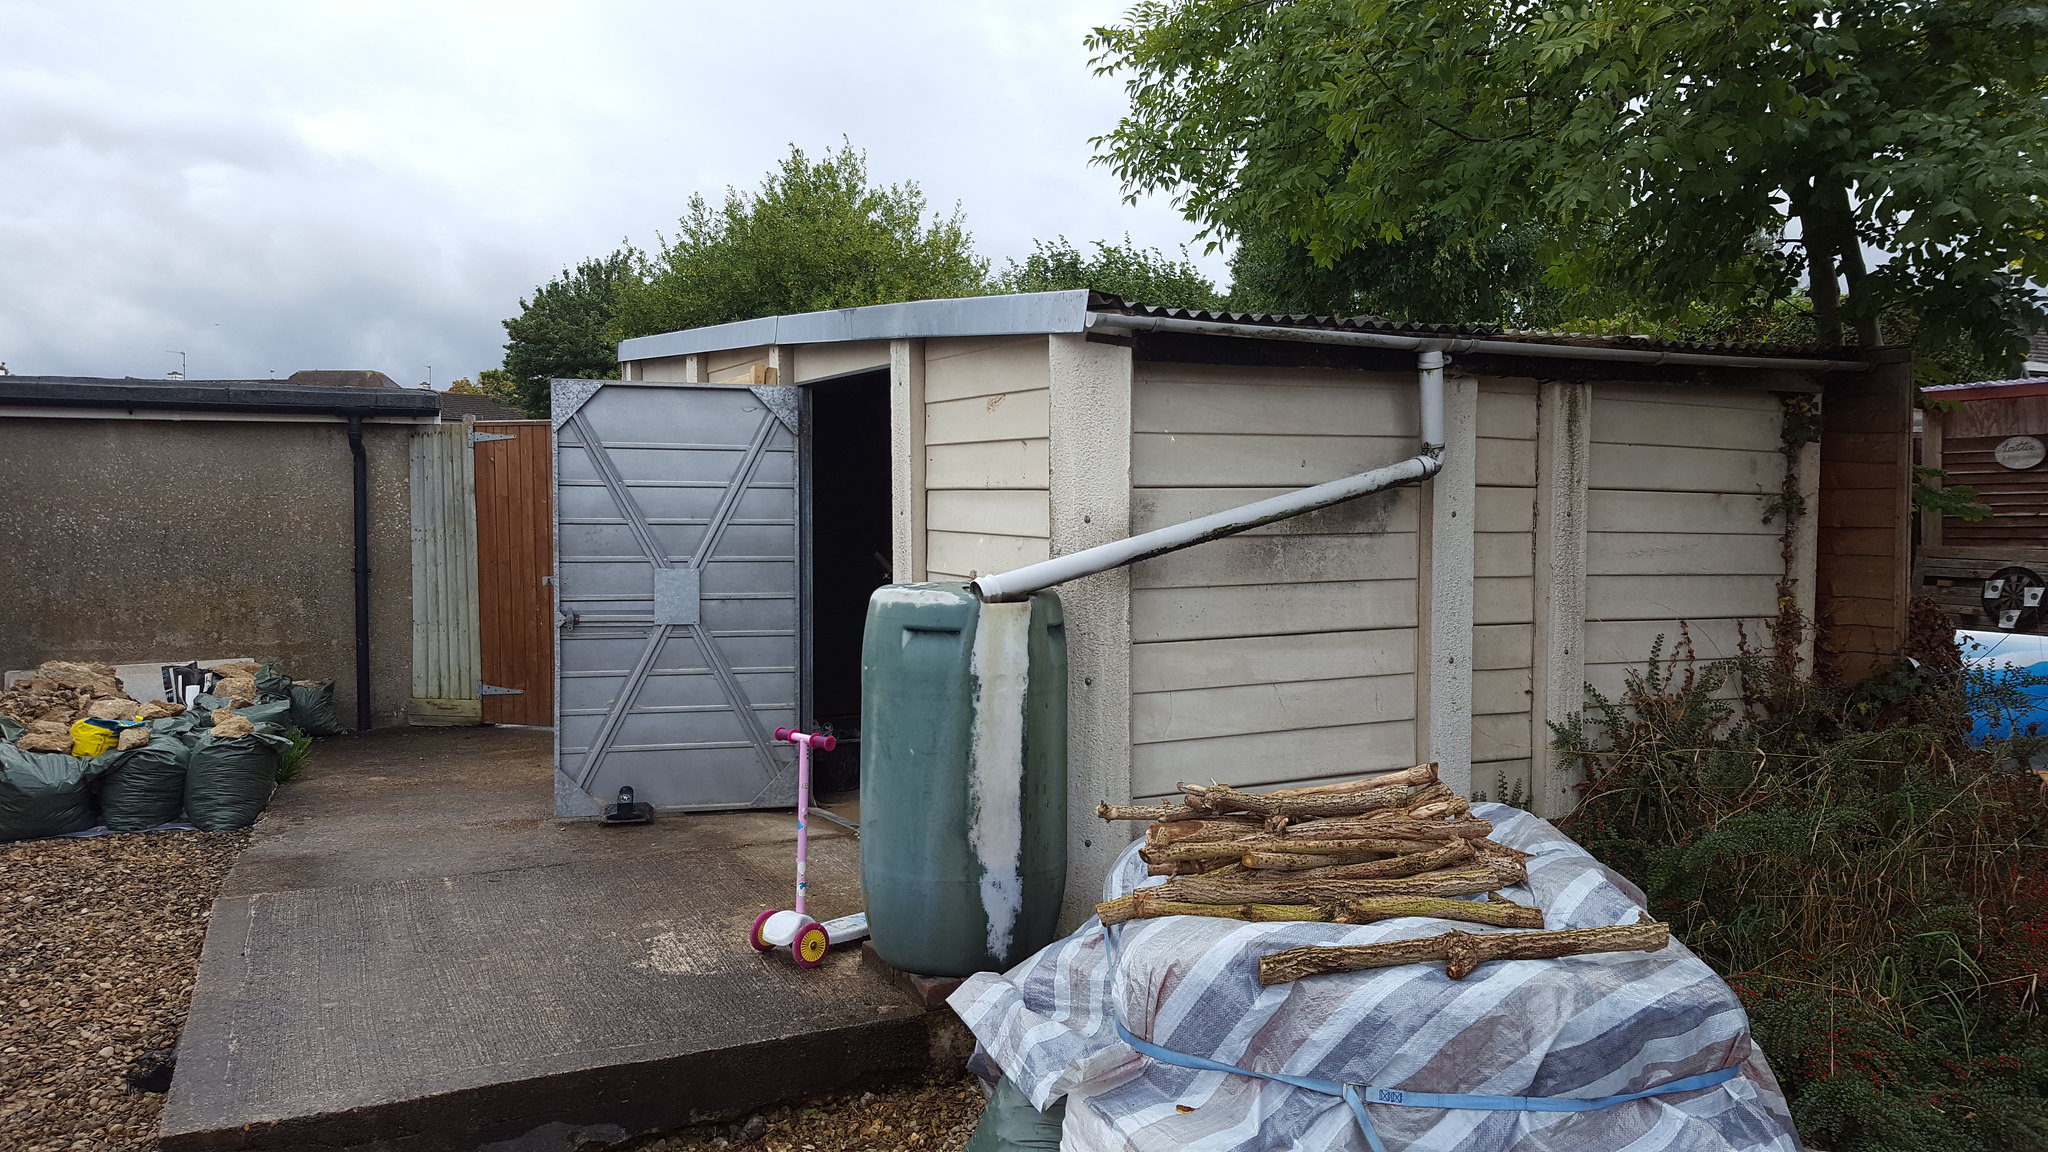
Now you see it...

36826409891_97b5bfc662_k.jpg


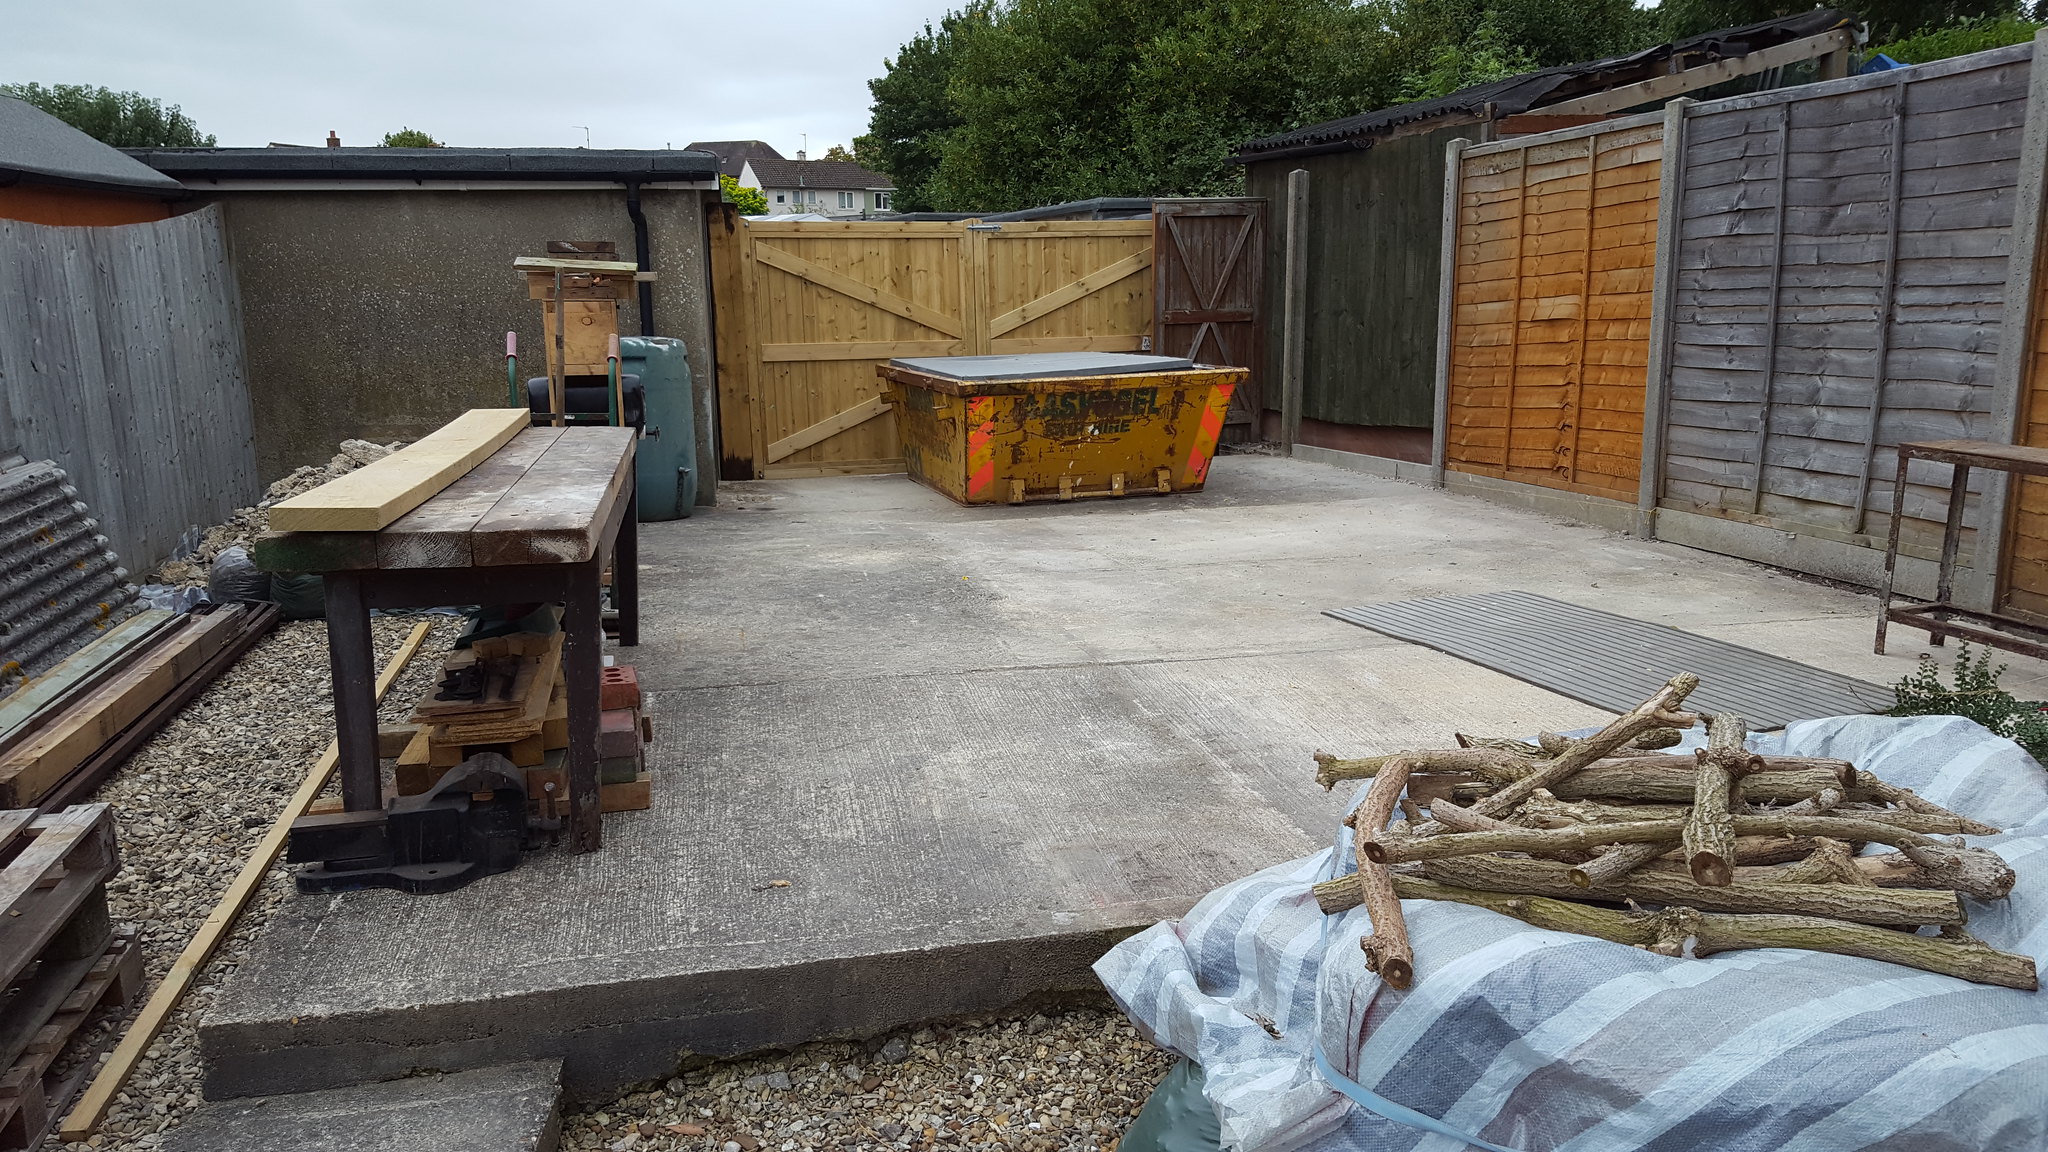
Now you don't!..

36826447971_b05fcbfb61_k.jpg


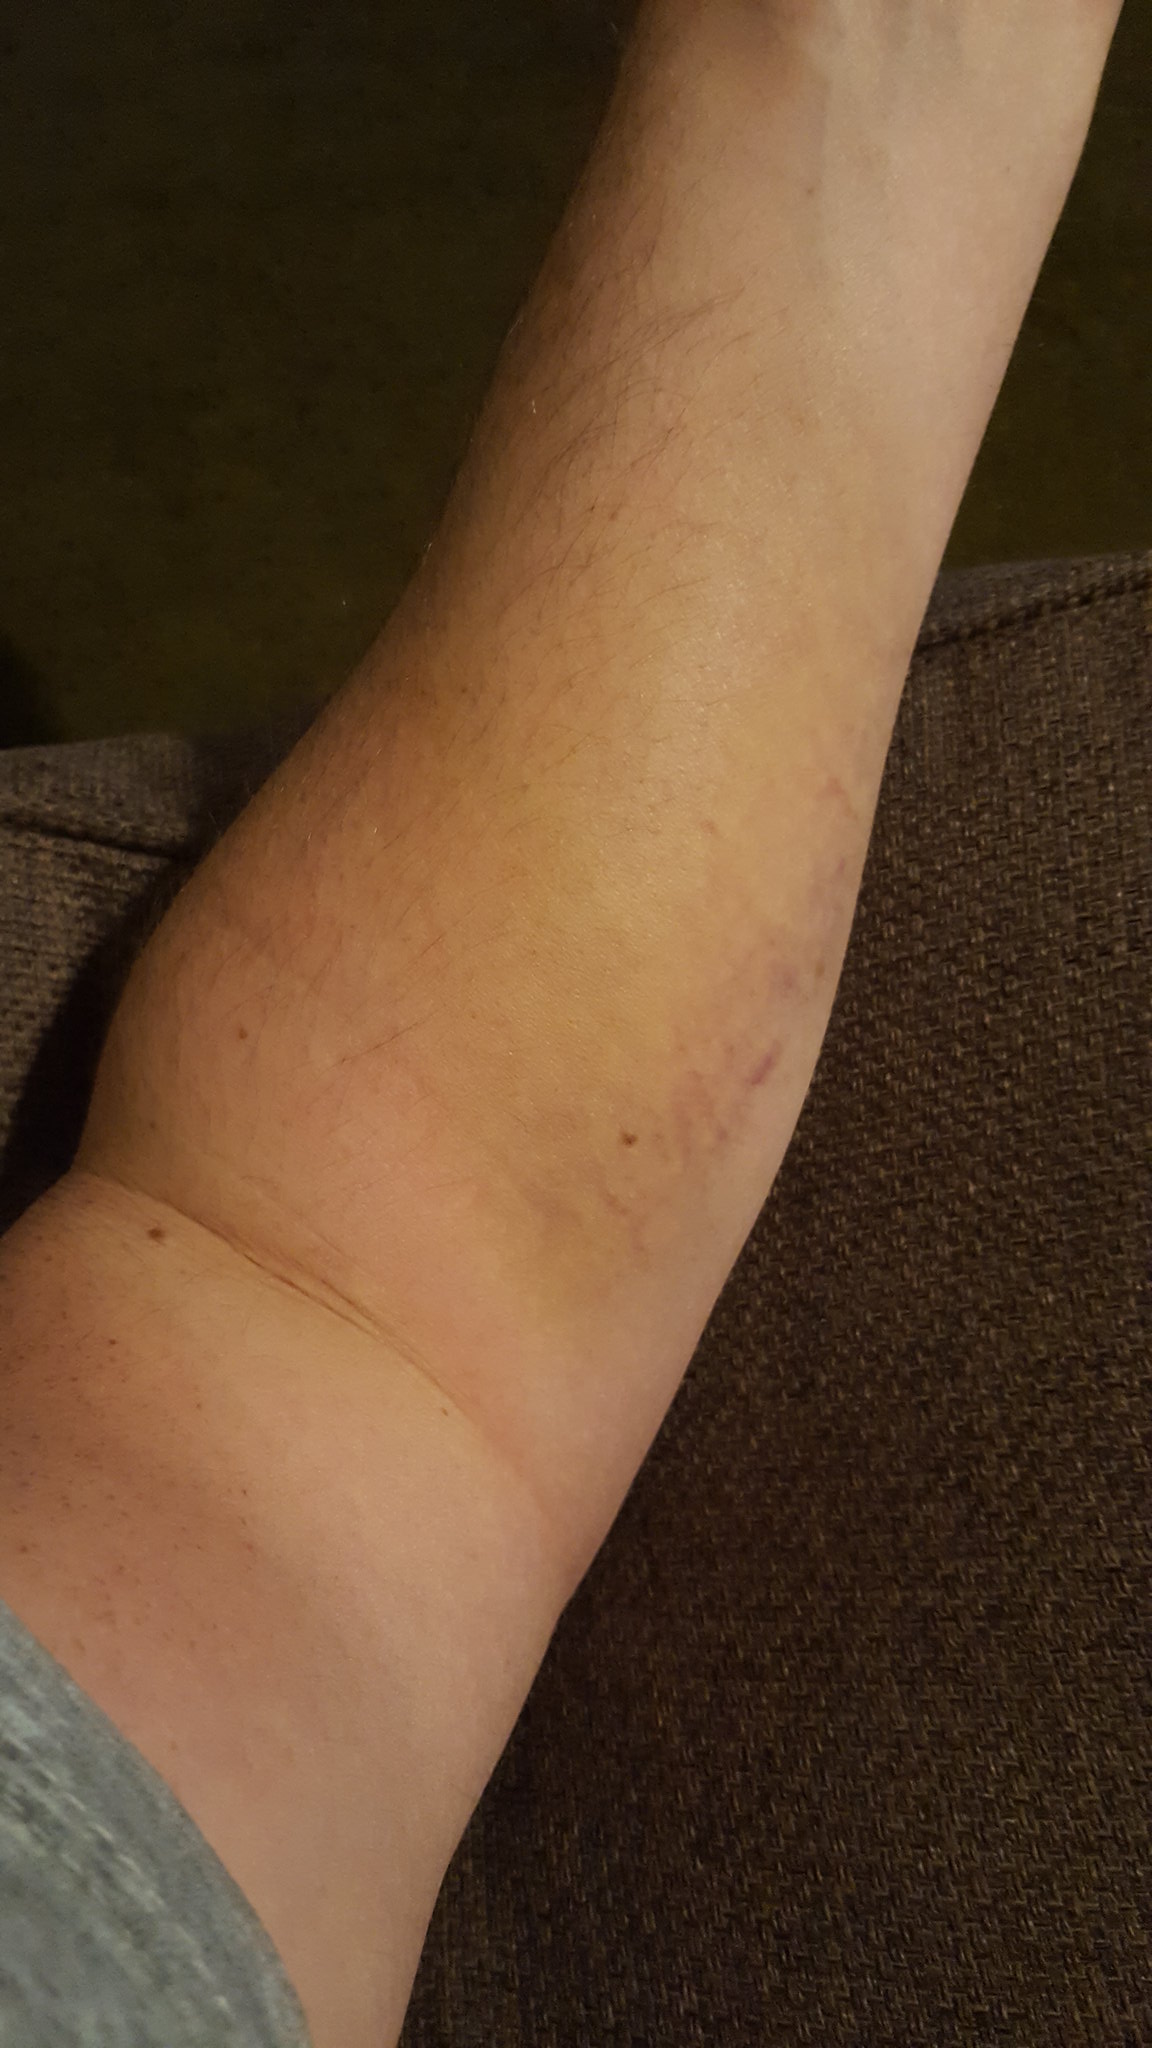
One little accident resulted in a bruise covering almost my entire forearm :o

36569768110_fabda01065_k.jpg


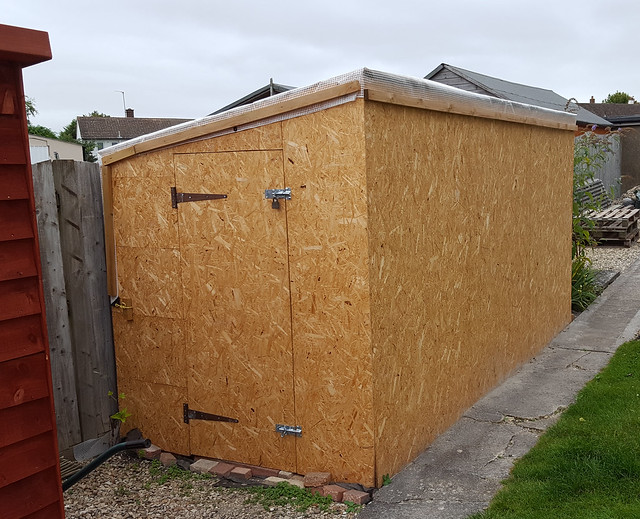
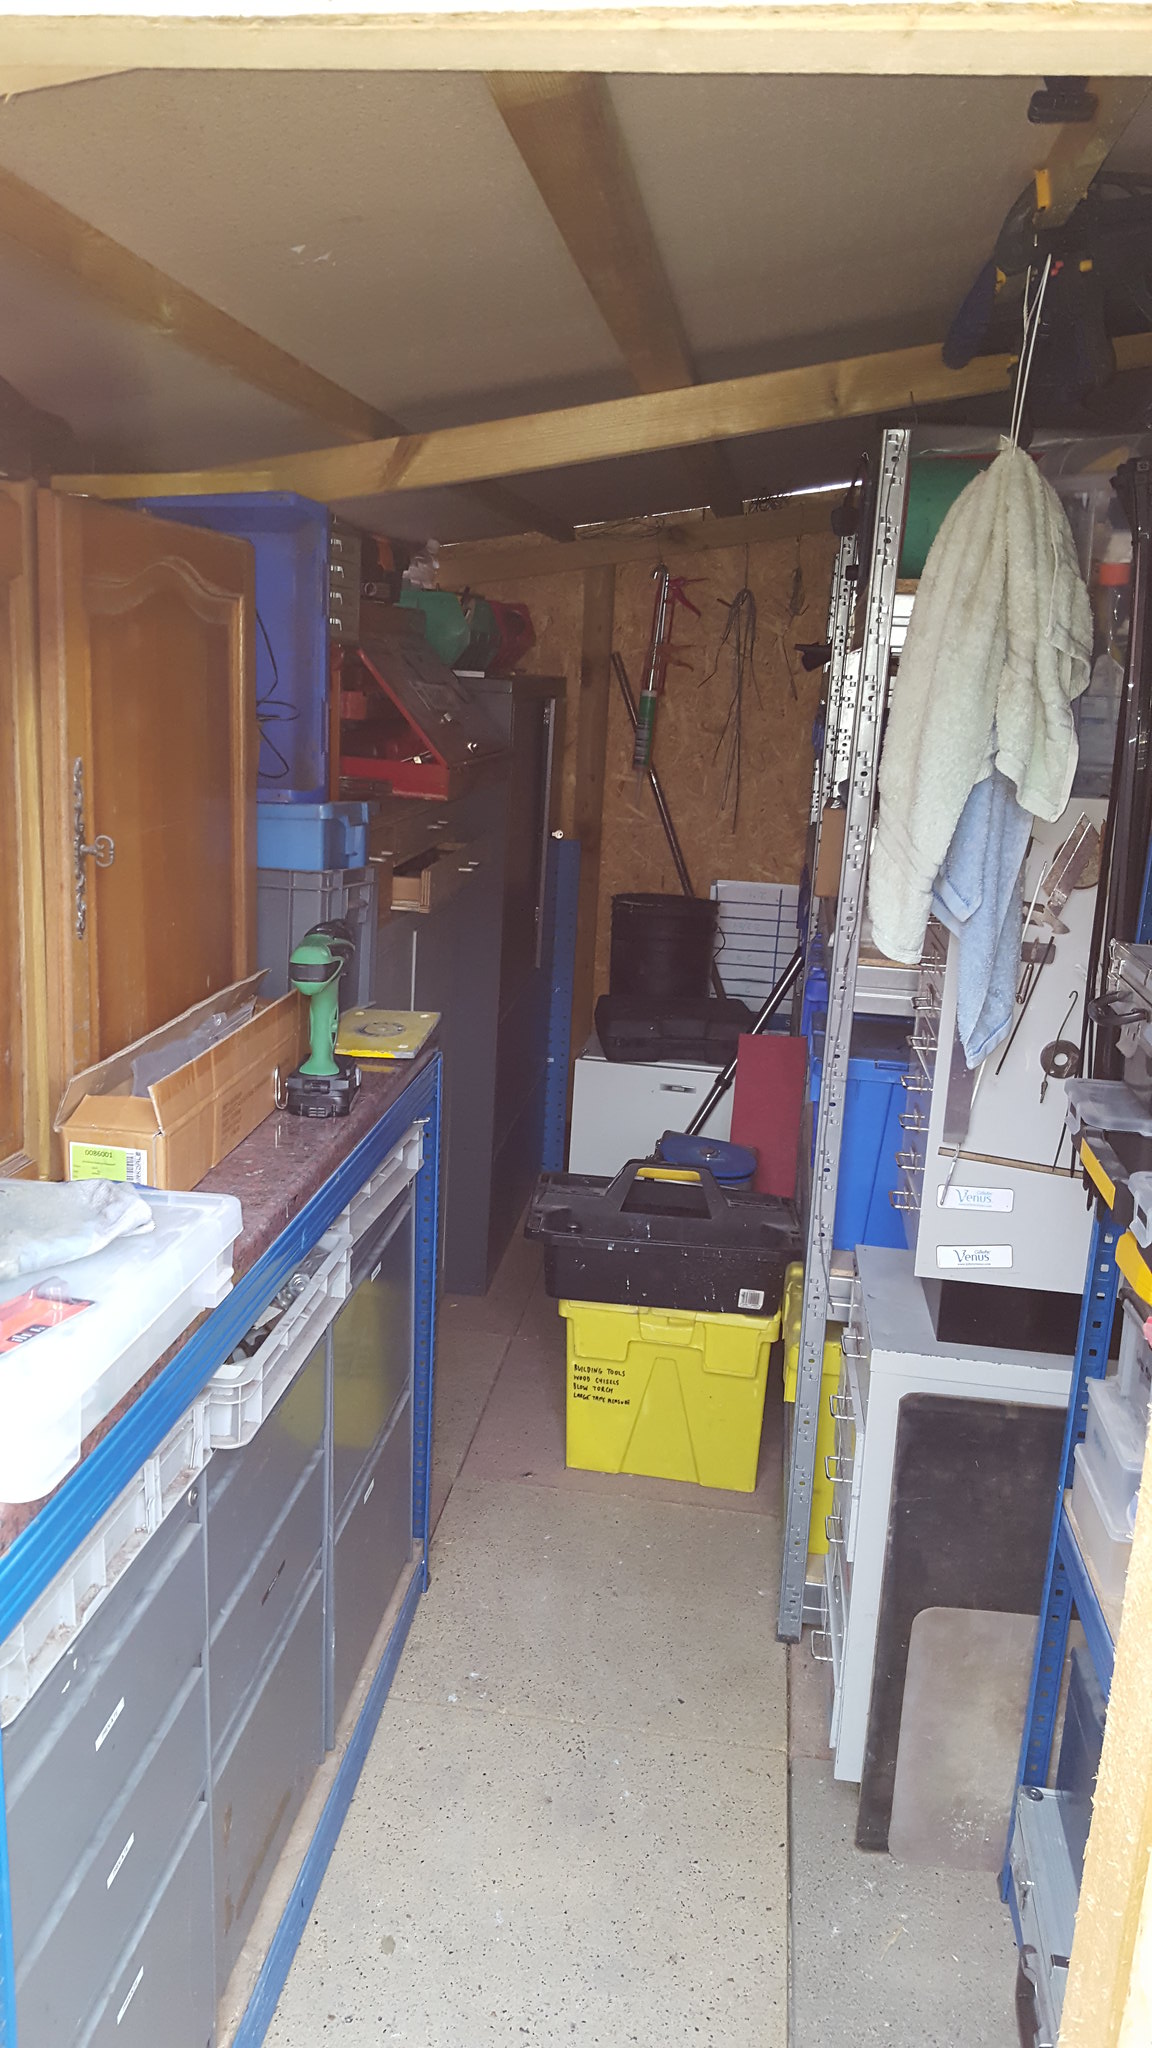
Temporary shed approximately 1.8m x 3.6m built for ~£200. Looks nice doesn't it? ;) :lol:

36569814480_01e2538250_z.jpg


All the 'essentials' crammed in!

36966442785_665dba3b66_k.jpg


Next up, all that concrete! Yes, it's all coming up! There are reasons behind this decision, lots of reasons which I will save for another day - early night needed if I am to stand any chance of getting it all up in one weekend!...
 
A workshop in a weekend!! This should be worth watching......

Good luck!
 
Back
Top