• Hi all and welcome to TheWoodHaven2 brought into the 21st Century, kicking and screaming! We all have Alasdair to thank for the vast bulk of the heavy lifting to get us here, no more so than me because he's taken away a huge burden of responsibility from my shoulders and brought us to this new shiny home, with all your previous content (hopefully) still intact! Please peruse and feed back. There is still plenty to do, like changing the colour scheme, adding the banner graphic, tweaking the odd setting here and there so I have added a new thread in the 'Technical Issues, Bugs and Feature Requests' forum for you to add any issues you find, any missing settings or just anything you'd like to see added/removed from the feature set that Xenforo offers. We will get to everything over the coming weeks so please be patient, but add anything at all to the thread I mention above and we promise to get to them over the next few days/weeks/months. In the meantime, please enjoy!

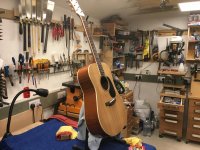
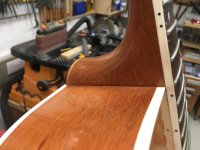
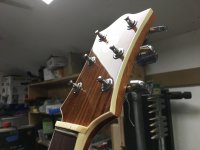
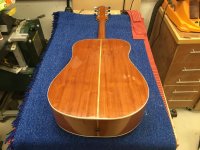
Martin Guitar Kit (It's First Public Outing!)

DaveL":260k4mlw said:
Do you have MS word, even an older version has a useful tool called word art that will put letters on a curve.

I haven't had MS Word for years, Dave. I use LibreOffice and its WP has a WordArt tool which does something like that, and I can't get it to look anywhere near right at the small size each letter is in the logo.

LO's Drawing programme has helped design the logos so far. I even tried a ten day free trial of Affinity Designer.
 
Andyp":2rciy2lt said:
Are transfer really the only option? How about a round metal disc, engraved by your local jeweller? With a good forstner of the same diameter to make the hole.


Not necessarily, Andy. Mostly the luthier trade does inlays. I've only just started to learn how to make a guitar, let alone inlaying it's logos. Whatever sort of is employed, even a metal disk, it has to go under the final lacquering and so now all the logo work I'm trying to do is holding up the finishing of the guitars.
 
MY63":jw7yrut2 said:
My friend has just bought a laser engraver I am sure he would engrave it for you, Brass mother of pearl or a piece of wood.


That's an idea, Michael. Thank you. I shall save it for future guitars, if there are any.
 
I have come to an executive decision and shall not progress the transfer idea any further.

I have used several different transfer media with my Canon inkjet and stuck them to my desk, and a friend has given me his Chinese copy of a well known American model guitar to practice on the back of the headstock. As much as I tried, I could not get the transfers to look professional enough.

Having rubbed down the back of his headstock a number of times, I have filled the stamped digits and letters made by the Chinese manufacturer (and hey mate's own scoring to remove fake information) with CA glue and I'm happy with that process. I shall use it again and can recommend it as a shallow filling process for imperfections in wood. That worked well. I have now re-stained the wood and am re-lacquering it.

So.....I either leave my guitars' headstocks blank as they will have my label on the inside, or as I have no experience or skills with MoP and similar inlay work, I could take up this forum's idea of a copper disc with etched logo inlaid into a shallow round hole.

Any ideas where I can get a small run of, say, ten designed and made up for a cost reflecting the amateur nature of this project?
 
Malcolm I am happy to ask my friend to give me a price for laser engraving the logo for you.
I am doing some hoil foil stamping today I will see if it works on wood for you, getting the stamp made and postage would be the only cost to you.
 
Michael, that's kind of you. Thanks. Please ask him. I like the idea of cooper discs (30mm) as a nod to my first career. Your hot foil idea appeals to me, too. Thanks.

One thing I forgot to add in my post was that I also felt that I couldn't get the artwork looking professional enough with my domestic software, particularly for the worded logo. So I shall have to find somewhere to get that done at a reasonable cost for just the two words.
 
Hot foil definately works on wood (thin weneer) I am using lead type today to stamp my wifes note books for her return to work tomorrow.
I think the pressure is too high as it is blurring around the edges a proper stamp will not do that.

2020-08-31_12-57-44 by my0771, on Flickr

If you are providing the discs my friend will laser engrave them for £5 each for 25 mm discs
 
It might be worth checking out any local key and shoe repair shops near you. We have one in Sudbury that has laser engraving kit, they do glass and metal with it and it does look good.
 
Gents,

Thank you all for your suggestions and recommendations.

I have made contact with Dave Neale and I am already commissioning him. He has been extremely helpful.

I shall provide him with some veneers of the local ash that I have already used for my workbench which he will even out on his drum sander. His laser machine can both cut the circular discs and etch the logo.

We are currently looking at different fonts and sizes in a circular format inside two thin concentric rings and I shall consider filling the etched logos with CA glue after inlaying into he headstocks.

We eliminated copper and any metal because they are mainly pressed and therefore do not leave a clean 90 degree edge. Turned discs would be disproportionately expensive. We have eliminated acrylics even though their effects are nice looking because the nitrocellulose could react with the plastic, so we settled on wood. He likes wood!
 
Service, of a sort, is resumed!

Dave Neale and I have been emailing back and forth on fine details of a logo design.

I've decided to simplify the design and go with the worded version. I've chosen a simple font because those with serifs looked 'busy'. I shall have the logo laser etched onto some light pink beech and cherry discs, which Dave's laser cuts out, about 30mm diameter, and see if I can infill the words and circles with black CA glue. Once flattened, I intend to lacquer over the whole disc.

MV1-2.png

In the meantime, when you haven't got a spray booth, you have to improvise.

IMG_4431.JPG

IMG_4432.JPG

I've waited for the rain to stop. The forecast now says I've got 7 straight dry days, and the wind just got up!

The workpieces waiting for the wind to drop. The schedule is something like 3 coats a day on and off for about 7 days and I'll have to bring them in every night.

IMG_4433.JPG

Can you spot the difference between a Dreadnought and a 000?!
 
Well a very long time since I have checked in - Laser cutting is keeping us quite busy so not a lot of time to do fun things :-)

I have had a quick scan at the WIP and - well bowled over!!

Looking forward to testing the material for the inserts and seeing how the CA works!
:D

Best
Dave
 
Now I know you've all been waiting with bated breath (or is it baited?) for an update and here it is.

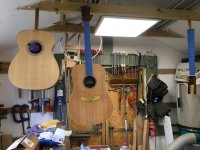
I've had a window of 8 clear days without rain of winds and have at last sprayed 12 coats of nitro cellulose clear lacquer onto both guitars. Whether the spray mixture was the right weight, I don't know.

I've scuffed them with 400 grit paper after every three coats (each sprayed one hour after the other) and today I've scuffed them with 600 grit paper to help the solvent escape. The dust coming off is still white, so at least that means I haven't sanded through to the wood!

They now stay hanging in the workshop for a couple of weeks. After that it's wet 'n' dry from 1000 through 1200, 1500, 2000 and 2500 before buffing.

IMG_4444.JPG

I think I prefer the look of the darker grain filler on the left.

IMG_4443.JPG

Can you see the difference between the 000 and the Dreadnought shapes?


I've just ordered a complete set of parts for a ukulele, this time from the UK!! Do you want to follow that WIP when I start?
 
Can you see the difference between the 000 and the Dreadnought shapes?

Yes the one on the left has a thinner “waist”.

I’ve found the guitar wip fascinating so yes please for the ukulele WIP. I’ll watch it while I’m cleaning windows :)
 
Andyp":2qdlbszz said:
Can you see the difference between the 000 and the Dreadnought shapes?

Yes the one on the left has a thinner “waist”.

I’ve found the guitar wip fascinating so yes please for the ukulele WIP. I’ll watch it while I’m cleaning windows :)

The 000 has rounder shoulders and hips, or rather the Dreadnought has squarer shoulders and hips because the 000 is an older design.
 
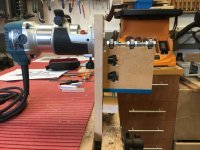
While the lacquer's curing and the ukulele timber is acclimatising, I had a think about the wieldy binding router jig that I made for the last guitar. I had a look round the industry and a different type is made from aluminium and again, I can't justify that cost. So Looked at if I could replicate the design in wood and anything else I could find in the workshop.

I think the benefit of this jig is that one of the main components of the the work is fixed. In the other I built, both the workpiece, the guitar, and the router moved. This one, the jig is clamped to the bench and the workpiece is moved around letting the cutter only cut where it touches. There is a thick washer that I've smoothed, polished and waxed that holds the guitar body away from the base plate, so only a tiny part of that is touching the contours of the guitar.

I've watched a few guitar factory tours on YT and this set up seems to be what they mostly employ.

Here it is.

IMG_4460.JPG

The wood is cherry recycled from some old kitchen cupboard doors. The bearings are old ones off the bandsaw. That's the best way I could find of fitting them to the jig.

IMG_4461.JPG

The bearing in the middle of the shaft is so that I can use the jig for the ukulele I'm about to start on.

IMG_4462.JPG
 
I've been working with Dave Neale of Lasercutz to create a headstock logo disc that I can drop in a forstnered hole on the headstock and relacquer.

I've used some recycled cherry from old kitchen cupboards which is light enough to contrast nicely with the dark rosewood of the headstock.

Dave has lasered the logo shown earlier in the post at different laser strengths, and I've been experimenting with filling the logo with black CA glue.

However, I don't know why, but try as I may, I couldn't get any to work without tiny bubbles that came out light when cured. At Dave's suggestion, I've changed to black acrylic paint.

I washed the disc surface and logo in thin clear CA glue to seal it and prevent leeching. I filled the the letters and circles with paint, three times, because each time they shrank. I then sanded the paint back to wood and then sealed agin with thin CA glue and sanded again with 1000 grit.

The acrylic paint is on the one one on the top left. All the others are black CA glue apart from the one on the right which is bare lasered.

IMG_4479.JPG
 
Andyp":zdqu802s said:
Are you happy with the results Malc?


It's not perfect, Andy, but neither is the guitar, or any of my work. I am not happy with the little clear blobs in the black glue that I can't get rid of.

So I am satisfied that it is the best I can come up with within my abilities and budget. I won't know what it will look like till it goes in the headstock and is lacquered over. But I will do a couple of trial runs in some mahogany stock to see what it looks like.
 
I rather like the relief shown on the unfilled one to be honest.
Perhaps a little laquer/varnish to seal the surface.
Just my 2p

You might be able to solve the pin hole problem with applying a small vacuum (reduced air pressure) to encourage the bubbles to come out before the filler sets.

Bob
 
9fingers":2wk4gqz0 said:
I rather like the relief shown on the unfilled one to be honest.
Perhaps a little laquer/varnish to seal the surface.
Just my 2p

You might be able to solve the pin hole problem with applying a small vacuum (reduced air pressure) to encourage the bubbles to come out before the filler sets.

Bob

Thanks for your 2p. Bob. I've thought about just leaving layered relief. I'd have to fill it with CA so the lacquer has a flat surface to be sprayed on.

I'm not sure about the vacuum. It happened so randomly during the CA cure. I had no control over it.
 
9fingers":1o32h71g said:
Not sure that I understand why it needs to be smooth to be laquered but assume there is a good reason.

Bob

I want the whole to be flat and look like part of the headstock under the lacquer.

I think the nitrocellulose lacquer is so thin, that it would take multiple spray coats to fill, and those coats outside the logo would have to be cut back. CA glue is used in the luthier industry to fill dings and dents for repair prior to touch up spray.
 
Andyp":2k5r3qw8 said:
Are there any alternatives to the CA?

CA glue is used in the luthier industry to fill dings and dents for repair prior to touch up spray. I used the acrylic paint as an alternative to the black CA glue.
 
Years ago I had a Davids Isopon epoxy resin kit to make paperweights and the like. IIRC is was very hard, clear and bubble free.
Might something similar be an idea worth trying?
 
Andyp":12ogqfs5 said:
Years ago I had a Davids Isopon epoxy resin kit to make paperweights and the like. IIRC is was very hard, clear and bubble free.
Might something similar be an idea worth trying?


Might be, but we're talking a tiny amount. The bigger of the two diameters was only 30mm and the laser depth is probably less than 1mm, which is deep in lacquer terms.
 
Interesting thread. I started making guitars when I was about 17 and have also made a lot of necks with fretboards and inlays for other people as a sideline when I was studying. Haven't made one for years now, and had absolutely no idea you can buy kits with most of the pieces cut out.

It seems to have turned out well. Do you think you will make one from scratch next - including wood selection and making the neck?

Looking forward to seeing the finished article.

Adrian
 
AJB Temple":2sgqvp0b said:
Interesting thread. I started making guitars when I was about 17 and have also made a lot of necks with fretboards and inlays for other people as a sideline when I was studying. Haven't made one for years now, and had absolutely no idea you can buy kits with most of the pieces cut out.

It seems to have turned out well. Do you think you will make one from scratch next - including wood selection and making the neck?

Looking forward to seeing the finished article.

Adrian


Thank you, Adrian.

So much has changed in the twenty years between my second and third guitars. Suppliers have increased and access to suppliers is easier. CNC can cut accurate necks etc.

I have a part built Dreadnought ready to start on when these two are complete. I have a concert ukulele ready to start on, and I have ordered the wood and ancillaries for another acoustic and another ukulele from a supplier in Spain. If my research is correct the difference between AAA and A or B sound qualities is negligible but the visual qualities are different. So some decent sound quality B or C spruce or cedar and be very reasonable.
 
Sounds very good.

When I was active - before a career intruded - I bought a lot of Brazilian rosewood, mahogany, spruce, ebony, figured maple and BE maple, boxwood, abalone, MOP, bone and so on. I still have this stock and one day when I retire I will start making ornate instruments again as my son is keen to learn. Still have a stock of old (unused) shellers and grovers as well.

A lot of this material is difficult or impossible to get hold of now so other materials have taken over.

My interest shifted to violins and I did a couple of courses in Cremona. Hand carved scrolls and hand cut beading looks easy when you watch masters do it, but isn't!

Great thread showing all the trials and trubulations. Well done from me. Adrian
 
Cheers, Adrian.

Don't leave it too long before you start up again, and try to do some before you retire.
 
No. Life moves on and our interests with it. I've made enough guitars, and bought and sold a lot too. Time to hand over to my son who is already older than I was when I started. I prefer the artistry of violins now. And musically I am firmly back at my classical piano roots.

So I will show him what to do and if he is interested give him the tools, moulds and stock. If he has no interest I will sell the materials to luthiers. Some of it will go instantly I suspect.
 
AJB Temple":lotfkbnz said:
No. Life moves on and our interests with it. I've made enough guitars, and bought and sold a lot too. Time to hand over to my son who is already older than I was when I started. I prefer the artistry of violins now. And musically I am firmly back at my classical piano roots.

So I will show him what to do and if he is interested give him the tools, moulds and stock. If he has no interest I will sell the materials to luthiers. Some of it will go instantly I suspect.


Would love to see a WIP of a violin being made.
 
Phil":2owo5gza said:


Thanks, Phil. It's a suggestion I made to another member a while ago for clamping an irregular shape. Unfortunately, I think he maybe a cyclist and sees the use of a new inner tube as sacrilege.! :D

I use a fabric tape from a nearby fabric mill to wrap around the guitar body to clamp the binding while the glue is curing.
 
In between waiting for other bits and pieces to be finished, I started rubbing back the neck with wet and dry as it's had a few weeks to let the lacquer cure.

IMG_4594.JPG

The neck is completely matt now and I haven't got anything finer than 2500 apart from rubbing compound, so I shall leave it at that till I fit the headstock logo, hopefully in the next week or so.
 
I've rubbed the 6 string back to 2500 grit all over and just started on the recent 12 string.

Here's the back just finished up to 2500.

IMG_4631.JPG

Rubbing compound and polish to go for finishing, but bridge and neck to go for fitting.
 
Remember this?


IMG_4242.JPG
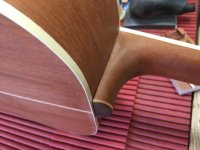
That huge gap that I built in to the neck joint 20m years ago! :oops:

This was my No 2 guitar that I made 20 years ago but never finished that had to go into storage while I sorted my life out and while I've been building the Martin 12 string (my No 3) I've been finishing this one off alongside it.

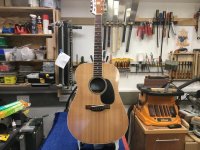
Well, I've been fitting the logo discs in the headstocks, spraying those and rubbing back both instruments through the grades up to 2500, followed by rubbing compound and followed by polish, and this is the result on the No2 guitar, the six string.

IMG_4645.JPG

IMG_4648.JPG

IMG_4639.JPG

IMG_4640.JPG

IMG_4641.JPG

IMG_4642.JPG

IMG_4643.JPG

IMG_4644.JPG

IMG_4646.JPG

IMG_4647.JPG

IMG_4634.JPG

I will string this instrument tomorrow.

Well, I'm quite chuffed with that, seeing that I started it over 20 years ago in a different part of the country and that it has been my first ever attempt at making an acoustic instrument and my first attempt at nitrocellulose lacquer spraying and finishing.

After I've strung it, I'll have a little play and see if I can record something decent for you to hear. Please understand that my woodworking skills are probably better than my playing.

The I'll get back to the Martin 000 12 string of the thread.
 
Back
Top