• Hi all and welcome to TheWoodHaven2 brought into the 21st Century, kicking and screaming! We all have Alasdair to thank for the vast bulk of the heavy lifting to get us here, no more so than me because he's taken away a huge burden of responsibility from my shoulders and brought us to this new shiny home, with all your previous content (hopefully) still intact! Please peruse and feed back. There is still plenty to do, like changing the colour scheme, adding the banner graphic, tweaking the odd setting here and there so I have added a new thread in the 'Technical Issues, Bugs and Feature Requests' forum for you to add any issues you find, any missing settings or just anything you'd like to see added/removed from the feature set that Xenforo offers. We will get to everything over the coming weeks so please be patient, but add anything at all to the thread I mention above and we promise to get to them over the next few days/weeks/months. In the meantime, please enjoy!

Preston style adjustable bit handle WIP

AndyT

Old Oak
Joined
Nov 23, 2020
Messages
3,876
Reaction score
1,799
Location
Bristol
Name
Andy
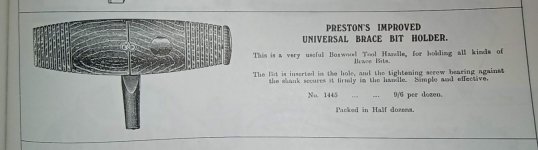
Ever since I saw one belonging to @toolsntat , years ago, I've rather admired the sort of bit holder introduced by Preston and included in their 1909 catalogue:
IMG_20241205_175714969.jpg

It's a simple but elegant design. There's a brass pin across a turned boxwood handle. A steel screw goes through a threaded hole in the pin, and can be tightened against a square taper bit inserted in the central hole. Simple and occasionally useful.

After Preston had gone out of business in the 1930s, Marples made them available again, with their own name on - this is from the 1938 catalogue:
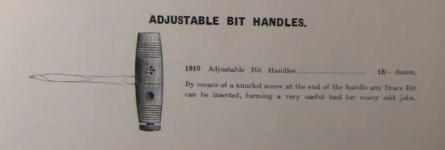
Marples 1938 design.png

Here's a close up of one I saw on sale, photographed but failed to buy. Maybe I was thinking of making my own, and that's why it was next to a ruler?
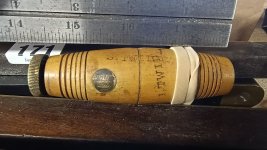
IMG_20240626_114425671.jpg

Actually, the David Stanley label is the clue - this was the preview day for an auction, which I forgot to bid on. I should have done - the Preston bit holder sold for only £20 + fees, along with two rather nice levels, so I think I missed a bargain:
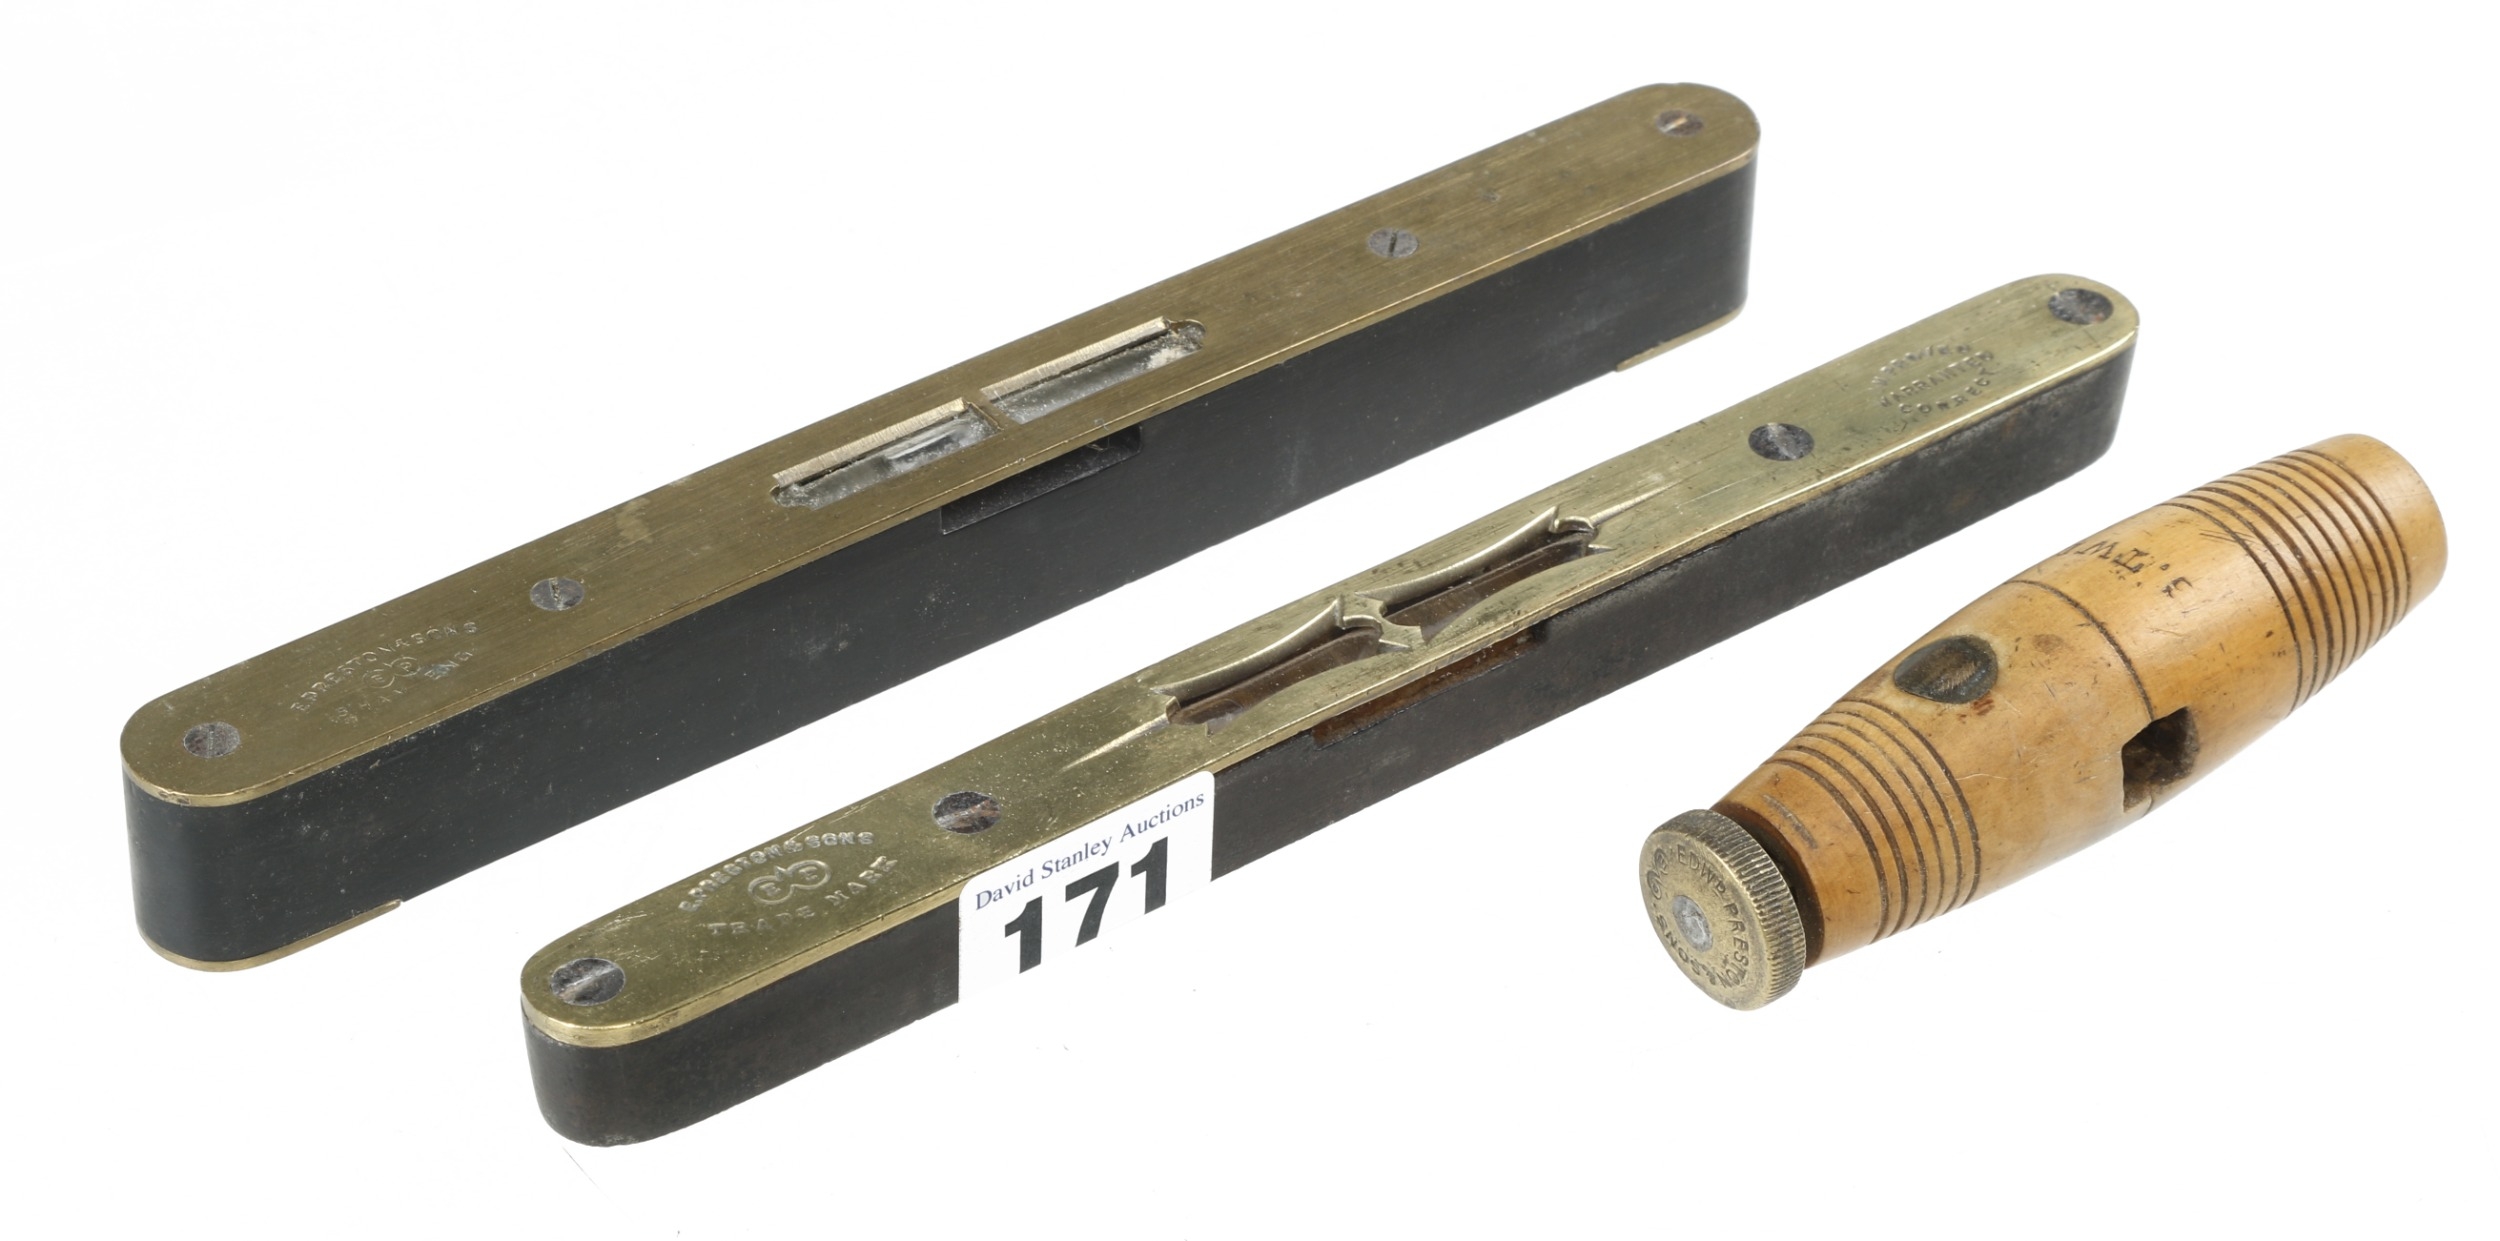
1100049774.JPG


Never mind, I knew that @rxh had made himself a rather nice copy of one, and was keen to have a go.
He very kindly shared some photos and provided a working drawing, which was all the incentive I needed.

After a bit less than a month, I found myself down in the workshop with these promising looking materials gathered in readiness:
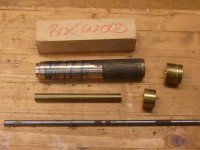
P1090733.JPG

The boxwood was given to me in a selection box of exotic offcuts by Custard some years ago, and had been waiting patiently for this moment.

I was hoping to get the brass knob out of one of the little offcuts of nice free-machining brass, but if I couldn't, the rough cast lump might be easier to work than when I last tried to turn it, as I have since acquired some extra tooling for the lathe.

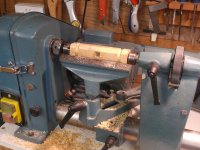
I'd had a long think about what order to approach this all in, and decided that the place to start was with the wooden part. I checked it for squareness and marked it out carefully.
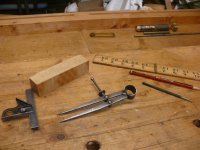
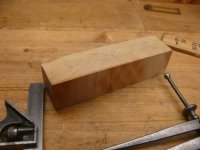
P1090734.JPG
P1090735.JPG

I could see from the photos and drawing that the cross pin was at right angles to the central tapered hole for the bits. I marked centres at both ends; one for drilling but both for mounting on the woodworking lathe.

I used my nice old bench drill, that you've seen before, to make sure all the holes were straight and square. I'm not setting out to make this whole project with tools from the Edwardian era, but that's what I have and what I like using. (I considered trying to drill the holes on the lathe, which could have been more accurate, but couldn't see how to secure the pieces at the right height without a lengthy side project making a platform and special clamps, which I didn't fancy diverting onto. I was going slowly enough already!)
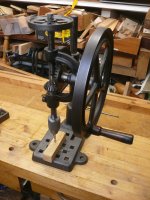
P1090736.JPG

I thought about how to drill a nice tapping hole across the 3/8" brass rod and decided to make a quick and simple jig from a bit of scrap. This also gave me a chance to check sizes and clearance for the finished article. In the photo above, I was making a preliminary smaller hole, to enlarge later.

Here's the jig:
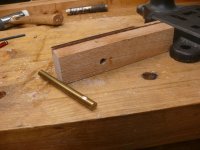
P1090737.JPG

and here's proof that it worked ok:

P1090738.JPG

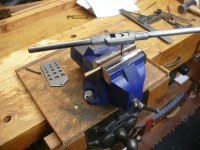
enabling me to tap at 1/4" BSW:

P1090739.JPG

I carried on with metalwork to make the matching steel screw:
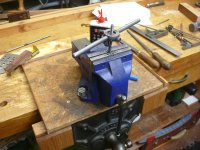
P1090740.JPG

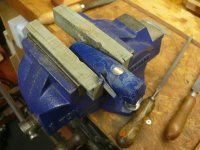
I didn't want to damage the rest of my piece of 1/4" mild steel rod by gripping it in the bare vice jaws, so first of all I tried using the leather jaws you can see in the earlier photo, but that didn't grip well enough. I tried putting the rod into the three jaw chuck on the lathe, but that slipped a bit as well. So I cut a bit off and filed flats on the end. That worked much better.
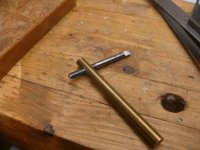
P1090741.JPG

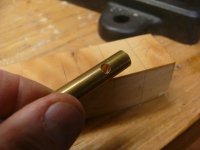
I knew that a 3/8" bit gave me a nice tight fit on the brass, so I enlarged the transverse hole you saw me drilling earlier. I was pleased when, with very little extra fettling, I managed to screw the steel part into the hole in the brass bar, which I had not yet cut to length:
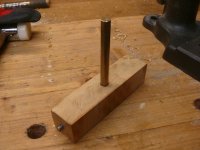
P1090744.JPG
How do you like the look of that? I was feeling quite encouraged by my success, for a few minutes. Hands up who's seen what I did?


Yep, I had enlarged the wrong hole. The central hole, where the bits will go, doesn't need to be that big. That's why I'd marked it as 1/4" diameter, back at the beginning. Bother! :mad:


Having left the room for a few minutes and thought about it, I decided not to chuck it all away, but to fill in the big hole and see if I can salvage what I had made so far. I found a tiny scrap of nice, tough, dry holly and sawed a little stick out of it:
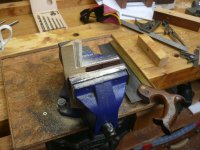
P1090745.JPG

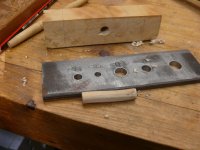
I bashed it through two holes in my dowel plate:
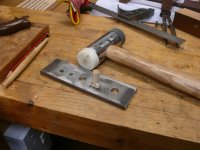
P1090747.JPG
P1090748.JPG

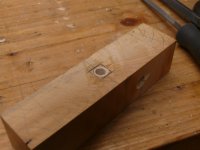
and straightened it a bit with some coarse sandpaper. Then I glued it in place
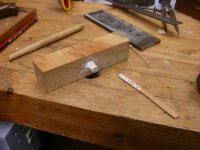
P1090749.JPG

and drilled the first hole in the place I should have been using:
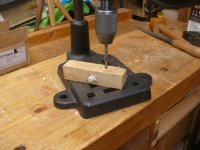
P1090750.JPG

Next time, I can start over on the tapered central hole and make sure that the steel screw goes through the cross pin ok in the proper position.

Oh and I can do some wood turning and make a little knurled knob. I'm not sure when that will be - maybe at the weekend if the wind and rain continue. There's no other deadline creeping up that suspends normal workshop activities is there?🎅🔨
 
There is a hole which need to go on the centreline. Will you drill into your dowel, or rotate 90 degrees and drill into virgin wood?
 
There is a hole which need to go on the centreline. Will you drill into your dowel, or rotate 90 degrees and drill into virgin wood?
I plan to drill the dowel, so the two holes stay at right angles.
 
That's a fun project. Why do we make these mistakes? It's infuriating!
If I knew the answer, I wouldn't make the mistake!

I guess I was thinking 'enlarge the hole' forgetting that one hole didn't need enlarging, and the other hole didn't exist yet. :(
 
Interesting looking project, thanks for sharing.

If you need a bit of extra brass for the knob, let me know. I've got loads of brass so could easily stick a bit in the post.
 
I like that you're using imperial sizes and BSW taps to keep it authentic, I'd have just used common metric tooling.
If you want to remake it properly :ROFLMAO: I can send you some box or other suitable wood.
 
I like that you're using imperial sizes and BSW taps to keep it authentic, I'd have just used common metric tooling.
If you want to remake it properly :ROFLMAO: I can send you some box or other suitable wood.
... and if you want to remake it really properly, I can lend you the metric tooling 😜 🤣
 
That’s a shame Andy, it looked to be going so well, I’ve seen auger bits permanently mounted with a longer handle like that for framework but never considered a handy swappable one like that for,
and that’s where I stopped as it made me wonder just what where and when a handle like that would be used. Also what maximum size of drill bit you could actually turn?
Anyway it’s irrelevant as it’s just a lovely thing to have.
Ian
 
Thanks guys.

I can work in metric, and cut metric threads and suchlike, but much of my kit is old style and so is much of the inside of my head :)

(And possibly the outside too, but I see no need to incriminate myself!)
 
I was brought up using furlongs, chains (think cricket wickets) and the whole B.S. panoply of ounces to hundredweight and tons (no second 'enn' or 'eee'). I witnessed decimalisation and got part of my degree in Metric units. I taught microns and Angstroms for 37 years, but I still can't easily visualise xxmm (under a foot)!
 
That rough cast piece looks more like a lump of bronze than brass?
Good point, it could be, it is a different colour.
I think it was in with a box of offcuts I bought a few years ago, so I don't have any further information about it. Would it be harder to work?
 
Good point, it could be, it is a different colour.
I think it was in with a box of offcuts I bought a few years ago, so I don't have any further information about it. Would it be harder to work?

It all depends on what type of bronze it is as there are lots of different grades and some are significantly harder to work with than others, but for the most part it will be harder to work with than the free-machining brass, which is probably why you have had a bit of trouble with it.
 
That’s a shame Andy, it looked to be going so well, I’ve seen auger bits permanently mounted with a longer handle like that for framework but never considered a handy swappable one like that for,
and that’s where I stopped as it made me wonder just what where and when a handle like that would be used. Also what maximum size of drill bit you could actually turn?
Anyway it’s irrelevant as it’s just a lovely thing to have.
Ian
I did a quick trial and found that I could make holes up to 7/8" diameter using auger bits but 1 1/4" was too much and I didn't even attempt using expanding bits :)
I found that a pilot hole of about 1/8" diameter was needed. As you would expect, it is much slower than using a brace but it was easy to get a hole nicely at right angles to the surface of the workpiece, which can be a challenge using a brace. Therefore, a possible use might be to use it to start a hole before switching to a brace. A two-handed action seemed to be best.
 
Being an obedient sort of citizen, I obeyed the Red Weather Warning in force round here, and spent today safely in my well-equipped basement security bunker. ;)

Now that it's ok to come out, I can update you all on the huge amount of progress I have made on this ambitious project...

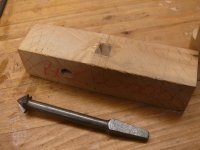
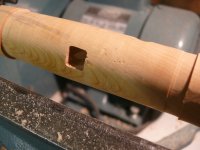
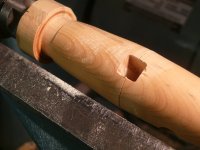
I flushed off the bit of glued-in dowel, drilled a fresh centre hole and marked out what I thought would be about the right size for a taper square bit.

P1090752.JPG

With some angle marks to guide me, I enlarged the hole with an assortment of files

P1090754.JPG

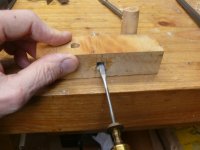
I always think that with a job like this, largely done by eye and feel, it's best to have really simple workholding, so it's easy to keep picking the work up and looking at it, with no tedious undoing of clamps. I settled on one of the little push-fit wooden pegs I often use, and that seemed to be ok. I kept testing with a sample bit

P1090755.JPG

until it went from this

P1090756.JPG

to this

P1090757.JPG

but I expect it will need further adjustment later, when I have turned away some more wood.

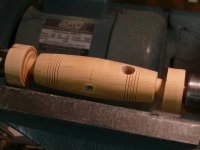
A little session on the lathe went from this:

P1090758.JPG

through this:

P1090761.JPG

and this


P1090765.JPG

to this

P1090768.JPG

You can see the clear limits of my skills as a turner, but I want to stress how anyone with a little bit of confidence can do this sort of utilitarian work.

I didn't dare shape the handle by cutting uphill, so even though I was taking very light cuts with a freshly sharpened skew, the areas where I was cutting against the grain gave significant tear-out.

However, boxwood sands very well, so by working through the grits I got something passable :), so I parted it off the lathe.

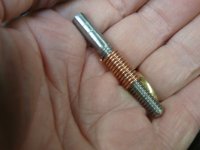
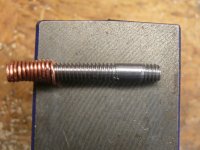
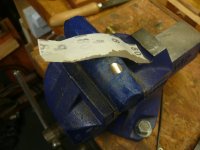
Meanwhile, back at the metalwork end of the bench, I needed to finish work on the steel screw. I assembled the parts so far, checked dimensions and cut the screw down to length. Not wanting to mess up the thread I had already made, I tried a dodge I read about somewhere and wound thickish copper wire round the thread before gripping it in the vice.

P1090769.JPG

That seemed to work ok but I think I must have been a bit hasty in filing a taper, as the first thread I cut went on crooked. Fortunately I had left some spare, so had another go.

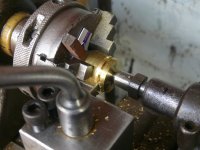
Then it was time for a bit of pedalling on the metalworking lathe, to make the adjusting knob. I managed to hold my stub of brass ok, with some wood and plastic shims - copy me at your own risk if your lathe goes faster than mine!

I parted off at what looked like a suitable thickness:

P1090772.JPG

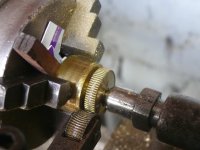
then brought in my single wheel knurler. I have a two-wheel clamp-on knurler, which is better as it doesn't strain anything, but that only does a diamond pattern. This tool gives the same pattern as Preston used. I had done a practice piece before, so I knew it could work. I had a tail centre up nice and tight for support and back gearing engaged for plenty of torque.

And although I forgot to file off the corners first, it started to look usable:

P1090776.JPG

I then discovered a minor hitch. Although the threads both look straight in this slightly fuzzy photo,

P1090779.JPG

the short piece is off at an angle again:

P1090781.JPG

which clearly won't do.
I'll call this a practice piece and thread up a new bit of steel next time, more carefully.

I should say that looking at photos of commercial examples of this tool, there is some variation in how the brass knob is attached to the steel. Some appear to be solid brass at the end, suggesting a blind threaded hole, or perhaps soldering. Others have the steel filed down to a pair of flats, going through a small slot in the brass. Others have a threaded hole and a short thread up to a shoulder. That's what Richard did on his, and showed on his drawing, so that's what I am trying to do. But not today.

More soon, when weather and whatever else crops up permit.
 
Bronze has a higher copper content than brass and is harder and less prone to dings. Not sure if it makes it harder or easier to machine. Sometimes harder metal machines nicer than soft chewy stuff.

I have one of those bonus boxes from custard, not much left now though.
 
Bronze has a higher copper content than brass and is harder and less prone to dings. Not sure if it makes it harder or easier to machine. Sometimes harder metal machines nicer than soft chewy stuff.

I have one of those bonus boxes from custard, not much left now though.
I find they are quite different to machine. Brass produces very fine particles whereas bronze gives long springy wire-like cuttings.
 
I find they are quite different to machine. Brass produces very fine particles whereas bronze gives long springy wire-like cuttings.
I'd agree with that. I think it depends a lot on the grades: the common CZ121 brass that a lot of brass round bar stock is free cutting, producing fine particles or short curls (depending on depth & speed of cut). CZ108 is the most common sheet material and that can be much more stringy to cut. Similarly "simple" bronze (copper & tin) is different to phosphor bronze (copper, tin & phosphor) which is different to aluminium bronze (copper & aluminium - no tin). Even within aluminium bronze the cutting characteristics can vary as there are various other additions.
 
I'd agree with that. I think it depends a lot on the grades: the common CZ121 brass that a lot of brass round bar stock is free cutting, producing fine particles or short curls (depending on depth & speed of cut). CZ108 is the most common sheet material and that can be much more stringy to cut. Similarly "simple" bronze (copper & tin) is different to phosphor bronze (copper, tin & phosphor) which is different to aluminium bronze (copper & aluminium - no tin). Even within aluminium bronze the cutting characteristics can vary as there are various other additions.
Interesting. Another learning day. (y)

The very rough bronze casting I worked into a plane earlier this year seemed extremely hard to work and took a long time using various files. I had no idea the materials could vary so much as I haven't had issues machining brass from various sources. Alloy on the other hand seems to be different every time I use it.
 
Alloy on the other hand seems to be different every time I use it.
Pedantically speaking (who, me? never!), "alloy" just means "mix of a metal and something else", so encompasses brass, steel & bronze among many other things.

Aluminium (which is sometimes referred to as "alloy" e.g. in the sense of "alloy wheels") comes in a vast number of different grades (with different alloying elements / proportions). Pure aluminium (i.e. aluminium not in an alloy) is rare. I'm not surprised you've found it different each time as it probably was.

In my experience with most of the more unfriendly metals, the depth of cut and rate of feed can make a huge difference to how they turn. With CZ121 brass (which I don't consider "unfriendly"), taking a light cut produces a shower of tiny little pieces that go everywhere (I often cut brass with the lathe running backwards and the tool upside down so that the pieces go down into the bed rather than up into my face). Increase the depth of cut and it produces neat little curls that are much more manageable.

Most aluminium alloys I've dealt with produce long horrible spirals that go everywhere, but changing depth of cut and feed rate changes the shape and, if you're very lucky (or, I guess, know where to look stuff up and can be bothered to do so), you can get them to produce little curls as well. I rarely manage with aluminium, but I do my best to avoid turning aluminium so I don't get much practice! I use EN1A steel for anything I can get away with as it is firmly in my category of "friendly" metals to turn!
 
I find aluminium (in its own right) to.be very soft, malleable even. On the other hand, a derivative, dural, is the proverbial hob of hell.
I've never (knowingly) tried turning either pure aluminium or duralumin (which I assume is the same thing as "dural"). Having said that, the vast majority of the aluminium I've dealt with has been skip-obtanium so I've no idea what grade it is!
 
Last edited:
I managed to find a bit of workshop time, so here's a tiny update.

As promised, I made a fresh steel screw to replace the crooked one. Second time round, I realised that I might get better results if I used the relatively precise lathe, rather than messing about in the vice, thinking I could do everything by eye...

One thing that helped was swapping to the four jaw chuck. It's bigger and heavier than the little 3-jaw scroll and grips a great deal better. Ok it takes a little bit longer to get central, but really not much. I filed a gentle taper on the end, then brought up the die resting snugly against the tailstock plunger, to keep it square.

P1090783.JPG

I cut the longer threaded part and filed the end round, while it was accessible:

P1090784.JPG

I sawed the piece to length, wrapped wire around the thread and re-chucked it to repeat the process threading the other end.

For the brass knob, the superior chuck held firm, with some specially chosen wood to make sure it wasn't going to get pushed back. The wood stayed obediently in place, despite the supersonic speed of my treadling...🤥

P1090786.JPG

I bought someone's little home-made tool holder on eBay recently. It means I can use big chunks of HSS (with appropriate shims) and get a nice solid cutting action. I faced the end, then made a parting off cut part-way, then did the single wheel knurling, as before. (No fresh pictures, sorry.) (Frustratingly, I spotted a superior tool post with four tool positions a week after buying this one, but do I really need that as well? Maybe not.)

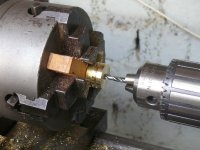
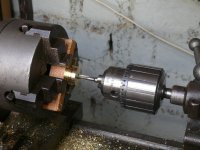
To get a tapping hole central and straight, all the way through, there was now an obvious, simple method:

P1090787.JPG

But how could I make sure that the tap went in straight?

P1090788.JPG

I just freed off the tailstock and turned the chuck around by hand. It worked nicely, pulling the tap in smoothly. Why didn't I do this the first time?

And here's a trial fit, to make sure I'm getting closer:

P1090789.JPG

It's looking better, but I expect there may be more inaccuracies lurking in the boxwood.
What with it being that time of year, I'm not sure when I shall next have time for another session. I hope you can all stand the suspense, as I don't think I will be able to set up a helpline or any sort of counselling service... ;)
 
Looking good Andy. That's how I tend to tap things: with the tap in the tailstock chuck & the tailstock clamp loose. Sometimes under power (with spiral flute taps that are relatively big), sometimes turning the chuck by hand.
 
I've never (knowingly) tried turning either pure aluminium or duralumin (which I assume is the same thing as "dural"). Having said that, the vast majority of the aluminium I've dealt with has been skip-obtanium so I've no idea what grade it is!
Skips for me as well and saved from various items I've dismantled means I have the same problems and yes I should have said aluminium not alloy as I should know better. :oops: I often turn it or use for small projects and it's never been easy.
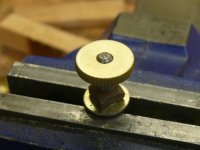
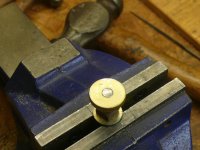
 
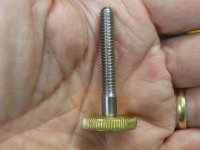
It's finished!

Here's what I did this morning.

One issue was that although the steel screw engaged ok with the brass cross-pin, as I tightened it up, it was binding on something inside. I couldn't see what was going on, but concluded that the problem came from the hole in the boxwood not being perfectly central, or the hole in the cross-pin not being perfectly at right angles, or some combination of both.

I didn't want to enlarge the central hole too much (just because it would look clumsy, though the hole is entirely hidden unless you dismantle the tool - not very good logic here!)

So I spent some time enlarging the far end of the hole, by using a small shell bit, which cuts by scraping the side of the hole, aiming at the far end. This removed some wood quite nicely but didn't fix it. So I put the steel screw back in the lathe and thinned down the first 3/4" of threads, which are all forward of the cross-pin, so don't do anything. This worked, and I could feel that the adjustment was now free to turn properly.

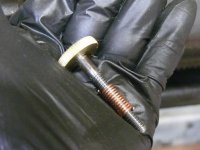
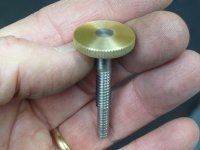
The next step was to fix the brass knob on. Not having any Loctite, I decided to rivet it instead. I put a nut and a threaded collar onto the screw, so I could hold it in the vice without damage. (Yes, I am the sort of person with a box of assorted BSW threaded fasteners close at hand!) Here it is before any damage:

P1090794.JPG

and after a bit of abuse with a ball pein hammer:

P1090796.JPG

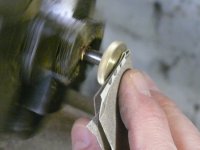
Then it was back in the lathe to remove the scars:

P1090800.JPG

I worked up through the grits, adding some oil and a scrap of hard wood behind the paper. That got me to this stage, where you can also see the reduced diameter section.

P1090804.JPG

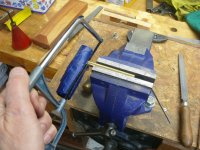
I was unsure about how to trim the cross-pin to length neatly. I settled on protecting the boxwood with masking tape, then trimming the rod with a junior hacksaw

P1090807.JPG

followed by careful filing

P1090808.JPG

and sanding:

P1090806.JPG

I was worried about little bits of brass getting embedded in the wood and spoiling it, but it proved not to be a problem. With the tape removed, there had to be a bit more sanding to get the surfaces flush. This showed me how grubby the handle had got, and I ended up hand sanding with the grain all over.


P1090809.JPG

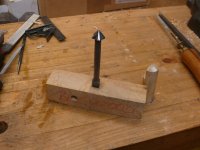
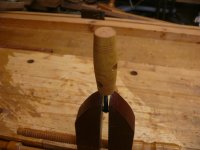
I cleaned out all the grooves with a toothbrush and applied the first coat of linseed oil. (If it's good enough for Bill Carter's boxwood planes, it's definitely good enough for this!) Here it is, drying off, held on a temporary bolt:

P1090811.JPG

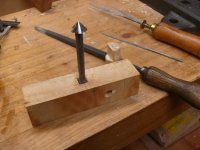
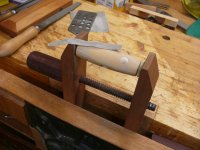
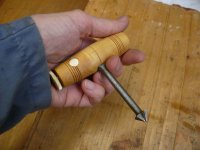
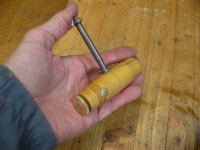
and here it is again, posing with a countersink, which is the sort of job it could actually get used for. (I did try making holes with it, which was very tedious, and I'm struggling to think of circumstances in which you'd have this tool, and some bits, but no brace.)

P1090812.JPG
P1090813.JPG

It's not perfect (of course) and I'm glad I'm not required to turn them out by the dozen for pennies. I very much doubt if I have made them the way that the original craftsmen in Birmingham or Sheffield did, but I really only embarked on this project to find out how one could be made and to amuse myself.

I imagine that the professionals would have had suitable jigs to get the transverse holes made, with the axial hole bored on the lathe. I spent ages fiddling to get the bits to fit, which they would not have needed to do, but I enjoyed myself. Thanks for watching!
 
Excellent, Andy. I'll be looking out for this tool popping up somewhere in a future WIP.
 
Yes Andy, very nice project and thank you for taking your time to do yet another wonderful write up 👏👏
You could put a chunky slotted driver bit in it and cause the next internet stampede from the masses for cap iron screwdrivers, I'm sure everyone would want one😊😎
Cheers, Andy
 
Very nicely done. It was interesting to see how you overcame difficulties and found solutions. I hadn't thought of using it with a countersink bit - I must try that.
 
Very nicely done. It was interesting to see how you overcame difficulties and found solutions. I hadn't thought of using it with a countersink bit - I must try that.
Thanks. Now that I've finished, I'd be interested to hear what order you did the steps on yours in. Did you do all the drilling on the lathe? Did you cross drill the brass rod in-situ? Etc.
And thanks again for the dimensioned sketch.
 
Thanks. Now that I've finished, I'd be interested to hear what order you did the steps on yours in. Did you do all the drilling on the lathe? Did you cross drill the brass rod in-situ? Etc.
And thanks again for the dimensioned sketch.
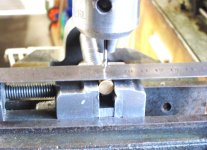
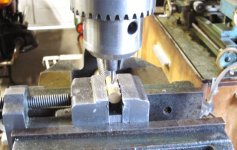
I made the transverse holes in the handle block with the drill press and the axial hole with the wood lathe. I cut the threads on the steel rod on the lathe using a tailstock die holder. To make the hole in the brass rod I used the drill press, starting with a small centre drill and using a small steel rule to centre it, as in these photos:
IMG_8179.JPG
IMG_8180.JPG
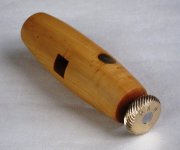
Then I changed to a small twist drill to make a pilot hole all the way through, followed by a larger one of the size required for tapping. I held a tap in the drill press chuck to start the thread in the brass rod, then moved it to a bench vice to finish tapping the thread. The brass rod was cut oversize and filed down after fitting to the handle. The knob was turned and drilled in the lathe, then it was tapped holding the tap in the tailstock chuck. I cut the knurling by hand, using a thread restorer file. I wrung the knob onto the steel rod, with Loctite on the threads.
IMG_7647A.JPG
 
I made the transverse holes in the handle block with the drill press and the axial hole with the wood lathe. I cut the threads on the steel rod on the lathe using a tailstock die holder. To make the hole in the brass rod I used the drill press, starting with a small centre drill and using a small steel rule to centre it, as in these photos:
View attachment 30653
View attachment 30654
Then I changed to a small twist drill to make a pilot hole all the way through, followed by a larger one of the size required for tapping. I held a tap in the drill press chuck to start the thread in the brass rod, then moved it to a bench vice to finish tapping the thread. The brass rod was cut oversize and filed down after fitting to the handle. The knob was turned and drilled in the lathe, then it was tapped holding the tap in the tailstock chuck. I cut the knurling by hand, using a thread restorer file. I wrung the knob onto the steel rod, with Loctite on the threads.
View attachment 30655

Brilliant, many thanks again.
If I'd not managed to make the bits fit together and had had to start again, I hope I would have thought of doing things as you described. Or else I would have asked you sooner!
 
  • Like
Reactions: rxh
Cor, you lot making beautiful stuff! Wish I had the time presently, but I'm stuck on DIY for the foreseeable.

Anyway, I wonder if those handles might possibly have served instead of a joist brace (i.e. one with a ratchet handle) for getting into tight spots.

I still have a joist brace from waaaay back when I didn't own any spade bits, nor a right-angled drill adapter, nor anything battery powered. It was tedious, but it did work. One of those handles might be even worse to use, but much better for keeping in the toolbag for an occasional crisis.

That would make it a plumber's tool, mostly. Is there any evidence that they were used that way?
 
Back
Top