• Hi all and welcome to TheWoodHaven2 brought into the 21st Century, kicking and screaming! We all have Alasdair to thank for the vast bulk of the heavy lifting to get us here, no more so than me because he's taken away a huge burden of responsibility from my shoulders and brought us to this new shiny home, with all your previous content (hopefully) still intact! Please peruse and feed back. There is still plenty to do, like changing the colour scheme, adding the banner graphic, tweaking the odd setting here and there so I have added a new thread in the 'Technical Issues, Bugs and Feature Requests' forum for you to add any issues you find, any missing settings or just anything you'd like to see added/removed from the feature set that Xenforo offers. We will get to everything over the coming weeks so please be patient, but add anything at all to the thread I mention above and we promise to get to them over the next few days/weeks/months. In the meantime, please enjoy!

Slow hand tools centre bit box wip - finished

AndyT

Old Oak
Joined
Nov 23, 2020
Messages
3,876
Reaction score
1,799
Location
Bristol
Name
Andy
It's time for another little project to use up some of my hoard of "useful" wood and keep me happy pottering harmlessly in the basement. I'll post pictures as I go, but don't expect anything speedy - I shall do a bit more whenever I feel like it and only until I get too cold - the workshop is lovely and dry because it's well ventilated but that does mean it can get a bit parky at this time of year.

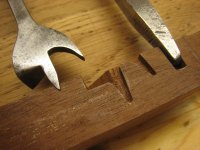
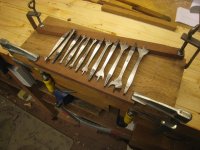
I've got a set of centre bits that are a bit nicer than the others and deserve a little box to put them in. They range from 1/4" to 1 1/4" plus a couple of countersinks. A friend of mine has an old tool chest which has a neat rack for similar centre bits, so I started by copying that. The bits can rest on a pair of little battens with carved sockets to hold them steady. Here's the set laid out temporarily to get an idea of what's needed.
IMG_7198.JPG

In that picture they mostly have the cutting "wing" pointing upwards. That's how it was done in the toolchest, but I decided to make it harder for myself by arranging them all the other way up. It needs more carving that way but I think it means they can all be held in place better.

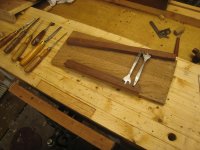
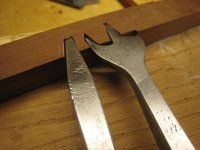
I started off with the biggest ones and with the battens loose so I could get at them easily. (That oak base is not what I intend to use, it was just the first handy piece about the right size.)
IMG_7199.JPG

IMG_7200.JPG

IMG_7202.JPG

This turned out to be rather enjoyable. The wood I was using was a tiny scrap left over when I made a shelf for the hall. It was a single leaf from a dining table. Definitely mahogany, and a real treat to work with. I can see why it got so popular. It's soft enough to carve easily but without the challenging hard/soft layers of pine.

It was a good excuse to unpack a selection of carving tools and tiny chisels and put them to use.
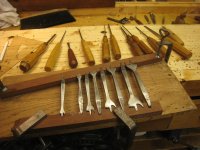
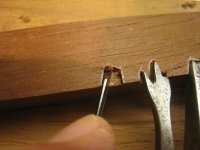
IMG_7205.JPG

IMG_7207.JPG

Progress continued over several sessions, which allowed plenty of time to think about how the rest of the box could be constructed.

I speeded up a little as I got more used to what was needed, leading to this exciting stage, where they all nestle in quite nicely. More soon!
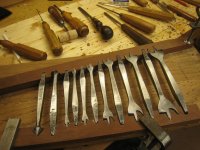
IMG_7209.JPG
 
Oh good, I shall enjoy this.

Tell me about your white pencil, Andy. I need something a bit better than one pinched from a set of kids coloured pencils. Bog oak is a pig to mark out on.
 
Mike G":p8zpz2cl said:
Oh good, I shall enjoy this.

Tell me about your white pencil, Andy. I need something a bit better than one pinched from a set of kids coloured pencils. Bog oak is a pig to mark out on.

I bought a box of Lyra brand white pencils from Axminster. They're probably no better than what you have already - they're soft and a bit crumbly so a point doesn't last well. Ok for this level of imprecision.
They don't seem to sell them any more.

Another option I use sometimes is to put down masking tape and mark on that. Or scribble with white, then add a pencil line on top. But none of these methods works perfectly.
 
Chris101":15gpdsak said:
Ohhh.
Andy's doing a WIP.

*Pulls up a chair.*
:)
Do you mind if I take this seat next to you ? :)

I really ought to sort out my brace bits. Clanking about in an old cardboard box is not the best way !
 
Last week I bought an old tool chest full of (mainly unremarkable) tools. What I really wanted from it was a box of old-style auger bits made by C.I. Fall of Sweden. Similar to these. Mine are in their original box but that is looking a bit (pardon the pun) the worse for wear so I may make something more serviceable. I will follow this build with interest.
 
Oh goody, I’ve settled in my chair with a cup of tea to watch developments, just thinking, A couple of strips of P section draught strip on the underside of the lid to keep them all in place? Ian
 
Thanks all for the appreciative comments. I'll try and keep instalments coming.
Design-wise some things are clear but others are fluid and may need some experiments. A strip of draught excluder is a definite possibility if it rattles too much.

And a box for a set of Irwin patter bits sounds a nice challenge, especially if you were to use hand methods. You could use the drills themselves to make a row of holes in a half-depth block, then split the block in two and lay the halves end to end.
 
I've got a 'set' (more a bunch) of old auger bits I picked up in Devon on holiday. Old but unused, some are still packaged, they are probably Irwin bits (after a quick google on different types from memory). I'll have to dig them out, take some pics and see what you guys think. Sorry to go off topic a little on your build Andy but I reckon it's connected enough if that's ok with you?
 
No problem Chris - digressions so often lead to interesting places! Irwin bits have a central rod with a helter-skelter track brazed on outside it, unlike most of the other sorts which were made by twisting a flat bar. The best single reference resource I know of is by James Price and is a free download from Gary Roberts's site here https://www.toolemerapress.com/2019/12/ ... nload.html The text is a bit fuzzy in the low resolution scan but the content is excellent.

I've not got much more to show for myself, but I do have a few pictures which can provide an update.

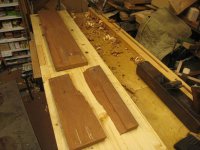
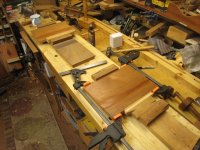
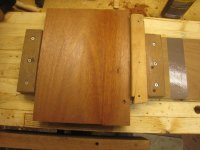
The size box I need is now set by the area taken up by the two supporting battens holding a trapezium of bits. It needs to be about 9½" by 7" internally and about an inch deep. I want to make it with the top and bottom overlapping the sides, so I will need to find a board about 8" wide. In practice, my suitable bits of wood are all narrower and I shall be gluing up to make a wide enough board.

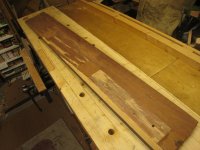
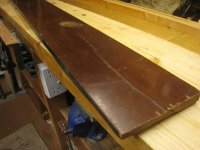
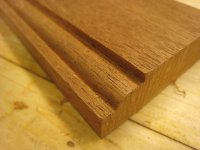
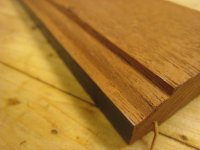
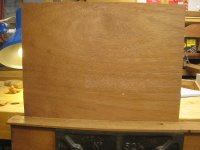
This has been in stock for a decade or more. It's a mahogany top from a wrecked piano, given to me by someone who couldn't bear to see the wood go to waste.

IMG_7210.JPG

IMG_7211.JPG

There will still be enough if I remove the split part.

IMG_7212.JPG

IMG_7214.JPG

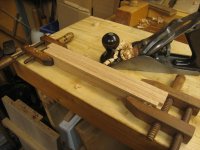
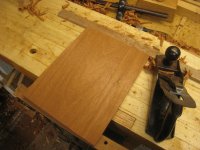
After some preliminary planing I remember the tip that it is easier to see a bevel than a line on the edge, so bevel round the board with a little block plane.

IMG_7215.JPG

and plane down till it's gone

IMG_7216.JPG

and tidy up

IMG_7217.JPG

That other jack plane is the exact same model I remember from school, fifty years ago. They still work! ;)
 
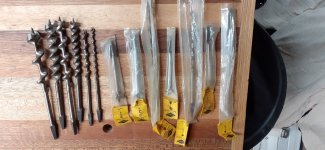
Thanks for the link Andy. Fortuitously|I remembered to dig these out today and take a photo. I wonder if there has been some nefarious skullduggery going on as the sizes have been altered on a couple of the 'unopened' bits. I know. *Horrified Gasps All Round*
Still I don't think I paid more than a fiver for the lot and they are in good condition. The lead screws on the opened bits look untouched so I won't call the old bill just yet.
There's four shorter drill augers if the name is correct and you can make them out similar to the many various ones my Dad still has in tobacco tins though I doubt most have been used since his Father gave them to him.
Maker is Whitmore of Sheffield. No idea of pedigree but a 10year old thread on ukw seems to think their planes were a little inferior? I can't readily find more information but I haen't tried to dig too deep either tbh.
I did read somewhere or other that these sort of older bits were becoming a little harder to find these days. Not sure how true that is but judging by the price of planes these days I could be retiring on the back of these lmao.
Joking aside (@Andy especially), Have you seen the price of Eclipse 4s sets on ebay. I saw one for £43! Had a look and they are mostly on for £25+ Should have bought a few more eh? ;)
Good tip about planing to a bevel Andy. Thanks.

augerbits1.jpg
 
Well Chris, I reckon that lot will probably cope with all your hole-making requirements no matter who made them!
According to BPM4, the Whitmore brand as found on planes belonged to Branson Baker Ltd of Kingswinford in Staffordshire. This is confirmed by this 1951 advert (at Graces Guide)

Im1961bBen-Branson.jpg


I'm pretty sure there's nothing there now.

There was a long tradition of toolmaking in Staffordshire, especially for agricultural tools and augers, with many of the old firms being absorbed into the Spear and Jackson conglomerate. So your Whitmore bits could have been made in Sheffield for Branson Baker to sell under their own brand name, or maybe a Sheffield firm bought the brand name from BB. (The IPO's database of trademarks - https://www.gov.uk/search-for-trademark - is down for maintenance today, so I am unable to do any more vital research on this question! :eusa-violin: )
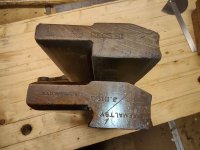
As for the ever-useful 4S, I think I paid under a tenner for mine on eBay. It's excellent for cutting slots in home made replacement screws - how does anyone struggle through life without one?
 
I've been working on this box on and off and doing a lot of experiments, mostly on the catch to keep the lid down and the mouldings on the lid and base. More of these soon, but logically there's the middle bit of the box to consider.

This is really simple. It's just a dovetailed frame an inch deep. I've got some left over bits of oak previously prepared for drawer sides so I just bandsawed them to width, planed to size and dovetailed them. Nothing to see there? Not much, but here are some pictures anyway, showing how I like to do those things.

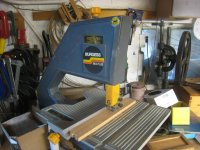
I only have room for a tiny bandsaw, which I bought secondhand ages ago. I expect it dates to the 1970s.

IMG_7220.JPG

The four pieces are easier to plane if clamped together.

IMG_7221.JPG

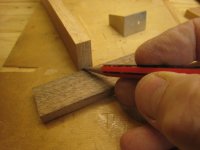
This was an easy way to mark the dovetails on small, fiddly pieces.

IMG_7223.JPG

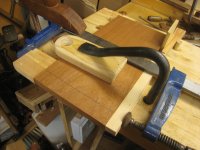
I like to use the traditional method to line up parts to transfer the markings, with a plane on its side behind the vice. I generally set a weight on the top board down but on this narrow piece I had to hang it instead.

IMG_7224.JPG

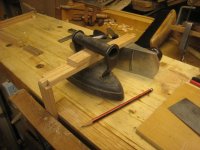
For cutting away the waste, I like my "Old Concepts" fretsaw.

IMG_7225.JPG

IMG_7226.JPG

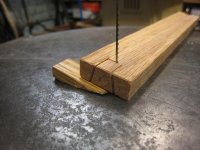
It's safe enough to hold the piece up with a wedge to make the angled cuts - not something I would recommend with an electric one.

IMG_7227.JPG

One day maybe all power tools will be like this and start or stop telepathically whenever the user thinks about it happening. ;)

And there's the finished frame, ready to glue up later.

IMG_7228.JPG
 
AndyT":29cb5w0t said:
Well Chris, I reckon that lot will probably cope with all your hole-making requirements no matter who made them!
According to BPM4, the Whitmore brand as found on planes belonged to Branson Baker Ltd of Kingswinford in Staffordshire. This is confirmed by this 1951 advert (at Graces Guide)

Im1961bBen-Branson.jpg


I'm pretty sure there's nothing there now.

There was a long tradition of toolmaking in Staffordshire, especially for agricultural tools and augers, with many of the old firms being absorbed into the Spear and Jackson conglomerate. So your Whitmore bits could have been made in Sheffield for Branson Baker to sell under their own brand name, or maybe a Sheffield firm bought the brand name from BB. (The IPO's database of trademarks - https://www.gov.uk/search-for-trademark - is down for maintenance today, so I am unable to do any more vital research on this question! :eusa-violin: )
As for the ever-useful 4S, I think I paid under a tenner for mine on eBay. It's excellent for cutting slots in home made replacement screws - how does anyone struggle through life without one?


How awesome, they give their telephone and telegram address seeing as email had not been invented

brought a smile to my face
 
AndyT":2wxyqi58 said:
Well Chris, I reckon that lot will probably cope with all your hole-making requirements no matter who made them!
...
As for the ever-useful 4S, I think I paid under a tenner for mine on eBay. It's excellent for cutting slots in home made replacement screws - how does anyone struggle through life without one?
Many thanks Andy, as always you are a generous with your knowledge. I'll keep these to one side as the brace doesn't get a lot of use if I'm honest but I would never get rid of it and have a feeling I'll drift that way at some point in the future.
I'm (still) in love with your Trump brothers fretsaw. I don't know why I am, I just am. Every so often I look at pedal fretsaws whistfully on ebay lol. ¯\_(ツ)_/¯

Enjoying the build as always Andy.
 
Let's get back to the top and bottom of this little box. I've decided that it will have an over-sized top and bottom, from solid wood. I don't want a plain square edge and boxes with rounded over edges seem to be all over the place on YouTube these days. Also, I have quite a few old moulding planes that I don't use often enough. Time to play.

Of course, most of the time, moulding planes are used along the grain only and they work well for that. Some people may not even realise that they can work across the grain as well. I can only think of one project of mine where I have planed a cross-grain moulding. It was on a library chair which converts to a set of steps. (I'm rather pleased with this chair - it took ages and stretched my abilities a bit but I got there in the end. I documented the whole story on UKWorkshop.)

Here's a shot of what I mean:

IMG_0809.JPG

IMG_1524.JPG

That was on some beautifully easy-working reclaimed sweet gum from an old cupboard. I'm hoping this old mahogany will be as co-operative.

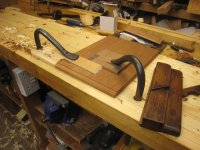
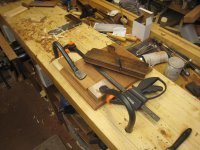
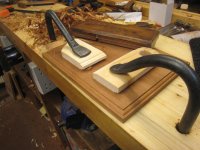
Rather than cut this bit of wood to length, I left the spare on the end so I could try different planes on it. Here it is, clamped flat on the bench, with a sacrificial scrap at either end to stop any break out.

IMG_7243.JPG

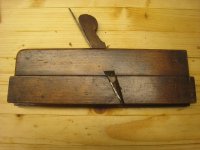
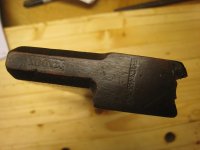
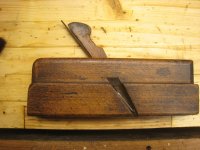
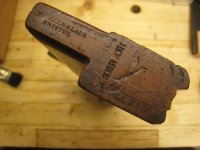
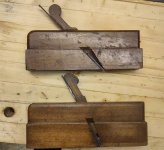
And here's the first plane I tried, by William Madox of London, probably about 250 years old.

IMG_7252.JPG

IMG_7253.JPG

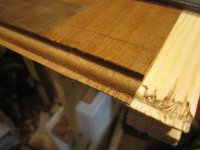
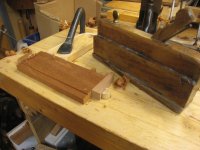
This worked really badly. It was ok on the pine, long-grain, but it plucked the relatively weak mahogany out by the roots and mashed up the edge:

IMG_7248.JPG

It was a bit better when I knifed in along the top with a cutting gauge, but still not great.

IMG_7250.JPG

I thought some of the problem might be because that plane is pitched at 60º (cabinet pitch). Fortunately I have another that cuts a similar size and shape and is lower - though it's still 50º (York pitch) rather than 45º. It's by local boy William Greenslade. Hard to date as the firm lasted so long, from 1826 through to 1941 when their factory was blitzed, but probably quite old.

IMG_7261.JPG

IMG_7262.JPG

With a pre-cut line, this looked more promising. I'll use this on the proper edges, once I have glued up the boards to make them wide enough. I can get on and do that now that it's warmed up a bit.

IMG_7260.JPG

Now some of you may well be wondering why I don't just unpack my perfectly good electric router and run it round the edge of the board. That would work just fine on end grain, of course it would. But for me, this isn't the point. The centre bits are ok in a cardboard box or a plastic ice cream tub - I don't need to make a box at all, so making it quickly is no gain. But I enjoy the meandering, the exploration of old ways of working, more than my arrival at a destination. You could ask why people walk up Snowdon when there's a perfectly serviceable railway to the top - but they too are getting pleasure by doing something that their forebears did for hundreds of years, which we can still enjoy just as much. :)
 
Those nice old moulding planes are also less likely to bite your fingers off!

I think it's great that you not only like owning old tools, but also that you use them in anger. It's brill.
 
I know you can get skew rebates but did they ever make skewed moulding planes for predominantly cross-grain working to avoid tearing?

Coming from a machine-oriented brain that would make sense to me but maybe it’s not necessary?

NickM":141ca3x7 said:
Those nice old moulding planes are also less likely to bite your fingers off!

Don’t worry, fingers grow back! 8-)

No they don’t!
 
Trevanion":y5mzn04q said:
I know you can get skew rebates but did they ever make skewed moulding planes for predominantly cross-grain working to avoid tearing?

Coming from a machine-oriented brain that would make sense to me but maybe it’s not necessary?

That's a very sensible question. As far as I'm aware, the answer is no, presumably because almost all the time, they were only used with the grain. But alongside the skewed rebate planes, there were their hollow and round cousins, and they could be had with some skew to them.

This is the sort of thing that I have learned by randomly acquiring quite a few hollows and rounds in various sizes and then noticing the other differences. In general, the amount of skew is quite slight, only about 6 degrees, which is hard to spot on a narrow bladed plane unless you put it next to a straight one. (I've seen one hollow with much more skew, but those are very rare.) Take these two narrow hollows for example - the one on the left is skewed:

IMG_20210216_140449079_HDR.jpg

It's easier to see on these bigger ones:

IMG_20210216_140552399_HDR.jpg

IMG_20210216_140653444_HDR.jpg

IMG_20210216_140522216_HDR.jpg

And making the sort of simple edge moulding I want is perfectly practical using rebate planes and a hollow.
As ever, there are different ways of going about this. Until you asked the question, I had forgotten that when I made the chair I did try out both methods - if only I could learn from my experiments, I'd be unstoppable!
 
Well I typed a comment, reviewed it and seen you had just said this:

AndyT":28hkhr18 said:
And making the sort of simple edge moulding I want is perfectly practical using rebate planes and a hollow.
As ever, there are different ways of going about this. Until you asked the question, I had forgotten that when I made the chair I did try out both methods - if only I could learn from my experiments, I'd be unstoppable!

Which is more or less what I was going to say. As follows:

"Andy

Good to see another of your wip.

Far be it from me to advise on how to do things (and this is obviously only for duffers like myself), but this is an alternative.

I made this cross grain moulding:

DSC04321.jpg

with this method: cut a groove parallel to the edges – marking/cutting gauge, knife, knife wall and a saw with blocks taped to the sides to regulate depth. I actually used the blade from one of those small Lidl japanese type saws. It gave a really sharp edge. Then a combination of home made rebate plane and router plane (chisel in block of wood in my case) to bring the outer portion down to the right level, and the corners rounded over with an ordinary bench plane.

Very similar end result. You have an additional step at the base of the moulding. Should be doable with the same procedure at 90 degrees.

Didn’t really get any tearout even on rubbish pine – lower angle on the planes used, because they were bench planes, perhaps?

Less tools used. But that isn’t the point really, is it. I don’t have your collection of wooden planes, which I would undoubtedly have tried to use. And failed. And then sworn and thrown my hands up in despair about the cruelness of the world.

The journey is the thing, as you say.
 
Tiresias, I completely agree. And that's a very tidy result, especially on pine. So many possible approaches!
 
Actually, having thought about it Andy... I know you said it's a slow hand tool project but I think that's the problem!

A spindle moulder cutter block that's 125mm in diameter has a rim speed of around 90mph and will produce clean cuts across the grain with sharp cutters.

An Andy planing at a distance of roughly three-feet a second has a cutting speed of around 2mph.

You simply just need to speed up, perhaps some amphetamines might help? :lol:
 
I'd better send you a pm, that's not an offer I often get! ;)
 
Just to finish off the digression about how to cut the moulding, here's a quick experiment on another bit of the same wood.

First, mark off a shallow but broad rebate and cut it. I used a moving fillister for this - there are plenty of other options.

IMG_7274.JPG

Then make another, narrower rebate. I chose to cut this one with my first home-made plane, using the technique where you sit one corner into the gauged line, take a cut, then go deeper and straighter until you reach your depth mark.

IMG_7275.JPG

Then you join up the two rebates with a suitable hollow plane.

IMG_7276.JPG

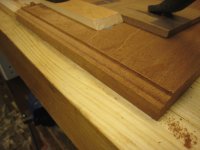
This was after a little bit of cleaning up with a chisel and could still benefit from some sanding. For comparison purposes, I worked the opposite edge with the dedicated moulding plane.

IMG_7278.JPG

IMG_7277.JPG

What the pictures don't show is that the rebate+hollow method is much slower, with some marking out needed and three separate planing operations. Also, the metal depth stop on the fillister plane left a bit of a bruise on the top surface of this soft mahogany.

So, although I haven't demonstrated using skewed planes on end grain, I can clearly say that if you have got a dedicated moulding plane of the right size and shape, it makes good sense to use it. The great advantage of the other method is that it is so flexible. You can use it to match old sections or anything you design.

Meanwhile, back on the base and the lid, I edge jointed the extra bits to make the width up and glued them on. If anyone reading this struggles with edge jointing, all I can offer is to say, get some nice old mild wood and try that. This is just stood in place for a final check but made me happy:

IMG_7263.JPG

IMG_7264.JPG

For the glue-up, I favour liquid hide glue and these simple home made clamps with folding wedges.

IMG_7265.JPG

Here's the glue wet, with the surplus wiped off

IMG_7266.JPG

and here it is the next day after some cleaning up with a smoothing plane

IMG_7267.JPG

and if I pick my camera angle carefully I can kid you that the joint really does disappear - you can see where it is from the step on the end

IMG_7268.JPG

That's all for now - next time, finishing off the frame and making a catch.
 
How's that planing stop (parallel to the face of the bench) mounted?
 
Mike G":mx8hsxle said:
How's that planing stop (parallel to the face of the bench) mounted?

Two turned hardwood pegs are a pushfit in holes in the bench. A bit of scrap wood, thinner than the wood being planed, spans between them. The open vice gives a bit of adjustable extra depth.
 
Simple! Thanks. I've got something somewhat quirky, which I'll grab a photo of tomorrow if I remember.
 
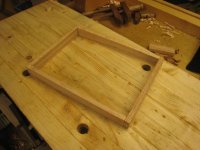
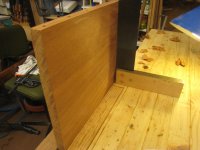
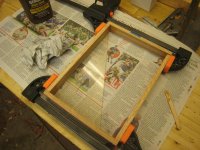
There's not a lot that needs saying about the little dovetailed frame for the sides of the box. I planed one side low for a hinge, drilled a hole for the catch, put some glue on the joints and clamped it up square.

IMG_7273.JPG

That could only be done after I had decided how to hinge and fasten the box, so let's backtrack a little.

I looked at commercially made catches, but they generally suit a box where the top and side meet edge to edge and scope for non-essential shopping is a bit limited at present. This box will have a top that sits over the sides like a roof. I doodled a bit and abandoned some early ideas based on bendy wood - there's not enough room for that.

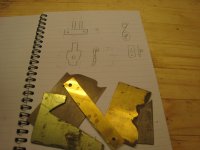
After a while I decided on this precision design and these attractive materials:

IMG_7231.JPG

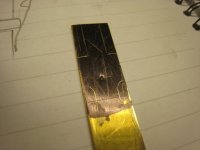
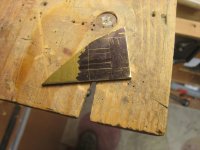
I marked the bits out in the usual way - a permanent marker, a centre punch and a scriber - then cut them out with a little piercing saw which I seem not to have taken any photos of, but you can imagine a junior hacksaw size frame with a thin thread of a blade.

IMG_7232.JPG

IMG_7233.JPG

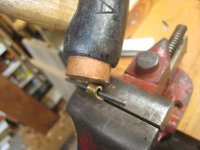
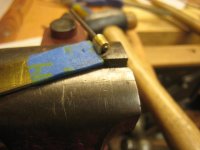
The tab was gently hammered around a pin to make it like a hinge

IMG_7234.JPG

IMG_7235.JPG

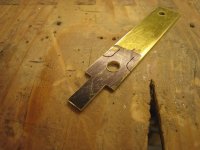
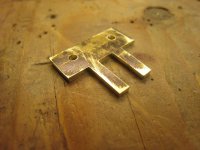
Here's the other half

IMG_7236.JPG

IMG_7237.JPG

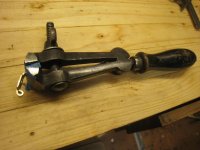
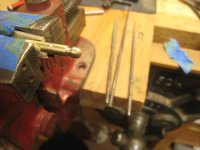
As you can guess, there was quite a lot of filing to get the parts to fit nicely together. The tab needed to be bent so I can get hold of it, which was easier in this little hand vice, the luxury model with a wooden handle.

IMG_7239.JPG

And here's the peg that the hole will fit over. I decided against making a backplate for this - I'll just glue it in a snug blind hole.

IMG_7240.JPG

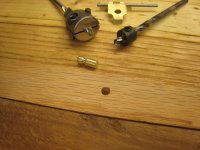
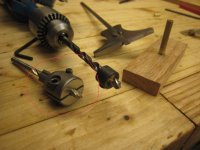
I know that will work because I spent quite a while testing it on a bit of scrap. A 3/16" hole is needed and a good way to get that neat is to drill with a metric 4mm brad point bit first, then enlarge the hole with an ordinary twist bit. Both bits needed depth stops.

IMG_7270.JPG

IMG_7271.JPG

IMG_7272.JPG

We'll revisit the catch in a future episode, but I won't really know if it works until I get it fitted.
 
Back to the lid and the base and their moulded edges.
I spent quite a bit of time doing experiments on methods that led to dead ends, which I won't record in quite as much detail as the rest, you'll be glad to know. These included attempts to make the end grain ovolo moulding using rebates and a hollow and even by hand carving it with a gouge. This did achieve more of a glassy, slick surface than the slightly scraping cut that the plane gives, but was too much trouble to be fun and would be too hard to do full scale.

The most important thing was to get the plane properly sharp. In this case that meant more than just tickling up the edge with slipstones - it needed reshaping to match the sole properly. I've put this in a separate post - How to sharpen a moulding plane.

The next important thing was to get the sequence of work right. I'd left the pieces oversized to allow for a second chance, but you can't leave things oversized and finish a project. The right sequence was to get an end and a side square, shoot one end, plane the moulding on that end, then cut the other end to the right length, square it and mould it.

Once I had two good ends I could size for final width and mould the edges.

In pictures:

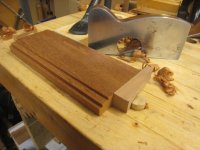
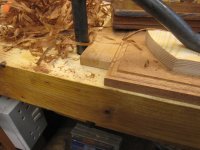
Planing the first end. The piece of softwood on the left is essential and prevents any breakout.

IMG_7301.JPG

IMG_7302.JPG

Planing the second end. You can see that I added an extra clamp to hold the sacrificial piece, which seemed helpful.

IMG_7309.JPG

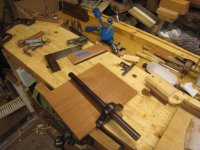
Gauging for width. The bench could have done with a good tidying, but I was getting stuck in and didn't feel like breaking off.

IMG_7308.JPG

To mould the sides, no blocks are needed - the plane can just run in and out of the moulding. (This will always be so; moulding planes won't cut re-entrant mouldings, only those than can be mitred.)

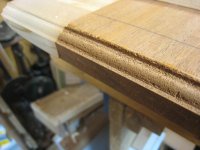
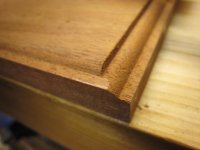
Here the shape is nearly formed:

IMG_7303.JPG

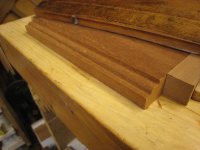
and here it is after the final stroke:

IMG_7304.JPG

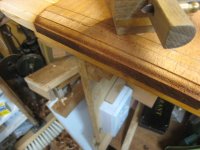
General view of shaping an edge:

IMG_7312.JPG

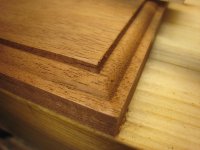
and the far side intersection:

IMG_7311.JPG

I've said it before but there is something very satisfying about using tools a century or two old, bought for a few quid, to do the work they were made for.

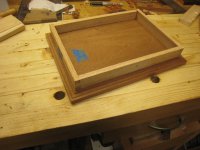
And here's the frame of the box, sitting on the base, proving that I had checked the size as I went along.

IMG_7305.JPG
 
Thanks for all the appreciative comments. I must stress that for me, this is definitely down at the "enjoy the making process and spin it out as a pastime" end of woodworking - the opposite of doing anything commercial or because it's urgently needed in the household. I'm often trying things out to see what works and don't want to suggest my ways are "best" or the only correct ones.

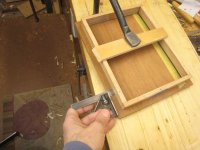
Anyway, here's a bit more of what I have been doing. A few steps back, I needed to decide what size the top and bottom would be - in other words, how much extra wood there is around the outside. I did this by setting the frame down and judging what looked right, then using a combination square to measure the extra.

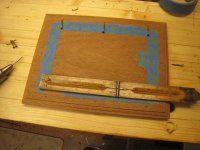
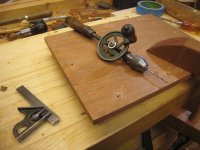
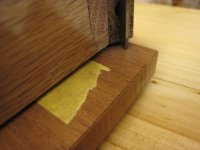
Later, with the base cut to size, I used the square to get the frame central and put tape down inside to mark where the frame would go. I marked a pencil line in the centre of the wood and drilled 3mm holes through the base.

IMG_7306.JPG

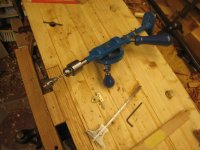
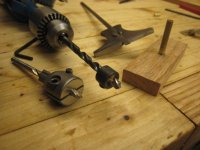
Then I clamped the base down on top of the frame, checked it was central, and drilled 2mm holes into the thin oak frame. This little lightweight drill is ideal for the job. It's the sort of thing that used to be included in fretwork sets in the 1930s. I then countersunk the holes. Obeying frequently given advice, I ran a steel screw in first in each hole, then a brass one, with wax on the screws.

IMG_7307.JPG

I did a similar operation on the strips which will support the bits. I know that I'm ignoring seasonal movement of the wood in this construction. But on the other hand, this wood has probably been in my basement workshop for ten years now. The box will stay in there too. Mahogany is pretty stable. And there's a bit of give in the skinny brass screws. Overall, I'll take the risk and report back if it tears itself apart.

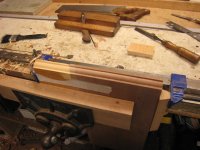
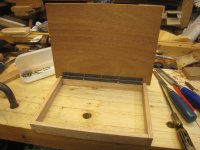
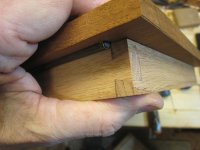
The lid is fixed with a bit of piano hinge, from the same piano that donated the wood. The lid was centred in the same sort of way so I could work out where to fix the hinge to it.

IMG_7313.JPG

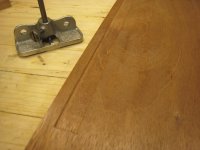
The hinge will need to be set into the lid, by about this much:

IMG_7317.JPG

I drew a line along the edge of the hinge, onto some tape which was just to make it easier to see.
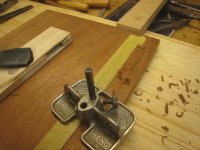
I then cut a corresponding line for the width of the hinge, using a cutting gauge. The sinking was done with a chisel, then a Stanley 271, bought for about £10 I think, back when hand routers were cheaper than they are now. If I didn't have this, I'd buy the Veritas or make one of similar size. I know you can use a big tool for a small cut but sometimes a small tool and a good view is just easier.

IMG_7318.JPG

IMG_7319.JPG

It fits!

IMG_7320.JPG

IMG_7321.JPG

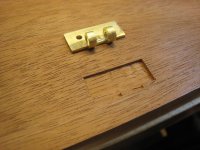
I then needed to fit the top bit of the catch

IMG_7322.JPG

IMG_7323.JPG

Sometimes, taking close-up photos and then looking at them on a reasonable size monitor shows up things that don't look quite right. More observant/fussy readers will be relieved to know that I have since gone back and countersunk those screws a bit further. 8-)

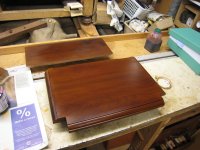
That's nearly the end for construction. I need to decide on a finish and whether to stain the wood darker first.
 
Back
Top