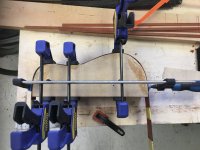
• Hi all and welcome to TheWoodHaven2 brought into the 21st Century, kicking and screaming! We all have Alasdair to thank for the vast bulk of the heavy lifting to get us here, no more so than me because he's taken away a huge burden of responsibility from my shoulders and brought us to this new shiny home, with all your previous content (hopefully) still intact! Please peruse and feed back. There is still plenty to do, like changing the colour scheme, adding the banner graphic, tweaking the odd setting here and there so I have added a new thread in the 'Technical Issues, Bugs and Feature Requests' forum for you to add any issues you find, any missing settings or just anything you'd like to see added/removed from the feature set that Xenforo offers. We will get to everything over the coming weeks so please be patient, but add anything at all to the thread I mention above and we promise to get to them over the next few days/weeks/months. In the meantime, please enjoy!

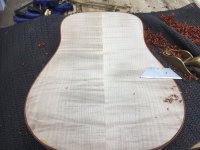
Seven Heirlooms - and one for my great niece, too.

From what I've heard padauk is notorious for breaking when bent unless the grain is dead straight. What moisture content did you start at? They've mostly cracked in several places around that quite tight radius front curve. It would be interesting to know if they cracked during the bend or when coming out of it. Did you hear them cracking? Sympathies btw.
I soaked them before wrapping them in baking parchment. The upper bout radius is tight, about 25mm. I didn't hear any cracking it makes noise while I'm pulling the cauls round over the shims. I think they must have broken during the bend because the shims were thinner than I've used before and I noticed the top shim didn't stay flat/curved against the wrapped workpiece.

I have manually bent Padauk before with success. I'll try some of my 1/4 sawn stock manually and see how I get on.

I milled these strips to 2mm. I shall have a go at 1.5mm.
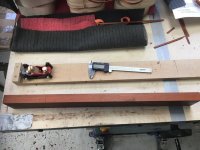
 
So here's my expensive Padauk stock.

7E527661-712F-43F3-AFBE-9645945EFE96_1_201_a.jpeg


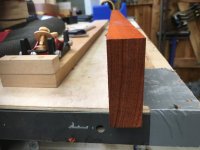
Although the stock is slab sawn, I cut it down the quarter (across the thin edge).


58B30127-5486-4778-93CA-4AE8C48C0CAD.jpeg


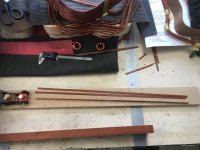
I've run off one strip at 2mm on the bandsaw, then put it through the drum sander to 1.6mm. Then ripped into three 7.5mm wide strips and then reduced to 7mm with my sledge plane.

98519BB7-CFD4-4F97-8CE9-3C38BF343DD4_1_201_a.jpeg


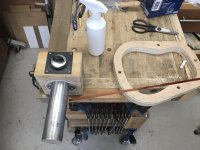
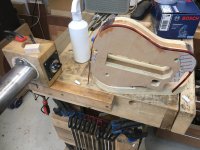
Time to fire up the heating iron.

DDD67702-E41B-453F-8FCE-4B48306C2ED9_1_201_a.jpeg


45 minutes later...

E6495A45-960F-4A6D-B47D-94A90CAD10DE.jpeg


I could see a crack beginning to appear on the upper bout radius and immediately stooped pressure and was able to continue with no other cracks starting. I've got no fingerprints left.


However, I've got 27 more to do.

Good job I'm retired. :)
 
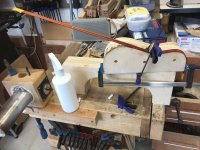
Yesterday I shaped one at a time on the heating iron.

DC43D832-66F5-4ED2-9960-AB3DD6BB36FC.jpeg

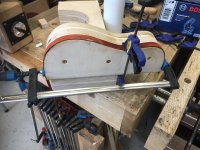
So, today, I thought, why not two at a time.

F1DAB91E-06D7-49A2-8CD9-0A85DE8DFD4C.jpeg

Seemed to work with a bit of persuasion.

D8786886-B7EF-4516-B287-8E27BCE7ADD4.jpeg

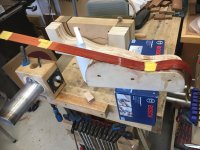
So I thought, why not four at a time.

2624BC26-C5E2-427F-9C1C-96FCEDF2B0F8.jpeg

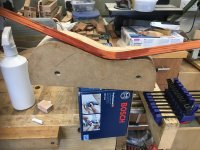
Works for me.

1FEA6BBC-3958-427C-8B63-4AEDD1C05AF2_1_201_a.jpeg

Still a bit more persuasion needed to iron out my bumps.

In conclusion, reducing the thickness to about 1.6mm and taping them together in groups of four together made it easier for an amateur like me to get close to the overall shape with the heating iron, and without cracking the wood on the tight upper bout bend. Taping the four together reduced to potential to twist the individual strips.

I suppose my fingerprints will grow back in time. :)
 
Well done for persevering. I would have swapped to an easier wood.
I like the look and smell of Padauk, and I have other Padauk highlights around the instrument. So it's a design feature as well as functional. And I think it's easier to work than the Purpleheart I used last year.
 
Have you tried fabric softener Malcom?
That's fairly commonplace on the OLF and the likes, should you have stumbled across "supersoft" before.
Two heat blankets are often utilized for the "fox bender", and curious to know why you've stuck with the one....
Might that be adapting the forms to suit perhaps?

Nevertheless, the hand bending looks to be goin pretty well.

All the best
Tom
 
Thanks, @TomTrees. I must confess I've never seen nor read of using two heating blankets on on the bending machine. Of course, I've always used two sheets of shim steel with the workpiece on top of the blanket and the shims as the outer leaves of the sandwich.

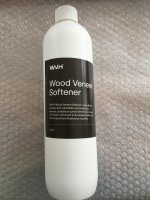
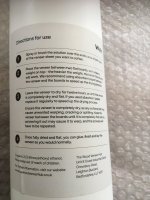
Neither have I heard of using fabric softener, or even Super-Soft 2 from Stewmac (after I researched). However, I've just found my UK veneer supplier sells a pre-diluted veneer softener. It has good reviews including one from a UK luthier. Conversely, it is mainly intended for flattening veneers, so may be of help for some members here.
 
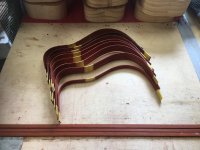
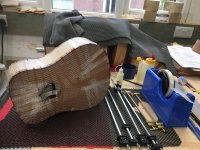
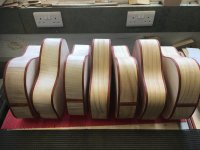
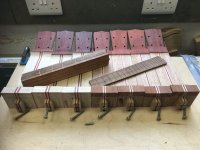
Twenty eight hand bent binding pieces with a couple of spares.

AB4359E8-A9B0-4DBE-A157-3B17FF5764EC.jpeg

What have I learned from this?

  • Some timbers bend better than others.

  • The shims in my bending machine, especially the top one, are maybe too thin.

  • You can bend more than one at at time, in my case four, manually on the heating iron.

  • When I get round to bending some exotic guitar sides (London Plane, Bramley Apple etc) from my stock, I will use veneer softener.

  • My fingerprint won't open my iPad or iPhone!!

  • Patience is a virtue. :)
 
Well done that man.
PS - if you plan to use fabric softener as a bending agent, check what is in it. Many of them contain oil (which replaces oils stripped out by detergents) and might affect your glue up of the bindings.
 
Well done that man.
PS - if you plan to use fabric softener as a bending agent, check what is in it. Many of them contain oil (which replaces oils stripped out by detergents) and might affect your glue up of the bindings.
I've ordered a bottle of veneer softener from my veneer supplier.
 
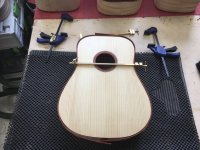
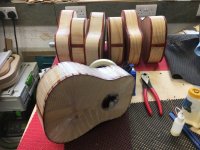
And here's where they go.

846D7D11-3576-4E32-B4A8-DFED6C10BBA1_1_201_a.jpeg

Dry run setup tp cut the joins.


ED032977-A01F-4DCB-B985-F413AA005D7E_1_201_a.jpeg

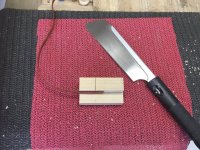
I need a little cutting block for square cuts.


7915190E-03AD-4DF3-9C8D-52DC9173354F_1_201_a.jpeg

So I can set up a dry run before gluing.

I sprayed all the tops with sanding sealer so the soft Spruce and Cedar will be a little protected while I work on the bindings.

The channels are cut with a rebate bearing cutter to 6mm deep and 1.52mm thick, so there won't be much to take off the binding to match the body.
 
Time to get the binding channel machine out, that @Dr.Al helped me make.

Because the back of the instruments are dished, a normal hand held router with a bearing guided rebate cutter would sit at an angle and thus the rebate would not be parallel with the instrument side. This machine achieves a rebate that is parallel with the sides.

4FE565DC-973D-460F-B3DD-57919B9BD7AD.jpeg

First back rebate milled.

5265D1E7-BD73-4C0A-9130-1C18C381E4E9.jpeg

First pair of front rebates fitted with binding.

B17D5A1E-9A5A-48BB-BE7B-A122FA49D80D.jpeg

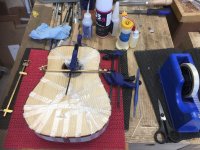
Aggressive adhesive tape is the only way to clamp binding around an instrument.

The binding is not only decorative and a design feature, it also covers the end grain of the top and back so that they can't absorb moisture in the air, and they're also protected from knocks on that edge.

One pair down, thirteen more pairs to go!
 
Last edited:
All four of the binding components glued to the first instrument body.

5CA25C14-6363-4413-A2B7-128F2300C507.jpeg


Time to reduce the thin edge.

CCD578D6-DC60-4DC3-BFBE-53F68BB3C4A1_1_201_a.jpeg


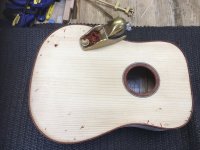
Then it's time to scrape the wide side. I mostly use a fresh Stanley blade for most of it. But for the final scraping to make sure both sides are on the same plane, I use a cabinet scraper.

B6758A31-3CF8-42EB-8F9B-8847B802FE96_1_201_a.jpeg


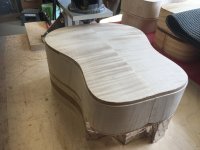
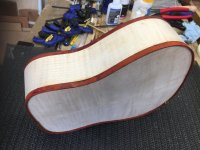
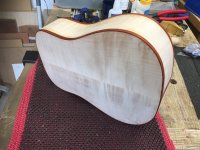
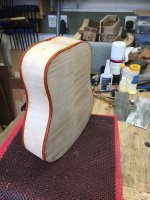
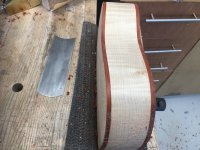
I just love the way that Sycamore grain pops.

6DA12254-3706-4BF0-B1B2-832C5769121E.jpeg


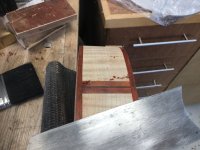
And I really like the contact between the Sycamore and the Padauk.

0E8D781F-D3AD-4BD6-BE0C-A5CE3DC5F9E9.jpeg


Next on to rout, glue and scrape another 24 bindings. :)
 
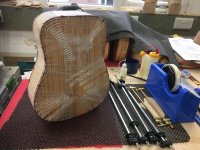
This is the only way I've found I can clamp my shop made timber bindings to the channels around the body. The tape is glass reinforced, and even then some of the binding will not fully fit into the channel.

B42A0745-124E-40D5-88F7-262F152F4DED.jpeg

I've forgotten how many reels of this tape I've got through.

9E6D0CB8-FE55-4E16-995A-BEEB0AE9640B.jpeg

It's not my favourite job. The tail joins and neck joins all have to be exactly central and align with the joins of the tops and backs. That something I don't always 100% manage to achieve. Must try harder. But at last I've glued 28 pieces of binding.

65311B61-378B-4AF2-826F-CDF191B06B00.jpeg

I like this next part, where I plane and scrape down the binding to the levels of the sides, top and back.
 
Malc, I'm surprised that tape comes off cleanly without pulling wood fibres out.
Ahah! I'm glad you mentioned that @NickM. The Sycamore and the Monterey Pine are both robust enough not to have fibre pulled off. But for the Spruce and the Cedar, I sprayed them with cellulose sanding sealer first! Sneaky, eh?! :)
 
Is this a special tape Malc.
Yes, @duke. Here's the blurb from the supplier.

Clear polypropylene film, reinforced with glass fibre filaments which are cross-woven into an aggressive high shear adhesive to give high strength. Used for heavy reinforcement, high security sealing. Adheres to all paper, card and plastics.
 
I really enjoy this part of the build process.


EF5E851F-AE79-42BF-B792-1E97D5567DF8.jpeg


Getting down and dirty with the work and seeing all the beautiful nuances the timber gives me as I scrape one piece down to the level of the other.


6B0DAC64-80BF-4EC0-AD9E-5FDF058C9925.jpeg

Can't wait to see the results of grain filling and lacquering towards the end of the build.
 
I can imagine the feeling is akin to seeing the grain appear when turning a scrappy piece of wood on the lathe.
I hope you feel the same after the seventh one.
 
I can imagine the feeling is akin to seeing the grain appear when turning a scrappy piece of wood on the lathe.
I hope you feel the same after the seventh one.
Thanks, Andy. Always the same. This is No 5.
 
5E0D5A35-42A7-43C9-B74F-5A0E90CF29C7.jpeg1A0BB510-F328-4E21-AC8B-B216EC35E648.jpegF0FDFD54-D723-4C9A-BF1D-3E0DEA4DACD9.jpeg

Binding scraping finished.

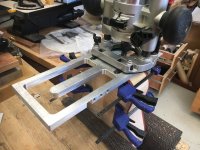
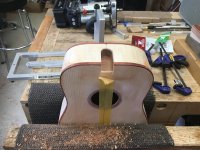
Somehow I've got out of sequence in the build process. Next, I think, is mortising the bodies for the neck tenons using that hugely expensive aircraft grade aluminium routing jig.

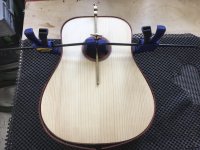
But even before that, I have to confirm the centrelines of the soundboards and prepare a flattened area on the rim to receive the neck, perpendicular to the centreline.
 
Some of the jobs in the build process I fine a bit fraught. This is one of them.
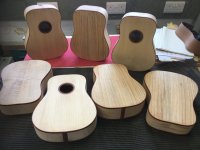
04E8D9F2-73EC-47BA-8E9F-FED6EC8A2540.jpeg

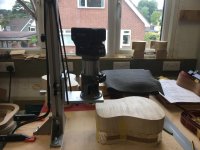
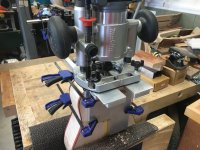
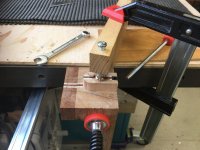
It looks like it should be easy, but the aluminium jig is clamped to the instrument body and the body is clamped in the vice, and the body has to bear the pressure of the clamps and the weight of the jig and the router as well.
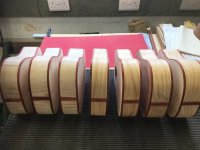

F0943658-D22D-4032-9220-59F0DCFF829B.jpeg

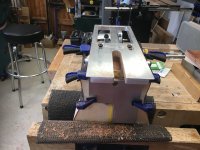
On top of that I have to clamp the jig aligned with the instrument centre line through two axes and make sure it doesn't move during the clamping or routing processes.

80DA83A4-A97B-4DAE-A787-F808CF1B8988.jpeg

But I take my time and rout in three passes.


1BF7AFAE-8FB8-47A6-938B-B45E7B8B0755.jpeg

Looks OK.


7F65AC3F-9505-4CD7-ADFB-1F33B6AF5986.jpeg

Fits OK.


DE5105E1-2978-4CFC-A13E-1DE3E99FE31D_1_201_a.jpeg

It even looks straight.

The jig is designed so that although the perpendicular piece has to be moved between routing the tenon on the neck and routing the mortice in the body, the lengths of the tenon and the mortice remain the same.

Six more to go.
 
That strikes me as an incredibly fraught operation. I hate electric routers at the best of times, but after you've put that much work in it must be seriously daunting.
 
That strikes me as an incredibly fraught operation. I hate electric routers at the best of times, but after you've put that much work in it must be seriously daunting.
I wish I still smoked. I could do with a sit down and a cigarette after each one. 😀
 
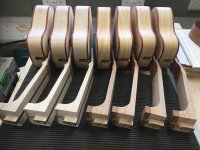
Seven mortices for seven tenons.

096337C0-E456-45A2-8DD4-DDCBA2AF43CB.jpeg

Next up, blanking the bridge position with parcel tape so I can spray sanding sealer on the soundboards, while leaving the bridge area clear so that glue can penetrate to timber when fitting the bridges later in the build and the SS can protect the Spruce and Cedar while other work is going on.
 
Seven threaded inserts fitted to seven tenons.

4958BD67-E815-4450-888E-081B94A09D99.jpeg


Noice the little pointed thread?

52EB49B3-97A6-4DE4-9C3E-CA7A419C1A3A.jpeg

I can screw its blunt end ito the insert, then offer the tenon into the mortice and press.

The point leaves an indent which tells me where to drill the hole in the mortice for the bolt.
 
First I rough cut the plan outline on the bandsaw.

06788991-B252-4784-8287-1536BF5221CA_1_201_a.jpeg

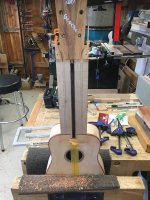
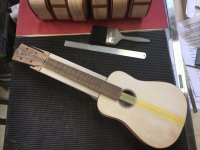
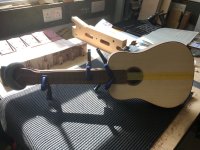
Then I use the centre line on the neck and the spare fretboard template to align them both and then fit the tenon into the mortice.

CE55B9D8-48DD-4928-A650-EFA87A583561.jpeg

Seems to line up nicely. Go, me! :)

Do you like its little protective sock?
 
Last edited:
Back
Top