• Hi all and welcome to TheWoodHaven2 brought into the 21st Century, kicking and screaming! We all have Alasdair to thank for the vast bulk of the heavy lifting to get us here, no more so than me because he's taken away a huge burden of responsibility from my shoulders and brought us to this new shiny home, with all your previous content (hopefully) still intact! Please peruse and feed back. There is still plenty to do, like changing the colour scheme, adding the banner graphic, tweaking the odd setting here and there so I have added a new thread in the 'Technical Issues, Bugs and Feature Requests' forum for you to add any issues you find, any missing settings or just anything you'd like to see added/removed from the feature set that Xenforo offers. We will get to everything over the coming weeks so please be patient, but add anything at all to the thread I mention above and we promise to get to them over the next few days/weeks/months. In the meantime, please enjoy!

Seven Heirlooms - and one for my great niece, too.

Malc, I think it's fundamentally important for the two outer strings to be dead parallel to the fretboard edges. Any deviation will be very noticeable to any player. I suppose your other option is to centralise the bridge and slightly offset the bridge pins to compensate. Key not to throw intonation off by changing the scale length, even slightly.
I agree, Adrian. As the pin holes are already milled in the bridges to keep the string end gaps equal, I feel if they were offset in the bridge, that would become noticeable. Scale length is set to the second string on the saddle with the other strings compensated by the saddle angle.
 
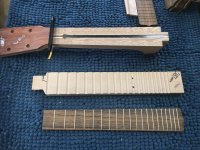
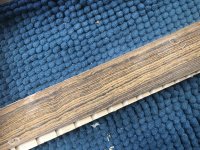
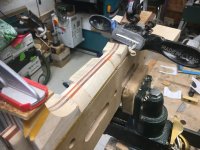
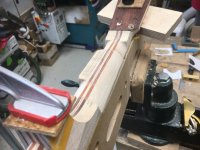
First I had to make cauls with grooves in to exactly match the spacings of the frets.

4858D9CC-5C4B-4834-BD3A-FCDD7BA05A7C_1_201_a.jpeg

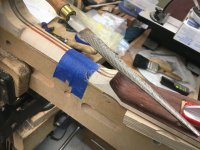
Previously, in the blank fretboard template I had drilled a 1mm hole in the first fret and twelfth fret. That the allowed me to drill 1mm holes in the necks and 1mm holes in the backs of the fretboards so I could accurately locate the boards to their necks for gluing using 1mm steel pins.


D0966303-C697-44CA-8579-5722CCBCF904_1_201_a.jpeg


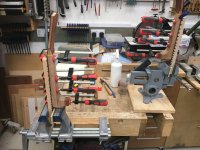
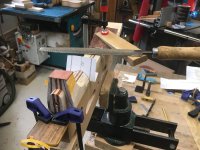
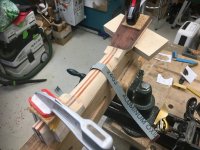
As I've got seven to glue up, I set up two gluing stations and set to work clamping two necks.

8C7130C4-EE48-4937-8C6C-74DC91B4049A.jpeg


You can never have too many clamps…………or vices, it seems. :)
 
How did you machine your grooves in the cauls, Malc? There is always a need for more clamps, I need more for when I do many glueups at a time waiting for some at a bargin. Yes I'm cheap!!
 
How did you machine your grooves in the cauls, Malc? There is always a need for more clamps, I need more for when I do many glueups at a time waiting for some at a bargin. Yes I'm cheap!!
Well, the first one I did on the CNC machine a couple of years ago when I only made two instruments.

As the machine is currently stowed in the rafters, for the second one I marked all the fret positions on the caul, and then I used the depth stop on the Kapex 60 to groove them.
 
Had some family events so it's time to warm the workshop up again.

This next process is totally hands on, so those who don't approve of power in the workshop can watch this without offence. ;)

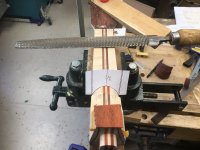
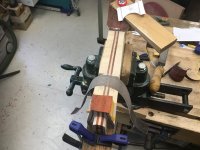
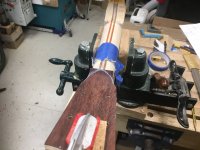
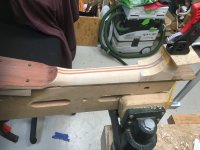
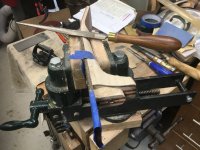
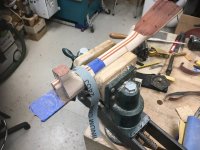
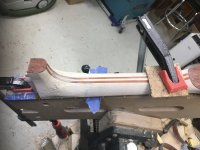
A neck gets clamped to a neck jig and held on the end of the bench in pattern-maker's vice. A template is cutout for the 9th fret and out comes the big rasp.

2755CC2E-7E1C-4D0C-A6B6-A7175AE37D41.jpeg

I was taught to rasp/stroke the curve at roughly three angles; from vertical to the centre 75, 50 then 25 degrees. I do that twice on one side, then twice on the other.

7056ADDF-B337-4540-8296-B8837B408CEE.jpeg

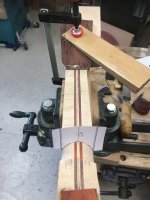
I pencil a few parallel lines each side to guide me and keep my rasping even. I keep offering the template over the wokr every few passes.

D389B084-B79A-4CD9-BD6C-EC06AD5C1B4F.jpeg


When I get close enough I change to abrasive strips and use the 'shoeshine' method to get more or less there.


B29FFEE6-D0AF-4339-A21D-18B106C07C6D.jpeg

More or less there. Next, I use the same process at the first fret.
 
Rinse and repeat at the first fret, then shave between the two profiles to join them together.

F26982A2-6371-4FC0-9CEE-FD78CDA02848.jpeg

Slowly does it.

86194D9B-5103-43E9-B2E5-AFA9A37CC1CA.jpeg


Using a sanding board to smooth it round.

A6C6616C-9906-449D-A938-DE858B5F8ADB.jpeg

Shave and sand the other side and then 'shoeshine' the tapered profile.

C81B87E2-5DA4-4BEC-8F69-CF631D5CE05F.jpeg


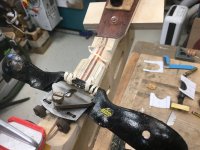
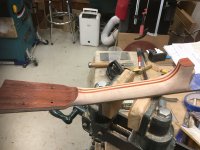
Now comes one of the tricky parts, carving the volute where the neck is joined to the headstock.

D0826E20-4AFF-4F4C-A3D2-1A3D8DF31E00.jpeg


724B6720-B0A9-4932-98A8-C41E25C66953.jpeg

And eventually I get there.

62B4B92D-B980-458D-80CF-7475D0D5B28B.jpeg
Now on to carving the heel.
 
Last bit of carving; the heel.


The CUF didn't leave message to tell me it had visited a few processes back. Before I used the aircraft grade aluminium jig to rout out the tenons, I should have routed the heel profile just below the end of the neck. on previous instruments, I have used that that routed shape in the end as the carving guide not to go beyond. But I forgot to include it.

So now all I have are pencil lines to carve to, not routed edges. Hmmmmph.

4D88741B-6A82-4BFD-BF83-BA72A3FDDC0F.jpeg


But I'll carry on, bit by bit till both sides are carved.


614361AF-D0D3-4CD3-8711-C7ED7462981F.jpeg

Then I can start shoe shining….

F5D385F0-2159-430C-BC2E-E54465B9723D_1_201_a.jpeg


…till I can join the neck to the heel.


8325966C-F64C-462D-9072-3071532DC43E.jpeg

It looks OK, but not to my discerning eye.

84B7D30D-7B4C-4315-9D89-DE626D4DCE8C.jpeg

But they seem to go together nicely.

That's taken ma about three days on and off. I've now got six more to do!

The pro that I was interned to could carve a neck in about half an hour, but he had made thousands of them. This is my tenth.
 
Challenging Malc. I remember doing my first electric guitar neck when I was about 17 and it took me an entire day. I still have that very first guitar. Needs a rebuild now :cool:
 
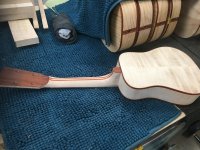
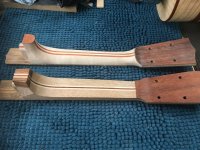
I’ve just gone back to post #288 and realised that all seven necks are as identical as I had thought, and remember. Unless it's camera trickery the thickness of the lower of the two necks above does not look thick enough to produce the curves of the one above.
Or am I overdue and appointment at specsavers ?
 
I’ve just gone back to post #288 and realised that all seven necks are as identical as I had thought, and remember. Unless it's camera trickery the thickness of the lower of the two necks above does not look thick enough to produce the curves of the one above.
Or am I overdue and appointment at specsavers ?
Yes. :)
 
Challenging Malc. I remember doing my first electric guitar neck when I was about 17 and it took me an entire day. I still have that very first guitar. Needs a rebuild now :cool:
I've still got mine, too. Gigged it at my first retirement do in 2000.
 
I’ve just gone back to post #288 and realised that all seven necks are as identical as I had thought, and remember. Unless it's camera trickery the thickness of the lower of the two necks above does not look thick enough to produce the curves of the one above.
Or am I overdue and appointment at specsavers ?
Funny how the camera plays tricks as I thought exactly the same thing when I saw the image. Or maybe I need to go to Specsavers too!
 
Funny how the camera plays tricks as I thought exactly the same thing when I saw the image. Or maybe I need to go to Specsavers too!
I can assure you and @AndyP that it is an optical illusion. All the neck blanks were routed from the same template.

You can cancel your SS's appt, and spend the time in your workshop. :)
 
I can assure you and @AndyP that it is an optical illusion. All the neck blanks were routed from the same template.

You can cancel your SS's appt, and spend the time in your workshop. :)
Phew. Thanks Matt too, reassuring to know I am not alone.
Was out in the workshop this afternoon, with thermal socks. 90 mins was as much as I could stand.

Ukes look great of course although we could be looking at the same one photographed 7 times :)
 
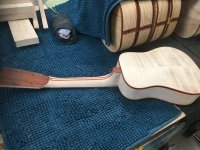
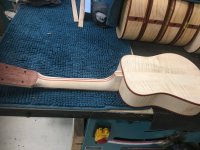
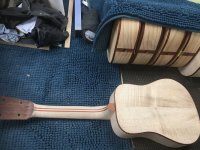
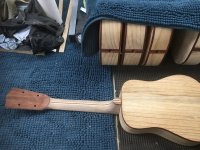
So now all the necks have been carved and fitted to their bodies, it's not quite time to fit the bridges, that's one of the last jobs after spraying, curing and finishing, but it is time to fine tune the bridge locations. My work doesn't always end up as accurate as I'd like, but it's not the end of the world. The neck lateral angle might be out by less than a degree, but that will alter the way the outer stings will locate relative to the edge of the fingerboard, but adjustments can be made at this stage to mitigate that.

Firstly, bolt the neck in position and place two straight edges alongside.
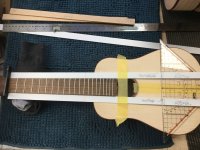
5789A518-E0D8-4FBC-A4D5-7C836386BAC2_1_201_a.jpeg

Then with the symmetrical set square I can tell that it is out of line; one edge shows 25mm and the other 22mm from the centre line.
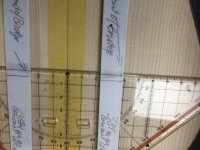
740AB171-DF1B-47B6-B1D8-53B054120E9D_1_201_a.jpeg


So the centre line, for the bridge, has to move.
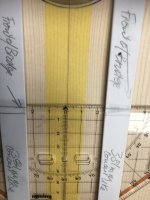
7F07C68A-C2C0-4ABB-B66E-1846B35E2B5F_1_201_a.jpeg

23.5mm either side offsets the centre line about a millimetre.

For my acoustic guitars and ukulele, I set the exact scale length at the second string and the saddle is angled to compensate for the thickness of the other strings. On the straight edges I mark both the scale length and the front of bridge to help me locate the bridge.
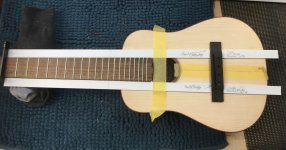
2A26FC9B-1AFF-4530-96F3-CBED8CACADA9_1_201_a.jpeg

I can then use the straight edges to estimate where the outer strings will appear over the fretboard.
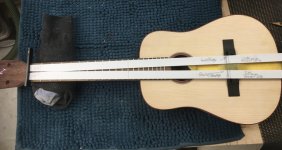
F1E44BF7-AA92-469F-8680-4D049CC190C8_1_201_a.jpeg

Not as good as I'd like. If the CNC machine were available this minute (it's in the rafters) I would slightly reduce the gapping od the string holes in the bridge and run off another set of bridges. It's strange, because I've followed all the plans and the outer strings are still a tad close to the edges of the fingerboard at the body end.

Anyway, locating the bridge in light of that. If you've followed my guitar builds, you will have seen the hack of drilling two little holes along the saddle groove and placing the bridge according to the last few photos, indent the soundboard with the tips of cocktail sticks and then drilling two little holes in the soundboard.
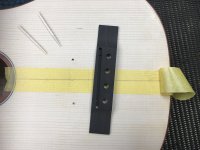
D6F28773-F21C-4054-AFE9-310468606CB4_1_201_a.jpeg

Then using the sticks to locate the bridge. Believe me, it doesn't move.
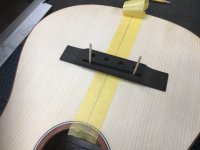
88B74F74-0132-40CA-9F94-4CD07E1C443C_1_201_a.jpeg

Now, the bridge has to shape masking medium so that sanding sealer and subsequent cellulose lacquer does not cover the gluing area of the bridge. I use parcel tape for this masking.
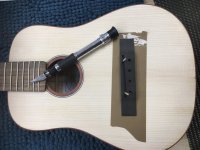
5238A47C-A1D8-437C-ABE7-1AF5CF0EB93C_1_201_a.jpeg

Cor, I have to use magnifying lenses and a steady hand to do this.
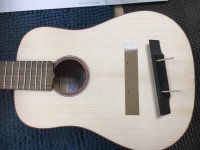
B80BF13D-5044-48B4-8182-C9C1A974132C_1_201_a.jpeg


And then do the same for the fretboard overhang.
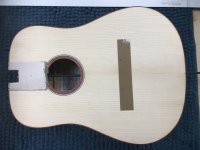
CEEAFB83-A80F-4215-BA06-1EB92FFEE442_1_201_a.jpeg

That's one done; six more to go.
 
Looking really smart Malc. In this photo, your straight edges don't look very straight to me (they're touching part way along the length). Is that just an optical illusion?

F1E44BF7-AA92-469F-8680-4D049CC190C8_1_201_a.jpeg
 
Looking really smart Malc. In this photo, your straight edges don't look very straight to me (they're touching part way along the length). Is that just an optical illusion?
Yes, @Dr.Al , I shaved a little off the nut end so they could both fit on the fretboard at that end. Otherwise, the remainder of that edge and the other edge are completely straight.
 
Having shaped and sanded the necks, it's now time to organise their pore filling. There's a number of thing to do; Mask their fingerboards, make seven handles that can screw into their threaded inserts, fit hooks so that the individual necks can hang out of the way while they cure, and fix a hanging bracket for them.

11A430EF-21E1-4127-9E19-B6840854CE1E.jpeg

The bench now ready for the first neck's pore filling session. My choice of pore fill is a finishing resin. I apply it with squeegees, then sand down to wood, reapply and sand till they're all filled. I use far less lacquer by using this method, so it's cheaper and more efficient than waiting for so may coats of lacquer to dry. The little handle that's screwed into the tenon is what is clamped in the vice.

F008D32A-1E9C-4C49-B692-95C0F5C3729D.jpeg

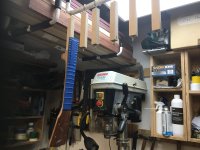
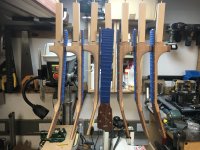
A couple of hanging brackets is what I'll hang the necks on while the resin cures; even though it's a 30 minute resin, I'll still leave it to cure overnight in these temperatures.
 
Bloody hell.....

As always, Malcolm, I'm in awe of this difficult and precise work. Fantastic stuff.
 
A bit more organised; the handles are made, they have their hooks and there's a bracket to hang the necks from when I get round to pore filling.

FE2AAFB0-81F8-4981-BB73-45DBFD3C1436.jpeg

And the bodies all have handles now and little bits of tape showing me where blemishes need to be sorted before pore filling and sanding sealer.

E13C5FD6-76CC-4C93-BC0F-0C397EC6DF64.jpeg

Haven't got a hanging bracket for these yet, still working on it.
 
It's great to see them all together.

Are you going to have to leave the lacquering until the temperature increases? That would really frustrate me!
 
It's great to see them all together.

Are you going to have to leave the lacquering until the temperature increases? That would really frustrate me!
Thanks, @NickM . I'm going to have to. I don't have spray booth, and I shan't spray them inside the workshop. The spraying regime takes a week to two weeks before final curing, so winter temperatures just won't work. While it is a real annoyance, I'm not working to a deadline, so I'll just have to store them safe till the outdoor temperature improves next year.

BTW, the Sycamore sands so well, it might not even need pore filling.
 
Well, all seven necks have been pore filled with finishing resin, scraped back to wood, inspected for how much more is required and pore filled for a second time.

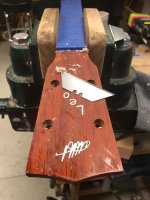
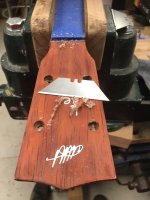
Here's a look at the scraping process after the second filling.

3E412908-057E-4838-9A36-767403AFF243.jpeg

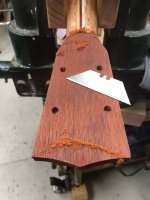
The scrapings are coming off white showing me that this is resin. I can also see the shiny bits which are the lower surface areas which I still have to scrape below.


0A781477-DCF4-489D-97F9-316FF4F27865.jpeg

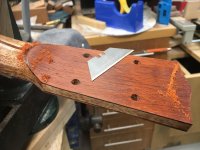
Getting there. The scrapings are both white and Padauky.


694C5E95-54C7-4C9C-AAA2-53E5A9C95108.jpeg

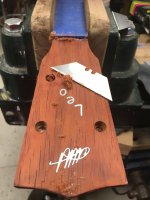
Virtually there. The scrapings are all Padauky, and I just have a few more scraped to get the overall colour the same.


B254FCD5-7347-4B15-9E44-3129E0893315.jpeg

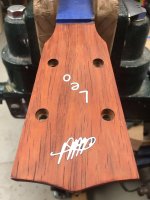
That'll do me. The headstock face is ready for lacquering. Now I have to do the same to the headstock back and the rest of the neck, which isn't flat, so it takes much longer.


74494B7F-A141-4300-BB68-FDD04489040C.jpeg

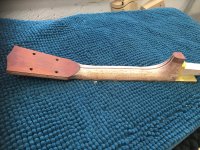
That's the back more or less done.

D752C701-34E6-4008-AEA8-20FDAE8F66CC.jpeg

You might note that the face of the headstock is timber that I've sawn and shaped during the manufacture of the neck, and the back is veneer that I've bought.


AE243451-A114-4423-A46C-C0BA4C3E9593.jpeg

Anyway, one pore-filled and sanded neck ready for lacquering. Only six more necks and seven bodies to go.
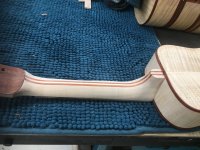
 
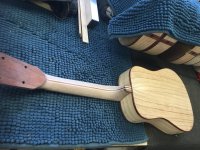
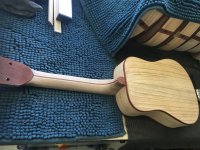
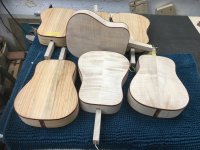
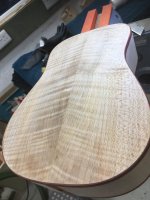
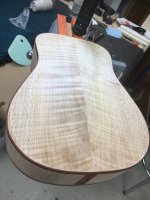
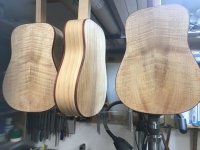
I've pore filled seven backs with resin and have just started scraping/sanding back to wood.
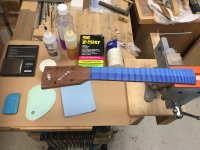
The camera doesn't do justice to the beauty of the Sycamore. I can't wait till I can lacquer it.

402C0785-7859-46BB-B5C9-556F92D02B25.jpeg

This has been scraped back to wood. the figure just shimmers as you cast your eye over it.


14E50DED-E37A-4963-9501-ED3F22231857.jpeg


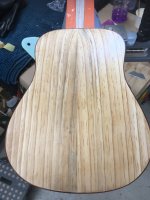
Although the Devon Monterey Pine doesn't have the same character as the Sycamore, I still find it attractive and interesting.

E0E52C2C-9000-4A5A-9B40-0EC777BA83C8.jpeg

1664BF0B-1C99-4C12-B097-869AAC4C453A.jpeg

Four more to go, then pore fill the sides.
 
Back
Top