• Hi all and welcome to TheWoodHaven2 brought into the 21st Century, kicking and screaming! We all have Alasdair to thank for the vast bulk of the heavy lifting to get us here, no more so than me because he's taken away a huge burden of responsibility from my shoulders and brought us to this new shiny home, with all your previous content (hopefully) still intact! Please peruse and feed back. There is still plenty to do, like changing the colour scheme, adding the banner graphic, tweaking the odd setting here and there so I have added a new thread in the 'Technical Issues, Bugs and Feature Requests' forum for you to add any issues you find, any missing settings or just anything you'd like to see added/removed from the feature set that Xenforo offers. We will get to everything over the coming weeks so please be patient, but add anything at all to the thread I mention above and we promise to get to them over the next few days/weeks/months. In the meantime, please enjoy!

4 panel door build WIP

Do we want a WIP thread on my 4 panel internal door?

  • Yes certainly interested.

    Votes: 29 93.5%
  • I'd like a summary rather than intimate details

    Votes: 2 6.5%
  • Not my sort of thing really, its not round!

    Votes: 0 0.0%

  • Total voters
    31
  • Poll closed .

9fingers

Moderator
Staff member
Joined
Jul 21, 2014
Messages
10,414
Reaction score
165
Location
Romsey Hampshire between Southampton and the New F
We sorted out the proportions in another thread.
I've got a pile of oak and now the time has come to get on with the build.
If a WIP is voted for then I'll try and remember to take lots of photos.
I'll leave it open for a week.

Bob
 
Daft question! This forum needs all the WIPs it can get as it's in danger of disappearing up it's own social media backside.
 
I too voted yes please. Although there is little chance of me ever making one there are always things to learn by watching how people go about making stuff.
 
Andyp":3frhdsdt said:
I too voted yes please. Although there is little chance of me ever making one there are always things to learn by watching how people go about making stuff.

Fairy nuff. I will possibly doing quite a few things in an unorthodox way as is my wont and naturally no hand tools will be used with the exception perhaps of a brush for glue and varnish :lol:

Bob
 
9fingers":kuaizy9b said:
Fairy nuff. I will possibly doing quite a few things in an unorthodox way as is my wont and naturally no hand tools will be used with the exception perhaps of a brush for glue and varnish :lol:

Bob

Oi! I voted yes as well you know. :lol:

It'll be interesting to see what new stuff has come in the last century or two.
 
It means that, more often than not, when I open this forum there are more new posts about non- woodworking subjects than the actual subject the forum is here to discuss. To me, it's a bad sign when one of the moderators thinks he needs to ask if anyone wants to see a WIP on woodworking.
This is just my opinion and people can use the forum any way they choose, maybe I'm in the minority. You can check my comment history for WIPs and criticise me for not posting enough either if you want but I think it discourages people, myself included, from posting when the majority of the posts are constantly 'social media' type posts.
I hope that clarifies my comment for you.
 
Rezi":2ok33how said:
It means that, more often than not, when I open this forum there are more new posts about non- woodworking subjects than the actual subject the forum is here to discuss. To me, it's a bad sign when one of the moderators thinks he needs to ask if anyone wants to see a WIP on woodworking.
This is just my opinion and people can use the forum any way they choose, maybe I'm in the minority. You can check my comment history for WIPs and criticise me for not posting enough either if you want but I think it discourages people, myself included, from posting when the majority of the posts are constantly 'social media' type posts.
I hope that clarifies my comment for you.

Yep, that's fine, everyone is entitled to their POV, I just didn't understand the context, now I do, thanks.
 
Rezi":q6cz0iwi said:
Daft question! This forum needs all the WIPs it can get as it's in danger of disappearing up it's own social media backside.

It is perhaps not such a daft question as you might think. When I do WIP write ups it is generally to show doing something using methods that are unconventional to many or making an item that is out of the ordinary.
Sometimes a combination of mechanics woodwork and electrics. I've no woodwork training save 1 year in the 1st from of secondary school. I approach woodwork from an engineering point of view and treat wood as just another material to be machined into the dimensions needed to fit together.

The reaction I get can be very varied. Sometime something I write up creates interest other times there is virtually no reaction. This does not mean I want to attract attention as an ego boost but sometimes I'm left wondering if the point I was making was missed or perhaps I did not put it over very well.

In this case a door is a pretty basic item and might not be very interesting to others hence asking the question.
The reaction clearly agrees with you that there is interest and I will be doing a write up.

Bob
 
Yes, thank you, I look in on here more now than previously (The other place is now burnt toast as far as I’m concerned) and I am a little sad that sometimes there isn’t anything all day in the general woodwork section, and I’m probably more guilty than most, I haven’t made anything worth talking about for a little while now as life has got in the way. But we are talking about it, so it’s likely that things will change for the better. We do have Craig (soon) and Tim"s work to enliven us at the mo, so that’s good.
I have a project that has been going on for five years in between other jobs, that I will be bringing in as a work in progress, but probably in a years time.
Should I be showing what I’ve done up to now? And then adding to it in six months time? Or, as I prefer present the whole thing in one big splurge? From my own perspective I feel that if it’s too long between sections the effect is lost. Interesting topic though. Ian
 
Cabinetman":105u4j9b said:
.....
Should I be showing what I’ve done up to now? And then adding to it in six months time? Or, as I prefer present the whole thing in one big splurge? From my own perspective I feel that if it’s too long between sections the effect is lost. Interesting topic though. Ian

Most definitely post up as you go along. I find it easier to digest stuff in small chunks than find the time to go through a multi-page project in one go.

Besides...it keeps 'em wanting more ;)
 
9fingers":2fe635x9 said:
Rezi":2fe635x9 said:
Daft question! This forum needs all the WIPs it can get as it's in danger of disappearing up it's own social media backside.

The reaction I get can be very varied. Sometime something I write up creates interest other times there is virtually no reaction. This does not mean I want to attract attention as an ego boost but sometimes I'm left wondering if the point I was making was missed or perhaps I did not put it over very well.

Bob

Same experience here. Long and detailed WIP's aren't for me; I generally post a few pics of the finished job and perhaps one or two pics to show it partially completed, but not much else. However, it there is sufficient interest and questions are asked about certain features, I'm more than happy to explain in detail, but screenfuls of step by step instructions I won't do - Rob

Edit- just as an example, I put a very quick pic up here: viewtopic.php?f=23&t=6966&p=115987#p115987 showing a constructional detail which elicited no response whatsover. Zip, nil, nada.
 
Woodbloke":1bjre1u4 said:
9fingers":1bjre1u4 said:
Rezi":1bjre1u4 said:
Daft question! This forum needs all the WIPs it can get as it's in danger of disappearing up it's own social media backside.

The reaction I get can be very varied. Sometime something I write up creates interest other times there is virtually no reaction. This does not mean I want to attract attention as an ego boost but sometimes I'm left wondering if the point I was making was missed or perhaps I did not put it over very well.

Bob

Same experience here. Long and detailed WIP's aren't for me; I generally post a few pics of the finished job and perhaps one or two pics to show it partially completed, but not much else. However, it there is sufficient interest and questions are asked about certain features, I'm more than happy to explain in detail, but screenfuls of step by step instructions I won't do - Rob

Edit- just as an example, I put a very quick pic up here: https://www.thewoodhaven2.co.uk/viewtop ... 87#p115987 showing a constructional detail which elicited no response whatsover. Zip, nil, nada.

Having looked, I think that's likely because the original poster said he'd ordered a Domino so the discussion kind of drew to a conclusion.

If you did a separate thread titled 'Cutting mortises with a router table instead of a domino" it would probably elicit more interest, albeit more work for you...
 
RogerS":2yih54vv said:
Most definitely post up as you go along. I find it easier to digest stuff in small chunks than find the time to go through a multi-page project in one go.
It's also quite a motivation to make progress, iirc.

And I am, and will remain, guiltier than most in not posting anything woodworky. Not from lack of wishing to, mind you. My woodworking life is strictly a vicarious one.
 
Well the people have spoken :lol:

So here goes my write up and already I did not take a photo of the boards to start with.
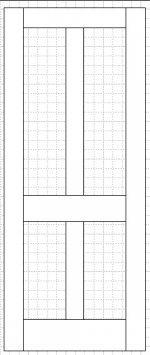
I like to have a drawing on the workshop computer. It is a very cheap £50 machine where I can pull stuff down off the home network. It does not need to be a powerful machine.
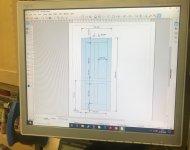
Computer dwg.jpg

Here are the boards rough cut to size. On a project this size with only a few parts I did not use the optimizer program but instead juggled the parts on the boards around any flaws and cutting first to length and then width working around any twists. Cross cut done with a hand held circular saw and rips on the table saw.

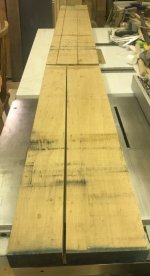
Rough cut to size.jpg

rough cut 2.jpg

A quick check of the parts need and the offcuts set aside.
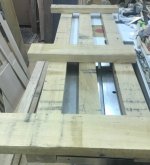
Quick check.jpg

The pieces are still over length. Trimming after planing to size yields a few offcuts with the correct cross section that are so useful for set ups later on.

Each piece gets two adjacent faces planed flat at 90 degrees to each other (oops no photos)

Then out with the thicknesser. Bit of a large beast but rock solid, amazingly accurate and no snipe.

Going in.jpg

The machine elevates out of storage and automatically stops with the bed precisely level to use the table saw as an outfeed table.

Exit.jpg

As each piece exits the thicknesser it is examined for any hint of tear out. If there is any, then the piece is rotated end for end with the same surface kept upper most ready for the next pass through to look for reduced tear out. once the saw marks are no longer visible, the pieces are flipped end for end but this time vertically to expose the opposite face. This flip is repeated after every pass to remove an equal amount for each face to minimise any warping due to relieved stress in the boards.

Identical process for planing to width. Result square, flat unstressed stock - fingers crossed.

Once complete the thicknesser gracefully lowers in the stand.
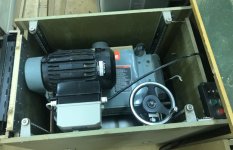
planer lowered.jpg

And rolls under the bench out of the way.

Planer stowed.jpg

Planed timber left in stick for a few days (when possible) just in case it decides to move despite best efforts above

Some of the timber turns out to be rather pippy. All very nice a pretty features.

Its a bit pippy.jpg

But a PITA when a pip turns up on a corner and pops out.

Pippy 2.jpg

As it happens, I will be fitting bolection mouldings around the panels so most of the edges will be covered up. So provided the timber I select for the moulding is not pippy then all should be well.

NB to the couple of readers who voted for an abbreviated version please feel free to speed read and look at first and last photos :lol:

Thats it for now
Bob
 
My earlier drawing was done in Libre office as i was under the impression that my goto 2D drawing toll Visio would not work under windows 10. I have a version limping along under windows 7 but that machine is being retired as I slowly bring my systems up to date.
However I found a very useful guide online on the details of "compatibility mode" and now my software from last century is working superbly.

And yes the timber did move whilst resting in stick so instead of 40mm thickness, a couple of errant pieces has revised the overall thickness to 36mm.
All the parts have been selected for optimum orientation making any minor flaws as hidden as possible and sanded to 320 grit.

Today has been sorting out the details in the knowledge of the exact dimensions of the planed timber.

This is the assembled door drawing

assembled in visio.jpg

And an exploded version to show the joint detail

Exploded in visio.jpg

What do you mean you want dimensions?? Oh ok then here we go:-

Dimensioned in visio.jpg

Bob
 
9fingers":144swqyd said:
No problem it is European oak purchased for a kings ransom locally. Between £2500 and £2200 per cu m according to thickness.

:lol:

You should try buying Accoya sometime, 200mm x 75mm @ £3800 a cubic metre, just a hair over £50 a linear metre for glorified tanalised pine.
 
9fingers":2g046gvw said:
No problem it is European oak purchased for a kings ransom locally. Between £2500 and £2200 per cu m according to thickness.

Bob
To save me trying to work it out, then not knowing if I'd gone wrong, do you have a figure handy for how much the oak for this door would have cost? I feel a bit clueless on this sort of thing.
 
i thought it was oak from the photos, but I'm horrified to hear what you pay for it.
i buy mine, all local grown oak, live edge boards, kiln dried, for around 1200€/m3
Air dried also available from time to time at much the same price.
 
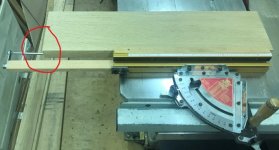
Now that all the cross sections are all sorted, its time to trim to length. For pieces up to about 30 inches where I need several the same length I use an adjustable stop on my mitre guide.

Cutting to length 1.jpg

This works really well and can be swung out of the way for a dust cut on the first end and dropped back down spot on for the second cut.

The three rails came out like this.

all same length.jpg

One cut on the styles exposed a nasty inclusion but thankfully wont be visible.

nasty inclusion exposed.jpg

The trimming yields offcuts that are useful test pieces being the exact section I'm using so keep these handy.

useful offcuts.jpg

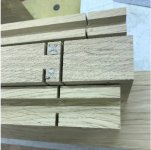
Each of the seven pieces needs a groove, or dado or two down the long edges.
Having decided the postion and orientation of each piece. I marked where the dado had to be cut to avoid mistakes.

edges marked.jpg

All the dadoes are the same size and central in the narrow faces. The width needs to be the same as the mortise chisel 1/2" in the case and 15mm deep.

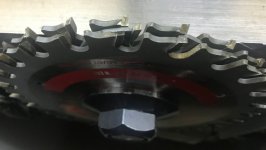
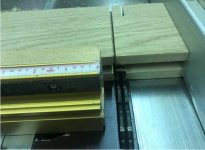
I set the dado blade up with just one chipper which in my case comes to about 11mm.

dado set up.jpg

The depth of cut is set to 15mm

set dado depth.jpg

A near zero clearance inset and a feather board keeps the work pushed against the fence.

Dado with FB and insert.jpg

Each piece will be passed through twice , reversing end for end to ensure a central cut. The fence is fine adjusted with a test piece until the width of the dado is a sliding fit on the chisel.

Dado set to match chisel.jpg

Time to run all the pieces. Well worth the 10 mintues or so setting up as everything comes out indentically with no scope for error.

Within a few minutes they are all done.

Dados cut.jpg


I've got more to write up but have to take abreak to cook dinner.

Bob
 
Thats dinner done and dusted so back to the write up.

My usual saw blade is 235mm diameter which does not give me enough depth of cut for some of the tenon cheeks to be cut with my tenoning jig so I will be hogging out the waste with the dado blade. To make sure the shoulder cuts are nice an clean, I will run a cut with a standard blade first.
The fence acts as a length stop. I did not photo the set up but here are some of the results. Pieces with two cuts define the haunch length.

Shoulder cuts.jpg

Before doing the cheek cuts, I cut a reference mortise so I could creep up on the correct fit of the tenons.
I don't want a honeymoon fit more of a mummy and daddy fit to make the glue up go smoothly.

test mortise.jpg

For each tenon length I set the fence so the dado blade is about 1mm clear of the shoulder cuts and plough out the waste by repeated cuts.
Here is the first cut

starting cheek cut.jpg

and one cheek completed

One cheek cut.jpg

and all done including raising the blade to cut the haunches too

Cutting the haunch.jpg

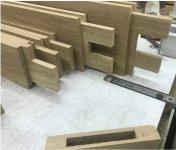
tenon cheeks cut.jpg

Unusually for me, the waste between the two tenons was free handed on the bandsaw.

All tenons cut.jpg

All up to date now and I've got other distractions tomorrow.

Bob
 
Cabinetman":ngf0ohgg said:
You’re almost make it look too easy Bob, I’ve never used a dado cutter, must say it looks a very handy piece of kit. Ian

Thanks for the comments guys. I hope the write up is meeting expectations.

Yes Ian the dado cutter set is very handy and to be honest, when mounted in a chunky tablesaw with the correct length arbour I really don't think the safety issues are any greater than other spinning multitooth cutters. We have to respect our tools and the damage potential each has and work accordingly.
I've got a little chart that I use to help select the right chippers and shims for any width of cut in its range so setting up is always right first time. Although in this instance the width setting is not at all critical.

Yes it is fairly easy most of which comes from the design and upfront thinking through the methodology. If a job is becoming difficult then quite often you are doing it the wrong way. Work smarter not harder.
By relying on setups and stops plus running test cuts with those offcuts first, then the cutting of the wood is trivial and relatively effortless and usually quick too. Boredom arising from tedium/repetition is often where mistakes creep in.

I've got to install a replacement shower in one of my rentals today but should be back in the workshop tomorrow to start cutting mortises.

Bob
 
Looks good Bob. I use a similar method for tenons but cut the mortices first as my hollow chisel morticer is not super accurate and I have to fit tenons individually to mortices which never seem to come out all identical.
A vertical tenoning jig is not an option for many of the things I build, the ceiling is not high enough - max around 1m50 above the bed of the TS (not helped by me being tall and having raised the TS on a 25cm plinth to save my back).

I fit them on the TS like you are doing by creeping up on a good fit.
 
chataigner":1z0xr3db said:
Looks good Bob. I use a similar method for tenons but cut the mortices first as my hollow chisel morticer is not super accurate and I have to fit tenons individually to mortices which never seem to come out all identical.
A vertical tenoning jig is not an option for many of the things I build, the ceiling is not high enough - max around 1m50 above the bed of the TS.

I fit them on the TS like you are doing by creeping up on a good fit.

There is a lot of force within the structure of a HCM and things can flex with some designs especially the twin circular rod type. Mine has a cast iron dovetail slide which seems pretty good.
Past of the thinking in having the dado the same width as the chisel is that it will guide the chisel at the start of the mortise.

Bob
 
9fingers":3br53sdc said:
chataigner":3br53sdc said:
Looks good Bob. I use a similar method for tenons but cut the mortices first as my hollow chisel morticer is not super accurate and I have to fit tenons individually to mortices which never seem to come out all identical.
A vertical tenoning jig is not an option for many of the things I build, the ceiling is not high enough - max around 1m50 above the bed of the TS.

I fit them on the TS like you are doing by creeping up on a good fit.

There is a lot of force within the structure of a HCM and things can flex with some designs especially the twin circular rod type. Mine has a cast iron dovetail slide which seems pretty good.
Past of the thinking in having the dado the same width as the chisel is that it will guide the chisel at the start of the mortise.

Bob

Yes, mine is the twin rod type and as well as flex there is some play. I've drilled and tapped for four brass bolts into the back of the casting to bear on the rods so I can adjust for wear/play, but it's not a good machine.
 
Saturday is chores day for me but between batches of washing, I managed to escape to the workshop to do the mortises.

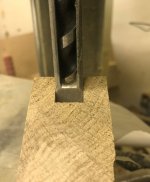
Here is a the big advantage of having the dado grooves the same size as the mortise chisel.
It is so easy to align the work to the chisel.

Chisel alignment.jpg

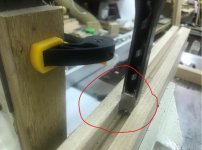
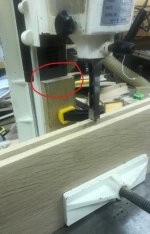
One fault common to most modern hobby/semi pro Hollow Chisel Mortisers is that the depth stop mechanism is totally inadequate to stand up to the force that has to be exerted to cut the mortise. Nearly always the stop bends or moves.

I put a piece of scrap in the base of the machine and secure it in place on the dovetail slide with a clamp.

Depth stop.jpg

I start with the widest rail - at the base of the door and trim the depth stop to suit that cut.

The middle rail is 28mm narrower so I simply trim that much off the depth stop.

Trimming the stop.jpg

And then cut that mortise from both top and bottom. the top rail, narrower again is cut in the same way with a further shortened depth stop.

The top rail is the same width as the stiles but are deeper so a final trim of the depth stop is needed.

One of my key principles is to measure as little as possible and instead make things to match other parts/constraints.

Here you see the bottom rail offered up to a stile from which I can mark the extents of the mortises.

Marking lower mortises.jpg

The centre rail mortises are similarly marked using the lower mullion. -

Marking mid rail 1.jpg

Marking mid rail 2.jpg

Similarly for the top rail but not shown.

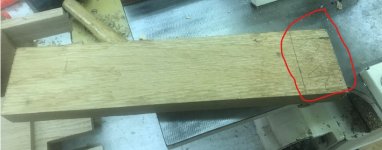
All 14 mortises cut now.

14 mortises cut.jpg

Next time is will be a dry fit with hopefully minimal tittivating.

Thanks for looking

Bob
 
Bob, isn't there a risk of the wood catching fire when you work this fast?! :D
 
9fingers":1tlynyxw said:
......One of my key principles is to measure as little as possible and instead make things to match other parts/constraints.......

We could hardly work more differently, but this is an absolute fundamental of woodworking no matter which way you work.
 
Back
Top