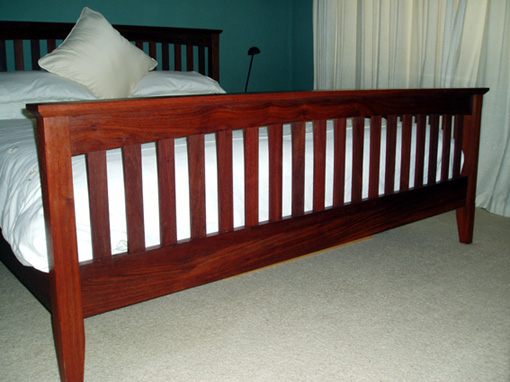
• Hi all and welcome to TheWoodHaven2 brought into the 21st Century, kicking and screaming! We all have Alasdair to thank for the vast bulk of the heavy lifting to get us here, no more so than me because he's taken away a huge burden of responsibility from my shoulders and brought us to this new shiny home, with all your previous content (hopefully) still intact! Please peruse and feed back. There is still plenty to do, like changing the colour scheme, adding the banner graphic, tweaking the odd setting here and there so I have added a new thread in the 'Technical Issues, Bugs and Feature Requests' forum for you to add any issues you find, any missing settings or just anything you'd like to see added/removed from the feature set that Xenforo offers. We will get to everything over the coming weeks so please be patient, but add anything at all to the thread I mention above and we promise to get to them over the next few days/weeks/months. In the meantime, please enjoy!

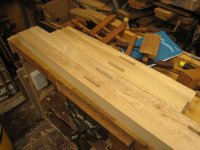
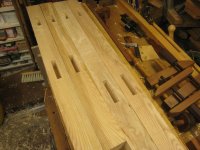
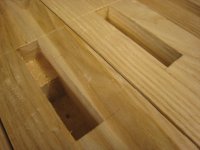
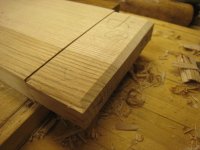
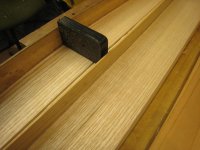
Ash bed WIP - Finished!

Alf, lock mortise chisels are huge! Ok for clearing out a blind hole say 3" long and 4" deep but not for Mike's job. I think those short deep mortises are why we have the sash mortise chisel alongside the pigsticker. Or nowadays any square edged chisel strong enough to lever with.

But just to agree with you both and confirm that proliferation of methods is nothing new, may I suggest reading "Jobbing Work for the Carpenter" by E.H.Crussel. It's a chatty little book from 1914, written from working experience rather than copying other books.

https://archive.org/details/jobbingwork ... ew=theater

In his chapter on making a door, he dismisses the idea of wasting time boring holes. He's very much in favour of putting the parts side by side on the bench, sitting on them and whacking away with no levering at all. This, he says, means each one only takes about a minute to cut. He's not the only writer to say this and I think it's probably the sort of work rate proper tradesmen could reliably produce.
 
AndyT":3ohqq9mv said:
There's nothing like cutting a lot of mortises for focusing the mind on these interesting details!

Fortunately, on this little project, I think I only have about 80 to do :)
That seems rather a lot Andy, I went back to the beginning to see the exact style but could only see a picture of somebody else’s bed which only had 48 mortises on it! You’re not actually going to Mortise all the base slats in as well are you?
 
I've not definitely decided on the number of vertical slats - I'll do a few mock-ups first - but it might be 17 at each end, mortised in at top and bottom, which makes 68. 8 for the 4 transverse rails and 4 for the 2 sides. Total 80!

The demountable bits will only need stub m+ts, but I am glad I am not planning on a set of matching chairs. :)
 
Yes agreed, well you will definitely be getting good at chopping mortices by the time you finished this!
I have always just screwed the bed slats down to battons screwed to the insides of the bed rails. It will be interesting to see how you do it with subtenons.
 
Sorry, I forgot to mention the slats under the mattress. They can just rest on a flat support like they do now, with a screw in each corner position to tighten the fabric tapes.
 
AndyT":jly2v78u said:
Alf, lock mortise chisels are huge!
I know! But once I'd thought of them and had to work out what they were called, I was damn well going to mention them. :P
 
Alf":28oto7hn said:
AndyT":28oto7hn said:
Alf, lock mortise chisels are huge!
I know! But once I'd thought of them and had to work out what they were called, I was damn well going to mention them. :P

Fair enough. And they just don't get the attention they deserve these days. Honestly, modern woodworkers, what are they like?! :D
 
How's this for speed? Less than a week since I bored the first hole in a leg and I have eight mortises cut!

On Sunday, the legs looked like this

IMG_7780.JPG

and now they look like this

IMG_7781.JPG

The upper mortices are haunched, as they will be at the very tops of the legs (but covered by a capping piece). I cut the haunches before trimming the legs to length. It seemed ok that way but I think it's maybe more normal to cut to length and then saw the haunches down to a line. I think I can get away with it.

IMG_7782.JPG

I like this stage. With no corresponding tenons cut yet, nothing has failed to fit or needed any fettling and fiddling. I've had several pleasant sessions getting on with this and I can tell myself it's more useful than going to a gym. ;)
 
Great stuff Andy. Looks very neat, and there is quiet satisfaction in a nice clean mortise.
 
By gum, Andy, those are some highly-trained woodworm you've got there!

:text-bravo:
 
AndyT":6lyt9kx9 said:
The upper mortices are haunched, as they will be at the very tops of the legs (but covered by a capping piece). I cut the haunches before trimming the legs to length. It seemed ok that way but I think it's maybe more normal to cut to length and then saw the haunches down to a line. I think I can get away with it.

Good work Andy.

I’m not sure when is the right time to do the haunches part of the mortise. I assumed it was best to do it later and cut with a saw as you suggest, but (in the context of making a cabinet door) Robert Wearing suggests doing it earlier as you’ve done here.

In any case, yours look like they’ll be excellent.
 
This will be the last update for a bit - I have other commitments for a couple of weeks, and nobody needs the same photos and comments for each joint I cut. But now that I ave actually fitted the first joint together, I may as well record that momentous event.

I was hoping to let the pictures tell the story but I don't seem to have taken very many. It's all pretty standard stuff though, with no surprises. I may not be doing this the way you would but it's a way that works for me with the tools and space that I have.

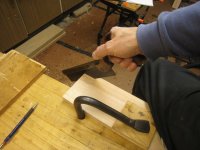
I started off marking the tenons on the ends of the rails. There's no need to remove much, just enough to make a shoulder. Here's a clumsily posed photo of a mortise gauge and a piece of wood. And it also shows how this piece ought to be nicely stable, with the rings at right angles to the surfaces.

IMG_20220203_104029638_HDR.jpg

Before sawing the shoulders, I like to make a place for the saw to run. Lots of YouTubers seem to favour cutting towards the line with a broad chisel but I prefer to cut across the grain with the corner of a narrow chisel instead. It's the way I was taught at school and I like the curly shavings you get ;)

IMG_20220203_105127789.jpg

(It's also the way I cut housings, where I try to emulate the chap in this picture

working a housing dado.jpg

which some of you will recognise immediately :) )

Where was I? Ah yes, I was getting the tenon to look like this by chiselling off the arrises:

IMG_7783.JPG

so I could chisel away the cheeks in fairly thick chunks, either across the grain or with the grain

IMG_7784.JPG

This stage was followed by quite a lot of further adjustment with chisels, planes and router plane, checking whether the corner would slide into the mortise, then taking a bit more off, making sure the sides of the mortise were square, etc. Then I could offer up the end of the rail and mark off how much to trim from the top and bottom.

Why is that textbooks and videos never cover making anything where the pieces of wood are more than about two foot long? If something is too long to stand up in the vice, how do you work on the end?

I just clamped the rail down onto the bench top like this

IMG_7786.JPG

and then sat on it to saw down vertically, mostly without holding a camera in the other hand.

IMG_7785.JPG

After that there was some more fiddling and adjustment. Apparently, most joints should fit straight from the saw. I shall have to find quicker ways on the rest of this project.

But my session in the playroom came to a natural end when I was able to produce this, which holds on nicely but is possible to dismantle for later gluing. Phew!

IMG_7787.JPG
 
Working on longer pieces of wood is when you really appreciate having saw horses. I know you don't have room. Kneeling is so much easier than sitting.

In that old photo, what do you think is the purpose of the short piece of wood with the nail through it?
 
Thanks all.

Holdfasts - so useful, so quick and easy. These were made by Richard Tomes, a lovely, talented man who left us far too soon, and remind me of him frequently.

I do get sucked in to details - so it's nice to be able to share them.

The scrap with a nail in is the simplest sort of depth gauge for a housing. If it scratches the bottom, chisel away some more wood!
 
AndyT":2gvt6f4b said:
If something is too long to stand up in the vice, how do you work on the end?
You'm have either a verrrrrrrrry tall bench and a step ladder, or a first floor w'shop and a hatch in the floor. ;)

AndyT":2gvt6f4b said:
Holdfasts - so useful, so quick and easy. These were made by Richard Tomes, a lovely, talented man who left us far too soon, and remind me of him frequently.
Well, damn. I'm sorry to hear that. :(

Anyway, looking good, Andy.
 
Thanks Alf.

Workshop headroom is only 6' 5" or so, but I'll bear it in mind.

And I expect there will be some more old tool spotting opportunities before I've finished, so do keep reading.
 
AndyT":327c5jla said:
Workshop headroom is only 6' 5" or so, but I'll bear it in mind.
Eep: I'd be banging my head all the time in there (I'm 6'6")

AndyT":327c5jla said:
And I expect there will be some more old tool spotting opportunities before I've finished, so do keep reading.

I for one will certainly keep reading: I'm thoroughly enjoying this thread
 
I once had a workmate (B&D not human) standing on top on my bench with a dovetail jig and a long length of beech, I had to stand on top of a stool to reach.

Pete
 
I was expecting to go quiet on this but I have found some more time to get on with it, so here are some more notes and pictures.

I haven't drawn out a design in full for this project. I have given plenty of thought to constructional details but some of the decisions about the appearance were always planned to wait until I could look at actual pieces of wood set out in front of me. One such decision is the shape of the concave curve on the rails that go across the head and foot. I was pretty sure that I wanted one continuous curve end to end, with no horizontal rail at the ends, nor any steep rising up (like a four centred arch does.) But the exact size was undecided. I was also unsure of how I was going to draw it.

When I have needed a shallow curve before, I did ok with a thin lath with a bit of string across the ends to make a sort of bow. I spent some time trying to make one of these, but it wouldn't work. With a lath about five foot long, if it's thin enough to bend to the curve, there's not enough tension in the string to keep the shape.

I also considered the method Steve Maskery showed us in his latest video, but the rise I want is so slight, I didn't think I could make that work nicely either. This is what I ended up with:

IMG_7788.JPG

It's the same sort of idea as the bow & string but with a second strip of wood replacing the string.

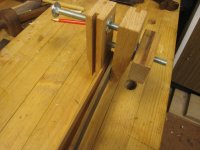
The ends are held together with some little clamps which are lightweight and also stand up nicely on their square tips. They are from a design by Robert Wearing and are very useful. (The groove is incidental; this is oak from some old furniture.)

IMG_7789.JPG

The two strips are wedged apart with a bit of scrap of suitable size

IMG_7790.JPG

and so with both upper cross rails arranged side by side, it's easy enough to hold the device with one or two hands and draw along it with another

IMG_7791.JPG

IMG_7792.JPG

I wanted to get this all sorted before I cut the tenons on these rails, so as to be sure that the bottoms of the mortises would not be revealed if I end up trimming more off the rails' breadth than I planned.

You may have realised that this curve gives me an interesting challenge for cutting all the mortises square. The answer - I hope! - is to mark out and cut the mortises first, then cut the curve, making the middle ones shorter than those at either side. I've decided that there won't be shoulders on the tops of the slats. (I think I have a better chance of getting neat work with exposed mortises than I would with trying to scribe all those curves.)

So, with those decisions made and the curves marked, I was able to finish off the other tenons. I did them in much the same way, splitting off the cheeks and planing /paring back to level, then adjusting to fit.

I do like cross-grain paring and planing on well-behaved wood like this. This old paring chisel from Marsden Brothers came out of the cupboard to join in

IMG_7795.JPG

and so did this anonymous "user grade" shoulder plane, which performed just as well as the Record 073 did earlier on.

IMG_7799.JPG

I found that there was just enough room to saw the sides of the tenons off with the work in the vice

IMG_7797.JPG

so you'll have to wait until I work on the 6' + long rails to see if I cut a hatch in the ceiling or dig a hole in the floor ;)

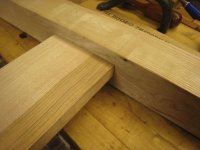
And so, after some hours had passed, I reached this much tidier stage. The joints aren't all knocked up to the shoulders - I can't see the tops of the haunches until I trim the surplus length from the tops of the legs - but they will all fit or be made to fit.

IMG_7802.JPG

I now need to decide on the number, breadth, thickness and spacing of the vertical slats, which will take some thinking about. I'll stop there for now, but may be back soon looking for opinions.

Thanks for reading this far!
 
Woodbloke":2hv4jscp said:
In pic No.2 I'm struggling to work out what the red pencil does? :lol: :lol: - Rob

It draws the curved line on the bit of wood! :D Fancy you not knowing that... ;)
 
It’s got a small cameo appearance in episode eight as well lol.
I like that curveI Andy, slow and subtle.
Oh hang on, have I got it right, the curve is on the underside of the top rail? Well why not!
But it’s going to make fitting the vertical slats interesting.
 
Cabinetman":3qnzb0u9 said:
I like that curveI Andy, slow and subtle.
Oh hang on, have I got it right, the curve is on the underside of the top rail? Well why not!
But it’s going to make fitting the vertical slats interesting.

Yes, that's right. Here's Derek Cohen's design, which I am loosely copying. I need a reminder too!

Furniture_html_3bad9030.jpg
 
You don’t make life easy for yourself do you Andy, each slat is a different length and though it’s not much of a curve it will show if you don’t get it right on the shoulder of the slats, both side of each one too, happy days!
 
Cabinetman":d97ybya7 said:
You don’t make life easy for yourself do you Andy, each slat is a different length and though it’s not much of a curve it will show if you don’t get it right on the shoulder of the slats, both side of each one too, happy days!

Easy; once they've been marked out, pare the shoulders in with Tedster's nice chisel. If the curve was going t'other way it would be a trifling more awkward 'cos then you'd need to use a very shallow scribing gouge as the curve on the shoulder would be slightly concave - Rob
 
This is an excellent thread. Some fantastic contributions from some seriously skilled people. I can't think how I have missed it until today. Adrian
 
Thanks all, food for thought.

I'll get the foot end done, then do some experiments and decide.
 
AndyT":3j0k3p6f said:
Cabinetman":3j0k3p6f said:
I like that curveI Andy, slow and subtle.
Oh hang on, have I got it right, the curve is on the underside of the top rail? Well why not!
But it’s going to make fitting the vertical slats interesting.

Yes, that's right. Here's Derek Cohen's design, which I am loosely copying. I need a reminder too!

Furniture_html_3bad9030.jpg

I built that bed in solid Jarrah some 25 or 30 years ago. Still going strong.

The trick to the tenons into curved mortices is this:

1. Leave the rails straight and cut the mortices. The mortices need to be super precise, so I used a router. Make them a deeper than the tenons by about the depth of the curve. Square up the ends with a mortice chisel (it is easier to keep square).

2. Now make the vertical slats. These need to be the very close to the external dimensions of the mortice. You can use a handplane to fine tune them at the end when fitting.

3. Now saw the curve on the underside and smooth with a spokeshave.

4. The aim is to fit the slats directly into the mortices. A close, slip fit is needed. If the mortices are not deep enough, you can deepen them now with a chisel or router.

5. A dry run - or two or three! - is needed as you size, fine tune ,and test the fit. When I built this bed, my wife was away visiting her mother for two weeks. I was alone in the house. No kids at that time. So I beavered feverishly to get it done as a surprise on her return. Without SWMBO to wag her disapproving finger, I assembled the ends a few days before she returned ... in the livingroom (well, it was night time). This is really no job to do alone! I had every long clamp I owned to hand. Thank God. Even glue did not lubricate the many slats-into-mortices enough, and I had a panic attack as the rails refused to budge. The clamps won in the end. Just glue one side of the mortices. Both are unnecessary as this is a very rigid set of joints.

Regards from Perth

Derek
 
Many thanks Derek, that's really helpful. It's more or less what I had planned, especially the bit about cutting the mortises before the curves. It'll be a challenge!
 
AndyT":2jhmc8pi said:
Many thanks Derek, that's really helpful. It's more or less what I had planned, especially the bit about cutting the mortises before the curves. It'll be a challenge!
When I was at uni in the 70's one lecturer told us to do 'all your marking out, then all your joint cutting and then all your shaping'

That works, sort of, but not all the time and certainly not on the project just underway in the 'shop - Rob
 
I've been away from the workshop for a while, which is why there's been no visible progress, but I'm back now so here's a little update.

Having had something like success with the head end outer frame, it was relatively easy to repeat the same process at the foot end. I didn't photograph all the intermediate steps but the end result looks like this:

IMG_7804.JPG

Obviously, there's some work still to be done - the tops need trimming off flush with the upper rail and there's half an inch to take off the feet before tapering them. Also, the joints are a little bit tight - which is why they are not all pulled up close. I can make up some long clamps for the actual glue-up but I'm relying on a soft faced mallet for assembly / disassembly at the moment, so I think it makes sense to leave the spare wood in place until as late as possible, to avoid damage to what will be finished surfaces.

I think I said earlier that I haven't drawn out every last detail of the design before starting. In my defence at what might be thought foolish, I have sketched out the constructional details and a bed is a relatively simple piece. It's deciding on the exact sizes and proportions that I struggle with from a drawing. I want to see and handle pieces of wood to decide what looks right.

One thing to do is to decide on the number, size and spacing of the slats.

The next paragraph or two may not endear me to most woodworkers under about 60, but I am of an age where I mostly think in inches, not millimetres (with plenty of exceptions too tedious to digress into). It suits my old tools and reading of old books as well, so please bear with me.

The space between the legs is 52⅜ inches. That measurement suits the mattress and is now fixed. If you multiply out so the unit is an eighth of an inch, that's (52x8)+3 = 419 eighths. Looking at pictures of other beds on line, including Derek's, I thought 15-17 slats would look about right. My wife and I agreed that we didn't want to group them into sets or include a wider panel or any of the usual variations on a theme.

For my first trial size, I settled on slats each 1⅝" wide, or 13 eighths. 15 slats would need 16 spaces.
The total width of the slats is 15x13 = 195 eighths. Subtract this from the available space: 419-195 = 224.

Divide 224 by 16 and you get exactly 14, or 1¾".

How about that? My guesstimate gives me a nice easy pair of measurements at the first go!

Having double checked my arithmetic, I used a trimming of ash from earlier and made some dummy slats of the right width and arranged them at the chosen spacing, like this:

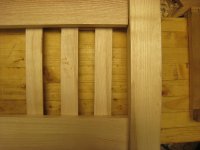
IMG_7805.JPG

IMG_7806.JPG

I think that looks ok, but do shout if you think a different way would be better.

I do also need to consider and decide about the thickness of these slats and whether the tenons are going to be shouldered or barefaced. Here's a view of the inside of my head at odd moments:

Shouldered - Pro:
  • Hides any irregularities in the mortices
    Fun to do?
    Impresses other woodworkers
    Allows for thicker slats which will share the sturdy look of the bed.

Shouldered - Con:
  • All my spare ash to make the slats is thicker than I need for one but not thick enough for two, which means lots of sawing and planing
    There's all that fiddly fitting to do
    No way to hide a slat that's too short.

Bare-faced - Pro:
  • No fiddly fitting of shoulders
    I can cut two thin slats out of my thick offcuts
    Slats don't need to fit accurately at both ends, making fitting and glue-up easier
    Short lengths of ash are stiff and strong even if only half an inch thick.
Bare-faced - Con:
  • Every slip would show. I'm not going to start using my powered router for this - I've never used it for mortises and would be inviting trouble.
    Might look lightweight.

Your helpful thoughts are welcome but this isn't a democracy and your votes may be over-ruled! ;)
I'll do some experiments before I decide for definite.

And if that's not enough, there's another aesthetic question I need to decide on - tapering the legs.

Derek's appears to have a taper on the two inside faces which I think looks good, but how big should it be? I already have a dummy softwood fencepost leg I prepared earlier, so here it is getting a trial taper on the bandsaw. The slope starts an inch below the bottom edge of the rails and there's a reduction of half an inch at the foot of the leg.
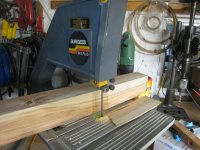
IMG_7807.JPG

IMG_7809.JPG

Is that too much, or too little? What would Goldilocks do? :?
 
Back
Top