• Hi all and welcome to TheWoodHaven2 brought into the 21st Century, kicking and screaming! We all have Alasdair to thank for the vast bulk of the heavy lifting to get us here, no more so than me because he's taken away a huge burden of responsibility from my shoulders and brought us to this new shiny home, with all your previous content (hopefully) still intact! Please peruse and feed back. There is still plenty to do, like changing the colour scheme, adding the banner graphic, tweaking the odd setting here and there so I have added a new thread in the 'Technical Issues, Bugs and Feature Requests' forum for you to add any issues you find, any missing settings or just anything you'd like to see added/removed from the feature set that Xenforo offers. We will get to everything over the coming weeks so please be patient, but add anything at all to the thread I mention above and we promise to get to them over the next few days/weeks/months. In the meantime, please enjoy!

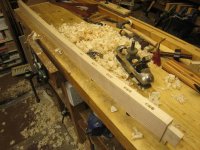
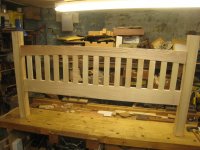
Ash bed WIP - Finished!

You were definitely right to replace those slats. I’m trying to learn to be more patient in my woodwork but often fail on that score!
 
Although the weather has turned too good to stay indoors, I have managed to slip away to the workshop for the odd hour or two.

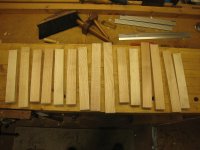
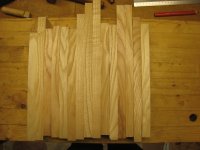
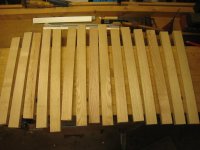
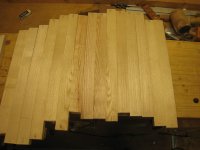
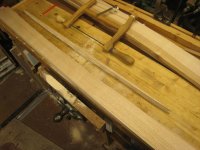
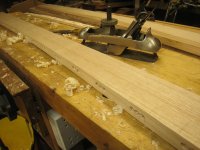
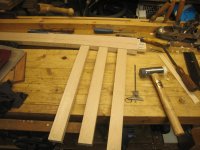
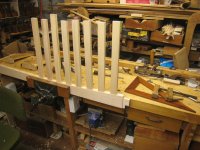
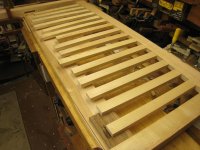
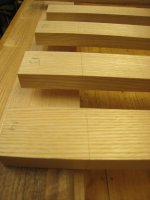
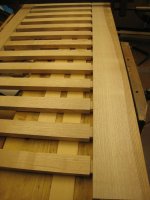
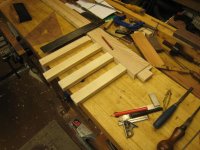
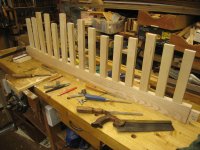
I don't need to say much more about slats except to say that I finished planing enough for the foot of the bed and they look like this

IMG_7857.JPG

IMG_7858.JPG

and the process seemed to get a little bit quicker as I went along. I've had an alternative suggestion about how to arrange the plain/more interesting ones so will either change my mind later, or leave them as shown.

Oddly, I have about seven or eight planed up pieces left over, which should make picking the right ones easier, or harder.

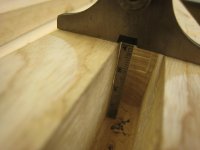
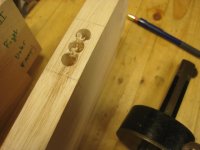
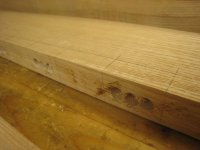
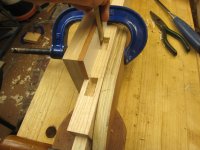
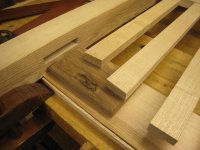
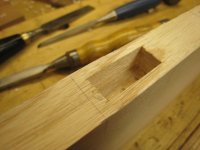
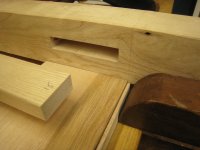
Before I went on to the next stage, I thought a bit about the glue-up. When I first assembled the head and foot "frames" some of the joints were a bit tight to pull up all the way. The last thing I want is to find I can't get all the bits together, so I went back to the M&T joints to find what was less than lovely. With my Mr Picky hat on, I found this sort of thing, where you can see that the sides of the mortise are not plumb, so it's narrower at the bottom.

IMG_7862.JPG

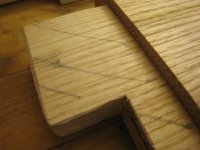
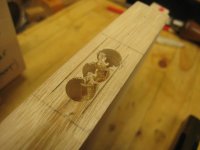
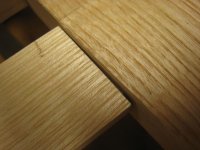
And this, where you can see that there's a bump in the side of the mortise, or else one on the tenon, so the pencil lines get smudged in one spot.

IMG_7863.JPG

Easily cured.

IMG_7864.JPG

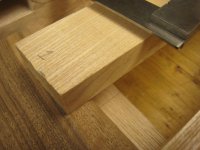
And more serious, I found this error stopping one of the joints from closing up properly - the haunch was too shallow, so I pared it away

IMG_7865.JPG

and I also sawed a sliver off the tenon. I suppose this would have been obvious if I had sawn the spare wood off the top yet. There's no real reason not to now, it's just one of the many things I have not yet done.

I'll use liquid hide glue, with its long open time, but I've had experience of that horrible stage where the glue stops acting as a lubricant and the water in it swells the timber, making an ill-fitting joint lock up beyond the reach of the ordinary and even the medium hammer... so I am sure this was time well spent. All the joints now slide together by hand without malleting. (It's easy to say that now, but time will tell.)

On to the mortises for the slats.

Readers who have slogged through the previous 8 pages of this may remember that I was concerned about the mortises that go upwards into the curved underside of the rails. I did an experiment, cutting a deep mortise with the wood square and then cutting some of it away, back to the curve. That would work, but it would mean an awful lot of mortising that would get trimmed off. I decided to take the bore & pare route instead.

I apologise to anyone who wanted to watch me chopping all 60 of these with just a chisel and mallet, but there will still be plenty of chiselling to do. I reckon what I can do is to make all the mortises by first accurately drilling to define the ends, making deeper holes where the curves will be. The actual chisel work can be done after trimming away the curve.

To do this, I need a clear centre line along each edge. Normally, I'd just reach for a marking gauge and get on with it, but one of these rails is distinctively wavy. I didn't plane it all to the same thickness - the better side will be the outside but the inside, hidden by the mattress, is a bit thin in places. Neither face would give a true straight line if marked from the face.

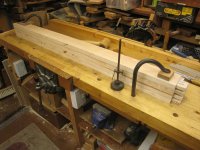
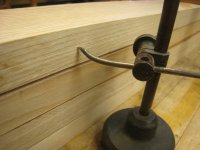
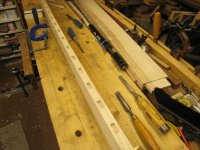
To get round this, I decided to mark the lines with a surface gauge off the bench, like this:

IMG_7866.JPG

The idea is that the bench is flat enough, so I can scribe lines along using it as a reference. You can also see a gap where the rail is less than perfect, and a bit of brown pith that will get removed when I cut the curve:

IMG_7867.JPG

I do wonder sometimes if my methods are getting a bit too wacky, and I can see that they are definitely not what anyone in a commercial environment would do. And I am certainly not expecting anyone to think this is the only or even a good way to make a bed. Think of it as a ramble around the byways of woodworking where the digressions might be more fun than the destination or might just be something to draw a veil over and never mention again. ;)

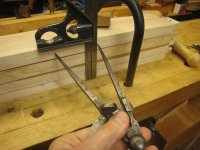
With the centre lines in place, I measured along for the spaces and slats, using dividers and a square to mark where the edges of the slats will be - not the same as the edges of the tenons.

IMG_7869.JPG

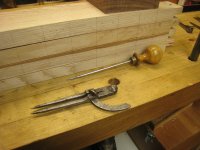
And then, to make the marks from the dividers consistent and visible to the tip of the drill bit, I pricked them all with this rather pretty boxwood handled awl. I also marked centre holes between the first two marks.

IMG_7870.JPG

That all took quite a while.

Now, some of you might be wondering how I am going to make all these holes. Will it be the nice cast-iron bench drill I used earlier? A brace and bit? A fancy hand drill? I have lots of different ways of making holes, but in this case there are fifteen slats at each end of the bed, with two ends each, and three holes per slat end. 15 x 2 x 2 x 3 = 180, so it's time for a power drill.

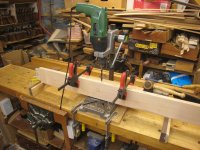
Don't worry, I've not been and bought a proper bench drill (but if anyone has an old Meddings to throw away, I could try and make room for one). I've got an electric drill from the 90s with a period-correct really sturdy Wolfcraft stand for it, just right for this sort of job.

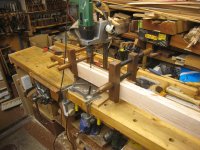
And so, with a few bits of scrap timber to set a level and hold the wobbly wood square, I set up a reasonable arrangement for boring holes in bulk. It started out looking like this but got a few tweaks as I went on.

IMG_7872.JPG

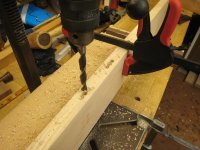
The stand has a nice positive depth stop, which was good for the bottom rails where all the mortises are the same depth.

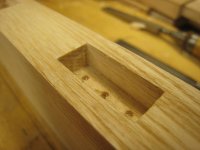
The 10mm lip and spur drill defines the length and depth of each mortise.

IMG_7873.JPG

I shall mark out the sides later and use a half inch chisel to cut them square, or maybe a smaller chisel and pare the sides with a guide, I've not decided yet.

By the time I got on to the mortises on the upper rails, I had realised that it makes sense to clamp the rails together. I also swapped to some nicer cramps that are possibly a bit more in keeping with my public image than the Wilco and Great Heck brands that sneaked in earlier. 8-)

IMG_7875.JPG

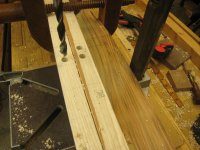
I'd measured the required depth for each hole to reach down below what will be the curve and written the depths, in millimetres, alongside.

IMG_7877.JPG

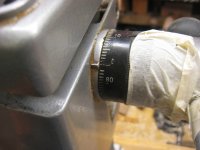
I could then use the depth calibration on the stand to go down far enough. I taped it in the right position and set the hard depth stop at the maximum I needed, but I don't think I overshot on any of the holes.

IMG_7879.JPG

And so, after some more time had passed, I got to this stage - all the positions defined, ready to be marked out and cut square.

IMG_7881.JPG

While doing all that drilling, I thought of a different approach which would have got the same result but would probably have been quicker because it would have saved some intermediate steps.

I'll try and remember it if I ever make another bed like this one! ;)
 
AndyT":2oudf995 said:
......I do wonder sometimes if my methods are getting a bit too wacky, and I can see that they are definitely not what anyone in a commercial environment would do......

One of the reasons I love woodworking is for this sort of thing. You have a problem, and you have to think up an answer. There's probably a couple of dozen practical ways of making it work, and the thing determining whether it is the right solution is only this: if it works, it's right. You've got a piece of kit I've never even heard of, let alone seen, and it provided a quick and easy solution to the problem of imperfect stock. I can think of a few ways I might have tackled that issue, but none of them are likely as neat as yours.
 
Mike G":2hg8i1g2 said:
AndyT":2hg8i1g2 said:
......I do wonder sometimes if my methods are getting a bit too wacky, and I can see that they are definitely not what anyone in a commercial environment would do......

One of the reasons I love woodworking is for this sort of thing. You have a problem, and you have to think up an answer. There's probably a couple of dozen practical ways of making it work, and the thing determining whether it is the right solution is only this: if it works, it's right. You've got a piece of kit I've never even heard of, let alone seen, and it provided a quick and easy solution to the problem of imperfect stock. I can think of a few ways I might have tackled that issue, but none of them are likely as neat as yours.

Also in the commercial world of wood mangling, time is everything and woodwork comes a long way second. Make the job in the hours dictated by the boss (or less) and you get bought beers at Friday lunchtime; go over the hours and you get shown the the door. Hence the reliance on every imaginable electriceral device to shave off the minutes.
I speak from experience - Rob
 
When I made my picket fence oak bed heads, I cheated (as always, because I dont do hand tools :lol: ).
I routed on the router table a "continuous mortise" actually a rebate, all across the rails, left the slats straight, and then chopped lots of close fitting spacers, and inserted one between each stile as I glued it all up.

It might well fail an inspection by a dedicated carpenter such as yourself :eusa-naughty: , but the other 999 people will never know :eusa-whistle: 8-) .
 
Thanks guys. I can see we all agree that the solving of practical problems is a big part of the fun of woodworking. Including your clever rebate and spacer idea Bob. Sometimes saving materials matters more than saving time, sometimes it's the opposite, or it's effort that's being saved.

It's bugged me for many years now that the education system and wider society seem set up to value paper-based abstract puzzle solving (as seen in IQ tests) so far above practical, real world intelligence needed every day in so many trades. But that's probably a topic for a different thread.
 
What's the best way to arrange a set of slats, where some of them are quarter sawn and show very plain grain patterns, while others are far redder, wilder and more decorative? I know it was the right thing to do to eliminate the ones from a different tree that really looked out of place, but there's more to it than just that.

I thought I had decided on putting them like this. They're pretty much laid out in symmetrical pairs, with colourful and plain ones alternating.

IMG_7856.JPG

But an old friend suggested grouping all the pretty ones in the middle, with plainer borders, like this:

IMG_7882.JPG

which looks better, so that's how it's going to be, with a similar effect at the foot end. All pieces have been re-numbered and will be marked again when the tenons get cut.

Meanwhile, back to the mortises.

On the lower rails, which stay straight, I marked out the sides of the mortises with a gauge and ran a pencil along so I can see what I am doing. I also extended marks onto the faces of the rails, which will help line up the slats so they are square and even. The ends are defined by the bored holes and I knifed across all of those.

IMG_7884.JPG

IMG_7885.JPG

There's no point doing the same on the upper slats - the marks would just get cut off in the next step. With those, I just extended the marks around to show the edges of the slats, making sure they went below the line of the curve.

IMG_7887.JPG

Then it was time to cut the curve.

Please take a moment to reflect on the many decisions I had to take. Some famous woodworkers advocate a minimal set of tools but I have entertained myself for several years (egged on by some of you lot) gathering up all sorts of variant tools and exploring the differences between them.

I could have used my bandsaw, but it would have been too much of a balancing act trying to support the work on a tiny little table with no extension rollers or equivalent. The same objection would apply to my treadle powered fretsaw.

I could have used my basic but perfectly serviceable electric jigsaw.

I could have used an old compass saw, probably blunt. Or a short, awkward pad saw.

I could have sawn straight stopping cuts at right angles and set to with a hatchet or big chisel to chop out the bits between them.

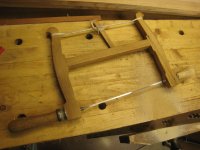
But, patient reader, I rejected all of those and decided on a little turning saw. It's not an antique - I think it's from somebody's school woodwork lesson. If I remember rightly, I got it when going to get a collection-in-person eBay purchase. (Top Tool Collecting Tip - it's always worth a few minutes polite chat to find out if the seller has anything else that they've not got round to listing yet ;) )

IMG_7890.JPG

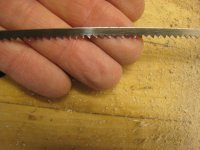
The blade is about 9 tpi; I gave it a quick touch-up with a file before use.

IMG_7891.JPG

Would it work? I've not had much experience with this sort of cut, certainly not enough to risk going anywhere close to the line. I drew a second line, freehand, a safe distance away and set to.

IMG_7888.JPG

I was cutting in what I believe to be the recommended way - blade arranged for a push cut, gripping with both hands on the vertical bit of the saw frame rather than the handle. It didn't take too long.

IMG_7892.JPG

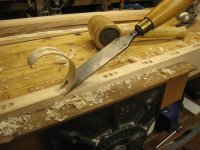
I'd left far too much wood, but it responded nicely to a chisel and mallet, without the cut running back below the line:

IMG_7894.JPG

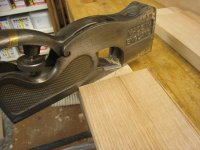
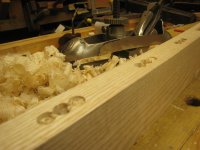
And then it was time for a compass plane!

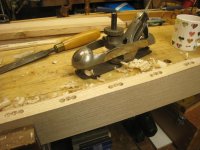
I'm sure I am not the only woodworker who has known about these ingenious tools since schooldays. I've owned this one for a decade or two but, unsurprisingly, have barely used it, not being in the habit of making boats or circular windows or revolving doors. Nevertheless, I got it out of the drawer, sharpened it and had a go. It worked beautifully! Exactly the right tool for this job. This is a Stanley no 20, recommended by Patrick Leach as the most usable of the metal compass planes and also available in a Record version.

IMG_7893.JPG

You can't really tell, but in this photo I have planed right back to the line and got a good, tear-out free surface all the way along.

IMG_7895.JPG

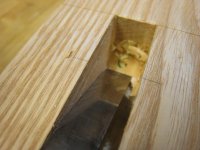
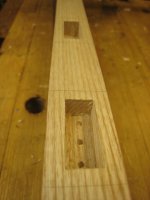
Pausing only to admire my own work, I marked out the sides of the mortises on the newly-exposed wood, then chiselled them out. As before, I knocked up a quick jig to keep my chisel square and in the right place for the final paring cuts. (Maybe I could have skipped the marking but I like a definite line.) (In this photo the one nearest the camera has not yet had its final trim.)

IMG_7896.JPG

After some more time, it looked like this:

IMG_7897.JPG

I've decided I quite like this boring and paring method for making mortises. Most of the cutting is done with just hand pressure, so the work isn't getting battered too much, and the results look ok if you zoom in one totally random, entirely representative sample :eusa-liar: .

IMG_7898.JPG

Maybe it's just as well - I've still got 45 more to do. Or perhaps I'll swap to tenons for a bit. Stay tuned to see what happens next!
 
Lovely stuff. Great to be able to put your compass plane into use. I have the same one which I bought on a whim a last year, but I haven't used it in anger yet.
 
Very nice Andy.

There are a myriad ways of approaching a long curved cut like that, and I doubt any of them are very much better than any of the others. I wonder if a medium rip saw would have got rid of the bulk of the waste pretty efficiently. With the wide kerf they can certainly do gentle curves with care. As an aside, I personally don't think there is anything much to choose between cutting on the push and cutting on the pull with a frame saw, so long as they are well tensioned. I now cut on the push just so I don't feel I'm giving in to the Japanese lobby!! :)

I might have had a go with a draw knife, too, simply because I love them. Any excuse to have a play with one.... And as I don't have a compass plane I reckon I'd have then reached for a spokeshave.
 
Mike, I did try a drawknife, but with this ash being really quite dry now I found I couldn't take much off. Certainly nothing like you could do with green wood. You can see that I had to wallop the chisel to get 2-3mm off in one go.

I didn't take any pictures, so left it out of the description. I could fill up twice as much room if I left in every detail of this project!
 
AndyT":2boaye8b said:
And then it was time for a compass plane!

I'm sure I am not the only woodworker who has known about these ingenious tools since schooldays. I've owned this one for a decade or two but, unsurprisingly, have barely used it, not being in the habit of making boats or circular windows or revolving doors. Nevertheless, I got it out of the drawer, sharpened it and had a go. It worked beautifully! Exactly the right tool for this job. This is a Stanley no 20, recommended by Patrick Leach as the most usable of the metal compass planes and also available in a Record version.
I've got a Record 0113 in mint condition and I've had it for at least two decades as well and never used it. I bought it off Martin King from 'another place' and paid quite a lot for it even then; no idea what it's worth now - Rob
 
AndyT":uca1n9dw said:
Well, this site puts them in the "rare" category and suggests that they weren't available for long

https://www.recordhandplanes.com/rare.html

But don't you ever feel like using it for subtly curved Krenovian legs and suchlike?
I was told that the 'Achilles Heel' of the 0113 was the riveting on the thin sole, which used to split if it was left in a curved position for too long. I've always kept it dead flat so the sole is pristine. I think there's a distinct probability that it may well get used for some Krenovian legs as I intend to at least try and make one cabinet with them - Rob
 
This may be the last update for a while. That's not for any bad reason, it's just that I need to do a lot of the same thing over and over and although that's pleasant and relaxing for me, it doesn't need to be photographed quite so much, even at my level of detail.

So, for a little while now, I have been getting to grips with cutting individually fitted tenons to fit in those oddly shaped mortises. Out of all the many different options for how to do it, I seem to be settling into a groove where I know what to do and can speed up a tiny bit.

The slats have all been numbered in the right order, with the numbering also relating to which way up and which way round they all go. All the other prepared pieces have been cleared away into the adjoining utility room, to avoid muddles. This is what I do:

First, I square a pencil line around the end, about half an inch in. I then gauge around with the mortise gauge and pencil in the marks so I can see them.

IMG_7904.JPG

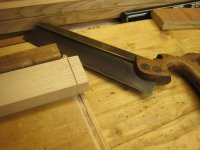
Then I saw down the shoulders. I really ought to make a new bench hook, but this one will do for now. The saw is just lying on the bench, not doing some clever horizontal cut. It's a nice old one, probably from about 1900, as sold by a Bristol ironmonger, Warlow.

IMG_7905.JPG

With the slat on the bench hook I zip off some thick shavings with a long paring chisel, then take some thinner vertical cuts to get closer to the lines.

IMG_7907.JPG

Repeat on the other side until it's a snug fit.

IMG_7909.JPG

Line it up so it's square to the back edge of the rail (ie held against a big try square) and mark off the length of the mortise. This should ensure that the gaps are consistent even where the junction is oblique.

IMG_7910.JPG

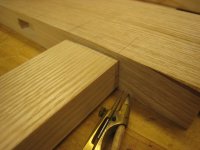
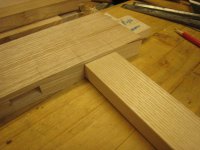
Put the slat vertical in the vice and saw off to width. Insert into the mortise and admire the gap where the shoulders are straight but the rail curves.

IMG_7911.JPG

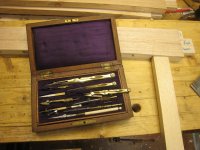
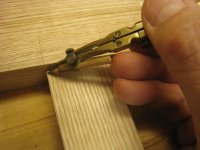
Scribing the line to trim the shoulders is quite a delicate job and my ordinary old school compasses seem a bit clumsy for it, so I got out my nicer set. Apparently these were made cheaply in France and sold to students, but they look good enough for me and they close up nicely.

IMG_7912.JPG

IMG_7913.JPG

IMG_7914.JPG

I did try scribing a line with dividers but couldn't get a clear line so decided to stick with the pencil and plenty of sharpening. I may need to make a new tiny thin pencil too.

I seem to have failed to photograph the exciting sight of a chisel taking a little sliver of wood off, but if you don't mind imagining that, we can move on to this stage:

IMG_7916.JPG

which is at right angles where it needs to be

IMG_7917.JPG

IMG_7918.JPG

And so, after some more time had passed, I could make it look like this:

IMG_7919.JPG

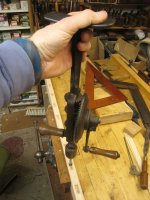
There was a bit of a digression today - I found that some of the mortises were not really quite deep enough, by about 3 mm. Of the many ways of dealing with this, I chose a modern 10mm Forstner bit. It has a round shank, so I needed a suitable drill to hold it. The one outermost on the rack was this nice Yankee 1555.

IMG_7920.JPG

IMG_7923.JPG

There's plenty of length, which helps get it vertical, and it's heavy enough to drill under its own weight.

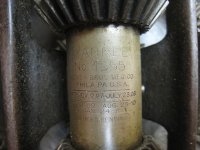
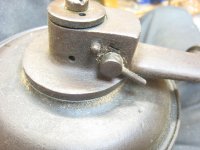
That's why I chose it, really, not just because it's one of the fanciest of its type, with a simple speed control lever

IMG_7925.JPG

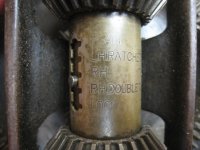
and a set of really clever ratchet options in case you only have a tight corner to work in

IMG_7924.JPG

I reckon I could just about remember how to service a Sturmey Archer three speed hub, but I am not going to dismantle the mechanism on this to see how much more complicated it is inside! Suffice it to say it's a nice solid tool well worth picking up if you come across one for a sensible price.

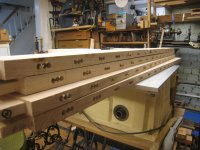
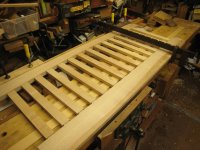
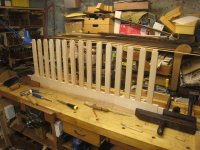
Anyway, with digressions completed and mortises suitably regularised, it was back to the routine until today's session ended looking like this run of picket fencing:

IMG_7926.JPG

Half way through one half of one end!

But as I may have said before, the point of this project isn't to finish it to any set deadline, it's so I can enjoy the challenge of making something and the time spent doing so. ;)
 
Andyp":1in5mxso said:
Really enjoying following this. Great stuff. That number of repetitions would drive me mad though,

Thanks Andy. I think previous projects must have driven me mad enough already! ;)
 
chataigner":h4nfjmay said:
I really appreciate the detailed descriptions and especially photos. Please keep it coming !
David
Thanks David, I shall.
 
Well, as I said a while ago, this project is going to get interrupted from time to time for family stuff, trips away, weather too good to spend indoors, etc, etc, but I have done a little bit more so may as well write it up. I do appreciate your nice comments, which help keep me going, and if I do post pictures I shall have a better chance of remembering how to do this stuff.

Anyway, we left the head end with some of its slats scribed to the curve. I finished all those, then put all the bits back in a pile out of the way.

But after quite a lot of tidying up and shifting things about to make space, I was able to make a start with the other ends of the slats. I must have spent many hours thinking through how I was going to do this, so it was nice to do it for real.

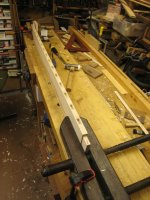
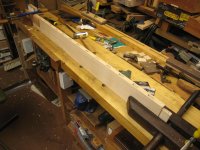
What you see here is the legs (still not cut to length) with the top rail in place, propped up and secured to the bench, so I can mark all the slats to length by lining them up where they need to go.

IMG_7927.JPG

Here's one end of the lower rail, laid under the legs but in the proper position, restrained by a clamp on the bench.

IMG_7928.JPG

On the far side, a bit of scrap is clamped to the bench on either side, so I can push against it.

IMG_7929.JPG

It's all square where it needs to be square (thanks to Steve M for the Square of Thales!)

IMG_7931.JPG

IMG_7932.JPG

This picture shows that the slats don't naturally all stick out horizontally

IMG_7936.JPG

but if I rest each one on this carefully selected scrap of the right thickness, I can check how well they fit.

IMG_7937.JPG

Incidentally, I keep a lot of scraps of various sizes behind the bench in some old shallow drawers. I find it really useful to be able to pick out something suitable to use for clamping or aligning parts. I don't think I could work in a completely tidy workshop!

Knocking all the slats into place together revealed a few where my scribing was not good enough, like this

IMG_7935.JPG

so those were re-done before anything else.

To mark the bottom ends, it was a simple job of aligning each slat above its position marks, using a small adjustable square, then turning the square round and knifing across the thickness, then one face. The other sides can be done later, with the slats removed.

IMG_7938.JPG

I couldn't have told you how long it took to check, adjust and mark all fifteen, but I can see from the timestamps on the photos that it was about an hour and a half.

I just know that I got into a really enjoyable rhythm of doing the same sequence of operations on each one, in the same way, with the same tools, not needing to change it as I went along. And what really helped was listening to Philip Glass as I did it - the way that the music seems to be just repeats but is actually making progress and change was a really good match for what I was doing.

It may not show up much in this photo

IMG_7940.JPG

but each of those slats has a nice clear knife line

IMG_7941.JPG

all ready to be fitted into the mortises on the bottom rail.

In fact, I enjoyed myself so much that I carried on and cut all those mortises in the same session (guided by the holes drilled weeks ago

IMG_7942.JPG

IMG_7943.JPG

and I even made a start on cutting the tenons, but that was done just the same way as I already showed you so I didn't stop to take new pictures. It was really nice to get back to working on this project and if I can find time before the next distraction I'll do some more, photograph it and update this thread.
 
Coming along very nicely Andy. That feeling you get when you are working with your tools and it’s all going well with a huge sense of self satisfaction is impossible to describe to people who haven’t had it, probably why we are all such happy souls.
 
Lovely posts, as always. I'd missed your previous one whilst I was away.

I have a bench hook like yours. After years and years of putting up with it, I finally made a pair of old fashioned ones, which puts the work right at the edge of the bench. They have made a huge difference, because I can now drop the heel of the saw, which means I can guarantee vertical accuracy. If I were you, Andy, I'd make it my next job.

NxqqZe5.png

My old one gets used still, but only for chiselling.
 
Looking very good!


Cabinetman":ic5hxuy5 said:
Coming along very nicely Andy. That feeling you get when you are working with your tools and it’s all going well with a huge sense of self satisfaction is impossible to describe to people who haven’t had it, probably why we are all such happy souls.

:text-+1: :text-coolphotos:
 
I'm another who enjoys your work and write ups Andy.

Please don't do what I did and carefully mark up pre-numbered slats only to cut the numbers off during the process! Getting it back together again was 'fun'!
 
Thanks all for the nice comments.

When I was planning this project, I didn't really know what it would be like doing all the repetitions, on 30 slats with m&ts at each end. In practice, it's been rather pleasant. Like eating one chocolate from the box, then another, then another.

It does force me to tidy up though - if only to fit everything on the bench - which encourages me to be more orderly and systematic than my default settings.

Stuart, you're dead right about numbering everything, and part of my routine is to transfer the numbers onto the freshly trimmed ends as soon as each one is cut. That's with dashes either side of the number if it's at the base. And all in the same orientation.

When not being worked on, the slats stay in three stacks of five. I really don't want to make mistakes! (Really attentive readers may have spotted that slat no 7 is a bit short to go in the middle - its tenon will be more like 3/8" than 1/2". I'm hoping to get away with it!)

And Mike, you're right about bench hooks. I'd seen descriptions, and a Roy Underhill video about old style hooks but not seen the reason for that design until you pointed it out. Time to break free from the design they gave us at school and have a choice for different sizes of board and different operations.
 
AndyT":ih0uyizd said:
And Mike, you're right about bench hooks. I'd seen descriptions, and a Roy Underhill video about old style hooks but not seen the reason for that design until you pointed it out.

These from WH are just the very thing Andy and very reasonably priced too :lol: - Rob
 
Woodbloke":1mu9mlo7 said:
AndyT":1mu9mlo7 said:
And Mike, you're right about bench hooks. I'd seen descriptions, and a Roy Underhill video about old style hooks but not seen the reason for that design until you pointed it out.


These from WH are just the very thing Andy and very reasonably priced too :lol: - Rob

I'd be looking round for some gash chipboard to protect them if I paid that much! :D
 
You'd need a laser beam too for doing the actual cutting because you wouldn't want to lay anything as crude as a saw into those lovely mitre grooves.
 
Well, I seem to be going at laser speed without needing to buy one!
Some more free time today meant a chance to make some more progress. It's much the same as you saw before...

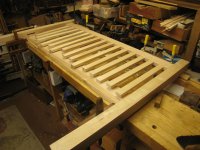
Having cut all the easy square mortises in the head end lower rail, it was an easy job to cut all the matching tenons. This lot took just a leisurely-paced morning. I cut them in five batches of three, marking, sawing, paring, fitting.

IMG_7944.JPG

There's more to do to all of them - all the arrises need to be chamfered and there are pencil marks to be planed/scraped/sanded away - but buoyed up by progress I decided to have a quick dry run to see if these could all be fitted together.

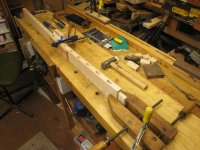
It soon became clear that wrestling the curved rail onto the tops of what you see in this picture was not going to be possible at all - it was all just too uncontrolled. I dismantled the bottom rail, had a bit of a tidy up, and tried a different tack.

I thought that if I laid it flat on the bench, with some thin bits to lift the slats into position, and assembled the top first, I'd have a better chance.

This shows an early stage. I'd pushed in the first two tenons at the right hand end and put a clamp over, just to stop them opening up again.

IMG_7945.JPG

IMG_7946.JPG

I could then work my way along, towards the camera, easing each tenon into place. (It helped that I had chamfered all the ends with a chisel before starting.) There were blocks clamped to the bench, so I could give the bottom rail a thump to encourage it into position.

To get everything to tighten up needed a couple of proper sash cramps, as seen here.

IMG_7947.JPG

This was all rather encouraging. I had a strong, stable structure with tidy enough joints.

I decided to check if the legs would still fit. They did!

IMG_7948.JPG

I've decided not to taper the legs, but they do still need trimming to length. However, it's handy to have the extra ends to mallet against when messing about like this, which is why they are still oversize.

Getting the bits apart again was much harder than putting them together. I don't have any cramps that are designed to work as spreaders, not on this scale. However, I found that the bigger heads on my other, heavier cramps (Record 136, with the T-shaped beams) have just enough spare metal to allow them to push as a spreader. Phew!

When it comes to the real glue-up, I am thinking that there's no point in messing about trying to glue all the slats, unless anyone can think of a good reason that has passed me by.

With that excitement over, there was still time to saw and plane the fancy curve on the top rail for the foot end. I sawed it with a simple turning saw, same as before, but a bit closer to the line. And then I planed it with the compass plane. Plenty of checking, turning around, feeling for bumps etc. All done with fine shavings so as to be ready to stop when I get to the line without any tear out.

That'll do for now. :)

IMG_7949.JPG

IMG_7950.JPG
 
Now you see Andy, if you had done slack Alice joints like the rest of us it would’ve gone together so much easier and you wouldn’t be worried about having the time to put glue on all the joints – which I would by the way, I suppose wood movement will be consistent across the grain so they shouldn’t come loose but it would be very annoying in the future for them to rattle ;) Ian
Just reminded me of when I was at college and the lecturer referred to things as slack as whore's draws lol
 
I'm back!

After a gap of not quite three months, for holidays, family stuff and other non-woodworking activities, I have been heeding government advice and sheltering from all that dangerous radiation round about us. The safest place I can find is my basement ̶p̶l̶a̶y̶r̶o̶o̶m̶ workshop where it's a perfectly comfortable and safe 23 degrees, so I have spent a few happy hours down there.

There's not much to show for it yet, and I haven't taken nearly as many photos, but I have made a start on fitting the fifteen little vertical slats for the foot end, into their horizontal rails. At the top, where the underside of the horizontal is curved, this means scribing and trimming the shoulders to match the curve, as already shown for the head end of the bed.

Here you can see me paring the ends and sides of the mortises, where I bored three holes for each one, using an assortment of sharp chisels and a little jig made up for the purpose. This is slower than ordinary mortising but seems to me to make sense for getting everything parallel and fitted.

IMG_7963.JPG

Have you ever noticed how macro shots blown up on a decent sized monitor show up every little whisker and inaccuracy? :(

IMG_7964.JPG

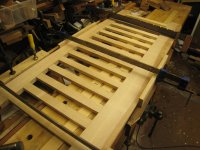
But they fit, well enough to satisfy the customers anyway. Soon I had this:

IMG_7966.JPG

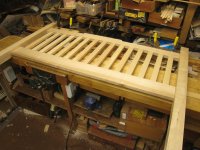
and not very many hours later, this:

IMG_7967.JPG

and all the joints slide in with hand pressure but don't drop out, which is encouraging. I had to remake one slat which had twisted while it was waiting for me, which in retrospect I should have anticipated as the grain is a bit wayward. Fortunately I had a spare bit to replace it with.

IMG_7970.JPG

I need to decide fairly soon how much to soften/chamfer the edges of these slats. I think it makes sense to do that just before assembly and pre-finish them all as well; that will be easier than getting any finish round afterwards with no drips, runs or missed places.

Actually, there's quite a lot to do before then. I've not touched the long side rails yet, or cut mortises in the legs for them, or decided the details of the fixings. I'll be using cross-bolts, long socket-headed screws and some cunning cover-ups, but need to get the right size bits ordered first.

So, be assured that this project is not forgotten. I'll add updates in more detail when I have anything new to show. Meanwhile, it's more of this at the other end:

IMG_7968.JPG

which will be followed by some careful clamping, marking out and cutting individually matched joints. Fortunately, I'm still enjoying it!
 
Yes looking very good. It’s too hot to sleep at the moment so you don’t really need a bed at the moment anyway!
 
I've been spending quite a bit of time in the basement in the last few days...

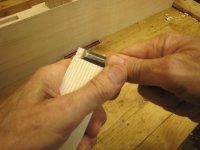
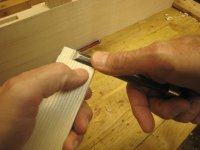
While trimming tenons to fit their mortises, I developed a reasonable routine. It included quite a bit of careful paring across the grain, with a chisel flat on the work. I did most of this in what I think is a carver's way of working, with the chisel held in both hands, one pushing it forwards, the other stopping it from moving too far, too fast, or in the wrong direction. Difficult to photograph, but using the timer function I had a go. Like this:

IMG_7985.JPG

To get control, my right hand is wrapped around the blade, up close, near the cutting edge.

IMG_7983.JPG

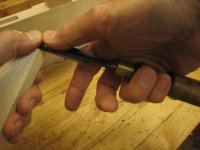
There's not much of the handle that I can reach, but what I realised was that I was preferring one chisel above the others, where my little finger could wrap tightly around a narrow bit of the handle, like this (I've uncurled my grip to show this):

IMG_7984.JPG

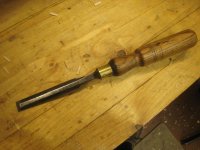
This is the chisel in question:

IMG_7986.JPG

IMG_7987.JPG

IMG_7988.JPG

IMG_7989.JPG


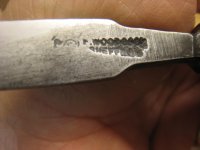
It's a perfectly ordinary old chisel, with one of the commonest patterns of handle, listed in catalogues simply as "round". It's marked (rather badly) F. WOODCOCK SHEFFIELD with a fragment of a logo. The company started by James Woodcock goes back a long way, but this mark puts my chisel at having been made some time between 1915 and 1957. It would have been individually forged (probably with a powered hammer) and doesn't have the distinctive round neck of later twentieth century chisels.

I really like the fineness of the edges, where proper bevels have been ground, but for this particular job it's the skinny bit of the handle which makes it so nice to use. It's all just the right size for my hands.

I compared it in use with other chisels with different shaped handles or longer blades, but came back to this one. This is one of the reasons why I like old tools and having a variety of different ones to explore. Finding that overlooked features can make a little, but welcome, difference.

I have other chisels with this shape handle, and even some gouges bought new in the 1980s which have it. Very common, very ordinary - but I suggest that it's worth making sure you have one or two in your toolkit.

Anyway, all that trimming got me to this stage

IMG_7996.JPG

which is encouraging, but nowhere near finished. I want to do a lot of easing of the joints (so there's room for glue), trim the legs to length, round or chamfer all the arrises, pre-finish the vertical slats, sort out the mortises for the long horizontal rails and the cross-bolts to hold them in place... the list goes on.

I'll be back soon with more detailed planning and progress, weather permitting ;)
 
I have a few woodcock chisels and my favourite one is more like a pairing chisel it is very thin almost like it’s a warn down or been snapped off and reshapened.


Pete
 
Looking very neat Andy, what decoration if any are you doing on the leg tops, I always like to plane the flat that’s left with a super sharp very fine plane to put a shine on the end grain. Ian
 
Back
Top