• Hi all and welcome to TheWoodHaven2 brought into the 21st Century, kicking and screaming! We all have Alasdair to thank for the vast bulk of the heavy lifting to get us here, no more so than me because he's taken away a huge burden of responsibility from my shoulders and brought us to this new shiny home, with all your previous content (hopefully) still intact! Please peruse and feed back. There is still plenty to do, like changing the colour scheme, adding the banner graphic, tweaking the odd setting here and there so I have added a new thread in the 'Technical Issues, Bugs and Feature Requests' forum for you to add any issues you find, any missing settings or just anything you'd like to see added/removed from the feature set that Xenforo offers. We will get to everything over the coming weeks so please be patient, but add anything at all to the thread I mention above and we promise to get to them over the next few days/weeks/months. In the meantime, please enjoy!

Chairs - Done!

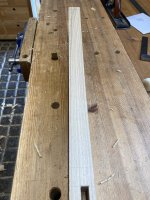
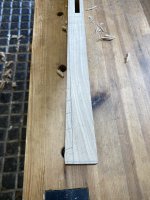
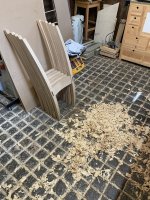
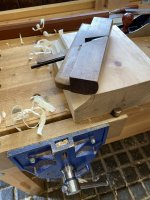
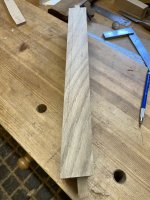
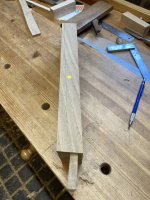
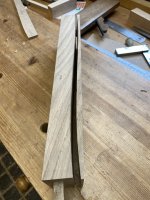
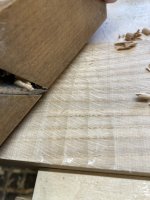
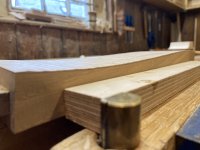
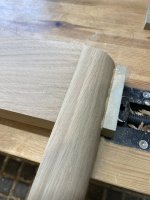
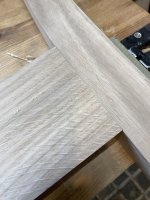
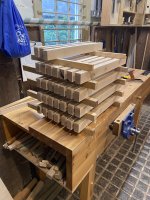
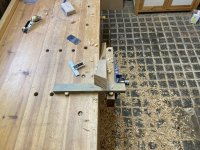
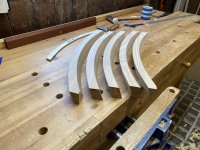
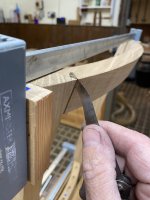
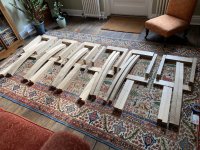
Tapering the legs was fairly straightforward. I used a bendy steel rule to mark the taper on the inside of the curve (the side that would be facing up when band sawing). I band sawed close to the line and then finished with a plane. They're all done and I'm left with a good pile of shavings!

IMG_4050.jpeg

IMG_4049.jpeg

IMG_4051.jpeg
 
The next big job is to shape the side rails, but before I do that, I wanted to make some clamping blocks to help clamp the curved front legs.

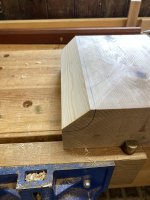
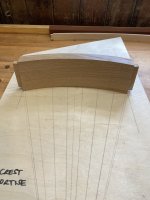
I used a big block of pine that I'd laminated up for some other project years ago. I marked the shape on both ends and joined that with lines on the face and edge. I cut the corner off on the table saw. To shape the curve, i used a couple of round bottomed moulding planes. They seem to work.

IMG_4053.jpeg

IMG_4054.jpeg

IMG_4055.jpeg
 
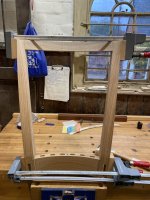
Part of the reason for making the clamping blocks was that I needed to clamp up a front leg, side rail and rear leg so that I could mark out the shaping required on the side rails.

There are three aspects to shaping the side rails:
  • the 'serpentine' curve on the outside face;
  • the 'twist' required to reflect the tilt of the rear leg; and
  • a curve on the bottom edge of the rail.
This photo shows the issue created by the tilt of the rear leg.

IMG_4061.jpeg

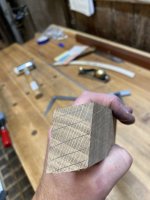
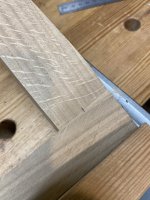
The hatch marks are on the end grain of the side rail and show the more wood needs to be removed from the bottom of the side rail than the top to get the rail flush with the leg. However, the front leg, and, therefore, the side rail at the front, is vertical. Hence there needs to be a twist shaped into the side rail.

I clamped up a side of the chair so that I could line up my template for the 'serpentine' curve.

IMG_4056.jpeg

I marked this curve on the top and bottom of the side rail and you can see the twist reflected in the fact that there is more wood to remove at the bottom of the side rail as it approaches the rear leg.

Top

IMG_4057.jpeg

Bottom

IMG_4058.jpeg

I band sawed close to the line being very careful to follow the line on the top of the rail where less wood is removed.

IMG_4059.jpeg

You can see how there is more wood left to remove from the underside nearer the rear end.

IMG_4060.jpeg

To remove that wood, I started by taking fairly aggressive cuts with a round bottomed moulding plane part way across the rail and worked down to the line as closely as I dared.

IMG_4062.jpeg

IMG_4063.jpeg

Cleaning up was done with a spokeshave and block plane and sanding across the joins with the legs.

IMG_4065.jpeg

IMG_4066.jpeg

The last job was to mark out, bandsaw and clean up the curve on the underside of the rail.

IMG_4067.jpeg

IMG_4068.jpeg

It's hard to photograph, but these shots show the twist in the finished rail.

IMG_4069.jpeg

IMG_4070.jpeg

This looks like a lot of work, but it actually goes fairly quickly. I've done two; ten to go.
 
That is a lot of work. It is oak not some mild compliant wood. Excellent work. You will be heading into the lead I am still sanding legs. Not that its a race😜
 
That is a lot of work. It is oak not some mild compliant wood. Excellent work. You will be heading into the lead I am still sanding legs. Not that its a race😜
No chance of me overtaking you! For one thing, I need to make 36 laminated back bars and I can probably only glue one per day! I haven't started those yet. That will slow me down, and I should probably have started them sooner in the process, but I'm not too worried about it and there will be lots of other tasks I can do on the chairs whilst those are being glued (e.g. partial glue ups, making crest rails, more shaping on the rear legs etc.). However, I do think I will turn my attention to the back bars as soon as I've finished the side rails.

Good luck with the sanding!
 
I've now done 5 side rails in total. I think it's around 1.5 hours for each one although that also includes sharpening as well clamping up each side and, where necessary, fettling the joints a little bit.

They should all be done by the end of the weekend.
 
As mentioned in a previous post, I need to get cracking on making the back bars. There are 6 per chair (36 in total) and each one is made from five 2mm thick laminations.

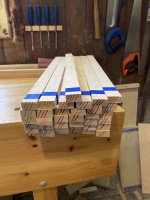
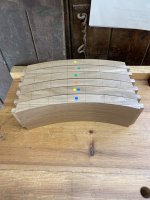
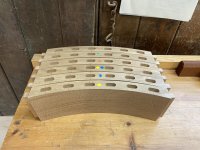
It's pretty dull work (largely pushing wood through machines) and there isn't much to photograph, but here are the blocks I prepared from a board of sycamore. The sycamore has some ripple in it but it's not as good as the boards I made the table from.

IMG_4073.jpeg

Each of those blocks could make enough laminations for two back bars. There are extra because (a) some have defects (you can see some of those); and (b) I wasn't certain which way I wanted to cut them.

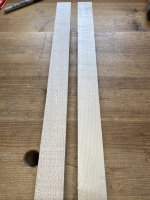
The issue with cutting direction is that I prefer the "creamy" sycamore rather than the really "flecky" look - I prefer the one on the right to the one on the left:

IMG_4086.jpeg

Some of the blocks were fine and produced the sort of look I wanted. However, cutting some of them in the efficient direction produced too much fleck so I cut those the other way which only produced enough laminations for one bar unfortunately.

Anyway, I think I've managed to get enough out of it to give me what I need plus a few spares. They now need to be drum sanded down to the right thickness. I want to keep layers in order and could foresee myself getting in a mess. To give me a chance of getting them back in the right order if things go wrong, I raided my daughter's Sharpie collection(!)...

IMG_4082.jpeg

...and drew diagonal lines on the end grain which should help me keep them in the right order.

IMG_4085.jpeg

I've started the sanding, but need to replace the conveyor on my drum sander so will be delayed for a few days.

In amongst this, I spent a day fishing down in Dorset and managed to catch a couple of bass. Neither was very big, but this one was legal size and provided dinner yesterday evening!

IMG_4078.jpeg
 
Whist waiting for a new conveyor belt for my drum sander, I decided to start the mortises for the back bars in the seat rail. I've covered this previously in the thread when I made the prototype chair and came up with a jig for the domino machine.

It was a case of marking the position from a drawing I had done before and using the jig to cut the mortises. I'll square up the ends later on.

IMG_4088.jpeg

IMG_4090.jpeg

IMG_4091.jpeg
 
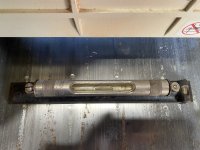
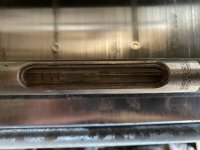
I've always struggled with the conveyor belt tracking on my Jet 16-32 Plus drum sander. I think I've read (from Steve M perhaps) that one issue can be twist in the bed so I thought I'd check that. These photos are of a level on each end of the bed and you can see that they ain't in the same plane!

IMG_4095.jpeg

IMG_4096.jpeg

With some shims, I managed to take out the worst of the twist and I'm pleased to say that the new conveyor tracks a lot better than before. It's still not perfect, but is now manageable.

I still don't really like the drum sander. Loading the abrasive so that it doesn't come loose is hard, but think I've got the hang of it. More generally, it's really boring feeding wood into it!

Anyway, I'm pleased to say that all 180 (192 if you count the spares) laminations have been sanded to a hair over 2mm. The mortises are 10mm and the back bars will be 'bare faced' where they go into the mortise. The stack of 5 laminations will be a bit over 10mm and I can shave them down so there's a really tight fit. Well, that's the plan anyway.

Here are the 38 stacks (2 spares):

IMG_4105.jpeg

And here's the first attempt at sorting them into six lots of six:

IMG_4106.jpeg

I then spent a bit of time making green dust by fettling the mould I made a while ago. There seemed to be a bit of a flat spot in the curve (shown up by bending a lamination over the mould) so that needed to be faired out. Having done that, I glued up the first one (UF glue):

IMG_4107.jpeg

Depending on the temperature, I'm hoping I can glue up two per day, and whilst they're gluing up I'll be making a start on the crest rails.
 
I've been doing more on the chair backs. I've got one set of bars pretty well fitted, but I'll come back to that process in a future post.

To get to that stage, it's necessary to make and fit the crest rails and to do that I needed to finish shaping the back legs.

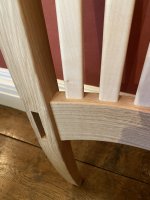
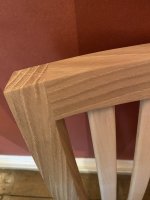
You might recall from the prototype, that I'm running the curve of the crest rail into the legs. In this photo looking at the top of the left leg, imagine the crest rail curving away to the right (the back of the chair is at the bottom of the photo).

IMG_4209.jpeg

The hatched wood needs to be removed. As it progresses down to the seat of the chair, it twists back to horizontal. Out with the spoke shave (definitely the hand tool I've spent most time using on these chairs) and scraper (and a bit of sandpaper) again.

The winding sticks show the subtle twist:ROFLMAO:.

IMG_4211.jpeg

I then had to do the inside of the curve.

IMG_4213.jpeg

I got it down to around 45 minutes for each leg.

The next job was to make the crest rails. I planed some wood to 40mm thick (the 'height' of the rail) and used a template to mark the outline of the top surface of the rail. I angled the bed on my bandsaw to an angle which reflects the curve of the legs and cut fairly close to the line. I'm trying to leave the rails over thickness for as long as I can so I can blend them into the leg shape later.

IMG_4214.jpeg

By holding the crest rail in various orientations against the legs, I could get a fairly good pencil line drawn to make a first cut (no photos of this process as it required all my hands to hold the rail and strike a line. From there, it was a case of planing the end of the rail and offering it to the legs and adjusting as necessary. (I've bought very few brand new hand tools, but I got a little Luban block plane for Christmas and I have to say it's superb.)

Once it was close, I clamped it up and checked for gaps by looking for light and trying to poke a feeler gauge in. This photo shows that there is a small gap on one corner. This was a low spot on one corner easily corrected with a light shaving.

IMG_4216.jpeg

IMG_4217.jpeg

IMG_4218.jpeg

The final job yesterday was to to flush the joint where the back of the rail meets the leg so that I have a reference for the domino machine. I did that with a chisel and a few strokes of sandpaper.

IMG_4219.jpeg
 
I needed to finish shaping the back legs.

You might recall from the prototype, that I'm running the curve of the crest rail into the legs. In this photo looking at the top of the left leg, imagine the crest rail curving away to the right (the back of the chair is at the bottom of the photo).

View attachment 36351

The hatched wood needs to be removed. As it progresses down to the seat of the chair, it twists back to horizontal. Out with the spoke shave (definitely the hand tool I've spent most time using on these chairs) and scraper (and a bit of sandpaper) again.

The winding sticks show the subtle twist:ROFLMAO:.

View attachment 36352
Great stuff Nick. There's so much work in these chairs!

It looks like you aren't yet at the stage where you are matching up components in their final locations. By that I mean you are just shaping all of the legs, then making all of the crest rails............and only then will you match them up into sets, and "blend" the surfaces together. Is that right?

I'm curious how far down the leg the shaping for the crest rail goes, and how you came to decide that length.
 
Great stuff Nick. There's so much work in these chairs!

It looks like you aren't yet at the stage where you are matching up components in their final locations. By that I mean you are just shaping all of the legs, then making all of the crest rails............and only then will you match them up into sets, and "blend" the surfaces together. Is that right?

I'm curious how far down the leg the shaping for the crest rail goes, and how you came to decide that length.
Thanks Mike. Yes, there's a lot of work! I'm still really enjoying the process but I have also welcomed the odd break from the chairs to work on something else!

Assuming I've understood your question, no, I am keeping them in sets of components as I go along. Each component has a coloured sticker to tell me which chair it's from. I have to do that because the components wouldn't be perfectly interchangeable. Tenons have been fitted to mortises, crest rails to legs etc.

I've tried, (as best I can) to match the look of the wood of each component. Despite all components coming from consecutive boards of the same boule, each part can look very different. I did this early on in the process (in early March!) and have kept the parts together since then:

IMG_3692.jpeg

It's not perfect, but I'm happy with some variation and even the odd knot here and there. It's just part and parcel of working with wood. It's actually surprising how much the look of each part changes as its shaped - medullary rays become visible/disappear as the angle/curve is created. All of this is a little hard to predict. If I'd started with really thick boards, then I could imagine you could really go to town with book matching components etc.

As for the shaping of the leg for the crest rail, I've basically taken it all the way down to the seat. It gets increasingly subtle as you approach the seat, but the idea was to have a smooth transition from the shape at the top of the leg to the shape at the seat level.

One other design decision I've got to make is whether to do something on the inside front edge of the leg where it meets the seat. I think the options are: (a) a small round over which is uniform all the way up that edge (I'll be doing that on most edges anyway as it makes the chair more 'tactile'); (b) a heavy chamfer at seat level which diminishes up the leg; or (c) a heavy(is) round over at seat level which diminishes up the leg. At some point soon, I'll try things out on the prototype and take some photos to post here.
 
Quick update...

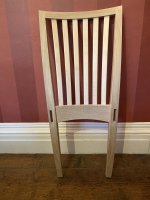
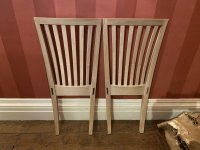
I've glued up one of the chair backs. There are a lot of steps to get to this point (mainly related to fitting the back bars) which I'll try to cover in separate posts at some point, but this feels like a milestone so I thought I'd share a few pictures!

IMG_4233.jpeg

IMG_4235.jpeg

IMG_4236.jpeg

The current state of play is that I've got another chair which isn't too far from this point (maybe a day's work) and back bars glued up (but not shaped) for another two. I've got a dozen more back bars to make.

I might also start looking again at the front end of the chair and the side rails in parallel with working on the backs. The main job on those is making the rebate for the seat base to sit in and I need to think about how to do that (some kind of router template - not my favourite tool if I'm honest). There is no rebate for the back of the seat as that will be supported by the corner braces.
 
That looks great and must be really satisfying.

All finished in time for C_r_s_m_s D_n_e_ ?:)
 
Great stuff Nick. Those joints look spot on.

What glue are you using?
 
Last edited:
Looking good.

Can you assemble the front legs and side rails turn it upside down and do the rebate on the router table with a rebating cutter.
Pete
 
Great stuff nick. Those joints look spot on.

What glue are you using?
PVA (regular titebond).

The guys at Edward Barnsley advised against gluing chairs up with UF resin because you can get cracking noises when stressing the joints because the glue is so brittle.

However, attempting to glue up the whole of the chair back in one go with PVA seemed impossible to me (16 joints!).

My strategy was to glue the bars into the seat rail and then clamp everything up to make sure they're in the right position. I then dismantled it and glued the bars into the top rail, again assembling everything else dry. Finally, I glued the legs on.

It seemed to work well.
 
Looking good.

Can you assemble the front legs and side rails turn it upside down and do the rebate on the router table with a rebating cutter.
Pete
Perhaps. Certainly an option I'll consider, but think I'll be happier doing it with a trim router and do some bits by hand (eg where the rebate goes into the front legs.

I'd actually like to do it all by hand but the rebates aren't straight so it would be difficult. I couldn't just use a rebate plane for example.
 
That looks great and must be really satisfying.

All finished in time for C_r_s_m_s D_n_e_ ?:)
Thanks. No chance! I might try to progress one chair a bit faster than the others so we'll see how far I can get that one before Christmas.
 
Well done it is a serious milestone to achieve.
 
PVA (regular titebond).

The guys at Edward Barnsley advised against gluing chairs up with UF resin because you can get cracking noises when stressing the joints because the glue is so brittle.

However, attempting to glue up the whole of the chair back in one go with PVA seemed impossible to me (16 joints!).

My strategy was to glue the bars into the seat rail and then clamp everything up to make sure they're in the right position. I then dismantled it and glued the bars into the top rail, again assembling everything else dry. Finally, I glued the legs on.

It seemed to work well.
That's why I wondered whether you might have used hide glue.......long open time, repairable, and flexible enough to not give that cracking noise.
 
The late and very great Alan Peters also advised not to use a UF resin glue (ie one that sets 'glass hard') Instead he always advocated PVA simply because there's a certain amount of 'flex' in the hardened glue - Rob
 
That's why I wondered whether you might have used hide glue.......long open time, repairable, and flexible enough to not give that cracking noise.
I dare say that would be a good option. I haven't used it very much before so decided to stick with the devil I know!
 
The late and very great Alan Peters also advised not to use a UF resin glue (ie one that sets 'glass hard') Instead he always advocated PVA simply because there's a certain amount of 'flex' in the hardened glue - Rob
It makes sense

I am using UF for laminating the back bars but that's a different scenario altogether. If anything, that's taking too long to harden off because in current temperatures I can only glue up one bar a day!
 
Thanks. Where are you with your chairs?
That is a long story but in a nutshell I have not been near my chairs since early September. I might get back this week if I am lucky.
 
Perhaps. Certainly an option I'll consider, but think I'll be happier doing it with a trim router and do some bits by hand (eg where the rebate goes into the front legs.

I'd actually like to do it all by hand but the rebates aren't straight so it would be difficult. I couldn't just use a rebate plane for example.
I would be scared about wobbling with a hand held router and leaving a gouge in the rebate, that’s why suggested a router table.

Pete
 
It makes sense

I am using UF for laminating the back bars but that's a different scenario altogether. If anything, that's taking too long to harden off because in current temperatures I can only glue up one bar a day!
UF is the right glue for laminating as for that application, you do need somat that goes off 'glass hard' but for jointing legs etc to the frame then PVA is your 'go to' adhesive - Rob
 
Quick update...

I've glued up one of the chair backs. There are a lot of steps to get to this point (mainly related to fitting the back bars) which I'll try to cover in separate posts at some point, but this feels like a milestone so I thought I'd share a few pictures!

View attachment 36587

View attachment 36588

View attachment 36589

The current state of play is that I've got another chair which isn't too far from this point (maybe a day's work) and back bars glued up (but not shaped) for another two. I've got a dozen more back bars to make.

I might also start looking again at the front end of the chair and the side rails in parallel with working on the backs. The main job on those is making the rebate for the seat base to sit in and I need to think about how to do that (some kind of router template - not my favourite tool if I'm honest). There is no rebate for the back of the seat as that will be supported by the corner braces.
That's looking absolutely lovely Nick. Top job. I don't think I'd ever be tempted by the idea of making chairs (too much repetition for me!) but seeing yours come together is quite inspiring. I'd forgotten the original design intent so, while I'd been enjoying reading the process of you making the bits for the chairs, I hadn't really known what they were going to look like when they came together. Seeing the back together has really shown what beautiful chairs they're going to be.
 
I said I'd have a go at explaining how I fit the back bars.

After the bars have been glued up, the first step is to clean up one edge and then plane them to 30mm width. Cleaning up hardened UF glue is not very easy. My latest approach is to deal with the worst of it using a belt sander before using a scraper to deal with the rest before planing.

I then start fitting the bars into the seat rail. This step is easier than fitting the top end, because the bars are independent of each other and can be fitted individually. Addressing gaps at the other end usually requires adjusting more than one bar. I'll cover that in a separate post.

The mortises I'm fitting the bars into were cut with a domino machine meaning they have rounded ends:
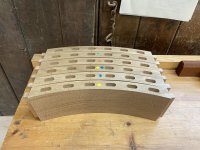
IMG_4091.jpeg

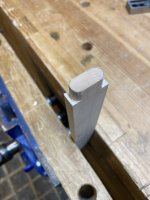
My initial plan had been to square off these mortises and make square tenons on the bars. However, I thought I'd have a go at making rounded tenons on the bars and have ended up doing it that way. I've found that it's just as easy to do it that way and, more importantly, it gives me more scope to round over the edges of the bars without exposing the mortise.

The final point to note about the mortise/tenon is that they are bare-faced with only a small shoulder at the edges. The mortises were cut with a 10mm domino cutter and I had to thickness the bar laminations to give me a 10mm thick bar (5 layers a hair over 2mm thick).

The layout of the tenons looks like this:
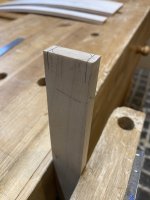
IMG_4258.jpeg

I've slightly guesstimated the angles of the shoulder lines doing the middle two bars at 90 deg, the next two at 91 deg and the outer pair at 92 deg. I should probably angle the tenon at 90 deg to the shoulder line, but forgot(!) and subsequently decided it wasn't really necessary (although see below - I may have changed my mind). I do that for the top end of the bars but the angles are more severe there.

The next steps are to saw the edges of the tenon (I don't go right down to the shoulder line yet - leaving a bit of waste adds another step, but helps protect the shoulders when doing the next steps) and then chisel close to the round line:
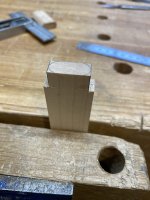
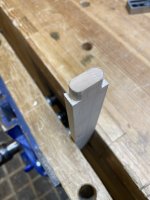
IMG_4259.jpeg

IMG_4260.jpeg

Finally, I use this nice little file to finish the shape. It has a safe edge which makes it perfect for this:
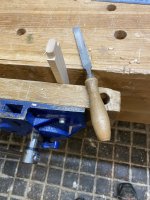
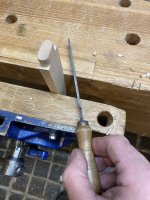
IMG_4261.jpeg

IMG_4262.jpeg

I do a quick trial fit at this point (to make sure the tenon fits in the mortise) before chiselling the shoulder down to the knifed lines.

It's then a case of testing and adjusting each bar to get a nice gap-free fit. To make sure the vertical alignment of the bars is where it should be, I made this dummy crest rail which has slots for the bars to bit into:
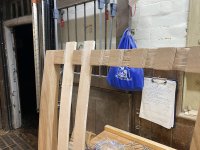
IMG_4266.jpeg

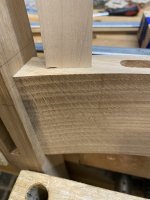
Sometimes there are gaps which need adjusting. This was the worst one (both outer bars were like this so I think I need to revist my 92 deg estimated angle and/or think about angling the tenon slightly to see if I can get a better fit first time):
IMG_4264.jpeg

To correct that, I use a feeler gauge which is same thickness as the biggest gap (0.8mm in this case - they're usually much closer than that!) to scribe around the shoulders - running a knife along the feeler gauge:
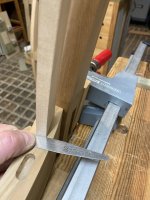
IMG_4265.jpeg

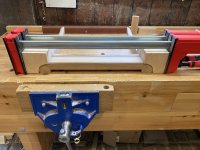
I also made this clamping arrangement (you might have seen Custard posting pictures of this sort of thing) which allows the bars to be pulled down snugly into the seat rail):
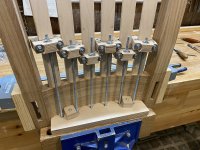
IMG_4267.jpeg

All of the above was an afternoon's work.

I'll take some photos when I fit the top end of the bars and will write that up in another post.
 

Attachments

  • IMG_4260.jpeg
    IMG_4260.jpeg
    127.4 KB · Views: 0
Wow!
Fascinating to see the sort of creative thinking required to get repeatable accuracy on a job like this.
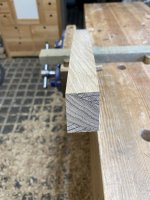
 
Back
Top