• Hi all and welcome to TheWoodHaven2 brought into the 21st Century, kicking and screaming! We all have Alasdair to thank for the vast bulk of the heavy lifting to get us here, no more so than me because he's taken away a huge burden of responsibility from my shoulders and brought us to this new shiny home, with all your previous content (hopefully) still intact! Please peruse and feed back. There is still plenty to do, like changing the colour scheme, adding the banner graphic, tweaking the odd setting here and there so I have added a new thread in the 'Technical Issues, Bugs and Feature Requests' forum for you to add any issues you find, any missing settings or just anything you'd like to see added/removed from the feature set that Xenforo offers. We will get to everything over the coming weeks so please be patient, but add anything at all to the thread I mention above and we promise to get to them over the next few days/weeks/months. In the meantime, please enjoy!

Dr Al's Latest Folly

Very very good Al. I can imagine the sense of satisfaction you must feel after building the lathe and your first handle.
Does it meet your original requirements of being easy to dismantle for storage?
 
Andyp":2fdyo37t said:
Very very good Al. I can imagine the sense of satisfaction you must feel after building the lathe and your first handle.
Does it meet your original requirements of being easy to dismantle for storage?

Not sure yet :lol:

If you don't count the motor, then I think the answer will be yes. The bed separates from the motor frame with two screws and unplugging the 9-way d-type connector that goes to the control panel. My plan is to mount the bed on the wall (if I can clear some wall space somewhere!). It remains to be seen whether I'll deem it necessary to remove the tailstock and banjo, but if so, it doesn't take long.

The challenge is going to be storing the motor / inverter frame. The motor is very heavy (the weight of the inverter and the aluminium extrusion is so little by comparison that it's arguably irrelevant), so I don't want to put it somewhere awkward to get to (or too low down so I have to lift it from floor level). The lack of available space is quite an issue for storing that bit. I imagine it'll stay on the bench for the next few weeks, so I'll think about storage when I have to!
 
Well done.
The tool you made is a roughing gouge, if you get a spindle gouge you will find it much easier to turn the ends of the handle.
 
DaveL":3mqifmle said:
Well done.
The tool you made is a roughing gouge, if you get a spindle gouge you will find it much easier to turn the ends of the handle.

Ooh, that's good to know, thanks. What's the difference?
 
The easy way to show you the two next to each other.
As well as being smaller, the edges of the flute are back from the tip, making it easier to turn in for the bead shape.
9fb9772a4225f7e1611d2e48fe03636f.jpg
cbd6d074d850f2ffe18c2a8ed808f6da.jpg
 
I've alerted the chisel police. You're in the deepest of doodoo's. They'll probably confiscate your lathe as evidence, so you may as well start designing the next one now.
 
Mike G":20thzvfl said:
I've alerted the chisel police. You're in the deepest of doodoo's. They'll probably confiscate your lathe as evidence, so you may as well start designing the next one now.
Ha ha [emoji23]
 
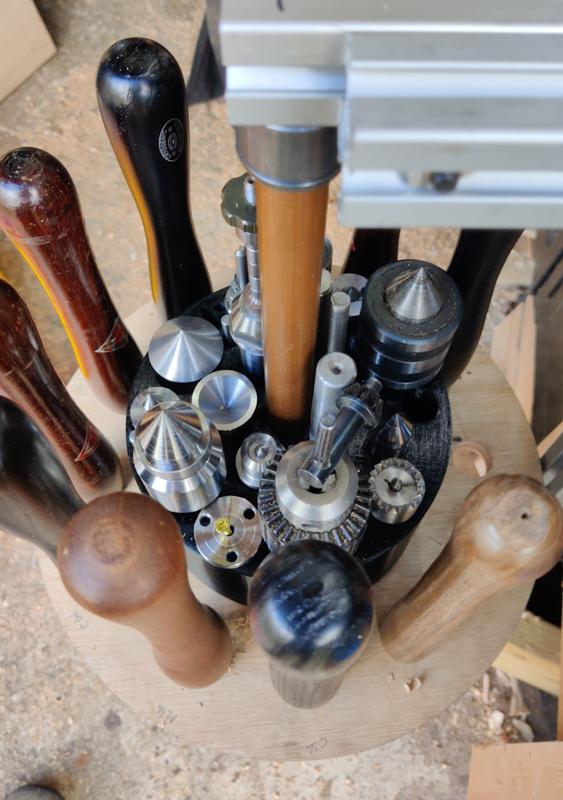
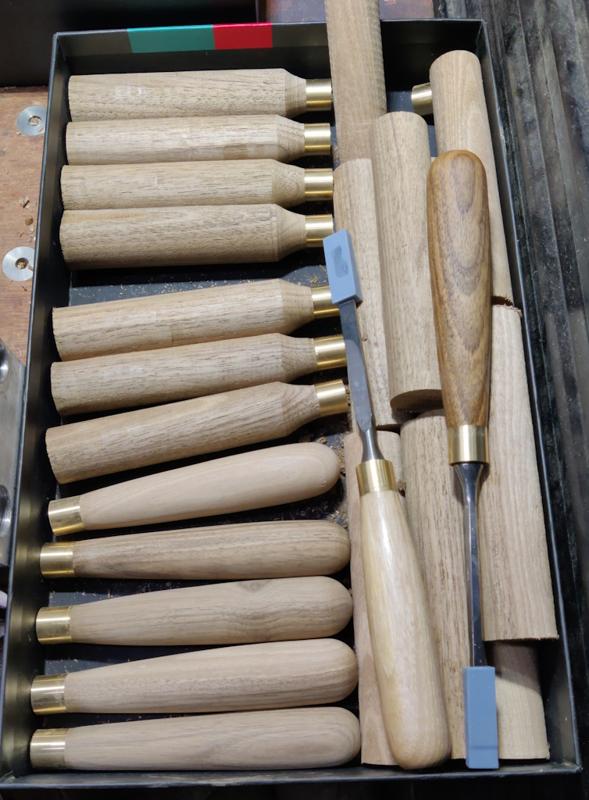
I thought it was probably about time I posted an update on how things have been going with the lathe. Since finishing the lathe I've done a bit of shopping (and a lot of sharpening!): I had a weekend in Lyme Regis and while I was in the area I visited Axminster Tools and bought a chuck and a set of turning tools to get me started. I then visited a superb second-hand tool shop in Beer (Dolphin Antiques) and found that they had a decent selection of used lathe tools and also a big array of second-hand chuck jaws (for £15 a set) that fitted the chuck I'd just bought. I can resist anything but temptation, so I got a bit carried away and now have several different chuck jaw options and a selection of cutting tools to experiment with, along with a cheap second-hand pen mandrel in case I ever get tempted to try pen or pencil making. On note unrelated to woodturning, I also bought a Quirk router as I've been looking out for one for a while. Photo of the haul from Dolphin Antiques:

dolphin_antiques_squander_800.jpg


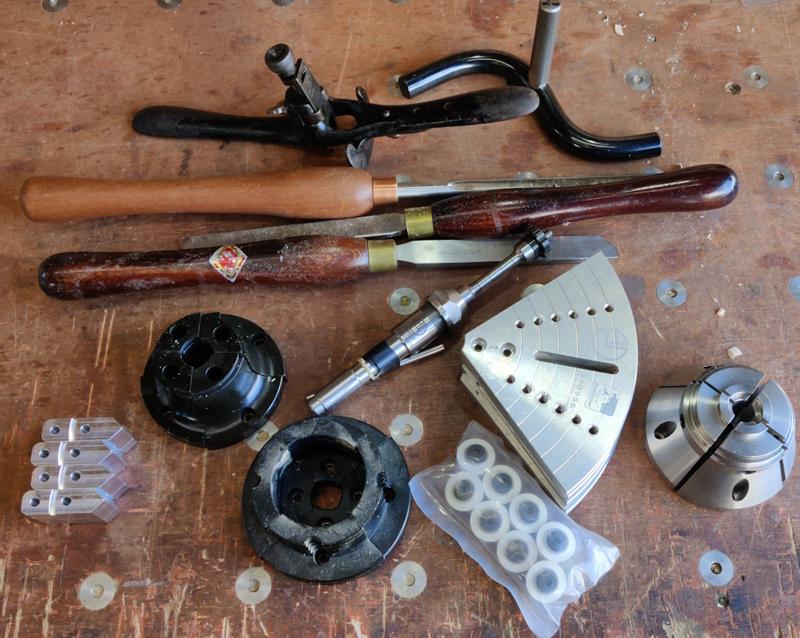
I've no idea at all how useful those chuck jaws will be, but at £15 per set it seemed daft not to buy a few varieties (I also have a set of so-called "Type C Dovetail Jaws" that came with the chuck). The buttons that came with the button jaws are still sealed in their packet, so I don't think the jaws have had much use! Dolphin Antiques had a lot more jaw types that I didn't buy, so I can at least claim to have been a little bit restrained! If it turns out that the jaws aren't especially useful for what I want, I can probably sell them for more than £15 a set anyway.

With a total of 10 turning tools and a selection of chuck jaws, I am now firmly in the "all the gear, no idea" category when it comes to wood turning!

On my return from the trip to Dorset, I tried fitting the chuck and found that it didn't fit the spindle. There were two problems: the threaded section was too long (and hit the back of the jaws) and also the register is too small (33 mm where it should have been 34 mm), so doesn't centre the chuck properly. The thread is a nice snug fit, so it would probably still run true, but I think the register is supposed to be the thing that ensures concentricity.

The over-long thread isn't a big deal: it's easy to remount the chuck on the metalworking lathe and shorten the nose (and I did that to check there were no other problems). However, making the register bigger would be an issue: I could consider shrink fitting some larger steel over the top and then turning it to size, but it would be much easier to just make a new spindle, so that's what I did.

two_spindles_800.jpg


To be honest, it wasn't a surprise that the chuck didn't fit. I had suspected that the chuck-mounting thread might be a problem, so I took some vernier calipers with me to Axminster Tools and measured the nose of one of the lathes in the shop: that was when I realised the register size I'd found on-line was wrong. The nose of the new spindle is made to match the dimensions of one of Axminster's lathes.

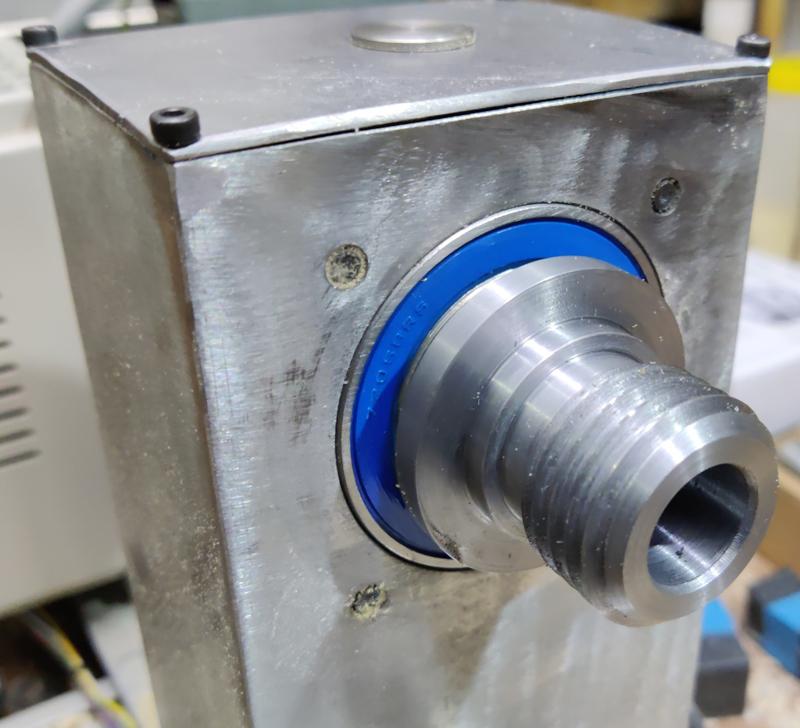
Anyway, the new spindle was made in much the same way as the old one and the chuck now fits very well. While I was swapping the spindle, I also replaced the front bearing with a sealed angular contact bearing - I wanted to swap it for a sealed type and since I had to buy that I figured an angular contact type might be better.

The new spindle fitted with the angular contact bearing:

angular_contact_800.jpg


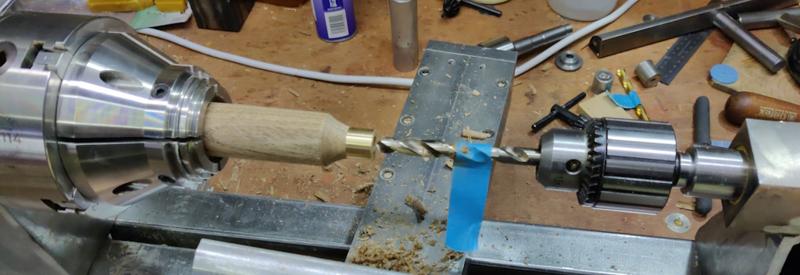
I'm still a long way off making any proper use of the chuck, although I gave it a try just to check it span on the lathe okay:

chuck_experimentation_800.jpg


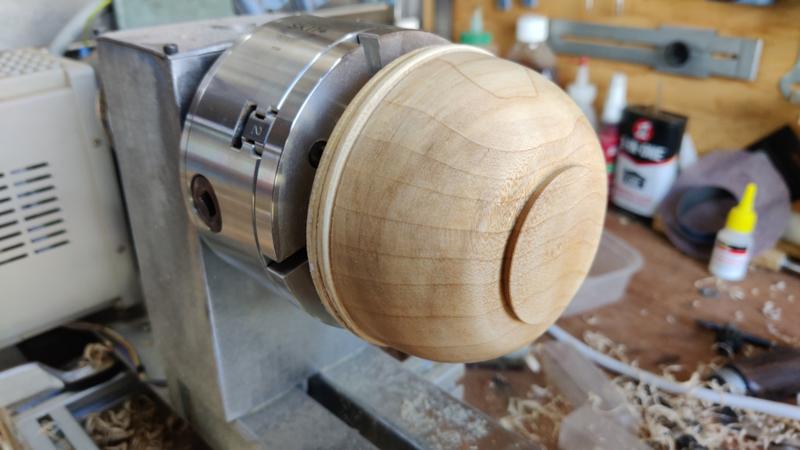
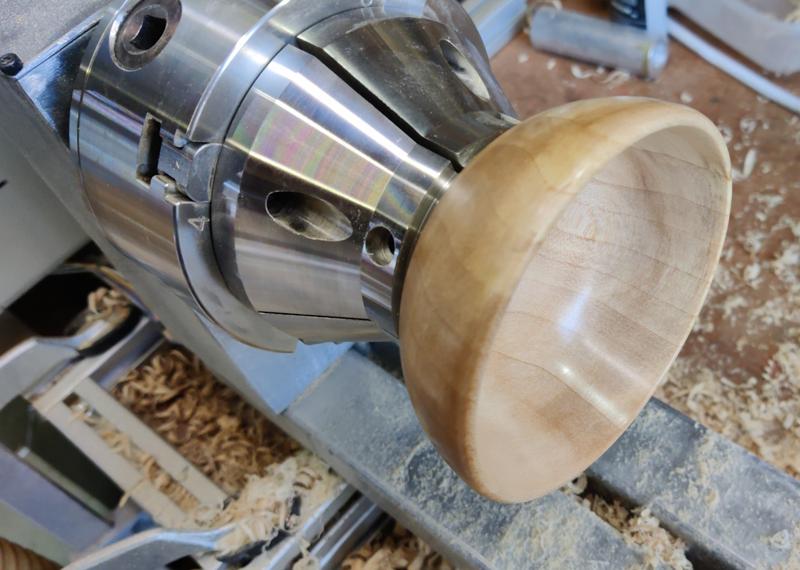
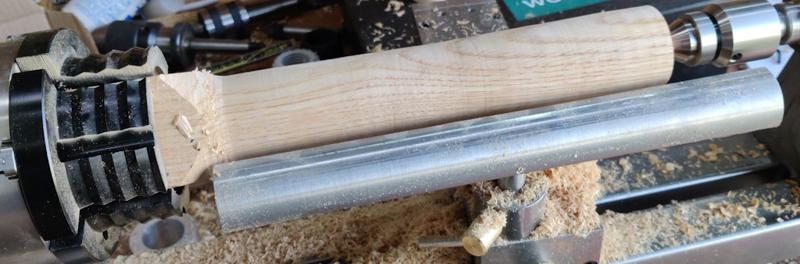
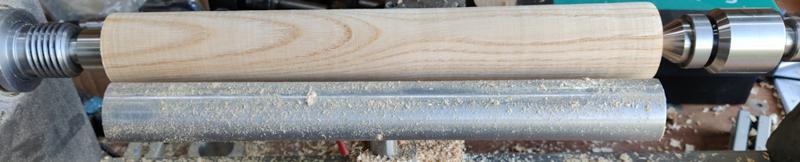
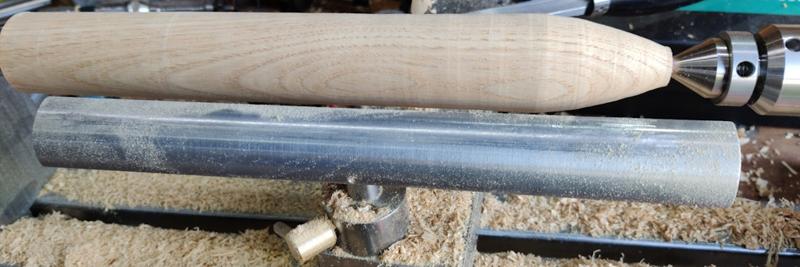
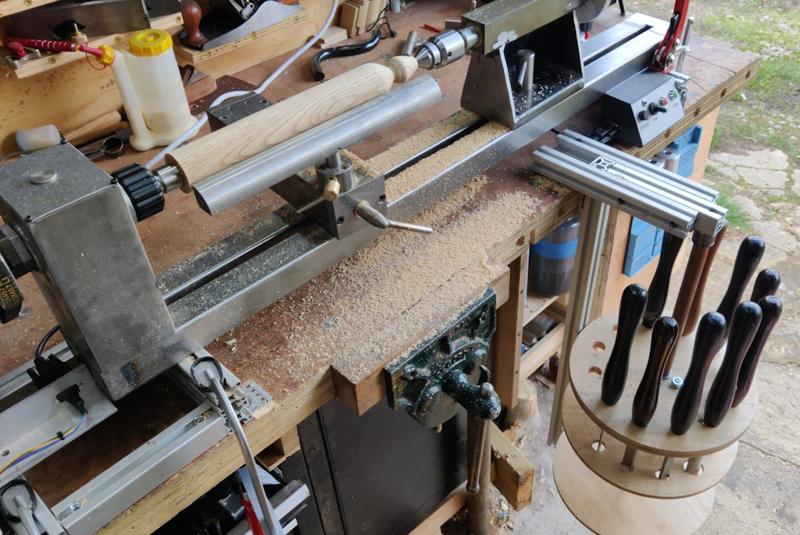
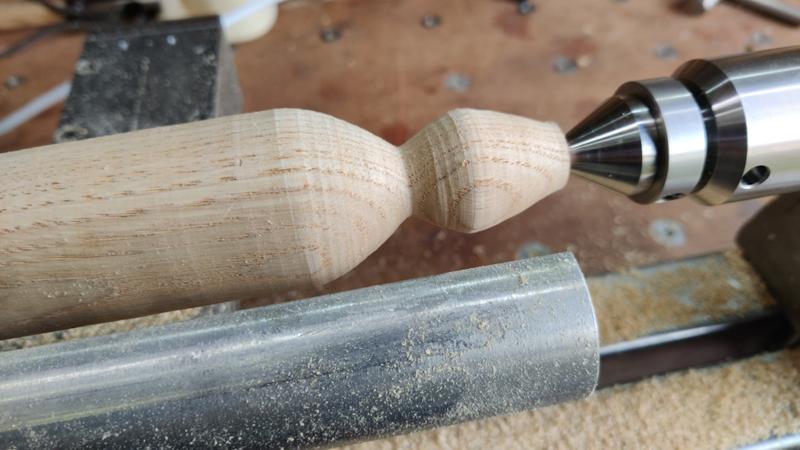
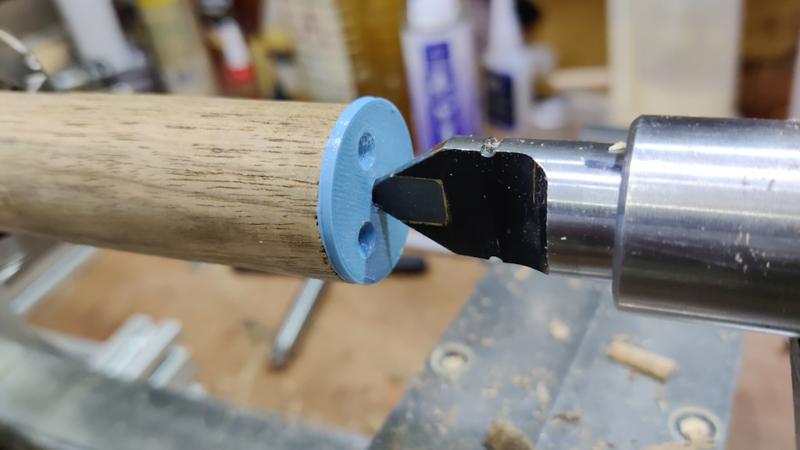
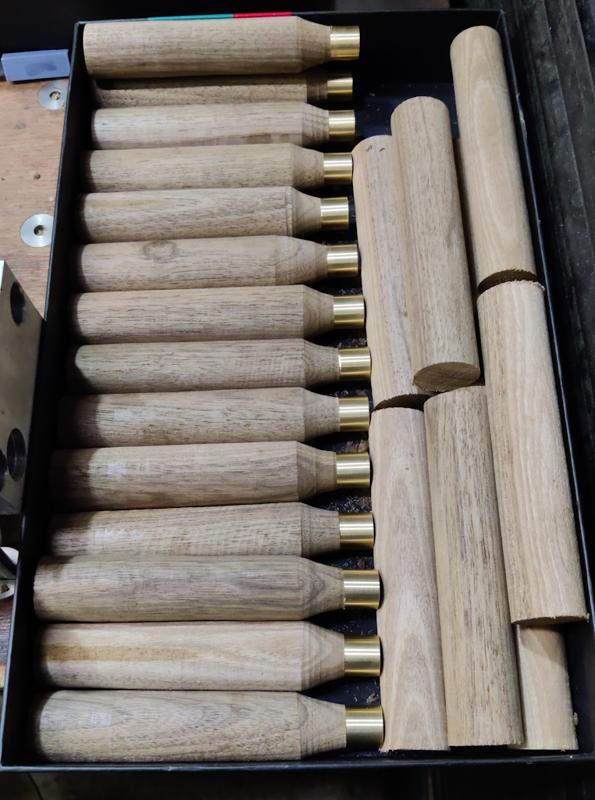
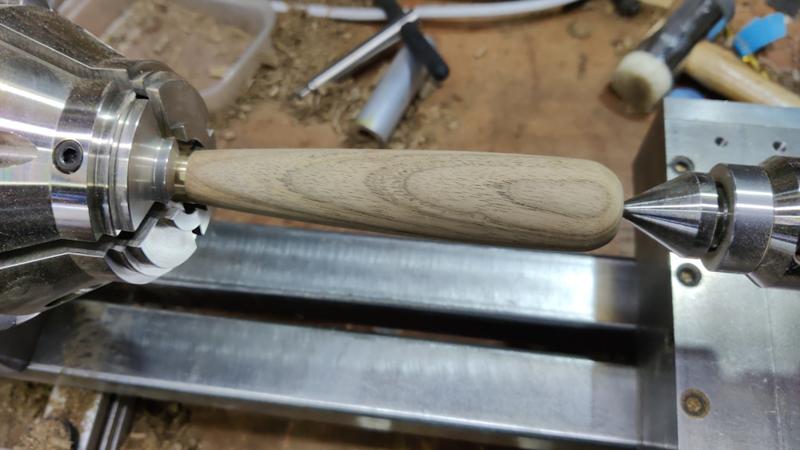
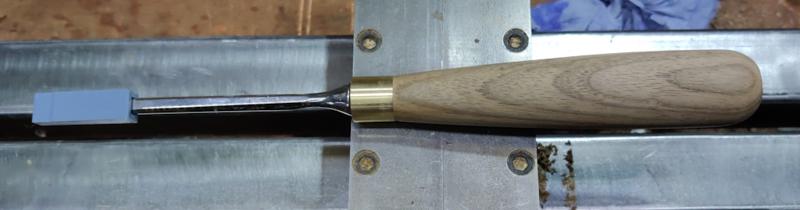
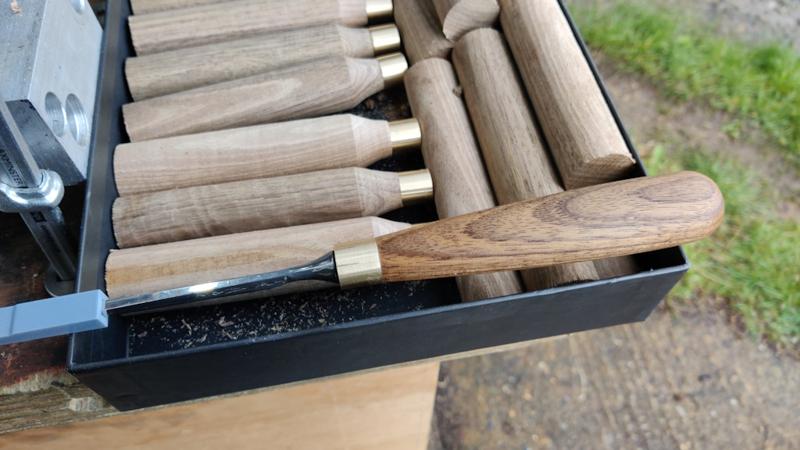
I've been experimenting with the "proper" (as opposed to home-made) lathe tools and I've definitely got a lot to learn. I'm okay with taking a square-section piece of timber and turning it cylindrical with a spindle roughing gouge and then making it smoother with a skew chisel, but I'm a long way off being comfortable with any type of shaping at all. I've managed a few goes at very simple shaping with the skew chisel but also had quite a few less-successful attempts. So far I've been even less successful with a spindle gouge. I'll keep practising!

I've also sent an email to the membership secretary of the Gloucestershire Association of Woodturners to try to join (or at least join the membership waiting list), but haven't heard anything back thus far. They offer courses for beginners, which would be great if I can join, but failing that I might have to look elsewhere for tuition. In the meantime I've got the next week booked off and no plans (and the weather forecast isn't looking great), so I will have plenty of time for more practice (and for watching more Richard Raffan youtube videos).

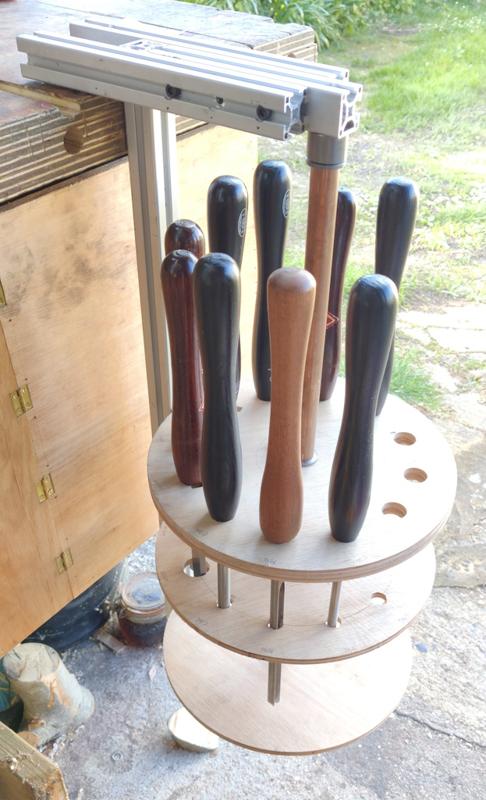
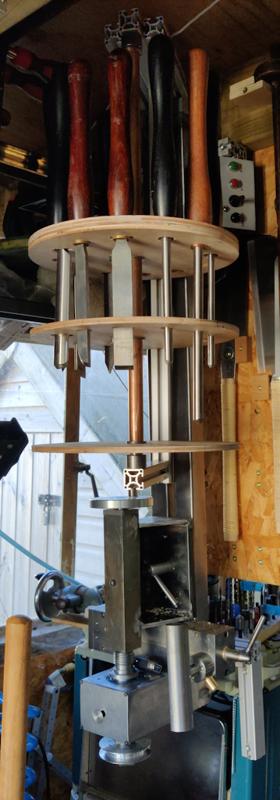
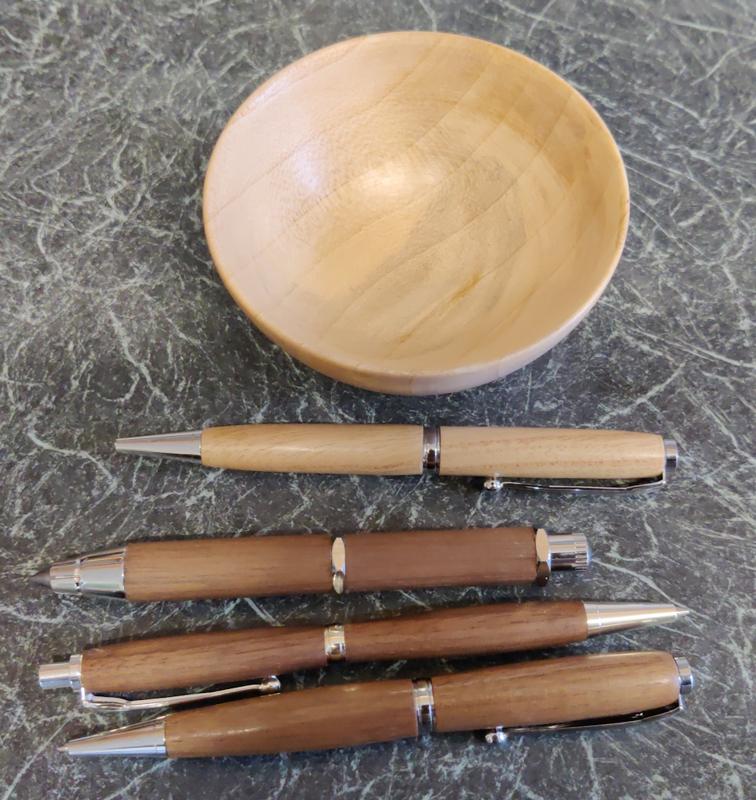
A couple of random photos from my experimentation:

turned_cylinder_800.jpg


turned_cylinder_2_800.jpg


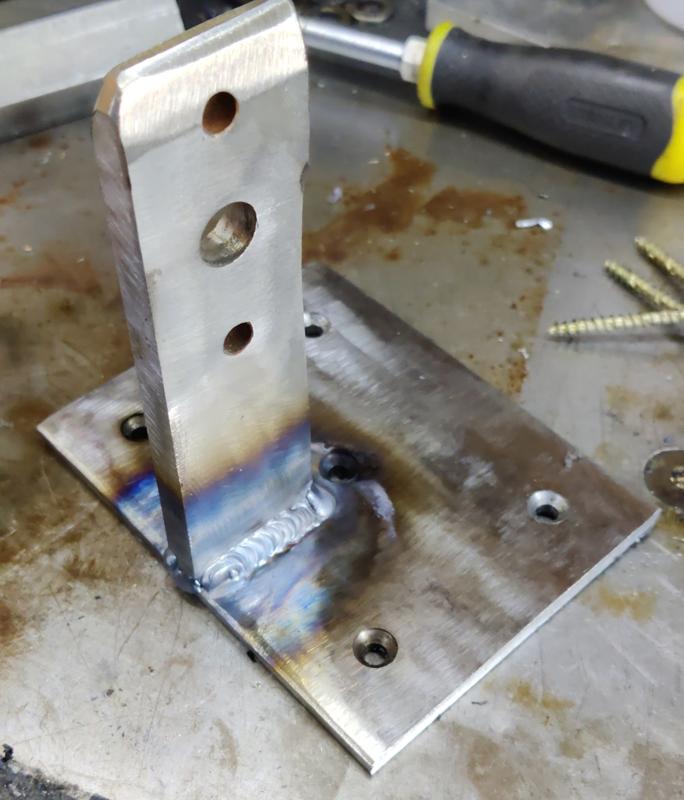
Another thing I've been starting to think about is where to store the lathe and the lathe tooling. For the lathe itself, I got a couple of offcuts of fairly thick steel and welded them together (after shaping one a little with a flap disk and drilling and countersinking some mounting holes in the other):

welded_bracket_800.jpg


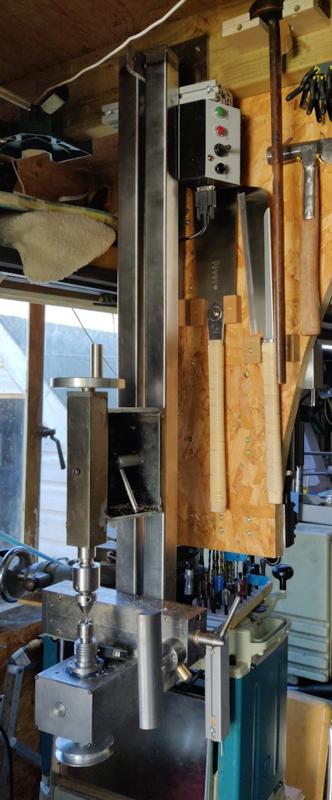
The holes in the "prong" were already there in the offcut I used: they serve no purpose here. That bracket got screwed to one of the joists and I could then mount the lathe bed to the bracket:

hanging_from_welded_bracket_800.jpg


It's right at the limit of what I can lift (and unusually for my lanky frame, I needed a step ladder to feel comfortable getting it up there) and it's probably the first real test of my welding skills as I've never done anything quite so structural before!

The eagle-eyed among you will notice another modification to the lathe: the bed has been raised up a bit higher (it's now on two pieces of 3030 extrusion instead of just one). I was finding the lathe a little low so I thought raising it a bit would help. If I have to raise it any higher again I'll either have to raise the motor at the same time or buy a longer drive belt!

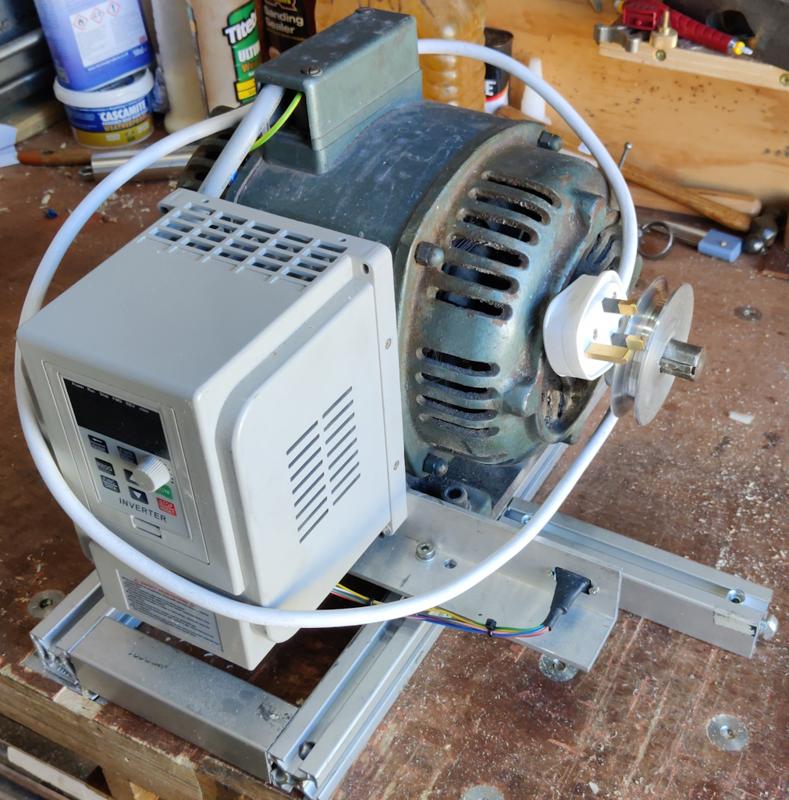
Regarding storage, I still haven't figured out where to store the motor & drive assembly:

no_idea_where_to_store_motor_800.jpg


The motor is very heavy, so I don't want to have to lift it very high up (so no option of hanging it from a joist) or put it low down (so no option of sliding it under something, not that there's any floor space under anything in the workshop!). I'm rather short of options, so it might just have to live on one or other bench for now until I can figure out a better option.
 
There used to be a wonderful SH tool shop in Colyton which closed. I wonder if someone bought the stock and moved into the Dolphin shop.

Looks like you did well. If you'd have let me know you were coming, I'd have put the kettle on. ;)

Your lathe's coming along nicely.
 
AndyT":3fnvxzg0 said:
Excellent news.

As for the storage problem, I'll just offer this little nudge... you need a new project now!

viewtopic.php?f=35&t=2293

I'd need a bigger garden to put the shed in first! I've got a shed but it's absolutely rammed full of stuff.

Malc2098":3fnvxzg0 said:
There used to be a wonderful SH tool shop in Colyton which closed. I wonder if someone bought the stock and moved into the Dolphin shop.

Yes, I loved that shop ("The Toolbox" I think it was called). I think (but might be wrong) that the guy who sells tools in Dolphin Antiques used to own the Toolbox in Colyton but sold it to someone else, who ran it for many years before finally closing it.
 
Most of today has been spent making a simple "Lazy Susan" tool holder. It's made out of some plywood pieces (which were made circular with an electric router) and various bits of steel, aluminium and copper. The frame is made out of more of the 3030 extrusion that I got out of the skip (I've still got loads left; it's really handy stuff to have around). The bar that runs through the middle is a bit of 12 mm diameter mild steel (the cheap stuff sold for construction applications). The ends of the bar were turned down to 8 mm and then various bushes were made out of 30 mm EN1A to centralise the 22 mm copper pipe that separates the layers. The ends of the bar fit into some more steel blocks that are screwed to the aluminium extrusion and have a hole bored for a skateboard bearing (which are very cheap to buy and I have quite a lot of).

lazy_susan_800.jpg


As the bar runs in bearings, it spins very freely (possibly a bit too freely: it rotates when there's a gust of wind!). It's attached to the bench using a simple 20 mm diameter bit of steel screwed to one of the bits of extrusion: that drops into a dog hole on the bench. As a result, it can be placed anywhere along the length of the bench, although I found this position quite comfortable for use:

lazy_susan_and_lathe_on_bench_800.jpg


I also drilled & counterbored some holes in a bit of 25 mm × 50 mm aluminium bar and screwed it to the holes in the end of the lathe bed:

aluminium_block_800.jpg


The bigger of those holes is 21 mm diameter and allows the tool holder to hang off the end of the lathe bed when the lathe is stored away:

lazy_susan_hanging_up_800.jpg


As well as the motor storage (which I'm putting off for now) I still need to figure out storage for the chuck & jaws and also all the various Morse taper bits and bobs. For the latter, I might make something that fit on the Lazy Susan in-board of the tools, but I haven't decided for certain yet.

After all that, I thought it would be good to have another go at turning with a spindle gouge and I think something clicked this time: it felt a lot more in control. I think (although I'm not certain) that when I'd been experimenting before I was trying to control the tool with my left hand (by the rest), whereas today I was doing a lot more with my right hand (on the handle) and it felt a lot easier. I'll keep practising, but this simple bit of shaping seemed fairly straightforward:

spindle_gouge_shaping_800.jpg


The finish is a bit rough (lots of lines where I didn't maintain continuous smooth movement: a problem I suffer when TIG welding as well!), but hopefully that will get better with practice.
 
How are you going to lock the drive shaft when you want to remove the chuck?
On lathes that us normal people ( :) ) buy, the shaft has flats to take a spanner for this.
 
Lurker":2cyle2hz said:
How are you going to lock the drive shaft when you want to remove the chuck?
On lathes that us normal people ( :) ) buy, the shaft has flats to take a spanner for this.

Mine never gets stuck tight enough that I can't get it off just holding by hand. The secret is a thin fibre washer on the spindle but many turners just cut a washer from an ice cream or butter tub which works just as well.
 
Lurker":1wq12omg said:
How are you going to lock the drive shaft when you want to remove the chuck?
On lathes that us normal people ( :) ) buy, the shaft has flats to take a spanner for this.

So far, it's just been a case of holding onto the pulley and twisting the chuck, but if I need to lock the spindle it's very easy: I use the same method I used to tighten the nuts that hold it in place.

The spindle has a cross-hole drilled in it, visible in this picture:

two_spindles_800.jpg


That hole, combined with.a tommy bar & a little hole in the headstock lid, makes locking the spindle very simple:

0803_headstock_lid_09_cap_with_tommy_bar_800.jpg
 
It felt about time to do another update on my progress. I feel like I'm getting the hang of the spindle gouge and the skew chisel. I've also used a parting tool a couple of times and that was very straightforward. The bowl gouge, however, is proving to be a lot more challenging!

Anyway, a few things that I've done. First of all, the 3D-printer has been rather busy. It has made cylindrical thingy that sits on the Lazy Susan tool holder and holds various Morse Taper widgets and such-like:

3dprinted_morse_taper_holder_800.jpg


Similarly, I made a liner for the box that the chuck came in. The liner holds all of the jaws I bought from Dolphin antiques as well as the bits and bobs that came with the chuck. There isn't much room for growth, but I can't imagine me needing any other chuck bits for a long time (and there isn't really any more room in that box anyway). I can't close the lid with the box as-is, but I can always replace the cardboard box with a wooden one if/when the inclination arises:

3dprinted_chuck_box_liner_800.jpg


The Altoids tin is full of the M5×12 screws that hold the jaws to the chuck (and which came with every set of jaws, so I have loads of them in there).

With all the chuck jaws laid out, I also thought it would be useful to make a custom version of Axminster's "Speed Sizer", with holes for all the jaws that I have. I've used it a couple of times so far and it seems to work very well:

3dprinted_speed_sizer_800.jpg


One of the things I used it for was making a couple of bowls (more on that later). This was a work-in-progress shot of the first one (made out of Sweet Chestnut) - as you can see, those button jaws only just fit on my little lathe!

button_jaws_just_fit_800.jpg


To say that making that bowl was fraught would be a bit of an understatement. I don't think I've quite got the hang of the bowl gouge. On the second bowl attempt (photo coming later), I was okay using it to shape the outside of the bowl and also to roughly shape the bottom of the inside. However, I'm really struggling to figure out how to hold it to cut the inside near the rim. I can do what I think is a scraping cut (with the open mouth of the flute roughly parallel with the inside of the bowl), but when I try to ride the bevel and do a more conventional cut, it all goes wrong. I think I'm probably working on an unsupported bit of the bevel, but I can't quite figure out what to do with my hands to make that not be the case.

The next photo shows the marginally more successful second bowl attempt (made out of Sycamore). A lot of scraping was used to sort out the mess I made with the bowl gouge! I also had a go at making a couple of pens (Sweet Chestnut and American Black Walnut, both with sanding sealer followed by wax) and a couple of pencils (both American Black Walnut and both finished with Mike's Magic Mix) - while I'm not that interested in turning pens and pencils, they were quite useful as spindle gouge practice without worrying too much about wasting lots of wood!

sycamore_bowl_and_pens_800.jpg


With all those various practice pieces done, I couldn't really put the chisel handles off much longer. A rough guide to the process I went through follows.

The first thing I did was use a roughing gouge to make a load of cylindrical bits of English Walnut. I then cut each length into three pieces, resulting in a big pile of cylinders, all about the same diameter and length. Each one was then held in the chuck and a little 3D-printed gauge thing (basically a miniature version of the "Speed Sizer" thing) was used to mark the size of the ferrule spigot:

chisel_handles_marking_size_800.jpg


A skew chisel was then used to shape the spigot. I started with a peeling cut to get it roughly down to size, then used the pointy end to cut the shoulder. I then crept up on the final size using planing cuts and checking against the ferrule often. Most of the ferrules went on with a bit of mallet-based persuasion; a couple slid fairly smoothly so I added a few drops of superglue to hold them more firmly in place (although I imagine they'll be pretty rigid once the chisel blade is shoved in).

Once the ferrule was fitted, I used the skew chisel again to skim the end down flush and then a spindle gouge to rough out the approach to the ferrule.

Finally (for the first setting), I drilled a 9.4 mm hole in the end.

chisel_handles_first_op_800.jpg


Rinse and repeat...

chisel_handles_lots_of_first_op_800.jpg


With lots of them done (more than I need, but I wanted some spares in case of problems), I held the ferrule in the chuck for shaping:

chisel_handles_ready_for_second_op_800.jpg


The spindle gouge did the bulk of the work, then I took a light planing cut with the skew chisel. I'm happy to say that (so far) I haven't had a single "catch" from either the spindle gouge or the skew chisel when making these chisel handles (unlike my bowl-making endeavours!)

chisel_handles_ready_for_sanding_800.jpg


The last thing to do before removing the handle from the lathe was a bit of sanding (150 grit and then 240 grit):

chisel_handles_sanded_800.jpg


Despite being in batch production mode, I couldn't resist fitting a handle to check everything looked okay...

chisel_handles_fitted_800.jpg


... and applying a quick coat of Mike's Magic Mix for good measure:

chisel_handles_first_one_oiled_800.jpg


The progress so far:

chisel_handles_progress_so_far_800.jpg


The pale coloured handle fitted to a chisel was my trial run to check the process. The wood is still English Walnut, but it's mostly sap wood (it's not obvious from the photo, but it has been oiled and yet is lighter than the other un-oiled handles). I'll almost certainly remove the blade from that handle and replace it with one of the newer ones once I've made them all.
 
Well done, you!

FWIW, and delving back into my memory of turning at school, (the WW master and me had a business going with turned items), the practice to attach a bowl blank to a flat faceplate, was to have a sacrificial piece of ply which was screwed from the faceplate and the ply was glued to the blank by gluing cartridge paper between them both. It never failed to hold the bowl being turned and could easily be split at the end of the job. (I suppose, the masking tape/CA glue/masking tape trick is the modern version)
 
Well done Al.

Just a couple of things on the ferrules. Firstly, where did you get them from? Secondly, I cringed a bit when I saw a ferrule in a chuck. Couldn't you have done that bit of turning before mounting the ferrules?
 
You don’t hang about do you. Amazing output after just a few days. Your organisation and tidiness puts me to shame.
Fwiw I use ROS sanding discs bought in bulk for sanding along with abranet.
Kudos for getting to grips with the skew. I never use it and would probably have made those handles with just a roughing gouge and spindle gouge and maybe a scraper.

If you do have time to say hello again in June I’ll try and make my workshop a little tidier and perhaps we can have a play with my toys and methods.
 
Mike G":1az8nnnp said:
Well done Al.
Thanks Mike

Mike G":1az8nnnp said:
Just a couple of things on the ferrules. Firstly, where did you get them from?

A bit of brass bar & a handy metalworking lathe :D

I know I could have used copper pipe, but brass looks good with Walnut.

I've since bought some brass tube in case I want to make more (to save on drilling most of the bar away).

Mike G":1az8nnnp said:
Secondly, I cringed a bit when I saw a ferrule in a chuck. Couldn't you have done that bit of turning before mounting the ferrules?

Maybe, yes. I played with a few ideas of different approaches but ended up preferring this one (which I nicked from a Richard Raffan video, although he turned the ferrule spigot between centres & drilled the hole with a pillar drill I think). I liked this approach for two reasons:

  1. I could drill the hole at the same setting as turning the spigot, so they should end up concentric
  2. I could do the rest of the turning with both ends supported

The ferrule diameter is the same size as the cylindrical size of the chuck jaws, so they hold it well. The ferrules are very firmly held (either requiring mallet persuasion or getting superglue to be safe), so the ferrule isn't going anywhere. It seemed fine to me; what was making you cringe?

Andyp":1az8nnnp said:
You don’t hang about do you. Amazing output after just a few days.

It's been nice having a week off without many plans: plenty of time to experiment (play!)

Andyp":1az8nnnp said:
Your organisation and tidiness puts me to shame.

:o 
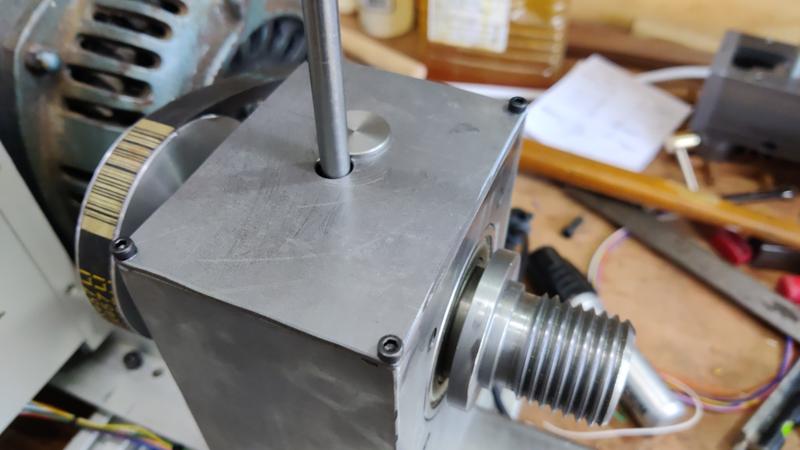
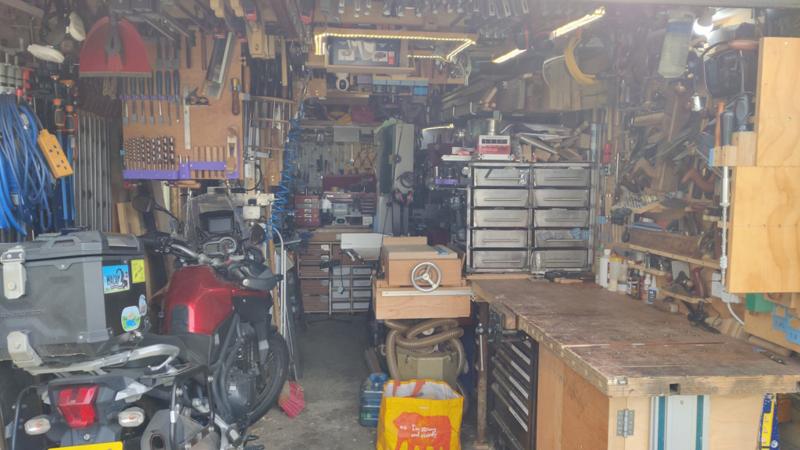
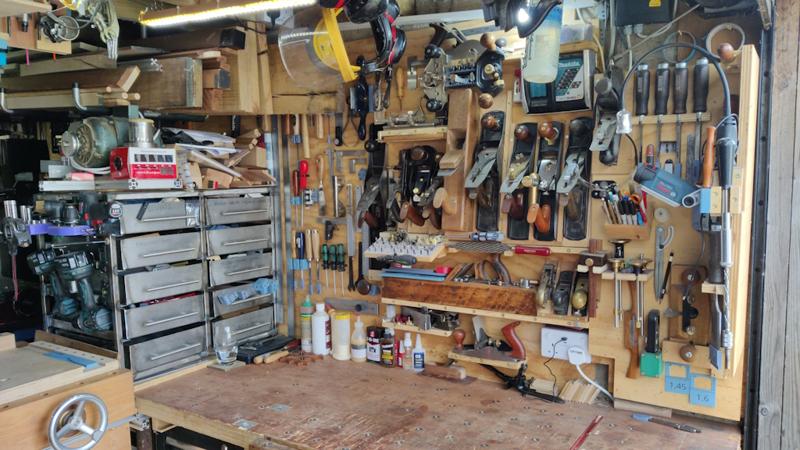
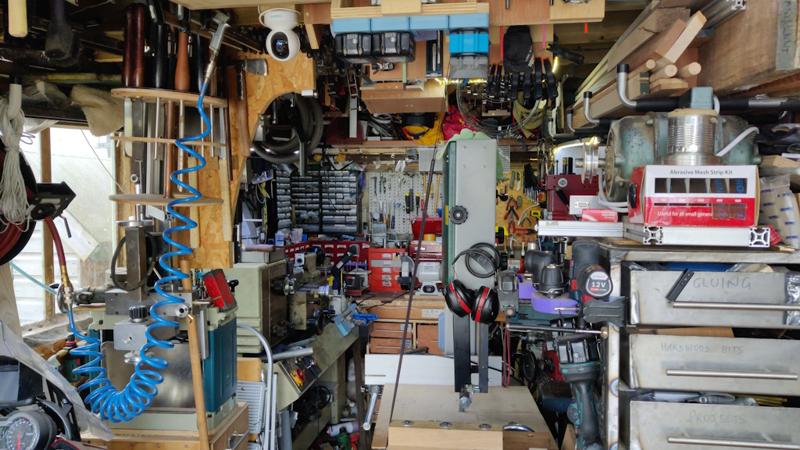
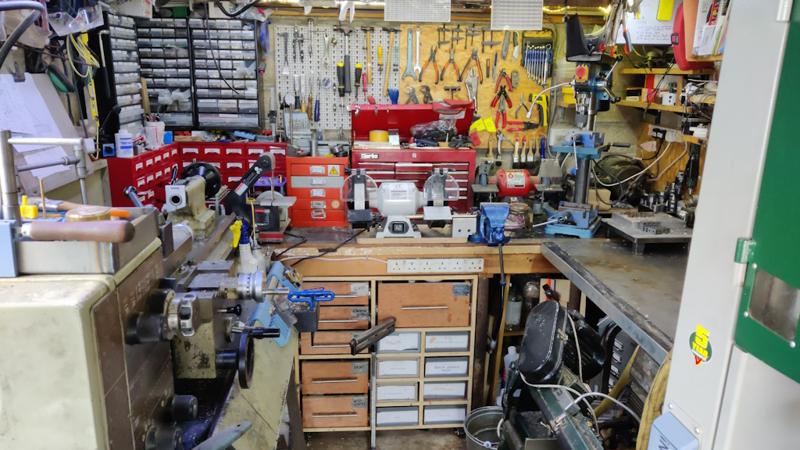
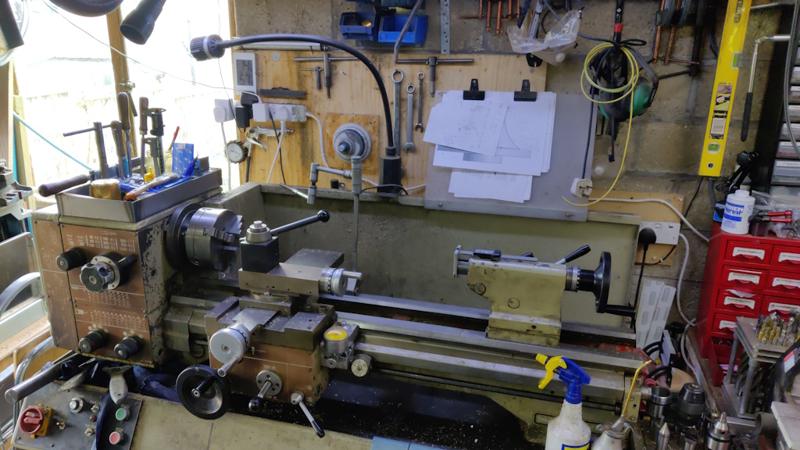
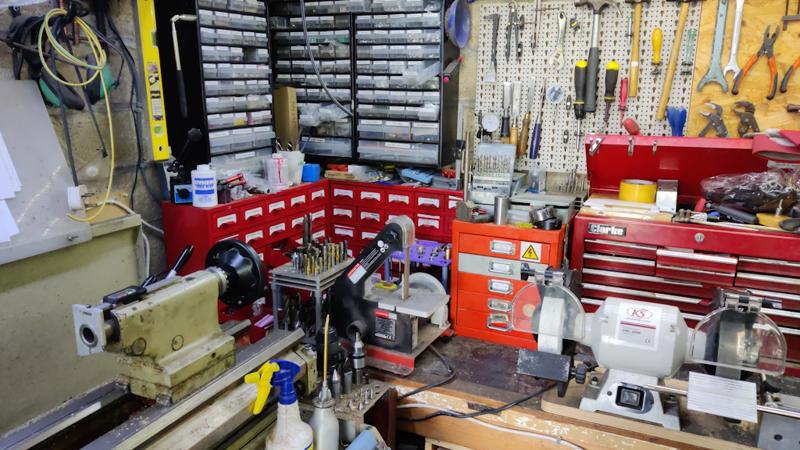
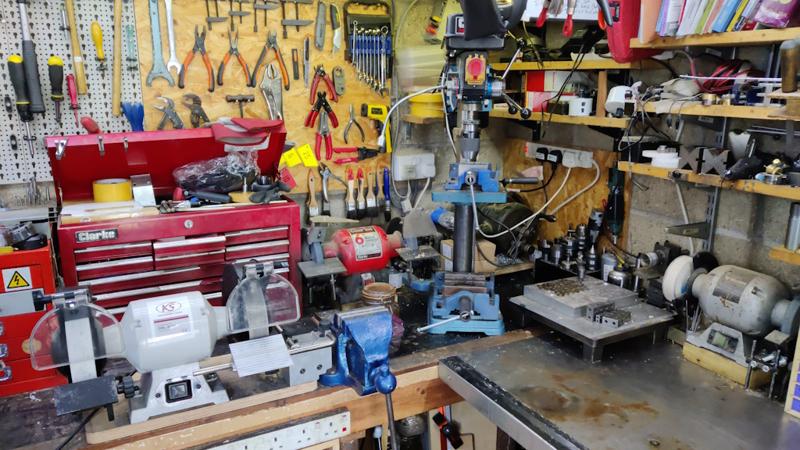
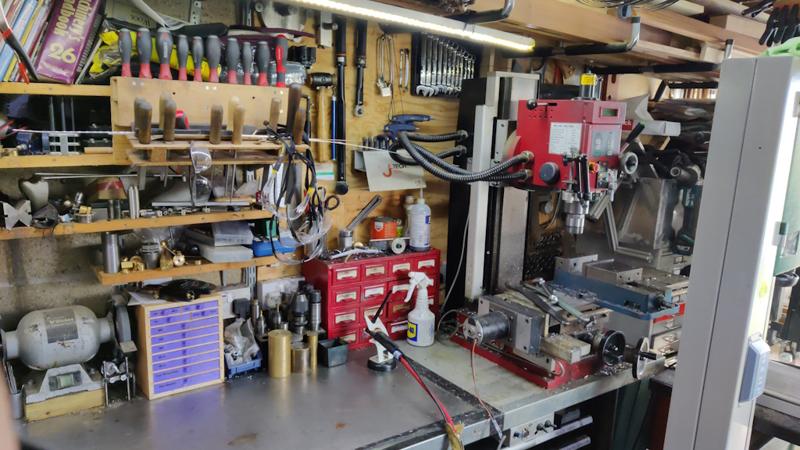
You wouldn't say that if you'd been in the workshop or if I'd taken slightly more wide-angle shots :lol:

Andyp":1az8nnnp said:
Fwiw I use ROS sanding discs bought in bulk for sanding along with abranet.
Kudos for getting to grips with the skew. I never use it and would probably have made those handles with just a roughing gouge and spindle gouge and maybe a scraper.

I wouldn't say I'm completely au fait with the skew, but it's definitely easier than it was at first. I still struggle going left-to-right with it (the only way I've found to do this is to swap hands & that reduces control a lot). Travelling right-to-left is okay though and that's the direction I'm cutting about 2/3s or more of the chisel handles.


Andyp":1az8nnnp said:
If you do have time to say hello again in June I’ll try and make my workshop a little tidier and perhaps we can have a play with my toys and methods.

Sounds good to me :obscene-drinkingcheers:
 
Dr.Al":t3akv9vx said:
.....The ferrules are very firmly held (either requiring mallet persuasion or getting superglue to be safe), so the ferrule isn't going anywhere. It seemed fine to me; what was making you cringe?....

A steel jaw being tightened onto a softish piece of metal.
 
Mike G":eeqm7q57 said:
Dr.Al":eeqm7q57 said:
.....The ferrules are very firmly held (either requiring mallet persuasion or getting superglue to be safe), so the ferrule isn't going anywhere. It seemed fine to me; what was making you cringe?....

A steel jaw being tightened onto a softish piece of metal.

Yeah, fair enough. I guess I'm quite blasé about that as I do it all the time on the metal lathe.
 
I had another go at a bowl yesterday and it went a bit better this time, although I wouldn't go so far as to say I enjoyed the process. I started with the other half of the bit of sycamore that I turned the last bowl out of. I mounted it using a screw chuck and turned the outside with the bowl gouge. That went fairly smoothly (and the 3d-printed speed sizer thing worked well again):

sycamore_bowl_outside_800.jpg


It then got reversed and held on the dovetailed base and the inside was turned. This went a lot better than last time - I don't think I'd realised that I needed to have the handle end of the bowl gouge right over the far side of the lathe. A shorter handle would probably have helped: the bench top kept getting in the way!

sycamore_bowl_inside_800.jpg


Anyway, it went okay-ish (there was still a fairly amount of scraping to tidy things up, followed by lots of sanding, but no actual catches). Overall though, I didn't really enjoy making it and I can't see me making many more bowls, so I guess I don't have to lose too much sleep over whether my technique is quite right or not.

I also finished off the shaping of the rest of the handles yesterday:

chisel_handles_ready_for_oiling_800.jpg


They had their first coat of Mike's Magic Mix yesterday and the second one today (I'll probably leave it at two coats):

chisel_handles_oiled_800.jpg


I've spent almost the entirety of today tidying the workshop. It was in an awful state and it had been a long time since I last had two clear benches. It was a real struggle at times to figure out what to do with some of the stuff, but in the end it came out looking good, so I took some photos (something I try to do on the rare occasions that the workshop is tidy!)

tidy_workshop_1_800.jpg


tidy_workshop_2_800.jpg


tidy_workshop_3_800.jpg


tidy_workshop_4_800.jpg


tidy_workshop_5_800.jpg


tidy_workshop_6_800.jpg


tidy_workshop_7_800.jpg


tidy_workshop_8_800.jpg
 
I reckon that shed gets a top level score on the "Density of Stuff" index!
 
What happens when somebody (the missus?) places a hypothetical order for a dining table to seat six+? :lol: - Rob
 
Back
Top