• Hi all and welcome to TheWoodHaven2 brought into the 21st Century, kicking and screaming! We all have Alasdair to thank for the vast bulk of the heavy lifting to get us here, no more so than me because he's taken away a huge burden of responsibility from my shoulders and brought us to this new shiny home, with all your previous content (hopefully) still intact! Please peruse and feed back. There is still plenty to do, like changing the colour scheme, adding the banner graphic, tweaking the odd setting here and there so I have added a new thread in the 'Technical Issues, Bugs and Feature Requests' forum for you to add any issues you find, any missing settings or just anything you'd like to see added/removed from the feature set that Xenforo offers. We will get to everything over the coming weeks so please be patient, but add anything at all to the thread I mention above and we promise to get to them over the next few days/weeks/months. In the meantime, please enjoy!

Return of the shed thread (a little more progress)

Probably too late now but I've cut rolls of insulation to odd widths before using an old carving knife while it is still in the wrapping.

Great thread and enjoying the honesty :)
 
Robert":187we6gd said:
Probably too late now but I've cut rolls of insulation to odd widths before using an old carving knife while it is still in the wrapping.

Great thread and enjoying the honesty :)

Nope, perfect timing in fact! I should only need half the second roll, so if I cut it whilst wrapped as you suggest I sold be able to keep the second half safely trapped in th elastic wrapper. Thanks for the tip.

Terry.
 
Good luck to you Terry, and well done for even venturing out in this weather some of us wimps have barely left the house, although this is not entirely due to the out side temp.
 
Got up on Saturday with a real feeling that it was going to be a really productive day. No rain, warmer and even a few brief glimpses of the sun, if nothing else the weather was a lot more conducive to working on the workshop.

First job of the day was to finish the final third of insulating the roof and then adding the second skin of OSB.

Thanks again Robert for the tip about cutting the insulation before unwrapping it. I knew I only needed half the roll, so cut the plastic wrapper and then because it is perforated at the halfway point just broke the roll in half. Very neat and now I half a packaged up half roll for some other, as yet to be defined purpose.


The whole process went pretty well and was finished in just under two hours. I'm pretty happy with the result, as per this picture from a window upstairs in the house.


The top roof skin has reinforced that the workshop isn't perfectly square, as by the end of the process the edge of the roof boards were about a cm from the rear edge of the roof joists. But hopefully the final roof treatment will hide such sins, and even if not it isn't a disaster as this is in the least accessible and therefore visible corner of the of the workshop.

Whilst working up on the roof I had a fairly long chat with my neighbour. He was asking a few questions which I thought at one point may be heading in an awkward direction, such as "if I want to build a shed like yours would I need planning permission" and "OK, so I can build to 2.5m, so how high is your shed then". I took some time to explain both the planning and building regulations rules for outbuildings and made it clear that the design of my workshop had been tailored to mean neither planning nor buildings regs approvals were required. I think, given the detail I went into, he would have been hard pressed not to have reached the conclusion that my workshop is perfectly legitimate.

After finishing on the roof I moved on to insulating the walls. I have to say the cavity insulation is really easy to work with, cuts easily, no hint of sagging and where more than one piece is used in a particular space it knits together really well. Because my studs are far from evenly spaced there was a fair bit of cutting to fit, and when I did have studs the perfect distance apart it made clear how much easier that made it! That said it all continued to go very smoothly.

I insulated a section I intended to cover with a single run of breather membrane. I then made good on a promise to take my son for a bike ride.


When we got back I prevailed on SWMBO for a bit of help. I could have put it up myself, but it would have been slower and the end result no doubt less tidy. With SWMBO it was dead easy. Last week I had bought a cheap electric Tacwise stapler from Screwfix, if was very effective for putting up the membrane.

I ended the day very happy with what I had achieved but not looking forward to the VAT return I had to submit before a family evening of bowling and pizza.


Back up this morning and the weather was even better, what joy. At times today I was on the verge of taking off my sweatshirt which would have left me working in just a T-shirt.

The process of stuffing the frame with insulation went smoothly but is not particularly interesting to recount. But I would like to show some attention to detail!


Then it was a bit more assistance from SWMBO, as she was supposed to be cooking dinner, ironing and any number of anything I really appreciate her help (just don't tell her I said that). After about an hour it was all covered in membrane.


Andy mentioned previously that he did not envy the access restrictions of my site. Well today was almost certainly the worst in terms of cramped working room. Getting insulation into the cavities along the wall next to the fence was very hard, getting the breather membrane down there was even worse. But in the end I don't think SWMBO and I did a bad job of it. You can probably also see that the workshop is now holding the fence up, so I'm going to have to turn my attention to that very soon as that brace of offcut OSB can't stay there much longer.


I'm very happy with progress this weekend, long may the bright weather continue!

Terry.
 
Well done Terry!! It's great when the weather doesn't interfere, and you achieve pretty much what you set out to achieve, isn't it?
 
I reckon that you neighbour is hankering after a workshop like yours and is waiting for you to offer to build it for him.

Cracking progress BTW
 
tabs":2e9w3nb7 said:
Have you got any slope at all on your roof?

I think this photo answers for Terry:

Wizard9999":2e9w3nb7 said:
url=http://s1378.photobucket.com/user/wizard99999/media/DSCN2275_zpsragvh8ha.jpg.html]
DSCN2275_zpsragvh8ha.jpg
[/url]
 
OK, so a long time since I have posted an update. Mainly it is because I am pretty busy at home and work and I have struggled to find the time to do both work on the workshop and write it up, so I decided to focus on the former.

First step, after much waiting was to get a nice EPDM roof on top. This was not my favourite job so far as I was worried I would mess it up and I only had one chance to get it right. It took a bit of time to lay out the covering and get it square and correctly positioned on the roof with the correct overhangs. Then is was simply a case of following the instructions. Fold back half way, apply water based adhesive to main part of roof, pull roof back into place. I did it a quarter of the roof at a time working from the middle. Photo credits to my son (and apologies for the construction professional's trousers, trust me there are far worse pictures with a lot more undergarment on show!)


This is actually the last section. I did not use anywhere near as much of the water based adhesive as I had anticipated, maybe my calculations were out maybe I just used to little, I guess only time will tell.


Around the edge I then folded back the covering and applied contact adhesive to both OSB and the roof material itself. Two difficulties here, first the fact I did not leave a straight line with the water based adhesive so I was trying to match an erratic application on the OSB on the membrane. Second problem was the unforecast hail storms and sub-zero temperatures that followed. Anyway, I pressed on and got it all down with some rollering of the edge of the roof.


If you look closely in the picture above you can just see some of the hail, trust me it got a lot heavier soon afterwards.

The next task was to deal with the overhang of the roof at the front. I need to ensure ventilation of the roof space so I ordered some insect mesh. I saw online a lot of people seem to drill holes to allow for ventilation, but I wanted to maximise ventilation, so went for 'leess OSB, more empty space'. Then it was a case of stapling the mesh on the underside of the two prepared sections of OSB.


It seems I failed to take a picture after fixing, I'll try and fix that omission later in the week. But I was very pleased with the end result, the OSB nicely traps the EPDM in place as it has been folded over the front of the roof.

Most recent work has been to start filling in the final open spaces. I made a door for my hatch and made one and a half doors for the front of the workshop. Having stuffed the walls with insulation it seems crazy to me to just have a thin layer of timber in the doors, so mine are more like the vault doors at the bank of England! I but jointed a frame out of left over timber from the walls then stuffed them with insulation and clad both sides with OSB. After having fitted the hatch door it occurred to me that I was in effect making SIPs, so it dawned on me that it would make sense to put a layer of breather membrane between the insulation and the outer OSB layer. This is mainly as I was using up left over OSB, so had to join a couple of pieces up for the cladding, so there is a risk of water getting into the gap between the pieces, however tight I make the join. A few more pictures of the framing of the openings (gravel boards were just the right size) and the doors themselves. Again, sorry, no pictures of the hatch and one main door fitted so far.


One mistake I have found I made so far (sure there are more to come) is that with a door for the hatch about 120mm thick (frame plus two layers of 11mm OSB) it needs a fair bit of space to swing out through the frame, so I have made it a bit too big. Now I know people say the cheap DIY Bosch kit is not up to much, but credit where credit is due. In order to get the hatch door to shut I needed to plane some material off the door in situ. So I reached for my late fathers green Bosch power plane, I haven't used it since he died and I'd be surprised if he used it for a fair few years before that, so that is at least 15 years since it has been switched on. Plugged it in and pulled the trigger, what do you know, no drama just started working and did just what I wanted.

There is a chance Bob will get to see my handy work first later this week so I am sure he can tell you what he thinks.

Terry.

P.S. In case this gives the wrong impression, this is not the result of just this weekend, but several pretty solid weekends of work. Sadly my slow progress can only be blamed on a lot of musing and pondering as every new problem comes at me like a bolt out of the blue, it isn't because of the quality of the work, ho hum.
 
Well done Terry. Nice to have the roof done, and with it the certainty that the building remains dry.

Where did you get the EPDM and glues etc from?
 
Mike G":3kopm87m said:
Well done Terry. Nice to have the roof done, and with it the certainty that the building remains dry.

Hmmmm, sadly not. Down one side I am still taking in water. I think what is happening is the water is running down the breather membrane, then where I have tucked the DPC up under the membrane it is finding a way to get between the bottom of the DPC and the top of the block work.

Plan is to add some more membrane tucked under current bottom piece and it extend it below the join between block work and frame. This will take water below where I think it is getting in. As frame and block work are flush I can then extend battens to same level and clad below top of block work. Fingers crossed that will get me water tight!

Mike G":3kopm87m said:
Where did you get the EPDM and glues etc from?

www.diy-EPDM.co.uk. Good price and next day delivery.

Terry.
 
Been a while since I posted on this thread. To be honest I have been on a bit of a low on the workshop build recently, its becoming a bit of a slog and the fact I was shipping water did not improve my mood. But that kind man Rob came over yesterday and I am now feeling a lot better disposed to the workshop.

First, I think I left it owing you a final photo of the soffits in place


Despite finding it a slog I have still been working away on getting the cladding up. So I got some battens up on the studs under the breather membrane. This picture reveals a problem I will come back to later.


Once the battens were up I quickly opened a trade account at a local fencing supplier who were then able to beat all the general builders' merchants' prices and went off to buy 300m of 150mm feather edge. Whilst I can't usually give any useful tips, here is one I can, 300m of 15mm featheredge is too much weight for a Grand Cherokee's roof bars
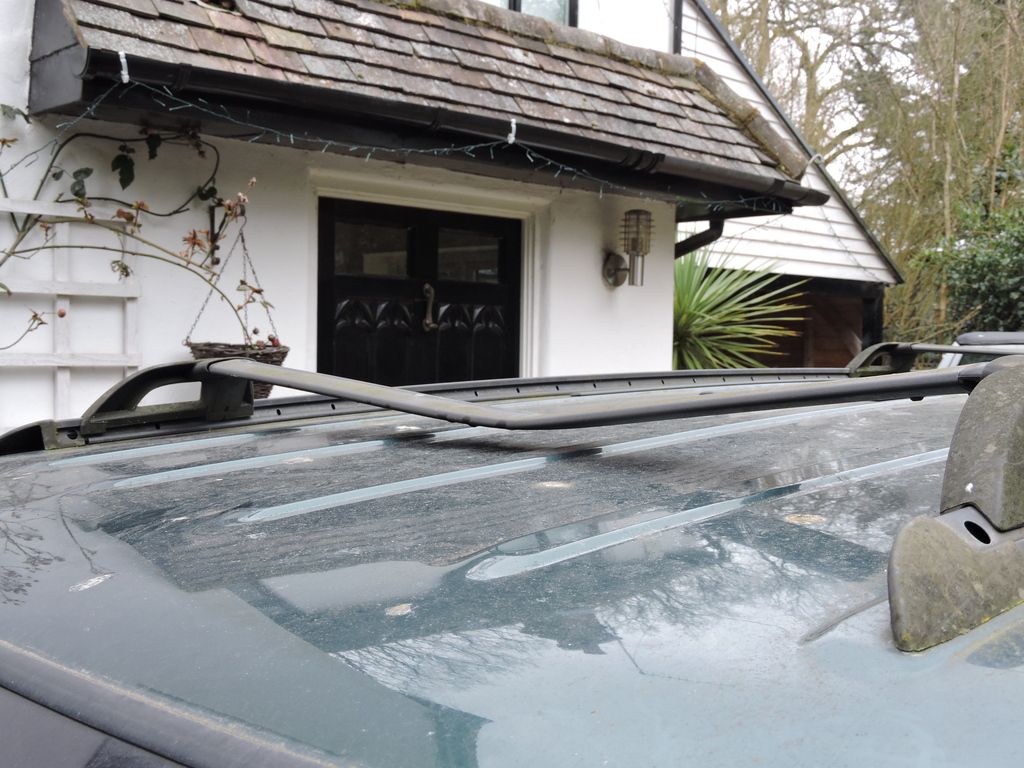
No matter it I just an old work horse that I am keeping until it dies.

Then it was on to cladding. As I was doing this on my own most of the time I cam up with a little jig to help me get the boards up, very much based on Mike's. I didn't like the idea of nailing it into the last board up so I managed to use a combination of hands, mouth (to hold nails), knees and belly to keep everything in place and get the nails in the boards. Not pretty but it pretty effective.


So plenty of boards went up around three sides. The back will have to wait until the point the fence comes down as otherwise it will be a complete PITA to get to with long boards.

I plan to have a corner detail which I am going to make out of 22mm thick gravel boards, but the ones I bought were so wet I need to let them dry out. It would have been ideal to have this up first and then fit the boards to it, instead I mocked up a corner piece and used that to try and line the boards up to. On the first corner I could clamp it, but after that I just fixed it with a screw. Not perfect but better than nothing.


But, despite the fix on the leaking side I mentioned previously (adding another piece of membrane to bridge the join between frame and block wall) I still had a leak, smaller but still a problem. It has been surprisingly dry here so it has been hard to test, when it did rain I was at work so I had to rely on quizzing SWMBO on what she could see.

Apologies for picture quality but it was taken on SWMBO's phone so she could text it to me in the office.

Yesterday I began investigating and it looked very much as though it was finding its way in under the hatch through the join between frame and block wall, with the corners particular issue and the wood on the inside still damp and a few drips of water still present.


There was no membrane to lap under here so a different solution was required. At this point Rob came over and we came up with a plan (well Rob came up with a plan and I nodded). The chosen solution involved some plastic window trim, a ripped piece of wood and a lot of sealant. The result is a lot more watertight than it was before.


After this picture the strip of wood Rob ripped down was added as a drip rail to the underside of the hatch frame, but afraid I forgot to take a picture of that.

It has rained a fair bit here today, enough to keep me inside and at the moment not a drop of water in the workshop, so I think this may have worked. May not be able to see from the pictures but the wood on the inside of the corners is noticeably drier today than yesterday.


I mentioned another problem I had made for myself. Rob pointed out that by pinning my EPDM under my battens if I could not achieve a perfect seal where the facia met the roof I would just be channelling water behind my featheredge cladding. Sadly nothing I do is perfect so I needed a bit of rework. Where necessary we un-nailed the battens where the nail went through the EPDM and then pulled the EPDM out from under the battens. Quick to type, longer to do. I used ring shank nails for the battens and whilst I could prise the batten off the joist behind it the nail was well bedded into the batten. The battens would snap if we tried to leaver it off enough to get the nail clear and with most of the cladding in place that would have been a disaster. So we had to prise the batten off as far as safe and then slip a hacksaw behind it and cut the nails. Time consuming, but we got there in the end.

The idea was to then extend the roof deck beyond the cladding by fixing left over 4x2 to the top edge of the wall. First I added horizontal strips of batten so when the 4x2 was fixed to the upright battens it would not leave a section of unsupported EPDM at the edge.


Then it was up with the 4x2s. Rob had to take a break for a family errand, so for the first side I bodge another little helper by making a shelf that I screwed to the wall. This meant I could hold one end of the 4x2 up while I fixed the other.


Rob was back in time to help with the second side. After this we worked more on getting the cladding up under the overhanging EPDM and ended the day like this.


As you an see now the EPDM comes over the extra 4x2 it overhangs the cladding. A facia will be added shortly to make it neater. The cladding now also goes well up behind where the facia will end, o any water would have to travel a long way up hill to get behind the cladding.

Hopefully things are back on track now!

Terry.
 
I have said it ten times and I'll say it again " I HATE water!!!" !

So much of my house has been affected by it even after 2 or three attempts to resolve due to body it builders in the first place. I'm on top of it now but it's cost me a hell of a lot in time, money and stress! I feel you pain Terry, but it looks like you're getting there and the benefit is that if the worst case happens and you do have ingress again then at least you know every mm of the build and will be able to troubleshoot!

Well done for getting over the hump and look forward to seeing it scamper along now. ;)

Cheers
Mark
 
Well done with persevering and finding a solution to the leak. I hope it holds. Looks like you will be in by Christmas. :D
 
It's always the details. Little details make a big difference. It's a great moment to finally know you are permanently dry........well done Terry.
 
Terry has in fact become so proficient at workshop construction he can now sneeze a mouthful of screws into multiple battens which self drive simultaneously!


He has also considerably upstaged your average builders bum with a fetching Oxford Weave :-)
 
Classic :D

You need a pouch Terry. They're only a tenner on eBay.
 
That's what I keep telling him....you need a big leather flap just in front of your groin I say!
 
When Easter comes putting up the last few pieces of featheredge will be a quick job and I think I am then going to start on the floor. I'd be really grateful for any thoughts on the following.

My plan for the floor is to put down a layer of DPM first, I have loads left over and I can't see how it will do any harm and if for any reason the DPM under the concrete was damaged it will keep the damp out. OK so far?

Step 2 will be a layer of 25mm expanded polystyrene (Jablite) floor insulation. This is less than half the cost of Celotex and I am not that bothered about the extra insulating properties, one of the main reasons for this layer is to have something with a little 'give' in it to allow for the fact my concrete is no beautifully smooth. Any problems here?

Now Steve M used this in his workshop and there was a fair bit of debate on his thread about whether the expanded polystyrene insultation could take the weight of heavy machines on top of it. In part Steve addressed this by using a different product which he had a small quantity of with more strength in key places such as under the table saw. I am no mathematician / engineer but the gist I got from the debate was that the important points were the strength of the insulation, the weight on top of it and the size of the area the load was distributed over.
Now I can't change the first two points, but I can spread the load out more. I can do this by using a layer of 3mm hard board (2400 x 1200mm sheets) laid in the opposite direction to the top layer of the chipboard floor (2400 x 600mm) will be laid. I planned it out and it means each sheet of chip will be spread across at least two sheets of hardboard. What do people think?

Would like to know if this is a crzy idea before I go and buy everything I need.

Thanks for any help,
Terry.
 
Terry,

just a word of caution about the polystyrene. The stuff is awful in a fire. Please make sure that any polystyrene you buy is "FR" fire resistant, and is flooring grade. Do you have a supplier of Celotex seconds near you? If so, it is perfectly good for your circumstance (I mean, all of my house is being done with "seconds", and it's fine).

The rest of your plans sound fine to me. You'll get even greater strength if you bond the two layers of flooring together somehow, and of course you must glue the T&G joints between the chipboard sheets, and hold the whole lot down with some well-fixed skirting.
 
Have you bought the chip board flooring yet?
I prefer plywood, need not be an expensive grade but is stronger for localised loads like machine casters.
I laid mini joists under my workshop floor made from tiling batten - dirt cheap - with polystyrene in between.
More battens under the other joins at right angles to the "joists"

Once laid and swept, I applied liberal coats of water based floor varnish, which has proved pretty durable and easy to sweep up.

Bob
 
Not aware of any seconds outlets nearby, but will check.

The Jablite (from B&Q) is flooring grade (that is why I was thinking of buying that rather than the cheaper polystyrene at Wickes). Need to check fire resistance.

Will look at ply as an alternative Bob, but I seem to recall even the cheapest ply is a lot more than chipboard flooring and of course the chip has the benefit of being T&G which I presume helps join it and therefore strengthen the joints. Did you just butt the ply?

Thanks for the helpful tips.

Terry.
 
I cant remember the cost of the ply but it was amongst the cheapest structural grades and i lumped the order with other materials a got an overall discount from Jewsons and got them to let me call it off for delivery as needed which worked really well as I had no space to store materials.

I think all flooring grade chipboard has some degree of moisture resistance but I just hate the thought of it turning to weetabix in the event of a spill or a leak. But granted it is cheap. Flooding with thinned varnish should help improve the water resistance

I have my "batten joists" under all butt joints in both axes and the ply is screwed down to the joists.

hth

Bob
 
Moisture resistant chipboard is commonly available (I use nothing else). It won't turn to mush. It used to be coloured green, but is now just stamped with an appropriate code. Flooring ply comes with T&G all round, and would be the better product in my view.
 
Mike G":p23vns5h said:
Moisture resistant chipboard is commonly available (I use nothing else). It won't turn to mush. It used to be coloured green, but is now just stamped with an appropriate code. Flooring ply comes with T&G all round, and would be the better product in my view.


I can't argue with your greater experience Mike. Do you think it is as strong as ply for point loads? Maybe the water resistance is achieved with extra glue/resin etc and provides better strength. I just feel longer fibres in ply even OSB make for a better workshop floor.

Bob
 
No, I'm suggesting ply, Bob, (but get the T&G type). Reading my post again I see the confusion......I meant "(if using chipboard) I always us the MR type" rather than "I always use chipboard in preference to ply".
 
Mike, Bob, et al

Jablite seems to get a tick in the box based on their website and haven't located a Celotex seconds supplier anywhere close by.

Similarly T&G doesn't seem that easy to come by, and I don't fancy trying to put a T&G edge on the boards myself as i) I don't have the cutters (though I suspect Rob probably does) and ii) it will slow the floor laying process down a fair bit. So I think it is going to be T&G chip flooring, though with regard to spillages, etc, I do plan to paint it, which should further help what is already moisture resistant flooring.

Have been thinking about the separate layer of hardboard and now wondering if it is necessary. As the flooring will be glued together presumably it will act in many ways like a single piece and therefore spread any load across the whole floor and not just each individual board. I that is broadly correct then the separate layer to help spreading the load would not seem to be adding anything to weight distribution. Any thoughts from those more informed than I am (and let's face it that counts pretty much anyone in)?

Terry.
 
I don't feel that a layer of hardboard is going to add much strength for point loads eg castors. Hard board is the ultimate in short fibre - shorter than chipboard.
If you do decide to use any form of lamination to strengthen the chipboard then maybe some thin-ish ply possibly underneath the chipboard and glued with basic PVA over the whole surface would be effective.

When I needed to make a rigid floor good enough to take tiles in a bathroom, I used 18mm ply with 10mm ply glued and screwed and it did come up very rigid indeed. A far more stringent requirement than yours but a good illustration of the benefit of laminations.

HTH

Bob
 
OK, I know I am going to look stupid but if I don't ask I'll never know...

Surely the ply is a laminated board anyway (with alternate layers running at 90 degs), so what does glueing two different thicknesses of ply add over a thicker piece of ply?

Terry.
 
I don't think it does but didn't you say you were set on using chipboard?

and if you are, that is possibly harder wearing as the top layer and some ply under would strengthen it.

I've not costed the combination but allowing for effort and glue, there is possible not much in it between cheapish ply Vs the lamination.

Bob
 
Bob

My question was about your floor, you said you laminated 10mm and 18mm ply, that's why I wondered what benefit of ply on ply was, versus just thicker ply, it wasn't really a question re my floor more out of a desire to learn more generally. But I think Mark has given the answer to the question, it is the fact the the joints in the two layers are not aligned, which they would of course be with just thicker ply. That makes perfect sense and I'm guessing that must be what you did to get the extra rigidity.

Thanks,
Terry.

PS did you see the PM I sent you?
 
Wizard9999":3uutemr2 said:
Bob

My question was about your floor, you said you laminated 10mm and 18mm ply, that's why I wondered what benefit of ply on ply was, versus just thicker ply, it wasn't really a question re my floor more out of a desire to learn more generally. But I think Mark has given the answer to the question, it is the fact the the joints in the two layers are not aligned, which they would of course be with just thicker ply. That makes perfect sense and I'm guessing that must be what you did to get the extra rigidity.

Thanks,
Terry.


PS did you see the PM I sent you?

When I did the bathroom floor, the height was an issue. the 18mm ply was dropped down between joists on to battens screwed and glued into the joist faces and the 10mm ply screwed over the lot, then the underfloor heating cables and finally the tiles so overall compared to the old 22mm floor boards, the floor level was only marginally higher.

No there is no PM from you waiting in my box - the last one from you was 2nd March. Are you showing a sent one un-read? ie in your outbox and not yet in sent box?

Possibly best to send again please.
 
OK, so now you go into detail I can see it was a much more complex job and I understand the use of two different thicknesses much better now.

Terry.
 
Back
Top