• Hi all and welcome to TheWoodHaven2 brought into the 21st Century, kicking and screaming! We all have Alasdair to thank for the vast bulk of the heavy lifting to get us here, no more so than me because he's taken away a huge burden of responsibility from my shoulders and brought us to this new shiny home, with all your previous content (hopefully) still intact! Please peruse and feed back. There is still plenty to do, like changing the colour scheme, adding the banner graphic, tweaking the odd setting here and there so I have added a new thread in the 'Technical Issues, Bugs and Feature Requests' forum for you to add any issues you find, any missing settings or just anything you'd like to see added/removed from the feature set that Xenforo offers. We will get to everything over the coming weeks so please be patient, but add anything at all to the thread I mention above and we promise to get to them over the next few days/weeks/months. In the meantime, please enjoy!

Two Concert Ukuleles (More or Less Finished)

A few posts ago, you might remember me machining a 1200mm radius dish onto a double thickness piece of MDF. Having finished the Florentine rim, I used the sanding board, the flat side and the dished side to flatten the top edge and contour the back edge of the rim. The motion of rotating the rim on the sanding board is affectionately known in luthiery as Driving the Bus. ;)

[youtubessl]LG99UpslKVs[/youtubessl]
https://youtu.be/LG99UpslKVs

If you missed it, the contour is visible in this image.

15EEA990-3192-4523-9503-DF633183570F.jpeg

I will make braces which will be sanded to the same radius, and when glued to the back of the instrument, the back will assume that same radius, hopefully making gluing the back to the rim a simple process, I hope.
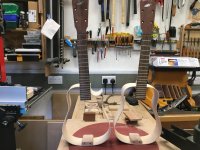
 
IMG_7780.JPG

Before I start to construct the backs and fronts, I've got some design work to do in cad/cam for the rosette. I shall also be trying to see if I can make my own purfling from some veneer I bought last year. So there will not be much production for a while.
I found this scrag end of Padauk and decided to rip/resaw it and see if I could laminate some to make some rosette veneer.

27C20A5F-FF0C-4527-B8C7-9CB791CDD7C3_1_201_a.jpeg

It looks like streaky bacon! But I reckon that could make a couple of guitar and a couple of ukulele rosettes. I'll save the real nice Padauk to see if I can make a back and sides out of it.
 
Malc2098":17riaiqa said:
I found this scrag end of Padauk and decided to rip/resaw it and see if I could laminate some to make some rosette veneer.

Paduk is lovely stuff; I bought loads from Yandles a while back; the current project has veneered panels and drawer fronts in it. It's a fantastic vermillion colour when first cut but unfortunately doesn't stay like that - Rob
 
Woodbloke":10t4g5iz said:
Malc2098":10t4g5iz said:
I found this scrag end of Padauk and decided to rip/resaw it and see if I could laminate some to make some rosette veneer.

Paduk is lovely stuff; I bought loads from Yandles a while back; the current project has veneered panels and drawer fronts in it. It's a fantastic vermillion colour when first cut but unfortunately doesn't stay like that - Rob

The face edge was brown before I started planing, and it then changed to light vermillion. But this section had loads of blemish sand faults, so I sliced it avoiding them and will try and glue them together as a veneer. The rosettes are only about 75mm diameter on the ukes, so it's the colour to mirror the laminations in the neck, with a bit of purfling around them to help them stand out.
 
You are very good Malc. Inspirational in many ways like building your CNC machine. I will never build a CNC machine, but one day when I retire I am going to have another crack at making violins.

Now. Those joints. I'm a bit puzzled by this. I know sweet FA about ukes, but I am somewhat familiar with guitars. For the cutaway joints you have done a superbly neat job, but I was surprised that you have basically used butt joints rather than mitres to hide the joint. Why is that? This is not in any sense a criticism but a genuine question. I've got a couple of acoustics with cutaways: a Taylor from the 90s and a Jazz guitar (that I don't play) pre WWII. In both cases the pointy ends of the cutaways are mitred. No bindings. Solid sides (not laminated).

2nd question. Uke ignoramus remember. On high end hand made acoustic guitars the backs are not always flat. They have a distinct slight profile (like a violin or cello) which is undesirable on the top. But the difference is with a violin etc it is carved whereas with a guitar it is brace bowed. Do you do that on uke's or is it always a dead flat back.
 
Thank you, Adrian.

1) I chose to do a butt joint because this was my first time, the thickness of the sides were barely 2mm each and the horn comprises an already acute angle. At my level of skill I assessed the risk of messing up a mitre to be more than messing up a butt joint. I am buying these tonewoods on a pension. I knew I could shoot a 90ish degree angle on the end of the cutaway. Shooting a 10ish degree angle would have really tested me. I shall be binding the top and shall see if I can create a mitre on the binding/purfling join.

2)The top is flat on my ukuleles. The fretboard is parallel to the top and the string height set by the nut and saddle. Guitar tops are dished around the sound hole to the neck joint to accommodate the 1 to 1.5degree setback of the neck. My ukuleles have a 1200mm dish to the back, and that radius is braced. The back on my Tenor Ukulele that I made on the course earlier this year has a 12' radius. The flat top braces are there to support the top against the pull of the strings and also to moderate its vibration.

I wonder if early guitars were carved and then bracing was a manufacturing development. I know some guitars are still carved these days, like the violin family. I am currently following a CNC luthier who is making an Octave Arch-top Mandolin, and he has cnc carved both sides of the top, and then braced it as well.
 
Thanks Malc. I did wonder if that was the reason and it fully makes sense.

Must admit I've never seen a modern (ie post war) dreadnought, jumbo or parlour sized acoustic guitar with a carved back. But this would not be viable for production guitars by the likes of Taylor, Martin, Gibson and Santa Cruz, especially for a D45 sized instrument. I've definitely seen carved back jazz guitars, but you can't tell if it is a true carved back acoustic instrument, or one that has had hollows routed out beneath the f-holes and pickups (if any) without poking a mirror in there. I would imagine pure acoustic jazz guitars from the 1920s could easily be carved similar to a violin. I do have some books on old guitars, so I will have to have a look if they say anything now that my curiosity has been piqued.
 
I think you'll find, Adrian, that the likes of Eastman and maybe Guild manufactured hand carved backs. The Eastman AJ615 is one example.

_1801_1801-Eastman_AJ615_3300_Archback_Jumbo_Acoustic_Guitar-1273d1f8465-62.jpg
 
I expect you are right. I've never seen an Eastman in the UK. In fact, I've never seen one in the flesh in my life. I've had a few Guild guitars over the years, and still have a 12 string, but they are / were all conventional construction. It was not my intention to suggest that no one is making acoustic guitars with carved backs, just that in 50 years of playing guitar I have never seen one in real life except f holes. However, to be frank, I don't get on with Martin's (action too high), Gibsons (bulky), and for years with acoustic instruments I have stuck to Taylor. My parlour size guitar is a Santa Cruz. Not an expert in any sense on modern acoustic guitar construction. I think the oldest one I have now was made around 1965.
 
Adrian and I have been talking about the distinctions between carved backs and braced backs on instruments like guitars, mandolins and ukuleles.

I thought, if you're interested, Dear Reader/Viewer, that you might like to see how, these days, a back of an instrument is carved.

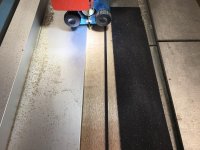
The dust extraction has been left off the machine to allow the video recording to see the spindle and cutter in action.

[youtubessl]nniT2I81YSs[/youtubessl]
https://youtu.be/nniT2I81YSs
 
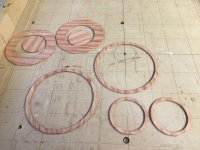
So having made some streaky bacon out of a scrag end of Padauk, I tried making rosettes out it.

D29C706C-444B-40B9-92D2-BE5206D75108.jpeg

I can measure the stock and draw the cad/cam file to fit it.

272AC69F-5818-4651-AE5F-B9A9E7DE0082.jpeg

It's extremely fragile and tricky to get off the tape without breaking.

6D472F03-72A2-445D-B7CF-EE5FAEF08372.jpeg

The three on the right are intact, the one on the left isn't. If it were perfect looking, but broken, it could still fit in the soundboard milled pocket because it breaks along the grain, which doesn't show when it's glued in. (The big ones would be for future guitars.)

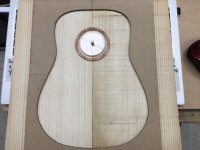
This is how it should look on the Alpine Spruce.

019C7D8D-17A8-450F-A18A-F2FF0790697B_1_201_a.jpeg

Maybe I could try and make some thin black and white purfling to go round its inner and outer circumferences.

It's not perfect. I've got some more strips gluing and waiting to be thicknesses that look nicer.
 
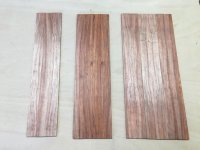
More streaky bacon for trying to make rosettes, but one of them is quite a nice vermillion.

133C9A73-3EC9-4FC9-91FD-B48F404308B5_1_201_a.jpeg

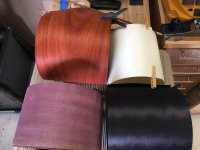
I've also got out my stash of veneer for purfling making, and the Padauk is stunning. The Purpleheart is for matching some guitar neck and headstock material for future guitars.

BF15B6D6-B500-476B-8E64-C4BCF33FEA5F.jpeg

So I'm going to try and make Black/White purfling on the outer and inner circumferences of the rosettes. Then I'm going to try and make a Black/White purfling to Padauk binding around the tops of these two instruments. Hopefully they will mirror the white and vermillion of the Maple and Padauk in the necks.
 
I'm struggling to get them to glue together nicely. I'll be back!
 
Having a nightmare with the Padauk, it's splitting all over the place.

But the black and white are working a bit better. I'm cutting 2.5mm strips, using a rotary cutter meant for fabric.

This is the general idea of purfling the rosette.

1D813B56-09B3-48E4-91D7-7B41FA93C535_1_201_a.jpeg

I think it makes a huge difference than just the wood rosette alone.
 
Why does the padauk split Malc, too thin perhaps? Supposing you were to laminate two pieces together alternating the grain direction and then cut your circle. Would that be too thick?
 
I've varnished fragile edges before cutting and sanded it off afterwards for the proper finish to go on. Don't know if that would have helped your cutting and handling.
 
The Padauk veneer split wherever its grain went as I was trying to lay it out and cut a strip.

I used the wrong glue to adhere the black and white together. It should have been the Gorilla type polyurethane glue, not Titebond.

I started on Plan B for the Padauk binding. I ripped a couple of strips from a nice piece I've had for a while and put it through the drum sander to 1.5mm thick.

I then ripped the two pieces into 8mm wide strips. Then I shot (shooted?) them to just over 6mm.

FAED920E-4875-444C-BC58-CF16DCAB448B_1_201_a.jpeg

Then I took one and clamped it with the black and white purfling to get an idea of how they will look together over a piece of the Spruce soundboard.

6C083341-8697-4319-8005-A2A5BFDAFF70_1_201_a.jpeg

If I can make sufficient consistent black and white purfling, I reckon that'll look ok.

That's all for a couple of weeks. I'm off doing a fortnight's internship and the workshop where I took my course earlier this year.
 
Apologies, dear Reader, for my absence, but you will have seen that I have been doing a 'just job' for a mate on his guitar, creating his MoP signature to cover a counterfeit logo. That took longer than it sounds!

I've also been experimenting making my own b/w/b and b/w purfling, for this project, but the temperature dropped and messed up the gluing. New glue and trying again, and it's looks like it could be working. If it does, I'll post and show photos.

I'm also trying a new process for me learned while away on my internship and will post that, too, if it works. It uses the CNC to create something I don't think I could achieve without it. Fingers crossed it works.

We've also been away for Christmas, but back now and good to be in the workshop.

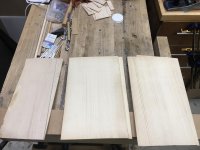
So…..back to these two Concert models. While waiting for the purfling glue to cure, I've been shooting the book matched joints of the tops and backs ready for gluing.

E50842F4-3AB0-4142-81EC-5F66CDBCFD7B.jpeg
That's the less figured Sycamore back pair.


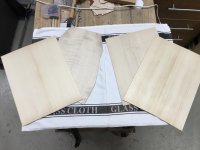
608A57A8-A01B-4274-BED4-A0C577B9CBF7_1_201_a.jpeg
Alongside it are the two European Spruce top pairs.


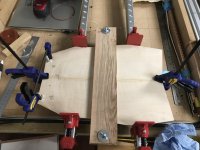
5CEECCD4-6AA9-46A2-BD3F-CC2324F3C6EE_1_201_a.jpeg
The highly figured Sycamore back pair clamped for gluing.
 
Having glued both front pairs and both top pairs, time to run them through the drum sander to intermediate thickness of around 3mm. Final thicknessing comes later.
F15DD289-AC65-4A06-8078-F0BE0D904715_1_201_a.jpeg


All done.
9BE42863-D57F-4986-9CC8-C8D35545278B_1_201_a.jpeg


Been making purfling while they were gluing, and I think it's worked. Photos next.
 
Why, you may ask, would you want to make your own purfling? Well, have you seen the price of it? I've managed to acquire some nominally 0.6mm black dyed lime veneer and some natural lime veneer that when placed together look like black and white. And I like the challenge, and at my age anything that keeps the grey cells going must be good.

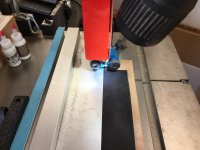
So, I got some HDPR sheet and ripped it into strips and did the same with some plywood and together they will comprise cauls for clamping the veneers together while the glue cures. I researched the interweb for making your own purfling and there's not a lot out there, but I did find one and it recommended two things: 1) polyurethane glue and 2) HDPE caul liners.

Polyurethane glue doesn't seem to be softened by heat, which I need to curve and bend the strips of purfling and the glue just peels off the HDPE whereas it would adhere to wooden cauls.

So, here they are.C66F87EE-4270-47F3-A0E9-1F7218D02D5F_1_201_a.jpeg

Spread the glue evenly over just one side of each layer to be joined and then clamp together. (Polyurethane glue cures with moisture, but water is only needed for impervious materials.)45DA4E6E-A6F0-4A07-B0F4-C7DE495DF25E_1_201_a.jpeg

And when they've fully cured, the sheets look like this (they're about 50mm wide, but they will only be viewed edge on in situ on the instrument.)CCA14231-4B4C-488C-A2E9-7F32DF9088A4_1_201_a.jpeg

The lower one is black/white/black, and the upper is black/white.

Next, a trip to the bandsaw and rip them into about 2.5mm strips.B73B3BA1-03BA-427D-85A6-90568B146E11.jpegFE8F4C07-AC78-4EFC-9D6A-256106268731_1_201_a.jpeg

And what it really looks like edge on.View attachment 3900F1290-568E-407C-9727-2975BE94794D.jpeg67AC2D5A-63ED-4515-BFD9-B72500C1AFED.jpeg

And with heat, it bends quite nicely without delaminating.DFD06611-C9B8-4943-9EE9-B02B4542B711.jpeg

And a 60mm diameter circle was what I need for the new process I'm trying out. The bigger radii around the perimeter of the instrument should be a doddle!
 

Attachments

  • 94D5A7DC-7C5B-41A8-B8F2-9736D30AB53A_1_201_a.jpeg
    94D5A7DC-7C5B-41A8-B8F2-9736D30AB53A_1_201_a.jpeg
    473.8 KB · Views: 1,582
I'll go along with the nice vote :)

One word of caution - I'll never use poly glue again after it discoloured on some chairs I made long ago. It has bonded well and has bled slightly into the wood so it is definitely strong. problem is the visible brown glue lines where the glue has discoloured. No one notices it except me so not a disaster but annoying none the less. Hope your white stays white.
 
RogerS":2x5fuutm said:
Cor ! :eusa-clap:

Bloody clever, that man. :)
Wot ‘e said!

Given me ideas for making some inlay strips for boxes as well.
 
Stuart":czi2pbmy said:
RogerS":czi2pbmy said:
Cor ! :eusa-clap:

Bloody clever, that man. :)
Wot ‘e said!

Given me ideas for making some inlay strips for boxes as well.

Thank you, Stuart. I have some coloured sheets that I shall probably never use. I'll let you know the colours if you're interested.
 
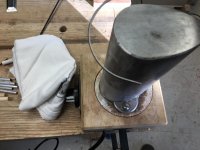
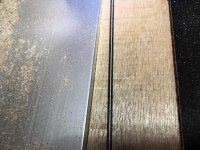
Using the fat end of the bending iron I create semi-circle.
6CC67509-5238-45F7-A2A7-87BA2120266C_1_201_a.jpeg

Obviously, I can't create a full circle round a teardrop shaped iron, so I have to angle the end round the fat end but over the top as well to create the full circle.
ABC251C5-A270-4D60-8710-A503ECCB86BC_1_201_a.jpeg

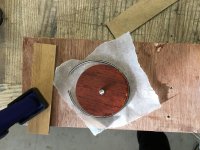
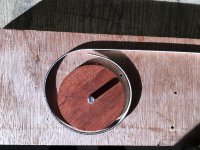
I'll explain what the Padauk disc is for shortly, but I've got to glue the purfling to the outside of the disc. I use baking parchment to stop the disc being glued to the board, and a 6mm rod through the centre to be able to rotate the disc. I used CA glue for the glue up, about 1 cm at a time.
1FF7A3F5-EB07-47F6-A2C4-C0316762C93F_1_201_a.jpeg

I start halfway round and work both ways to the join which is a vertical scarf joint. I try to line up the joint with a line of the grain, so that the eye isn't drawn to the join.
2DA4054E-24E1-4779-AD77-530A09FB69C4_1_201_a.jpeg


It gets messy, but is not difficult to clean up with a sharp chisel.
350C4C8B-59AB-48ED-B5C5-C7D1468B69C1_1_201_a.jpeg

I don't like the way it ends up looking like a threpenny bit! That comes from using a flat piece of wood to press against the purfling while the glue cures.

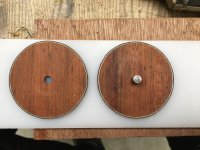
Attempt No 2. Why not use a circular piece to bear against. It can rotate against the purfling without bending it. And why not use the HDPE as the non stick surface, instead of the paper.
9F36764B-CD51-4B7D-907A-9D7DECC6F884_1_201_a.jpeg


The difference is significant.
57DF04D4-933E-4CD9-9E63-899D3D964EAC_1_201_a.jpeg


This process is to fit a Padauk ring around the soundhole of the instrument. I hope to machine a hole in the Spruce top about 10mm wider in diameter than the finished soundhole. I would then glue this disc into that hole. Finally I will machine the finished dimension soundhole out of the Padauk leaving a 5mm ring with the purfling between it and the Spruce.

Fingers crossed. Watch this space. :)
 
Malc2098":208n4cvx said:
Stuart":208n4cvx said:
RogerS":208n4cvx said:
Cor ! :eusa-clap:

Bloody clever, that man. :)
Wot ‘e said!

Given me ideas for making some inlay strips for boxes as well.

Thank you, Stuart. I have some coloured sheets that I shall probably never use. I'll let you know the colours if you're interested.
Yes please Malcolm.

Glad you redid that disc. The first one certainly looked a bit out of whack but that second one is going to look good in position.
 
I tried a couple more today. I'm not sure I'm getting much better.

I used the rotating caul method and used thick CA at about 2 cm intervals, then went round and wicked thin CA glue all the way round into the join between Padauk and white and also into the grain that would be in the finished piece.

81DD6D53-5DAA-4111-9F48-D6BE972F0EE7_1_201_a.jpeg

4579977A-A4AA-4F30-8BE8-613E6DAF9BA6_1_201_a.jpeg

The two on the left were yesterday's and the two on the right today's. I think I'm going to use the two in the middle, unless anyone seriously suggests I practise some more.
 
So far so good.

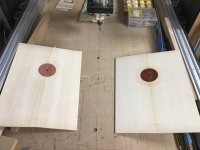
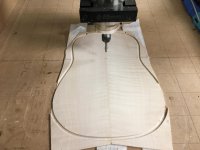
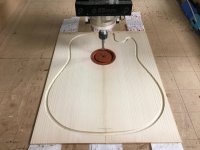
First soundboard top milled.
6BC0BF52-48C9-4DC8-96D4-3C8EE24339ED.jpeg

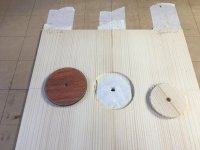
The Padauk disc is supposed to fit inside.
3255B152-8424-485A-9CA6-D583133F4930.jpeg

Remove the milled waste.
B5C97B13-1E02-4F46-860A-56069501C598.jpeg

And fit the disc……….just.
D69575E9-1D17-4AF3-89C3-9EBA61B594B2_1_201_a.jpeg

It did need a little persuasion. It's good job the Spruce has a bit of 'give' in it.

Anyway the second one wouldn't go in first try. So I had make another tool path increasing the diameter by 0.1 mm, and with a little persuasion, it went in.

Waiting for the glue to dry so I can mill out the soundhole to finished size and the oversize profiles of the instruments.
EACDC5BF-C790-4E5B-A6C7-D6B8C30DA83C_1_201_a.jpeg


Yay, I think.
 
And on we go.

Symmetrical model soundboard top, oversize profile milled.

8EAA329A-2BF4-485D-A2A2-2E2CF92A3309.jpeg

Soundhole milled.

24A74742-73E1-4C5B-96D1-CB4117B6F7DE_1_201_a.jpeg

I undermill the depth so I can sand to finished thickness.

97519F5F-48AD-4BF4-9A7F-40ECF54C718A.jpeg

Symmetrical model back, oversize profile milled.

A8317F76-D49A-4D38-B3AC-12DB883C77AF.jpeg

Both ready for drum sanding to final thickness.

B8EC3BAC-C8D0-4316-B187-4CDD8B3EDD8A_1_201_a.jpeg

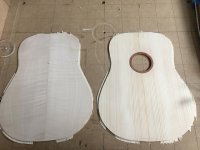
Cutaway model soundboard top, oversize profile and soundhole milled.

F249EC03-ACDB-4545-AC28-CD5AF7B14194.jpeg

The next pass should do it.

52A6EC45-5C75-4EC9-ADF1-5043DAD5127D_1_201_a.jpeg

Cutaway model top and back both sanded to finished thickness - 2mm.

7AE2FE4D-24F0-48A3-BBB1-E97CD820CFFE_1_201_a.jpeg

Symmetrical model top and back sanded to final thickness.

6A8AC848-96AE-48C8-8B92-930E80CCC902_1_201_a.jpeg

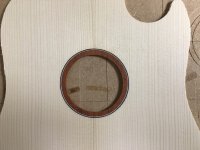
This is the soundhole embellishment that I have been working towards.

2C0235F8-5A25-4806-926E-5BAE20AFFB4E_1_201_a.jpeg

And if I can do it right, when I come to bind and purfle the body, I will be reflecting the black/white/Padauk around the whole instrument.
 
Stuart":290bso9n said:
Those soundholes look really good Malcolm.

Thank you, Stuart. Been a bit stressful getting there, but it was worth it in the end.
 
Cabinetman":3dalvtqn said:
Crikey, 2mm that’s thin, is that normal?

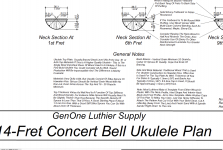
Here's a screen grab from the plans. The top and back will be braced, albeit differently. Any thicker, and I can't see the soundboard vibrating enough to produce a decent sound from the strings.

I'm using Alpine Spruce which is a similar density to Sitka Spruce.

Screenshot 2023-01-01 at 21.36.32.png
 
Back
Top