• Hi all and welcome to TheWoodHaven2 brought into the 21st Century, kicking and screaming! We all have Alasdair to thank for the vast bulk of the heavy lifting to get us here, no more so than me because he's taken away a huge burden of responsibility from my shoulders and brought us to this new shiny home, with all your previous content (hopefully) still intact! Please peruse and feed back. There is still plenty to do, like changing the colour scheme, adding the banner graphic, tweaking the odd setting here and there so I have added a new thread in the 'Technical Issues, Bugs and Feature Requests' forum for you to add any issues you find, any missing settings or just anything you'd like to see added/removed from the feature set that Xenforo offers. We will get to everything over the coming weeks so please be patient, but add anything at all to the thread I mention above and we promise to get to them over the next few days/weeks/months. In the meantime, please enjoy!

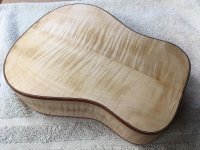
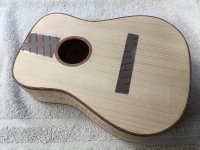
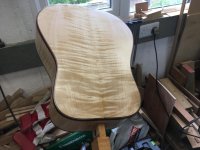
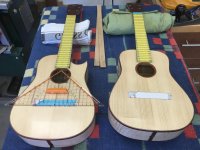
Two Concert Ukuleles (More or Less Finished)

Thanks, Gents.

I use 30 minute resin for pore filling. The necks are fairly open grain and will need at least two coats, rubbed back each time. I use a silicone cooks' squeegee to apply the resin across the grain.

76126EAB-F69D-47FB-B55B-4FF84EB8EF8A.jpeg

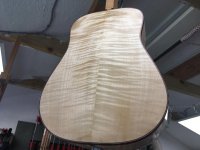
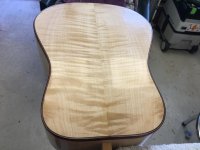
The Sycamore is a close grained timber and wouldn't normally need it, but the highly figured version doesn't sand or scrape well in places, and because the Padauk needs it I will fill the sides and backs.

C2CFBFB2-0FA8-4C20-B170-46A278CAD7EA.jpeg

7B3AE581-6EC5-44F8-A4FA-6DAF29692867.jpeg
 
Rather weirdly this thread and the history of your uke threads has inspired me to go back again to look at nylon stringed instruments. So my classical guitar is on its way out of storage.

It has also got me looking at the youtube channels of pro classical guitar player Brandon Acker and his luthier / high end dealer friend Marshall. Almost all musicians revere pretty instruments, not only with nice tops, but also lovely back and side woods. Your light colour job got me interested again. I've never personally owned an acoustic instrument with maple (or similar) back and sides, but have admired many.

Uke's are different but a classical guitar is not massively larger. Marshall Brune has an incredible ear and can recognise instruments blindfolded. He did a clip, which I now can't find, that said (paraphrasing a lot) that constructionally pretty much the only thing that matters musically is the quality of the top. This was backed up by an example by one of the famous old makers, like Rodriguez or Fleta (I can' t remember) made a classical guitar with papier mache back and sides. The instrument still sounded excellent.

This is not a criticism or anything like that: I just found it interesting. It's a bit of a black art picking tonewood.
 
Malc2098":2yatahym said:
Not bad, but not perfect.
Yes Malcolm, but are we talking a glaring issue or only something you'd notice because you did it and know it's there?

They do look rather splendid and you should rightly be proud of them.
 
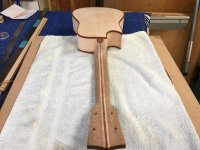
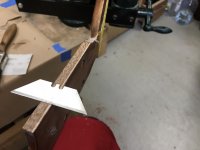
The necks have received two coats of finishing resin for pore filling and I've spent an enjoyable couple of days flattening back with my favourite scrapers, heavy duty Stanley blades.

I find sanding and scraping therapeutic and cutting/sanding back resin, so long as it's done gently, I find easy, because if the scrapings/dust are white/translucent, then they're still resin. When they change to wood colour, I can stop.
CE10E5A9-2180-4B62-94E2-686C31EC4FC3_1_201_a.jpeg

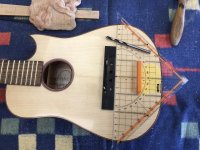
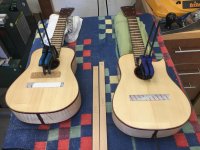
So, with the necks nearly finished, it's time to position the bridges on the bodies. For those who are new to stringed instrument construction, the scale length, the distance from the nut, (the white thing at the end of the neck), and the saddle, (the white thing on the bridge) (the black thing on the body), is critical. For these models the Scale length is 381mm. I've marked a couple of beech straight edges and cut them to scale length.

I used one to establish the saddle position.

02367D79-4051-4E33-A940-3EDD928800F5.jpeg

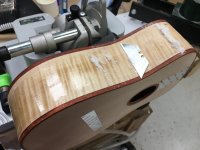
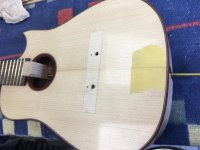
Before I go any further I need to be able to mask the area where the bridge will be located, so that the nitrocellulose spray will not cover the bridge gluing area. I used some leftover Celotex tape to cover a wider area.

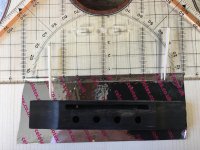
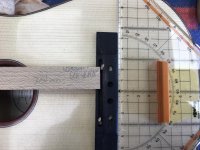
I then have to locate the bridge based on the the saddle position. The centre of the saddle is 3.5mm back from the front of the bridge, so I mark either side of the body using that special set square.

B7298F52-F2C8-4D5C-A933-1A1E532DFBE7_1_201_a.jpeg

I drill two 2mm holes in the saddle slot for cocktail sticks to pass through, locate the front of the bridge against the set square and poke the sticks through their holes to mark the tape.
BDE6ACB9-8524-4780-ACB9-0A0CCA03D428_1_201_a.jpeg

I then drill two 1.5mm holes through the body at those marks.

E8554211-6787-4DC6-B952-79B0BC13F093_1_201_a.jpeg

I can then poke the cocktail sticks through the holes in the saddle slot and then into the thinner holes in the body, exactly locating the bridge and and rechecking with the set square against the marks on the side of the body.
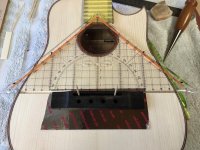
D7C8C3CB-B7C2-4DD5-966B-53AC23B5744D_1_201_a.jpeg

Now I can use scalpel blade with only just the weight of its handle to cut through the tape round the outside of the bridge.
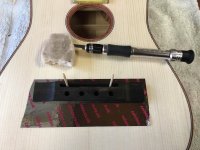
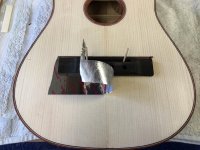
51AFB81D-5FA9-4E5F-9DD6-E1B6414E27F7_1_201_a.jpeg

5DCB8001-A4B5-4C58-A370-164092134E95_1_201_a.jpeg

So now, the bridge is accurately located, its gluing area is masked, and I can go on to do the same to the fretboard overhang and rinse and repeat on the other instrument.
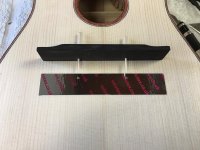
6316D3C3-E9D3-464B-BBFA-2EAD336E8C65_1_201_a.jpeg

After that It will be time to pore fill the instrument bodies.

The gluing of the bridge is one of the last elements of the construction.
 
Haha, I thought that read pour fill the instrument body, oh well. Personally I would take 2mm all round off that bridge shape before you spray, it won’t really affect the glueing but it will stop a possible unsightly misalignment of a fraction of a mil.
Ian
 
Cabinetman":uw5xdf1z said:
Haha, I thought that read pour fill the instrument body, oh well. Personally I would take 2mm all round off that bridge shape before you spray, it won’t really affect the glueing but it will stop a possible unsightly misalignment of a fraction of a mil.
Ian


Thanks, Ian. Maybe I'll take off 1mm.
 
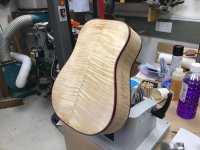
I've taken the ~1mm off all round the tape masking as Ian suggested and started on pore filling the bodies.

First the symmetrical model.

75EAEC13-B13F-472D-A4FB-D7818ED34CFC.jpeg

I found, by chance, that 4.5mg of resin covers the sides and back. I use a cook's silicone squeegee to apply the resin.

69C3A56B-93D2-4F85-A8F6-95DA8EF3623B.jpeg

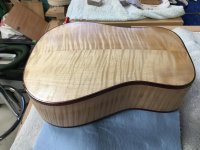
It certainly makes that grain pop!

88A15006-71E0-4405-985C-BA05D3B0ADBF.jpeg

In a different light.

90BA9BDF-2B0F-4BBF-8710-607D0A4E16CF.jpeg

0363545D-0189-4CBC-BA51-D41072B9693F.jpeg

After flattening, the Sycamore probably won't need another coat, but the Padauk will.
 
I need to say that the photographs don’t do these ukulele’s justice.

Having had the opportunity of seeing them in the ‘flesh’ they are a absolute delight. The workmanship does Malcolm a huge credit.
 
You're welcome, Ian.

Thank you, Stuart. It was good to meet up with Stuart and exchange ideas. He's got some interesting design ideas coming for his boxes and I can't wait to see them.
 
Second coat of resin filler and using my favourite small cabinet scraper. I've got through about 6 of them just on this body, but when sharp the do the job.

Curly white scrapings equals resin still coming off above the wood surface.

C32D6C2A-DD09-4562-AD2F-8F780A29CF7B.jpeg

Down to the wood surface in the waist.

F3CEC3D7-EE63-4BDD-BB41-FBFA6CFAEEA6.jpeg

Ready for lacquer spraying.

0B2FF6D3-CA2B-4D06-905E-46A75CAF8AF6.jpeg

I don't pore fill the Spruce. I should be able to get it flat enough by scraping and sanding for spraying.

FD25102D-B5BD-4B70-A4F6-267CEE5AE301_1_201_a.jpeg

Rinse and repeat on the cutaway model.
 
Well, it's been warm enough for my rhubarb.

05AE568F-DAF3-437F-928A-A5D97105B77D_1_201_a.jpeg

And it was delicious!

But, I've been pore filling away, scraping and rubbing back, and there's only so much I can do till they're ready for spraying. So here they are with their spray handles attached, just waiting to be sprayed.

4B12EF4C-FD79-4D96-862E-5289572F56AA.jpeg

As you can see, everything is ready for them to be sprayed. My choice of finish is nitrocellulose lacquer. The only difference I'm making this time, is that I shall use aerosols. But the contents are the same from the same supplier I used last time with my spray gun.

The trouble is even with my heater on, I can't get the workshop above 15 degrees at the moment and I need room temperature for air, lacquer and the items to be sprayed. For health and safety, I don't spray in the workshop. I spray outside on the deck under the roof and each part only takes seconds and goes back inside to cure. But, it's not warm enough yet.

I've still been busy. I've been fine tuning my instrument build project plan and looking to see how I can make all the CNC machined parts at an early stage of the process and then stow the machine to use the the table saw top. I've also started drawing the CNC components for the next instruments; two dreadnought guitars, one London Plane, the other Old English Walnut. Anyobody interested in buying one?
 
Amazing work Malc, I've always wanted to make a uke. doubt I could come close to this though.
With rattle cans I've found if you stand them in some warm water it improves the spray.
We have a local guy called 'Big Al' who is a bit of a legend uke player, he goes around the care homes and charities performing with his band.
 
wallace":30c0sl9y said:
Amazing work Malc, I've always wanted to make a uke. doubt I could come close to this though.
With rattle cans I've found if you stand them in some warm water it improves the spray.
We have a local guy called 'Big Al' who is a bit of a legend uke player, he goes around the care homes and charities performing with his band.


Thanks, W. Kind of you to say.

Go for it! Make a uke. My first instrument, 7 ago, was nothing like these. It's hanging on the wall above me now. It's not even symmetrical! But, I can still remember how I felt to hear its sound when I first put the strings on it. And that still happens with each new instrument.

Let Big Al know these two will be up for sale when I finish them. ;)

I've learned that, too, about standing the can in warm water, but I still need the work and the environment to be at room temperature.

These two instruments are now too valuable for me to risk spraying them in low temperatures. I can wait.
 
Still waiting for warmer weather, the temperature in the workshop is up to ooo 16 degrees.

I've checked the forecast for the next couple of weeks, and the temperature does not seem to be getting much higher, and importantly the humidity is getting and staying high.

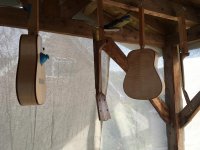
So, I've brought the two instruments, No 6 and No 7, in to the house and hung them up between Nos 1 and 2.

03975A5D-9506-488F-8818-06C92F9E82FF.jpeg

I had good afternoon, clearing the playing field that they were on and returning it to being a table saw, so I can cut the blanks for the next project's templates, forms and moulds, before I lower the CNC machine on to it and give it a service and rewire.
 
Could you not put a dehumidifier in the workshop Malc, I have one running at 40% humidity & after the first emptying of the water container once I’ve switched it on for the winter the unit is hardly on just the fan running so it works out quite economical.
 
Doug":1z907sbq said:
Could you not put a dehumidifier in the workshop Malc, I have one running at 40% humidity & after the first emptying of the water container once I’ve switched it on for the winter the unit is hardly on just the fan running so it works out quite economical.

I used to use one in my old shed, another advantage is they do push out a little heat too. I had a drainage tube on mine to empty any water out of the shed, no container to empty.
 
Thanks, Gents,,,,,, and Bob, I think. ;)

I don't use the workshop for spraying, but the instruments were in there. The shop is too small, and if I did warm and dehumidify it sufficiently and made some form of extraction for the fumes, then I wouldn't be able to use the workshop at all.

I usually spray under the deck roof with some dust sheet curtain hanging all around to reduce breeze carried dust onto the sprayed surfaces. That way I can get on with using the workshop.
 
….and I got a dehumidifier for the workshop. I have to empty it every day. So either my stash of timbers is smoking wet, or it's sucking the air in from leaks round the doors. ;) But it warms the temp in there, too, so I can spray the pieces outside and bring them in for overnight.

Three coats of sanding sealer on the fronts (soundboards) only.

392FCE41-A56F-470B-91BA-4D6FE62CF87F.jpeg

Using there party balloon trick to stop spray going inside.
 
Temporary pop-up spay booth (dust sheets round the deck)

Two coats, 10 to go!

C77A9240-59AD-4C6F-B9FD-F167C293D3B6.jpeg

That figured Sycamore is already starting to sing!

78C1C972-163F-42E9-A467-86D809F754F5.jpeg
 
E2BFAA01-4C2B-479A-9981-2857E688BAE8.jpeg


This time I'm using the same nitrocellulose from the same supplier but in aerosols. This way, at least I can know that all the mixes are absolutely identical. A bit more costly for me, but a consistent finish.

Nine more coats to go.
 
DaveL":3t286y5l said:
That does look good [emoji3]

I can assure you it does. It looks stunning. And it's native hardwood! I just hope the rest of my work does it justice.
 
Andyp":2wr2ty90 said:
Malc2098":2wr2ty90 said:
DaveL":2wr2ty90 said:
That does look good [emoji3]

I can assure you it does. It looks stunning. And it's native hardwood! I just hope the rest of my work does it justice.

I’m confident it will.

They look stunning.


:eusa-clap:
:text-goodpost:

Yes, definitely very good & 'nice'
 
Yes beautiful, went to a night’s entertainment with a ukulele band over the weekend, all very competent players but the singing was dire and none of them had an instrument anything like yours.
As an example of how dire it was the first song was “Do you want your old lobby washed down” No me neither!
It’s what passes for entertainment here in the sticks lol.
 
Cabinetman":3qxafk7i said:
Yes beautiful, went to a night’s entertainment with a ukulele band over the weekend, all very competent players but the singing was dire and none of them had an instrument anything like yours.
As an example of how dire it was the first song was “Do you want your old lobby washed down” No me neither!
It’s what passes for entertainment here in the sticks lol.


Thank you, and….. :lol:
 
If Heath Robinson made bespoke clamping and caul solutions, then they might look like this one.

DD59E7C0-BB00-4A5B-84CD-587851F7BEE2_1_201_a.jpeg

Locate the bridge using cocktail stocks in two holes I made months ago, and ensure it's square to the centre line.

88A9B0A1-7144-4233-92F6-EB2E3AA1EA29_1_201_a.jpeg

Drill two holes through the bridge pin holes, through the soundboard and bridge reinforcement underneath.

02F507EF-F837-43D1-9C42-79A4ADA8F215_1_201_a.jpeg

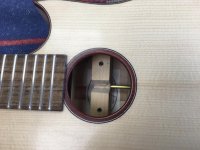
Offer the caul through the soundhole and screw the brass rod into the caul.

3BCA8E7A-A3AE-488D-9CE6-9BC4F2C0586B_1_201_a.jpeg

Using the rod bring the caul back to below the bridge location.
A3D25FD1-27DC-4503-B26B-8E98F9746B6C_1_201_a.jpeg

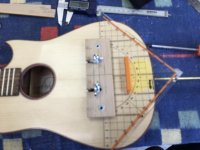
Screw the clamp though the two holes into captive nuts in the caul. When they've got sufficient threads on them, tighten the clamp using the wing nuts to pull the caul against the inside of the body and the clamp over the bridge.

EF6214BD-46FA-4005-8022-86E504537B5C_1_201_a.jpeg

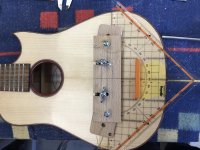
Then add the two wing cauls to apply pressure to the bridge wings.

AEE71EE2-9866-4F46-BE54-16A89E99D094_1_201_a.jpeg

That was the dry run. Now take it all part and glue the bridge and the body and put it all back together again.
Then when the glue has dried, dismantle the caul, clean up any squeeze out and put the instrument in its case, while I do the same to the other instrument.

B15FCDF2-3041-45AB-AA7E-8B2436D3A1D2_1_201_a.jpeg
 
Tuners and nuts fitted.

41858268-FFED-4542-BD9C-3ED489455230_1_201_a.jpeg

123CD712-264E-47C7-98C3-6A047A7CEC28_1_201_a.jpeg

Bridge pins, saddles and piezo undersaddle pickups fitted.

3C34E7EF-69A9-4738-9CD4-D255A1C94EA5_1_201_a.jpeg

Time to fit the jack sockets and connect to the pickups

3214071E-AE7B-46DC-B194-41CDAD3B6BDE_1_201_a.jpeg

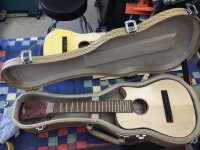
The other one resting in its hardcase.

03862368-D8A7-44CC-BCBE-9693D5539958_1_201_a.jpeg
 
MattS":1utbe475 said:
These are beautiful - enjoyed all your make threads but these look particularly good are you pleased with them?


Thank you. So far, yes. but they need fettling a bit, and the electrics aren't working properly yet.
 
Back
Top