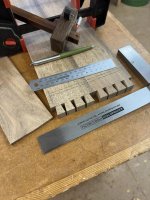
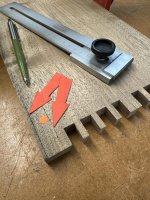
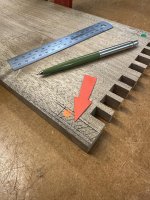
• Hi all and welcome to TheWoodHaven2 brought into the 21st Century, kicking and screaming! We all have Alasdair to thank for the vast bulk of the heavy lifting to get us here, no more so than me because he's taken away a huge burden of responsibility from my shoulders and brought us to this new shiny home, with all your previous content (hopefully) still intact! Please peruse and feed back. There is still plenty to do, like changing the colour scheme, adding the banner graphic, tweaking the odd setting here and there so I have added a new thread in the 'Technical Issues, Bugs and Feature Requests' forum for you to add any issues you find, any missing settings or just anything you'd like to see added/removed from the feature set that Xenforo offers. We will get to everything over the coming weeks so please be patient, but add anything at all to the thread I mention above and we promise to get to them over the next few days/weeks/months. In the meantime, please enjoy!

WIP for the New Year (Dun)

Woodbloke

Sequoia
Joined
Jul 22, 2014
Messages
7,496
Reaction score
1,585
Location
Salisbury, UK
Happy New Year to all!

As it's New Year's Day, yesterday I thought I'd detail the building progress of a small, wall hung cabinet to specifically contain our small but growing collection of Japanese netsuke. Most folk have heard of these things, the BM as well as the V&A in London having very noteworthy collections. They're always made from materials that take and hold fine (in some cases, extremely fine) detail such as ivory, horn (deer, narwhale, walrus etc) and timbers such as Boxwood and Yew. Some signed netsuke carved by famous artisans centuries ago command fabulous prices and are highly sought after; ours are more mundane though equally attractive.

They're fairly small objects and were originally meant to be handled in daily life so are highly tactile; as such examples from the Edo period have developed a wonderful patina which doesn't exist on contemporary ones; when Cabinetman (Ian) paid us a visit in the summer, he handled one of our little netsuke's made from deer horn which was at least a couple of hundred years old, maybe more.

Yesterday, SWIMBO and I had a reorganisation of one corner of the room so that a suitable space was created on the wall:
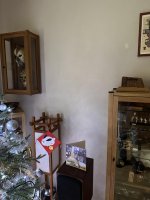
IMG_2131.jpeg

Prior to this, I had put 'the little grey cells' to work and realised that these little objects need to be viewed at eye height or below; it's no good having them in a cabinet and looking 'up' at them as we'd never be able to see them; the ones in the V&A are positioned so that you actually are looking down to view them.

Having drawn up a few ideas and some rough sketches, the cabinet will be 560mm long by 360mm high, so roughly 'Golden Mean' proportions. It'll have two glass panelled doors with the ends of the cabinet also glass panelled. There'll be two, full width 4mm glass shelves, each with a narrower glass shelf at a higher level, thus four shelves in all totalling some 2m of display area. This sounds a lot for such small items, but such is their intricacy, they do need some space around them so they can be seen properly.

SWIMBO has decreed that she'd like this little cabinet in English Walnut and being of moderately sound mind, who am I to argue? :lol: She could have had oak, elm, ash, paduk, Swiss pear or even some of Ian's wonderful mahogany, though a quick examination yesterday revealed that bits suitable for the top and bottom had ancient screw holes etc in them, so no good for this job.

I need to make a couple of proper working drawings to make sure that I've got the dimensions correct and the netsuke will fit, but in the meantime I can go out to the 'shop and select a suitable chunk of English Walnut and start to mark it out for conversion - Rob
 
Sounds fun!
I'm imagining something with slender strips of wood and concealed elaborate joints. Maybe some secret mitre dovetails in 7mm boards?
 
AndyT":12nufby5 said:
Sounds fun!
I'm imagining something with slender strips of wood and concealed elaborate joints. Maybe some secret mitre dovetails in 7mm boards?
Nothing quite as fancy as than Andy; this one will have one or two Krenovish elements to it. The sm shovetails will hopefully be used on an interpretation :eusa-whistle: of Kenji Suda box, one of which I saw in Japan a while ago. My nose was literally 100mm from it (no exaggeration) and there was no glass between it and the box! - Rob
 
What did it smell like? Sorry.
Looking forward to seeing this, sorry about the screw holes, but they are old, very old, a century older than me in fact.
I guessed it would be Krenovish as that’s your forte.
 
Cabinetman":3iw53den said:
What did it smell like? Sorry.
Looking forward to seeing this, sorry about the screw holes, but they are old, very old, a century older than me in fact.
I guessed it would be Krenovish as that’s your forte.
Fear not about the screw holes etc Ian, it's 'part n'parcel' of this sort of material bearing in mind it's age and where it was used. There will be a suitable project for the mahogany when it will be perfect, but unfortunately it's not this one - Rob
 
Having done some Googling out of curiosity, the design has changed to a 'portrait' style, wall hung cabinet with traditional 'stepped' wooden shelves (with SWIMBO's approval), which makes it a lot harder and more fiddly to make. In some projects it's quite feasible to adopt the 'fag packet' approach but in this case, a full on, detailed working drawing(s) is required.

I quickly sketched out the proposed ideas for a cabinet 60x38cm, inc the shelves, on some squared paper and this now needs to be transposed into a proper, 1:1 working drawing:

IMG_2138.jpeg

The stuff I always use is lining paper and a 20m roll of 1400grade will set you back a very reasonable £8 from Wickes. Attempting to buy proper drawing paper would seem to be prohibitively spendy and even A2 copier paper is far more sponds; this stuff is ideal as you can cut any length needed to suit the drawing board. This one is an old MoD melamine faced white board where I've made the corners square so that I can use my long T square on a short and long side - Rob
 
After much faffing, the 1:1 drawing(s) have been done:

IMG_2145.jpeg

...showing the arrangement of the 'stepped' shelves. The main carcase will be 16mm thick English Walnut dovetailed together; the shelves will be 6mm thick walnut dovetailed and housed; there'll be a veneered ply walnut back. The door will be a simple domino'd construction with a pane of museum quality, non reflective glass.

As the drawing is full size 1:1, all measurements can be taken directly from it as the project takes shape - Rob
 
Well that certainly isn’t just some shelves! My only comment is the sides and under top look a little thick to my eye, the top top looks more of an appropriate thickness. But obviously, your creation. Nice fine shelves!
Ian
Ps, the top top and base base I might experiment with having them slightly larger with a profile? But that would probably take it far away from your original ideas.
 
Cabinetman":3f6cqoco said:
Well that certainly isn’t just some shelves! My only comment is the sides and under top look a little thick to my eye, the top top looks more of an appropriate thickness. But obviously, your creation. Nice fine shelves!
Ian

What you can see there Ian, is the door frame under the top and above the bottom; cabinet sides are 16mm and the door rails and stile are 28mm wide. It looks disproportionate but I hope it makes sense now :D - Rob

Edit - 6mm shelves will be tricky to assemble and even more trickier to fit into the cabinet. It'll be a dovetailed cabinet so a profile of some sort isn't going to be possible. I could do it if the top/bottom were to be dowelled etc to the sides but with shovetails it ain't possible - Rob
 
MattS":3p02dqyt said:
Wow, those shelves will be a challenge even for your skills! Look forward to watching progress
Thanks Matt; I haven't got a scoobies at the moment how I'm going to build them, but you can rest assured that 'thought' (lots of it) and 'care' (even more) will come into the equation :lol: - Rob
 
I seem to remember you making a circular display case with staggered shelves a while back. I’m sure this one will be just as easy.
 
Andyp":9u768b1l said:
I seem to remember you making a circular display case with staggered shelves a while back. I’m sure this one will be just as easy.
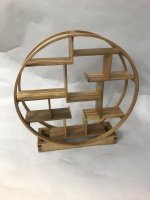
This is the one you're thinking of Andy:

IMG_5114.jpeg

The shelves are a similar arrangement, but once I got my head round how to build the thing, it was reasonably straight forward. This one presents the same sort of issues, but it's rectangular rather than round which entails some tricky problems to solve, especially in assembling each shelf unit into the cabinet - Rob

Edit - SWIMBO calls this her 'whirligig' :lol:
 
That does look challenging.

I think some people would use Mitre Mate and butt joints for a tricky assembly like that which doesn't need to support much weight. Somehow, I don't think they will feature in this project!
 
AndyT":3uqicz5l said:
That does look challenging.

I think some people would use Mitre Mate and butt joints for a tricky assembly like that which doesn't need to support much weight. Somehow, I don't think they will feature in this project!

In one or two of the ones I saw online, some of shelves, even with a light load had drooped beyond the horizontal so the theory is to use minute brass screws (No.4 say) into the back of each shelf in a couple of places to keep them on the straight and level. Practice is another issue, but I regularly screw drawer bottoms into 6mm thick backs, so with careful marking and measuring, it's doable.

I'll probably make a mock up in pine of a shelf sub-assembly and see how I get on sliding it into the housings, sans glue. I'm going to use a slow setting (30min) epoxy from WH to glue the actual walnut ones in place, so I'm hoping that I won't get an instant 'grab' as happens with TB3 for example and the epoxy will provide an element of 'slidability' - Rob
 
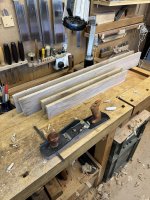
A suitable plank was selected and hacked up yesterday afternoon. The first bits to come out of it were the carcase sides and top as well as the material for the door; all planed to 17mm so an allowances left for finishing later to 16mm:

IMG_2149.jpeg

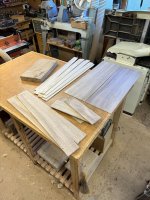
The next chunk out the board was a bit for the back panel veneers, cut oversize and run through the drum sander. Next up were a few bits for the shelves, planed to just over 6mm so a fraction left for hand planing to size; even oddments can be slip matched, glued together and then converted into another little bit for a shelf:

IMG_2148.jpeg

IMG_2150.jpeg

I was delving into all sorts of places yesterday trying to find something for a 'balancer' on the reverse of the ply back panel; then I found these thin strips of Ash left over from an earlier job which would be ideal. The walnut (as expected) has behaved itself overnight so I don't anticipate :eusa-pray: that it's going to move, twist or go walkabout. There's a chunk of Walnut left over for any subsequent shelves needed - Rob
 
The first job was to prep all four bits for the cabinet sides. Face side and edge were skimmed with the LA jack or try to remove planer marks and then each bit was planed to a fraction over 16mm on the p/t; the two new face/edges were then hand skimmed:

IMG_2159.jpeg

Then the blade on the LN51 was given a super sharp edge ready for shooting the bits to length, but first and foremost, each end was shot in dead square:

IMG_2160.jpeg

The shooting board I've now used for years is this one: https://www.youtube.com/watch?v=pwYJhfChDdM Over the decades I've made dozens (slight exageration :D ) and this one beats them all by several light years. All shooters sooner or later go out of kilter and refuse to plane an end at a dead 90deg. This one does as well, but if you take the time to watch the UToob clip, you'll see that it's an absolute doddle to re-plane the fence, do a couple of trial test runs and hey-ho, you're back up and running. The fence does become a little loose over time, hence the blue tape and it's worth clamping it down for really accurate shooting as is the case here.

If you haven't got one of these, you should have so make one! :lol:

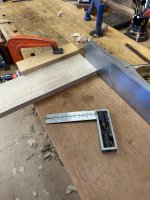
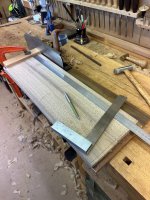
With one end of each piece shot dead square, they were marked out to length with a 600mm rule, try square and pen:

IMG_2161.jpeg

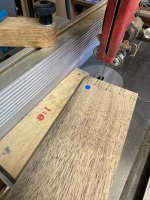
"Sacre bleu!''...not a marking knife in sight! For this part, the marking knife doesn't provide the accuracy as the pen line provides a guide for sawing just off the line (waste side) on the bandsaw:

IMG_2162.jpeg

The accuracy comes not from the saw but the shooting board, so the sawn ends on one of each side were then shot in precisely to the required size, one end shown below with the 600mm rule and the other end resting hard against the shooting board fence:

IMG_2163.jpeg

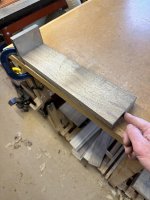
The issue then is to shoot the other pieces (2) to exactly match. This is very easily achieved with the 'finger test'. Some time ago, I bought a 100mm cast iron angle plate from 'the old firm' and it gets used extensively for this sort of job:

IMG_2164.jpeg

The angle plate was clamped to the bench and both pieces pushed hard against it, with the bit to be matched on top. When both are planed identically, I'm not able to feel any sort of ridge between the lower and upper piece, so they're now a matched pair. When both long and short bits have been planed, I've now ended up with two pairs of identically matched pieces of walnut:

IMG_2167.jpeg

Marking out dovetails next - Rob
 
Well, given the sort of results you achieve, I reckon it's worth paying attention to any tips you mention along the way.

So making that style of shooting board has just been added to my to-do list. Thanks!
 
AndyT":27vgwipr said:
Well, given the sort of results you achieve, I reckon it's worth paying attention to any tips you mention along the way.

So making that style of shooting board has just been added to my to-do list. Thanks!
Andy, this is the best jig I've ever made in the 'shop and it gets constant use. It does wear as mentioned above but that's easily remedied. On my one I've added a runway for the LN51 using a bit of thick Formica, but the UToob chap uses the bench instead - Rob
 
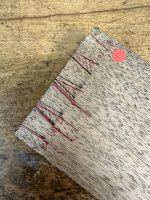
With the four bits prepared to size (almost :eusa-doh:) the through dovetails can be marked out, but prior to that little exercise, the relevant corners can be marked, with face edge/side facing out; there are lots of ways of doing this, but spotty dots are just about unbeatable. Note the position of them; near the top close the face edge, which also provides a useful reference point:
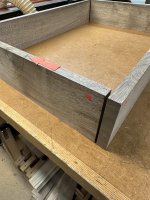
IMG_2169.jpeg

What I forgot to do though, was to reduce the width of the sides to allow for the door and once this had been done (bandsaw, p/t and try plane to finish to size) the shoulder lines were lightly marked with a gauge, set to slightly over 16mm (the thickness of the timber), remembering not to gauge (arrowed) where a line isn't needed:

IMG_2170.jpeg

On this little cabinet, I've decided to use staggered width tails, which on something only 82mm wide isn't especially easy. There's no way this can be done 'on the fly' as the layout needs to be planned on paper, which I always do on a scale of 2:1 as it makes it much easier. The idea is to gradually increase the with of the tails but leave the pins the same all the way across the board. It's a very attractive feature done on a wide board but less so on something narrower. Note also that the half tails are 8mm, half the thickness of the board...nine shown on the drawing but I made them 8:

IMG_2168.jpeg

If you try this way of setting out the tails, you'll soon find out that you won't get it right first time and there'll be copious amounts erasing until it looks about right! Having sorted out the spacing, the two long sides can be marked out using a suitable 1:8 marker:

IMG_2177.jpeg

...but even then, things can go a little bit pear shaped, so it's essential to have a different coloured pen close to hand:

IMG_2174.jpeg

Cutting the pins is easy, very quick and accurate, especially if you use a bandsaw wot has a nice new blade :D :

IMG_2179.jpeg

It's not particularly crucial if the cut isn't quite on the line as one or two of these are:

IMG_2180.jpeg

...as once the cabinet is assembled you won't notice the slight discrepancy. What is absolutely crucial is that the marking out and cutting of the other half of the joint is spot on - Rob
 
Waste removed now with a Knew Concepts saw:

IMG_2181.jpeg

...and a Japanese cross cut from 'the old firm'. I never cut on the shoulder line (not accurate enough) but leave a bit off for chiseling:

IMG_2183.jpeg

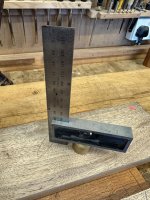
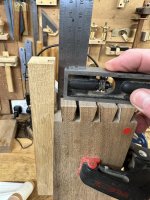
The next thing I do is to set the adjustable square to a fraction over the wood thickness (16.5mm) using some spacer gauge shims:

IMG_2184.jpeg

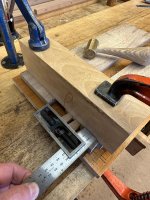
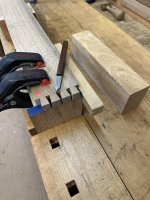
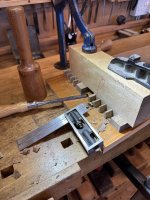
The set up for chiseling is pretty straight forward and very accurate:

IMG_2185.jpeg

The job is supported on a waste board of stuff and the chiseling block is clamped in exactly the right place by locating it with the try square and tapping said block with a small brass maul. The square ensures that the chiseled shoulder line is dead true.

IMG_2188.jpeg

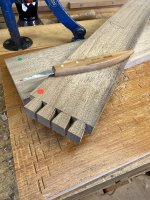
The Japanese dovetail chisels are again from Axminster; I removed the hoops and doweled on a Walnut extension which makes them far more comfortable to use for paring. They're honed at 25deg so I don't use a mallet on them. Note also the large pool of light over the job which is invaluable. Once the shoulder line has been chiseled, I use a:

IMG_2189.jpeg

...very narrow Pfeil carving knife from CHT to clean up the interior corners; I believe a certain JK used to do this as well and it does a really good job in removing all the 'frass' left by the chisel - Rob
 
Thanks Rob. It's always interesting to look over someone else's shoulder and see how they go about things.

I also like your adjustable vice jaw equaliser - is it made from a plastic chopping board?
 
AndyT":2dj15s4x said:
Thanks Rob. It's always interesting to look over someone else's shoulder and see how they go about things.

I also like your adjustable vice jaw equaliser - is it made from a plastic chopping board?
Nope, I spotted that on the CHT site. It's a new item from Lee Valley which I thought was worth having. My old one was made from bits of hardboard which was a bit 'naff'; this one is much better and worth the investment - Rob
 
As Andy says, really interesting seeing your approach, lots of good tips. I hadn't spotted the vice balance, not seen one of those before.
 
MattS":sm685xn7 said:
As Andy says, really interesting seeing your approach, lots of good tips. I hadn't spotted the vice balance, not seen one of those before.
As the late St.David of Charlesworth was fond of saying "you'll never achieve perfection but you can aim for precision" or similar which is the focus of what I attempt to do; doesn't always happen when things go TU :lol: - Rob
 
There are dozens of ways, jigs etc both old and new to transfer the tails; this in my 'umble opinion is one of the best:

IMG_2194.jpeg

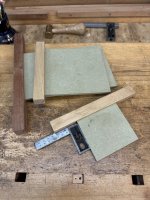
Simply a square or rectangle of stuff glued into a fence with a groove. Simples! I saw these first in the Pekovich book "The Why and How of Woodworking'' and I couldn't believe that something so straightforward could be so effective...but it is. The only thing that's vital is that square or rectangle really is a square or rectangle and that it's glued into the groove at a true 90deg. It's its not, the dovetails will out of kilter! I've made a few of these for various jobs and I chose the 'Golidlocks' size to fit these sides.

To set up the sequence, firstly secure (firmly!) the relevant end in the vice, either tail or front. The green dot is used in the pic but it's the same for all:

IMG_2202.jpeg

Place the dovetailed in the other vice and offer up the transfer jig, with the square set to 16.5mm on top. The blade needs to firmly locate against the green mdf of the jig; then clamp with a couple of spring jobbies:

IMG_2199.jpeg

The dovetailed/jig section can then be placed on top of the other side, firstly removing the block:

IMG_2200.jpeg

You can now see, I hope, why I placed the dots near the edge of the boards. Were they to be in the middle it would be very easy (and I've done it :eusa-doh:) to offset the wood on the wrong side! Before striking the lines with the 'shop made (very inexpensive Sam :lol: :lol:) knife, I need to ensure that the green edge of the jig is fully located against the job, so that once the tails have been transferred and the offending waste pieces of tape removed:

IMG_2201.jpeg

...I'm left with a reasonably respectable set of sockets to cut.

The last pic shows the jig swopped over and the green dot corner being marked:

IMG_2203.jpeg

Cutting tail sockets next - Rob
 
Sockets to be cut are marked out along the grain with a square and pen/pencil. I use one these fine line pens now that Alf recommended some time ago and they're pretty good:

IMG_2204.jpeg

I made a Moxon vice some time ago which is a useful bit of kit for sawing dovetails; not essential but it's a definite improvement on holding the wood in the Record vice:

IMG_2206.jpeg

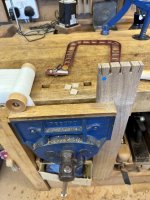
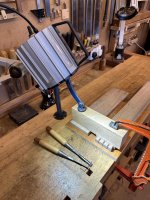
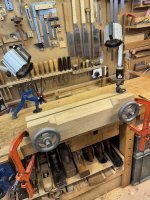
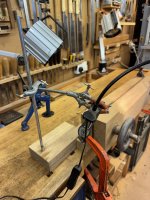
The problem that's plagued me for some time is getting enough light to illuminate the saw cut; the big led lights at the back are great but only cast light onto the rear of the Moxon; I need it on the side of the job as well. This is the jig I devised which works a treat:

IMG_2207.jpeg

It's a reasonably sturdy block of pine with a vertical steel rod (from an old printer) inserted at one end, onto which is hung a couple of bits n'pieces from a school lab I 'acquired' :eusa-whistle: long ago. The adjustable jaws of the test toob holder will grip a small, flexible lamp (this one's from IKEA but there are plenty of other options) which then casts a very satisfactory light on the front/side of the job:

IMG_2209.jpeg

The lamp can easily be moved to the other side of the Moxon as well so for me it's pretty much an ideal solution. I'm sure that this is a fairly common problem (lighting the workpiece) but this is my method of solving it; there are others such as an Anglepoise lamp but they're a bit clunky (even if they are rather attractive lights). When not in use, the block of wood with it's steel rod simply sits in the bench well until needed - Rob
 
Always a pleasure to see how the pros go about doing stuff like this. Puts my meagre attempts well and truly in the shade.
If only I had had the time…..
If only I had had the skills…
Just imagine what I could have done. :)
 
Andyp":3t4s9uej said:
Always a pleasure to see how the pros go about doing stuff like this. Puts my meagre attempts well and truly in the shade.
If only I had had the time…..
If only I had had the skills…
Just imagine what I could have done. :)

fiveeyes":3t4s9uej said:
Must agree w/Andy. Do not have these skills, yet, but will try one day.
Rob...I do appreciate the WIP. When I return to my shop,I will have a go.
thank you..........bil

Thanks chaps; these are just my own ways of doing stuff to attempt to get the best possible result (which don't always happen :( ) and at the same time make the whole process easier and simpler, 'cos as we always know, 'simple' is usually the best.
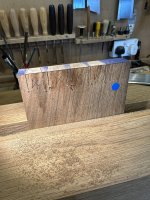
The dovetails are going to have to go onto the 'back burner' for a few days as we went into town today to collect some glass and mounting card for some picture frames which now need to be polished (two in Bubinga, one in Swiss Pear, the other in Walnut) and then the actual framing done to finish them off - Rob
 
The picture frames are now in the utility room to allow the polish (MMM :D ) to cure, so a few shovetail sockets are in the process of being cut:

IMG_2224.jpeg

Some of cuts were distinctly 'off piste' on the first bit 'cos I haven't cut any for ages and am not quite 'in the zone.' It's of no import as the sockets will be chiselled for an exact fit :eusa-pray: later on. The Japanese saw I use produces an incredibly fine kerf which is way too narrow for the Knew Concepts blade, so the waste needs to be munched out in two passes per socket:

IMG_2225.jpeg

IMG_2226.jpeg

Time to test the fit when it's still in the vice. I always pare a small 'easy in' chamfer on the inside.
It has been known for me to do this little trick on the outside :eusa-doh: but if the spotty dots have been positioned correctly, it's the side without one :D

IMG_2227.jpeg

If the jointing is sufficiently tight, the long side will hold horizontally when it's tapped into the joint by no more that 2 or 3mm. Note the tail which will need some attention later:

IMG_2229.jpeg

I cut the next one a bit better:

IMG_2230.jpeg

...and the long side fits equally as snug:

IMG_2232.jpeg

Two more sets to go - Rob
 
Good clean cuts Rob, following with interest, it’s a couple of years since I did any and these modern high tech bits of sticky tape are interesting and should come fairly naturally as I use masking tape to mark out with all the time.
Difficult to see from here, would a short length of 1” dowel in the end of the Moxon jaw work for the lamp?
Ian
 
Cabinetman":331senn4 said:
Difficult to see from here, would a short length of 1” dowel in the end of the Moxon jaw work for the lamp?
Ian
That would also work Ian, provided the dowel were stuck to a thin bit of ply or I'd never be able to hold anything in the Moxon under 25mm :lol: As shown, the retort stand and IKEA lamp offers maximum flexibility and can also of course be used in different circumstances where I need a dedicated light source, assuming that my two 'operating theatre' lamps won't reach :D - Rob
 
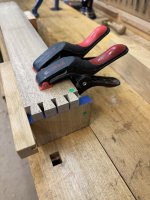
The tail sockets are chopped to the line in exactly the same way as the pins a few posts ago. The square is set to 16.5mm and gradually the block is tapped hard against it; the block is then tightened up when ready to chisel, this time tapping with a light maul:

IMG_2244.jpeg

It's essential that the chisel is kept dead square again the block, especially on the last couple of cuts to finish:

IMG_2245.jpeg

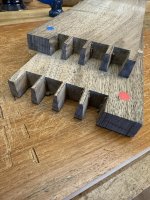
Once that's all done, I'm left with four sets of sockets all chopped to the line:

IMG_2248.jpeg

The final thing to do is to pare or clean up the sides/corners with a wider (and super sharp) chisel and Pfeil knife:

IMG_2249.jpeg

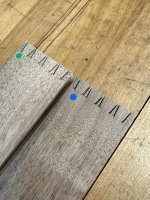
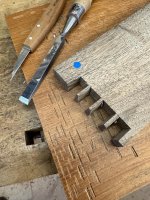
The idea is to get the sides straight and square and the faces even a little concave, which is what JK used to do. This removes any slight discrepancies in the sawing; the pic below shows the 'blue' joint which was sawn 'off piste' a while ago. It isn't any more:

IMG_2250.jpeg

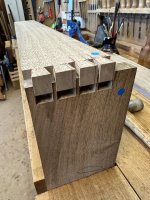
The final thing to do is to check that each joint will fit half way (and no more) with a few taps of a soft mallet:

IMG_2251.jpeg

As all the sides of the tails and sockets are square n' true I can be pretty confident that they'll go all the way down at glue up time....it has sometimes been otherwise :D. When chopping tails and sockets, all work is done from the face or 'show' side, never the other way round. If there's a small error which sometimes happens, it'll then be on the inside, not the outside. Only sockets are ever pared, never, ever the tails.

This about wraps up the dovetailing; next up I have to mark out and cut all the various housings, holes and slots on the inside of the cabinet - Rob
 
With the dovetails completed, two long sides are cramped back to back with three quick action cramps (never use just two for anything like this) and a new red spotty dot marks the top of each:

IMG_2268.jpeg

Starting from the bottom shoulder line and taking dimensions directly off the 1:1 working drawing, I marked out the position of the shelves, with a gauged pencil line showing where each will stop:

IMG_2269.jpeg

...so that by shifting the position of the cramps, all six shelving units have been marked out on both long sides:

IMG_2270.jpeg

The position of the end of each of the 3mm thick ply inserts used for jointing are marked in pen (arrowed):

IMG_2271.jpeg

Next, the position of the door is marked (arrowed):

IMG_2272.jpeg

...and within those parallel lines, the position of the hinge:

IMG_2273.jpeg

The hinges are Brusso ST18 knife hinges which though spendy, are excellent. However, it's virtually impossible to retro fit them as with an ordinary brass butt, so their stopped grooves need to be marked out and machined prior to gluing the cabinet together. CHT also give very accurate dimensions of Brusso hinges on their web site. Although it appears precise, there's a little bit of 'leeway' in the marking out, so it doesn't need to be quite as accurate, though it will be thrice checked before a router bit comes anywhere near it.

The final couple of bits to mark out are the sprung loaded JK style door catch which I always use:

IMG_2274.jpeg

...and the little button (again, something always used by JK) at the top of the door which maintains the shadow gap; tricky little blighter to fit as well - Rob
 
Just because I don't comment doesn't mean that I'm not following along. :) Door? What door? There's no door on your drawing, and I think we all assumed this was a set of open shelves.
 
Back
Top