• Hi all and welcome to TheWoodHaven2 brought into the 21st Century, kicking and screaming! We all have Alasdair to thank for the vast bulk of the heavy lifting to get us here, no more so than me because he's taken away a huge burden of responsibility from my shoulders and brought us to this new shiny home, with all your previous content (hopefully) still intact! Please peruse and feed back. There is still plenty to do, like changing the colour scheme, adding the banner graphic, tweaking the odd setting here and there so I have added a new thread in the 'Technical Issues, Bugs and Feature Requests' forum for you to add any issues you find, any missing settings or just anything you'd like to see added/removed from the feature set that Xenforo offers. We will get to everything over the coming weeks so please be patient, but add anything at all to the thread I mention above and we promise to get to them over the next few days/weeks/months. In the meantime, please enjoy!

Garden Table

Dr.Al

Old Oak
Joined
Dec 31, 2020
Messages
3,707
Reaction score
2,494
Location
Dursley, Gloucestershire
Name
Al
This is one of three projects I'm going to be writing up in parallel (the other two are described here and here). They'll each be running at very different paces, with two at the design stage while one is being made, but I thought I'd start posting updates on them all at the same time. I don't have space to work on multiple projects at the same time, but that doesn't stop me thinking and planning!

I'm starting this write-up while the project is in the design phase, although I've already bought the wood for it. I'll probably start cutting wood in a month or two at a guess.

The aim of this project is to make a new garden table. We currently have a cheap circular table made of painted steel with a glass top. The glass top used to be painted (and has been repainted a couple of times) but it's really starting to look shabby and it's time to replace it. I thought it would be an interesting and challenging project to try to make it (mostly using only hand tools) out of wood (sweet chestnut).

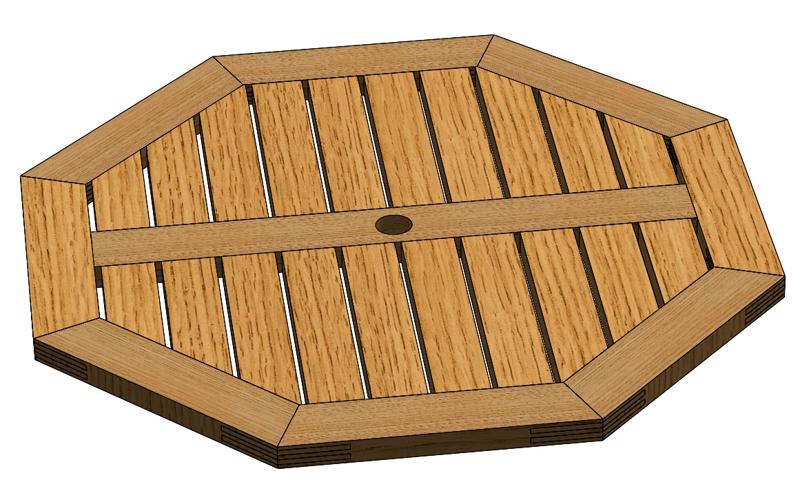
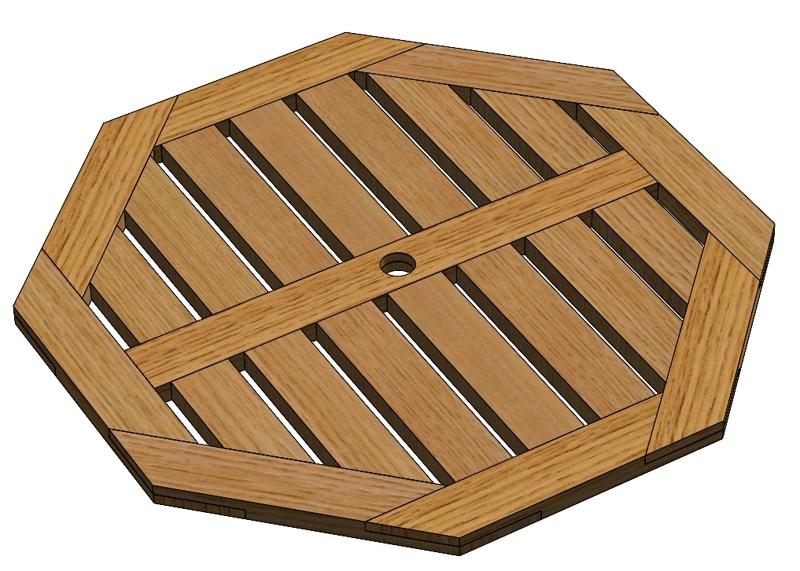
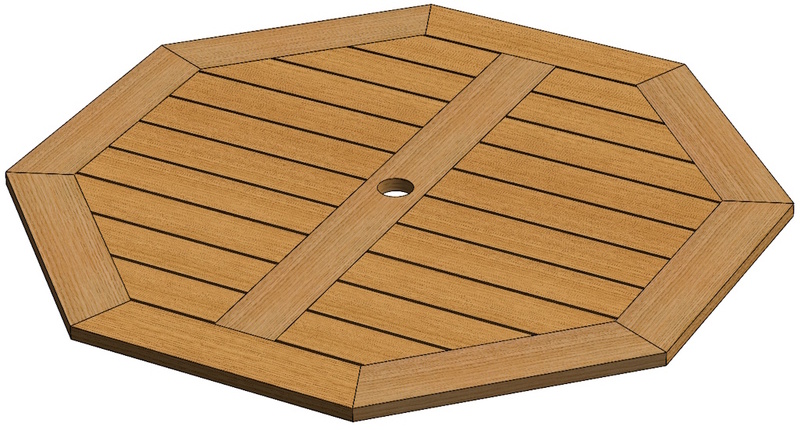
So far, I've decided (subject to change!) on the design of the table top:
garden_table_top_model_800.jpg


For a sense of scale, it's 900 mm "across-flats". I'd toyed with the idea of a circular table, but I quite like the look of the octagonal shape and I think it'll be a lot easier to make without resorting to power tools.

I haven't decided on the structure beneath the top at the moment, but I expect it'll be very simple, consisting of four legs with some rails going between them (with mortice & tenon joints to join the rails to the legs). I have no desire to make this table collapsible for storage: the existing metal/glass one can be folded down and it has never been folded down in all the years we've had it. I've no idea where I would store it if I did fold it away!

For the top, I'm not sure what to do about the joinery and would welcome any advice. I'd guess that for joining the outer pieces to each other (end-grain to end-grain), dowels might be a plausible option. An obvious option for the end-grain to edge-grain joints is to put tenons on the ends of the slats and mortice them into the outer pieces and the central cross-piece. It would be easier to have tenons going into a groove in the outer pieces (rather than separate mortices), but that feels like it would introduce somewhere for water to sit, so I guess that's not ideal for an outdoor table. Alternative ideas for either joint (or for the design in general) would be gratefully received!
 
You ought to consult Steve Maskery about this. I seem to remember he did an excellent magazine article on something very similar.
 
Be interesting to see what the best way to make the top is.
If it were me I think I would do long loose tenons on the outer frame joints - so that they didn’t show on the outer edge, possibly V shaped plywood ones. And all the internal parts tongue and grooved all round.
Ian
 
Be interesting to see what the best way to make the top is.
If it were me I think I would do long loose tenons on the outer frame joints - so that they didn’t show on the outer edge, possibly V shaped plywood ones. And all the internal parts tongue and grooved all round.
Ian
What are you doing up at this time of night?
 
I have to make one of these as well, and have gone through the same round-to-octagonal transformation of the design. The alternative shape is actually octagonal but with a circular outside shape......which doesn't change the structure.

My initial thinking was to have 2 structural cross members (at right angles to each other), not one, tenoned into the outer frame. I worry that the one cross member leaves quite a lot of unsupported outer edge. I was then thinking of setting the remainder of the top pieces in with a normal tongue and groove, but everything would be caulked with something like CT1 (flexible waterproof sealant). I can't conceive of a joint which prevents water ingress, I'm afraid......so everything will get gunked up with compound, and we'll make a waterproof cover for the table.

Mine is very early in it's gestation (possibly aiming for summer '25) so I'll be watching this with interest.
 
I have to make one of these as well, and have gone through the same round-to-octagonal transformation of the design. The alternative shape is actually octagonal but with a circular outside shape......which doesn't change the structure.

My initial thinking was to have 2 structural cross members (at right angles to each other), not one, tenoned into the outer frame. I worry that the one cross member leaves quite a lot of unsupported outer edge. I was then thinking of setting the remainder of the top pieces in with a normal tongue and groove, but everything would be caulked with something like CT1 (flexible waterproof sealant). I can't conceive of a joint which prevents water ingress, I'm afraid......so everything will get gunked up with compound, and we'll make a waterproof cover for the table.

Mine is very early in it's gestation (possibly aiming for summer '25) so I'll be watching this with interest.
I think whether or not you have one or two cross members depends on what sort of underframe you choose, with a central column type I agree you would be better with two, cross halving-ed together.
 
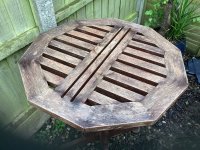
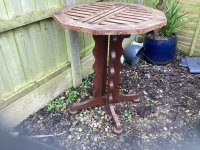
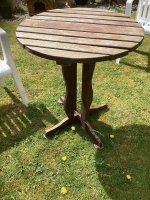
The above might be of interest, the joints between the outer rails and slats are grooves and short tenons secured with epoxy glue. I think that the gaps in the top are the key to preventing expansion destroying the structure.
The method of making the supporting legs allowed me to use the 25 mm finish material I had available rather than buying thicker materials for conventional legs
The timber is iroko throughout and has no signs of rot after 28 years of exposure.
The discoloured areas are down to a number of plant pots I removed before the photo was taken.
As you can see, machinery was used to make the item.
Overall diameter is 700mm but I see no reason why larger sizes would not be satisfactory.
 
Last edited:
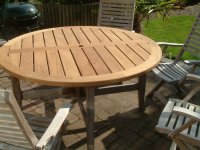
In case it is of interest, I have a large circular "Lister " (at the time the best manufacturer of garden furniture) table made of genuine teak plus 8 teak chairs, that has lived outside in sun rain ice and snow for over 30 years and been jet washed annually each spring to "de green" it. Oiled with teak oil a few times, but by no means often. Several members here have sat round it. The construction of the top is closely spaced slats tenoned into the rim and blind pegged into individual mortice slots from below. I suspect they are wedged teak pegs as none have fallen out in 30 years. The chairs were also all M&T pegged and glued. I suspect cascamite was originally used based on having had to repair arm joints on a couple of chairs.

We have a few teak benches of same lineage but greater age. Also an iroko set (rectangular top) which is not as well made and the table has twisted a bit. I think thickness and quality of wood both play a part so suggest not skimping on thickness of table top.

For a large table especially I would do the outer rim circular. This is because you can easily move the table a long way just by tipping it up and rolling it, and also because it makes chair placement less rigid.
 
I had a similar table and the unsupported joints were a problem, I didn’t make it but I did have to make a support structure to stiffen them up. Half the joints where supported by the base so a cross shaped support sorted out the rest.
It’s something to think about, you could laminate the edge and stager the joints.

Pete
 
My initial thinking was to have 2 structural cross members (at right angles to each other), not one, tenoned into the outer frame. I worry that the one cross member leaves quite a lot of unsupported outer edge.

Does that depend on the type of frame/base and the thickness/strength of the cross-slats? With a central base it feels like it would be more of a problem than with a square frame (something a bit like this), which would support it further out than a central base might. 🤔

I was then thinking of setting the remainder of the top pieces in with a normal tongue and groove, but everything would be caulked with something like CT1 (flexible waterproof sealant). I can't conceive of a joint which prevents water ingress, I'm afraid......so everything will get gunked up with compound, and we'll make a waterproof cover for the table.

I hadn't considered the use of a waterproof sealant, that's probably very wise advice, thanks.

Mine is very early in it's gestation (possibly aiming for summer '25) so I'll be watching this with interest.

I'm sure mine won't be a patch on yours, so I'd better get it made quickly to avoid too many direct comparisons :D

I'll look forward to seeing yours next year.

I think whether or not you have one or two cross members depends on what sort of underframe you choose, with a central column type I agree you would be better with two, cross halving-ed together.

👍 I'm thinking of a frame that will support it in a square underneath the top (like the picture linked above), so hopefully that'll be okay.

The above might be of interest, the joints between the outer rails and slats are grooves and short tenons secured with epoxy glue. I think that the gaps in the top are the key to preventing expansion destroying the structure.
The method of making the supporting legs allowed me to use the 25 mm finish material I had available rather than buying thicker materials for conventional legs
The timber is iroko throughout and has no signs of rot after 28 years of exposure.
The discoloured areas are down to a number of plant pots I removed before the photo was taken.
As you can see, machinery was used to make the item.
Overall diameter is 700mm but I see no reason why larger sizes would not be satisfactory.

Very interesting, thank you. My design has gaps in the rails (although only a handful of millimetres wide, so smaller than your gaps). There's no reason why the gaps couldn't get bigger if required (and they may well get bigger anyway if I don't manage to dimension the boards to drawing :ROFLMAO:)

In case it is of interest, I have a large circular "Lister " (at the time the best manufacturer of garden furniture) table made of genuine teak plus 8 teak chairs, that has lived outside in sun rain ice and snow for over 30 years and been jet washed annually each spring to "de green" it. Oiled with teak oil a few times, but by no means often. Several members here have sat round it. The construction of the top is closely spaced slats tenoned into the rim and blind pegged into individual mortice slots from below. I suspect they are wedged teak pegs as none have fallen out in 30 years. The chairs were also all M&T pegged and glued. I suspect cascamite was originally used based on having had to repair arm joints on a couple of chairs.

We have a few teak benches of same lineage but greater age. Also an iroko set (rectangular top) which is not as well made and the table has twisted a bit. I think thickness and quality of wood both play a part so suggest not skimping on thickness of table top.

I'd been aiming for 18-20 mm thickness of table top, although it wouldn't be a big deal to make it thicker (I think the sweet chestnut I've got in stock is quite thick).

For a large table especially I would do the outer rim circular. This is because you can easily move the table a long way just by tipping it up and rolling it, and also because it makes chair placement less rigid.

I'm not too worried about moving the table - it's not going to be that heavy I think and the garden isn't big enough for me to worry about having to move it long distances.

I had a similar table and the unsupported joints were a problem, I didn’t make it but I did have to make a support structure to stiffen them up. Half the joints where supported by the base so a cross shaped support sorted out the rest.
It’s something to think about, you could laminate the edge and stager the joints.
Hmm, interesting, thanks. I'm not sure I like the idea of laminating the edge (using hand tools), although I can definitely see that it would make it stronger. The idea that appeals most to me at the moment for the end grain joints is to cut something akin to a bridle joint, but with the "mortice" bit on both pieces and a spline/loose tenon thing filling in the gap. It feels do-able with hand tools and hopefully fairly strong.
 
18mm is thin. Our teak one is about 30mm thick. Plenty of room for good strong joints. Twas obvs made in the day when good was available and quite cheap. Reason for my post though was bottom blind pegged joints. No weather gets in.
 
18mm is thin. Our teak one is about 30mm thick. Plenty of room for good strong joints. Twas obvs made in the day when good was available and quite cheap.
Okay, thanks. I'll have a ponder and measure the sweet chestnut I've got. How big is your teak one? Presumably as the diameter goes up it's necessary to increase the thickness.
 
This is a simpler version of my original table, very much easier to make but the slats are free to distort a little.
 

Attachments

  • IMG_1385.jpeg
    IMG_1385.jpeg
    430.3 KB · Views: 14
Okay, thanks. I'll have a ponder and measure the sweet chestnut I've got. How big is your teak one? Presumably as the diameter goes up it's necessary to increase the thickness.
Approx 6ft diameter. Slats a bit thinner than rim, but morticed flush with top. Twin ring teak centre hole for parasol with full close and ring inserts in teak. Will try to take snap when I get back, though it is covered in garden stuff right now.
 
Approx 6ft diameter. Slats a bit thinner than rim, but morticed flush with top. Twin ring teak centre hole for parasol with full close and ring inserts in teak. Will try to take snap when I get back, though it is covered in garden stuff right now.
Thanks - that's about twice the diameter of the one I'm going to make. I'd be interested to see the photos.
 
Have you read Robert’s excellent WIP?
Quite a bit larger than what you have in mind but may provide a few pointers.
 
Have you read Robert’s excellent WIP?
Quite a bit larger than what you have in mind but may provide a few pointers.
Nope, but I will now. Thanks.
 
Sorry, late to this thread.
This was one of the most horrid projects I ever undertook. I made mine out of Iroko, nasty stuff. I wore a powered respirator and used barrier cream and I still had a bad reaction to it, itchy rash.
My first attempt was making an octagonal frame and biscuiting the ends together. It lasted one winter before it fell apart.
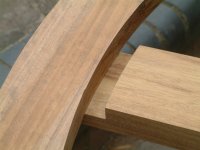
The second attempt was much better. I used my tablesaw tenon jig to cut two slots in the ends. Much deeper than biscuts and so a much greater gluing surface area. It's still in the garden of my friends in Nottingham, it must be 20 years old by now.
I can't remember the detals of how I attached the slats, I do remember it being a PITA. IIRC I made the inner edge of the rim circular as well and routed a rebate for the slats to sit in. It was a bit structually dodgy, TBH. Not my finest piece.
 
Thanks Steve. I think the slots and an insert sound like a good option for the end grain. I won't be using a table saw to cut them (I sold that a while ago), but depending on how confident I feel, I might resort to a bandsaw
 
Okay, thanks. I'll have a ponder and measure the sweet chestnut I've got. How big is your teak one? Presumably as the diameter goes up it's necessary to increase the thickness.
Teak is the obvious choice of timber but has it's limitations in that it's 'difficult' to glue (but not impossible), difficult to plane in that a edged tool can only be used sparingly before it needs re-sharpening and the proper stuff is now hideously expensive (the most expensive commercial timber). That said, it lasts forever with due care and diligence (HMS Foudroyant, built from Burma teak and once Nelson's flagship, was still afloat in Portsmouth Harbour during the 60's as I remember seeing it there) and when I was teaching in the 80's I regularly used to order a quantity for the school workshop. Strangely, very little was ever used on student projects and much of it still resides in the 'shop less than 10 metres from this keyboard :ROFLMAO: - Rob

Edit - not the original Foudroyant (wrecked on Blackpool sands in 1897) but a re-named HMS Trincomalee
 
Last edited:
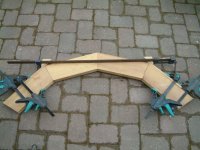
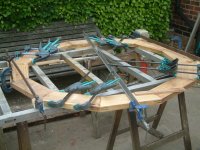
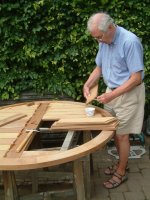
I also used loose inserts together with a wobble saw to house them, they were made of iroko like the table. One of the joints has failed as you can see ( about 11 O clock in the photo) can’t really complain after nearly thirty years.
An IMG_1392.jpeg An angled shooting board is the answer to accurate joints I think or you can cheat like me and make two four segment pieces and hand fit the two parts if required, this certainly makes the assembly of the slats much easier.
 
the design of this table is almost identical to one my parents had bought from B&Q, it probably lasted about 5 years outdoors before failing, I'd use a very durable timber for it, actually not a fan of the design much, water can and does get into the mitres around the edges, steve's table is much better.
 
I haven't had much time in the workshop lately as a result of my other half's car accident, so my three parallel projects have all ground to a halt. However, things are getting a bit easier as she gradually heals and I think it would do me a lot of good to have a bit of workshop time, so I've decided it's time to resurrect the garden table project.

The table top design hasn't changed much over the past couple of months, but it has had a couple of tweaks. This is what the latest CAD model looks like:

latest_design_800.jpg


It's still the same size (900 mm across flats, 975 mm across corners). The main changes are:

  • The top has got thicker (currently modelled as 30 mm thick)
  • The gaps between the slats have got a bit bigger (about 8 mm gap between 65 mm wide slats)
  • I've added splines on the edge mitres (currently two of them, although I might just do one when it comes to it).

My current thoughts for joinery are to use mortice & tenon joints for the ends of the central cross-bar. For the slats, I'm torn between doing the same (mortices and tenons) or doing something like a half-lap joint (possibly a blind half-lap dovetail). I'm currently leaning towards the latter as it offers the big advantage of allowing me to fit the slats after gluing the rest of the assembly together.

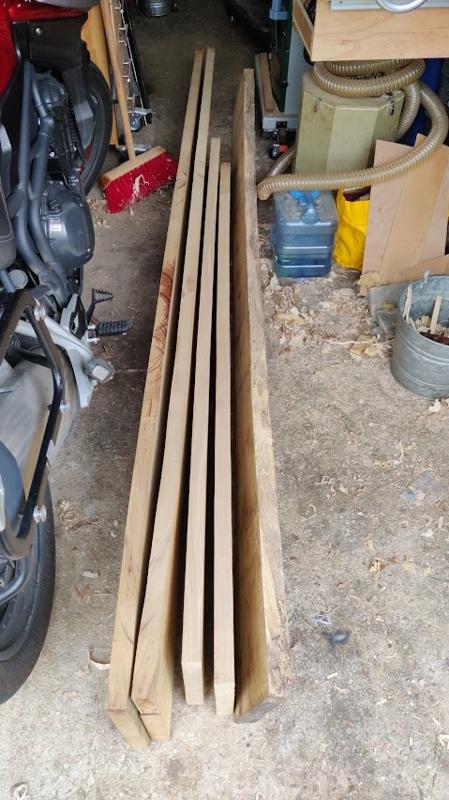
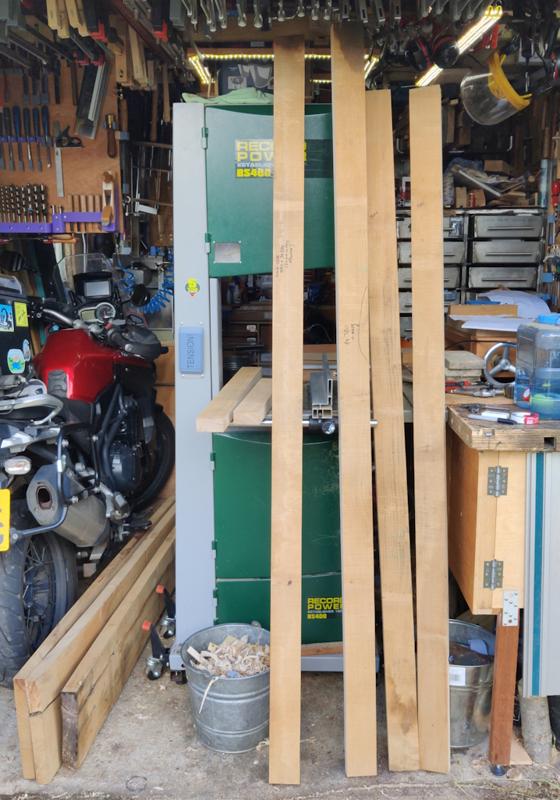
Although there's still plenty of scope for changing the design, at some point I'm just going to have to bite the proverbial bullet and start preparing some wood. To that end, I pulled my stock of sweet chestnut out of the rack and laid it out on the garage floor to measure it all:

sweet_chestnut_planks_800.jpg


The left-hand four planks are all about 36 mm thick (rough sawn); the right-hand one is about 47 mm thick (again rough sawn). I'm hoping I can turn the 36 mm thick planks into 30 mm planed pieces, which I'll then use for the table top and, if any is left, for rails/stretchers (for a base that I've yet to design, but is likely to be cross-shaped). The thicker plank (currently 47 mm thick) I'm hoping to use for the legs, but I'm not sure whether it's thick enough. I'd guess it would end up as 40 mm square legs once it's planed and chopped up. Any thoughts on whether that's enough for a 750 mm long leg on a table of this size?

The 47 mm thick piece is 2.6 metres long and varies in width from about 160 mm to 220 mm along the length. That should be plenty to produce the legs (if 40 mm is thick enough) as I'll be able to get multiple legs out of the width of the plank I think.

The others vary in length: two are about 1.9 metres long and two about 2.9 metres long. That looked to me to be an awful lot of wood, but it's surprising how much you need when you start adding up all the pieces that make up the top. If I cautiously assume that I can get two pieces out of each width (in practice I'll be able to get three from some bits: the planks vary in width from 220 mm up to 300 mm and the table top pieces are either 65 mm wide or 80 mm wide), then there is enough wood there for the top with about 600 mm spare: much less than I expected when I looked at the pile on the floor.

Of course in practice it'll be better than that as there will be lots of areas where I can get three pieces out across the width and there's also quite a lot of excess in the 47 mm thick piece. Either way, I've got a lot of planing to do in the near future!
 
Okay, I'm an idiot.

I'd been looking at those planks of sweet chestnut and thinking that it seemed a ridiculously large amount of timber to need for a garden table. However, I'd done the maths quite carefully and I'm (usually) quite good at maths. I decided to revisit it as I didn't trust the conclusion and I realised that I'd worked it all out assuming that I only got one piece width-ways out of each plank.

Having re-done it properly, I'll have plenty of wood and loads left over besides.

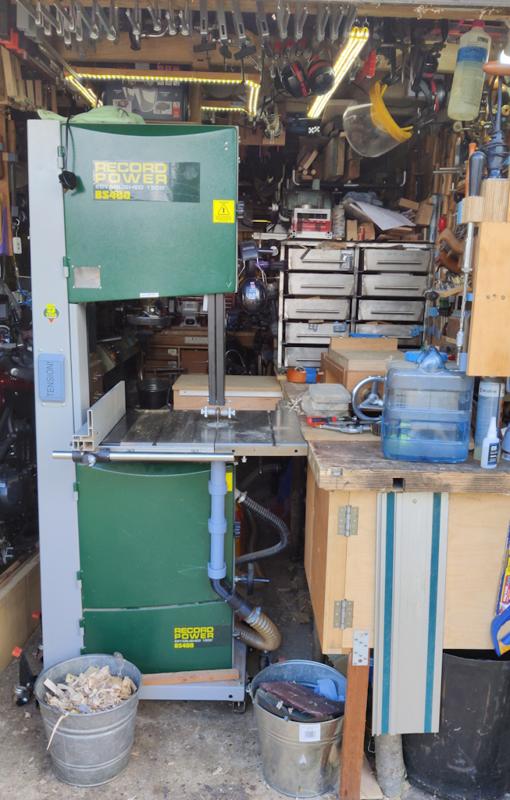
With that confusion sorted out and since the sun had come out, I decided to re-arrange the workshop to make it suitable for bandsaw ripping. The planks are currently too long to fit on my bench and given the tapering width, I felt it would be best to rip them to width and then sort out the length afterwards. The portable workbench got shifted onto the main bench, the framework and drawer underneath it got removed so that the bandsaw could come past and then the framework and drawer were reassembled to act as an out-feed table.

rearranged_workshop_for_bandsaw_800.jpg


I then took the two shorter lengths of sweet chestnut, sliced them up into two 80 mm (plus a bit for planing) widths and then sliced the remainder up a little narrower and hand sawed the remainder pieces to the length that they remained parallel. That left this lot (the shorter pieces are lying on the bandsaw table):

chopped_up_shorter_planks_800.jpg


One of them has a crack left in it, but I'll be able to remove that when I saw them to length.

The pieces I've chopped up so far should give me plenty of wood for the outer rim pieces and the central cross-piece. There might even be just about enough for the slats, although I suspect I'll have to rip a little bit more to get all of them.

For now I've got plenty to keep my #5 busy, so the bandsaw will get put away again and the three remaining full length pieces shoved back up on the roof hooks out of the way. Once all those pieces have been hand planed to thickness, I can think again about what else I need.
 
I really cannot see the point of a parasol hole in the middle of the table. At our latitudes only one half of the table would be in shade without the shade being so low as to prevent comfortable standing and sitting on the sun side.
 
I really cannot see the point of a parasol hole in the middle of the table. At our latitudes only one half of the table would be in shade without the shade being so low as to prevent comfortable standing and sitting on the sun side.
We have a parasol hole in the table at the moment and I wouldn't be without it. Only one half of the table is in the shade, but that's fine as there's usually only two people at the table (often sitting on the same side so we can look at a cryptic crossword together).

Sometimes Carolyn migrates to the sunny area but as a general rule, if the sun's out I'm either in the shade or indoors. Without the parasol I'd rarely sit at the table.
 
I've not had much chance to look at this, Al, but I have a little bit of a structural concern. You have a single element of structure across the table top, and that will hold the outer pieces at it's ends nice and strongly and square. However, the pieces between those two outer pieces have nothing to support them or keep them square, other than some end-grain splines. Someone leaning their elbows on that part of the table will be able to flex the entirety of that half of the table perimeter, and flexing, and sagging under the load of gravity, could lead to permanent deformation or total failure.

Have you contemplated putting a cross-piece across the table at right angles to the existing one? It would have to have a halving joint in the middle where they meet. Doing that would ensure that all elements of the external ring were either supported directly by a structural piece, or were supported between two such pieces.

-

I have had a look at this sort of table some time ago as I will be building one in due course. I was particularly keen to avoid end-grain joints (scarfs, effectively), and came up with this:

garden table.jpg


This seemed to me to give a more reliable glue line between long grains, and of course could be augmented with splines, loose tongues, dowels, or the like.
 
Thanks @Mike G that's useful. I had contemplated putting a cross through the middle, but didn't think it was necessary (I'm probably wrong, so I'm glad you've raised it).

I was perhaps putting more faith than I should in the dovetail half lap joints (this sort of thing) that I was planning to use to join the slats to the outer frame and the inner cross piece. I'd looked at it under the assumption that the entire table top would be quite rigid but still allow a little bit of expansion of the slats into the gaps. Is that an invalid assumption?

There's no reason at all I couldn't have two cross pieces and slats in the corners rather than across the two sides, the choice of a single one was mostly aesthetic.

Your scarfed top pattern looks like a very good idea 🤔. I'll have a ponder on whether I fancy stealing it or not :D.
 
The observant among you will have noticed that I said at the start of this project that it'd be mostly a hand tool project but all I've done so far involved a bandsaw. My life has taken a bit of a side-ways step lately following Carolyn's accident. As a result, my workshop time has been severely limited and it felt like the use of the bandsaw (as a not-especially noisy or tedious to use power tool) to speed things up might be sensible. That's my excuse anyway!

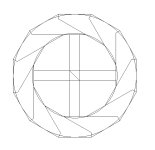
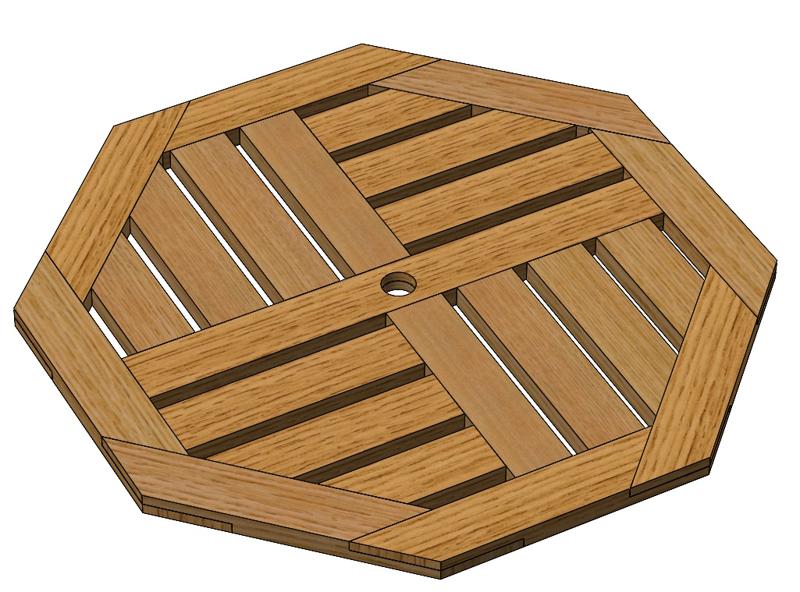
Following @Mike G's comment about end grain joints, I've been playing with the design a bit more to make the corners a bit stronger. I've come up with a couple of new design iterations, both with some fairly long half-lap joints on the corners. Hopefully that will work a bit better.

The first is otherwise quite similar to the previous design:

design_update_1_800.jpg


The second has the same outer frame but with a slightly different inner:

design_update_2_800.jpg


I'm on the fence about which I prefer at the moment. I'm probably leaning towards the first one, but my other half is leaning towards the second (so it'll probably end up being the second!), although she has said she likes all of the various designs I've proposed thus far.

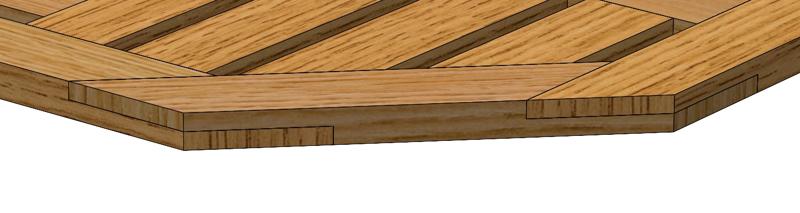
This image from the CAD model gives a slightly clearer view of the joinery at the corners:

half_lap_800.jpg


I think I like that joint design, so I'm going to bite the bullet and start preparing the wood for the edge pieces (although it's not too late to change my mind as long as any changes don't involve longer planks as the source material, so feedback continues to be welcome!).

The other pieces can come later. The pieces need to be quite a lot longer than they would have been for the simpler previous design, so I want to try to be relatively efficient when cutting to length. Having measured the planks I'd previously prepared, I worked out I could (just) get four pieces out of each length if I alternated the direction of each piece and as long as I was fairly accurate with my cross-cutting (gulp).

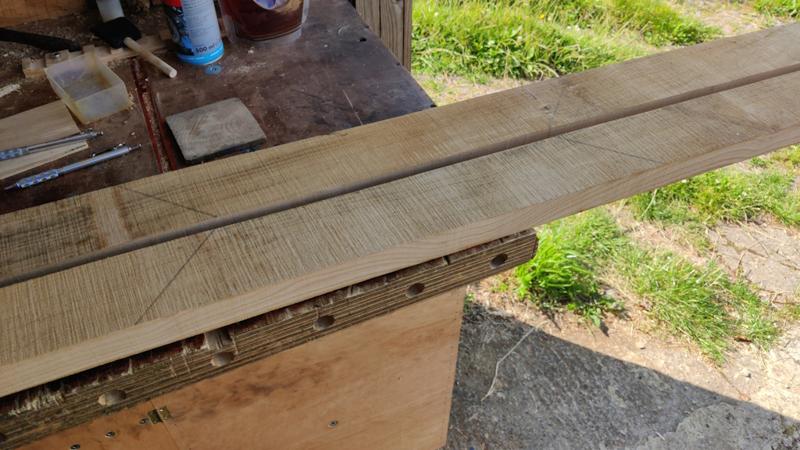
I marked the planks up, with two parallel lines at each join, about a millimetre apart. The idea was that if I managed to saw between the lines and square to the top, I'd end up with pieces that were all a couple of millimetres over size.

marked_up_planks_800.jpg


It's not the end of the world if the sawing ends up inaccurate, I'll make sure they're all the same length at the joint face later and the table doesn't need to be exactly the size I've designed it.

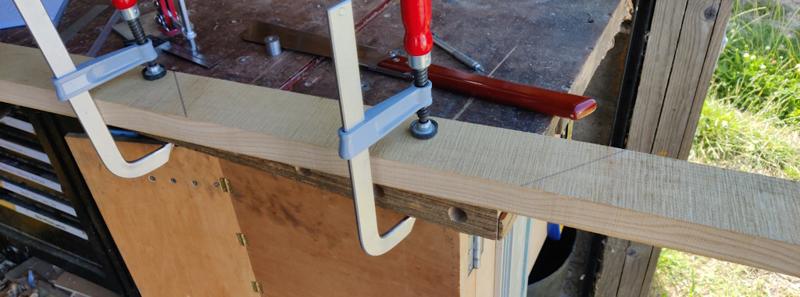
With the pieces marked up, there was nothing for it but to clamp them down to the bench (hanging out the door as they're much too long to fit on the bench):

clamped_for_sawing_800.jpg


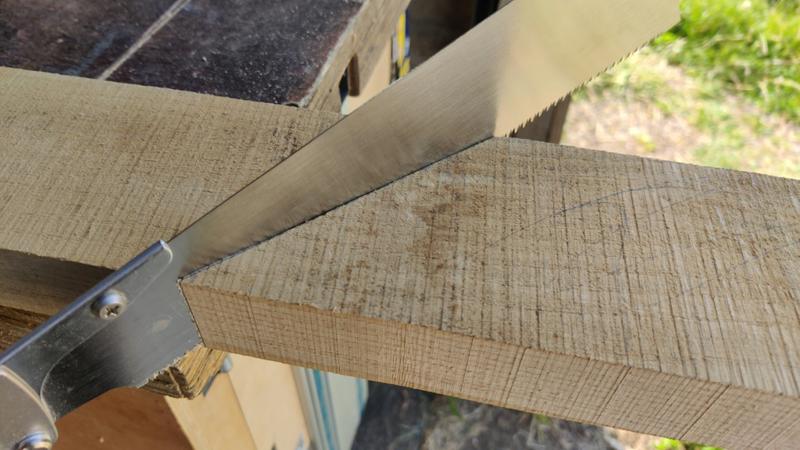
I could then attack the joints with the Kataba (which is the cross-cut saw I find I'm most accurate with):

sawing_with_kataba_800.jpg


I was really pleased with how the sawing went. All the cuts were close enough to square and followed the line well. Perhaps I'm getting better at this sawing malarkey?!

In the end I only managed to get three pieces out of one of the planks, but that was down to a long split in the wood near the end rather than anything to do with my sawing. It wasn't a problem though as I had other planks that could be used.

After a pleasant bit of sawing exercise, I ended up with this lot:

all_the_edge_pieces_800.jpg


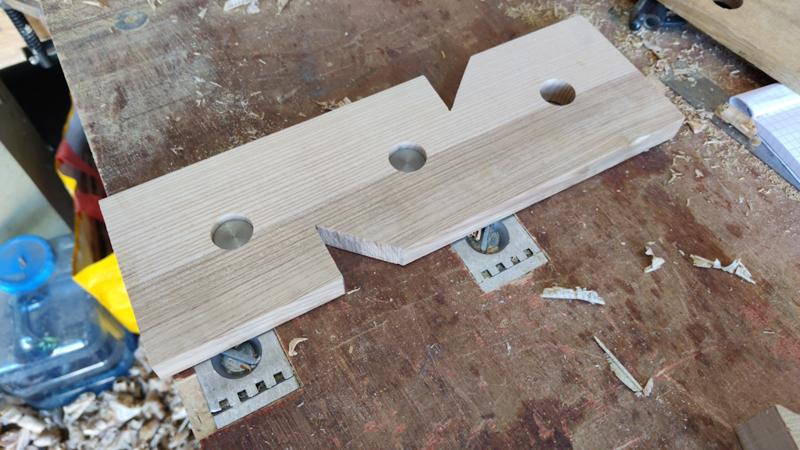
If I were a less frugal soul, I probably would have cut the ends of the planks square as it would make it easier for planing. I then could have got them flat and twist-free and then dealt with the mitre cut later (possibly even after assembling the table). However, I was trying to maximise the wood use, so the mitres are there already pre-planing. To make planing easier, I dug out an off-cut of ash, drilled a few holes in it and sawed a pair of notches into the sides:

ash_stop_800.jpg


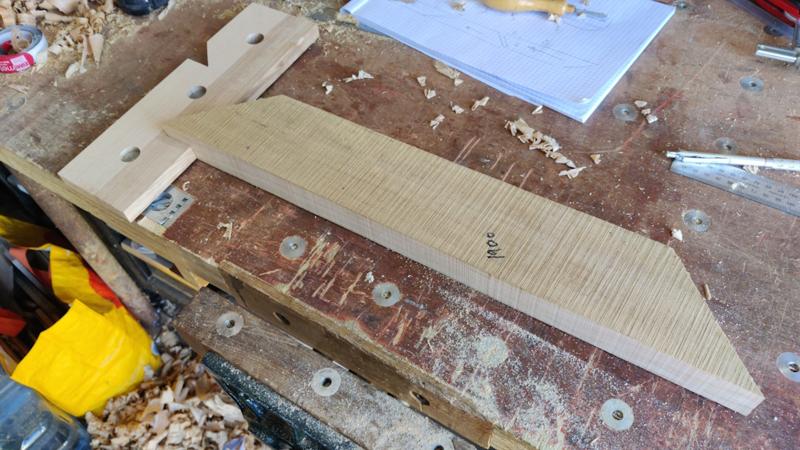
It sits on some bench dogs in the holes in my bench and, by rotating it through 180° I can have a notch in either orientation, so I can plane a plank like this...

ash_stop_position_1_800.jpg


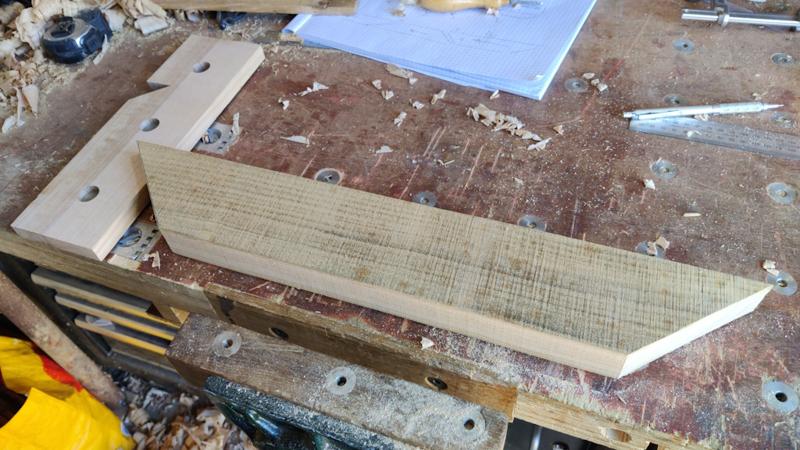
...or like this:

ash_stop_position_2_800.jpg


With my workshop time being limited at the mo, it'll probably be a while before the next update, but all being well the next update will be a brief description of the relatively long process of hand-planing to flatten and dimension all of those eight edge pieces.
 
I think half laps are a big step up from butt joints with splines. Now, can I persuade you to have a think about bridle joints... :)

My pointless tuppenceworth is that the first layout is simpler-looking visually, and would be the one I'd go for.
 
I prefer the first of the two patterns for the top, but it has the same problem that damaged the outer edge of my iroko table.
The expansion of the centre board was the cause of the problem. The centre board of mine was originally 125 mm wide and the small increase in width caused by moisture was transmitted along the slats to the outer edge and damaged one of the outer edge joints. The two 9mm slots were inserted after this damage occurred so any expansion can now occur in the centre.
( better late than never) Iroko doesn’t absorb moisture very much and I expected to have no problems.
I suggest that a method of avoiding a similar failure to mine needs to be included in your design.
 
Last edited:
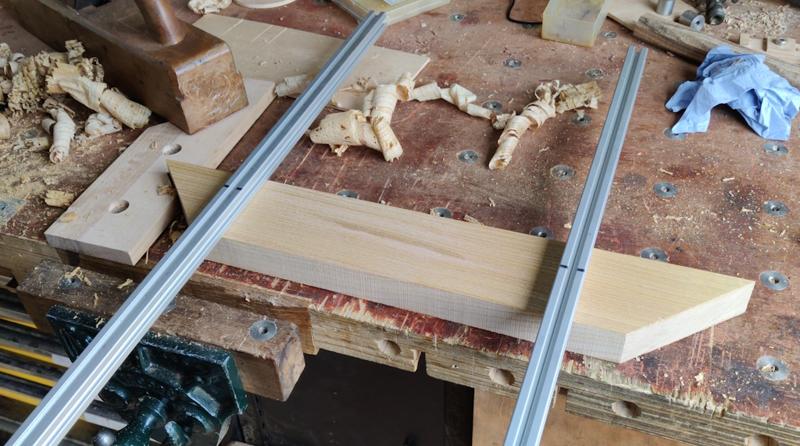
It has been several weeks since the last update, but I have been making slow progress. For each of the eight prepared pieces, I started by planing the first face flat, using the stop I showed in the last post, along with a wooden jack plane and a couple of bits of 2020 aluminium extrusion that I use as winding sticks:

planing_first_face_800.jpg


The wooden jack plane is generally my "weapon of choice" when I've got quite lot of planing to do (but not so much that I need to resort to the scrub plane). It's a lot lighter than the #5 and that makes quite a difference when you've got a lot of pieces to plane (especially in the middle of summer).

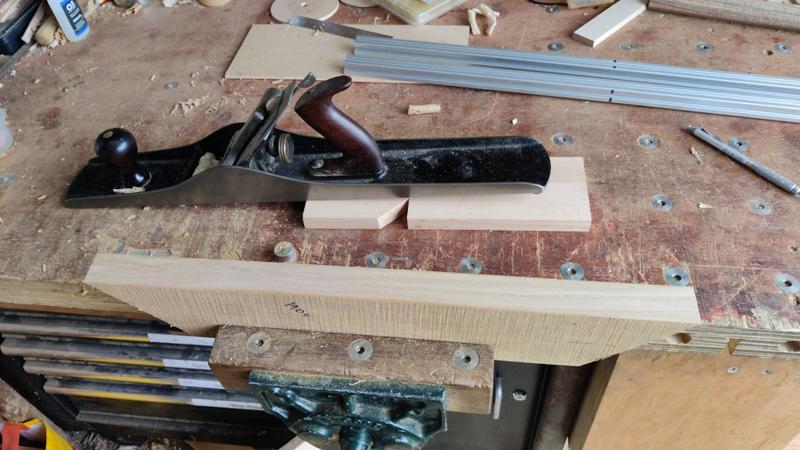
Once all the pieces had one face that was flat and twist-free, I held them in the vice and planed the first edge square using a #7:

planing_first_edge_800.jpg


I then used a marking gauge to mark them all the same width (80 mm) and again used the #7 to plane them to dimension. There wasn't much to remove as the bandsaw had cut them only slightly over 80 mm.

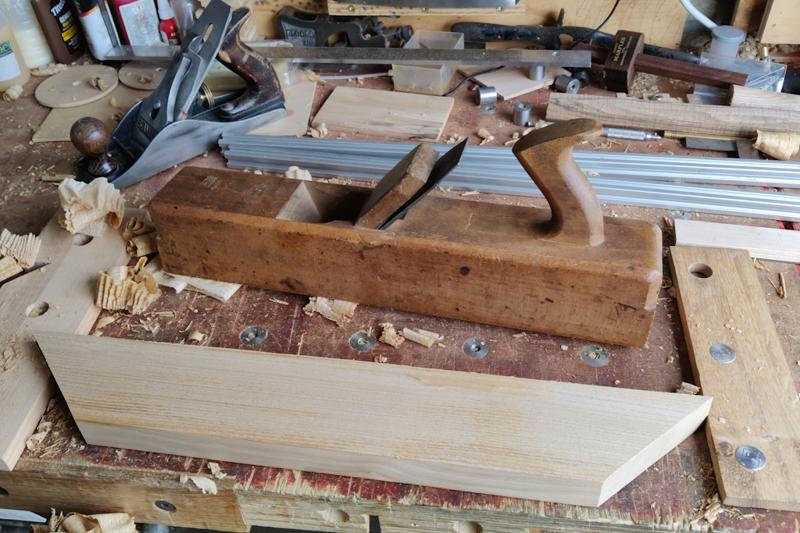
With both edges and the first face done, I measured all the planks and set a marking gauge to slightly less than the thickness of the thinnest piece. This ended up being 32 mm. I then marked all the way round all the boards and got the wooden jack plane out again to bring them to dimension (following up with a #4½ for a nice smooth finish):

planing_second_face_800.jpg


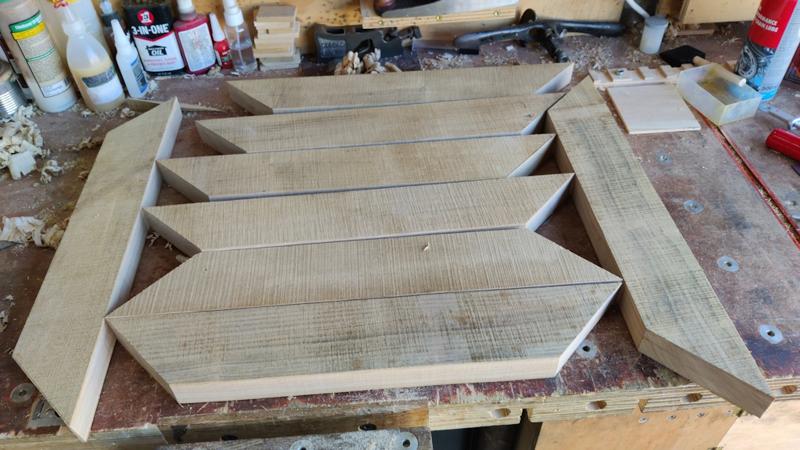
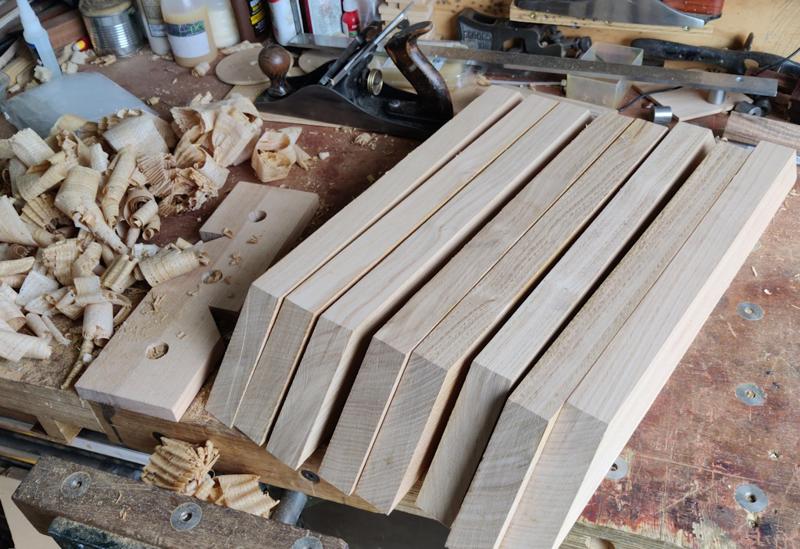
With that done, I have a nice stack of pieces that will form the outer edge of the table, all approximately the same width and thickness.

all_planed_800.jpg


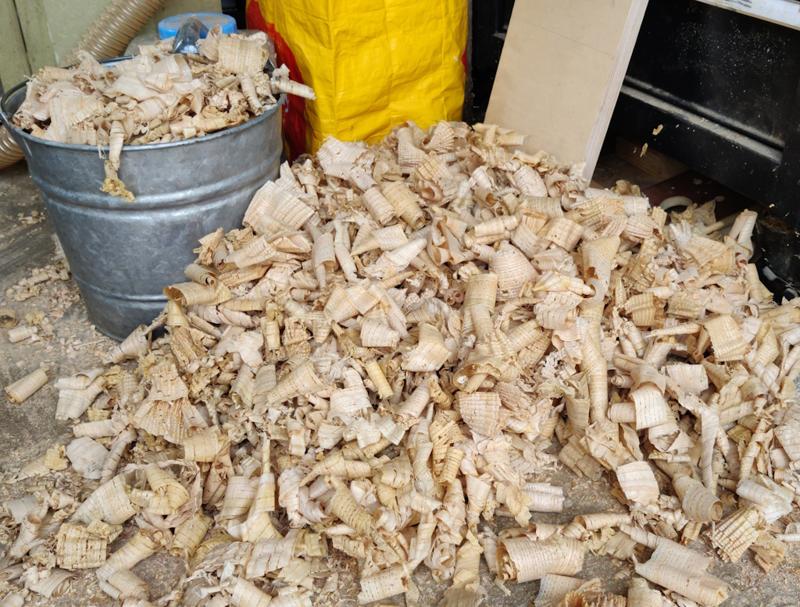
It's probably about time I emptied the shavings bin:

time_to_empty_the_bin_800.jpg


It's getting too hot to do any more garage work now, so I doubt I'll manage any more this weekend, but that feels like a nice milestone to have reached. I've still got all the stock preparation to do for the inner pieces (not to mention the legs etc); however, I'm quite tempted to get on with the joinery for the edge pieces first just for a change. Of course I might change my mind by the time there's next the opportunity for free time when it's cool enough to be in the workshop.
 
Back
Top