• Hi all and welcome to TheWoodHaven2 brought into the 21st Century, kicking and screaming! We all have Alasdair to thank for the vast bulk of the heavy lifting to get us here, no more so than me because he's taken away a huge burden of responsibility from my shoulders and brought us to this new shiny home, with all your previous content (hopefully) still intact! Please peruse and feed back. There is still plenty to do, like changing the colour scheme, adding the banner graphic, tweaking the odd setting here and there so I have added a new thread in the 'Technical Issues, Bugs and Feature Requests' forum for you to add any issues you find, any missing settings or just anything you'd like to see added/removed from the feature set that Xenforo offers. We will get to everything over the coming weeks so please be patient, but add anything at all to the thread I mention above and we promise to get to them over the next few days/weeks/months. In the meantime, please enjoy!

Mark's Workshop/Garage

Use warm/hot water in your mix and store the bags of mortar mix in the house to 'pre-heat' your mortar.

Keep an eye on the weather forecast (metcheck is the best I find) and try to place your mortar early on in the day to allow the hydration reaction the maximum amount of time to start before the night time freeze.

Also don't under estimate the amount of hessian/polystyrene/plastic sheeting you need to keep the mortar temperature above freezing. You can buy ready made frost blanket designed for the purpose.

Apart from that there's nothing much else you can do to ensure you get proper hydration of the cement.

If the frost does get to your mortar don't think that just leaving it a bit longer to cure will work, it won't. Once the ice crystals have formed in your mortar it is too late and the whole mix is knackered.

I am a Civil Engineer with my speciality in reinforced structural concrete, we have to contend with placing cementitious materials in cold weather every winter and these are the things we do to achieve the proper strengths. However even with the best preparation we sometimes get hit by the weather and end up having to rebuild.

Probably the best advise I could give is, unless you are sure it is going to work properly then just wait for a day when the temperature is maintained above 5oC for the following 48-72hours.
Cheers :obscene-drinkingcheers:
Will

p.s. Good luck and keep up the good work!!
 
Thank you everyone for your comments. To be honest I'm not overly concerned... yet! I'm sure the typical British winter down south will present plenty of mild enough days. Question is how soon and will they coincide with a weekend :eusa-doh:

will1983":2mfar2vm said:
Probably the best advise I could give is, unless you are sure it is going to work properly then just wait for a day when the temperature is maintained above 5oC for the following 48-72hours.

For now this the above is what I intend to do. I follow the weather closely during the winter season (an interest of mine) so I can plan accordingly.
I can't see any issue with the frames sitting on wedges for a prolonged period?

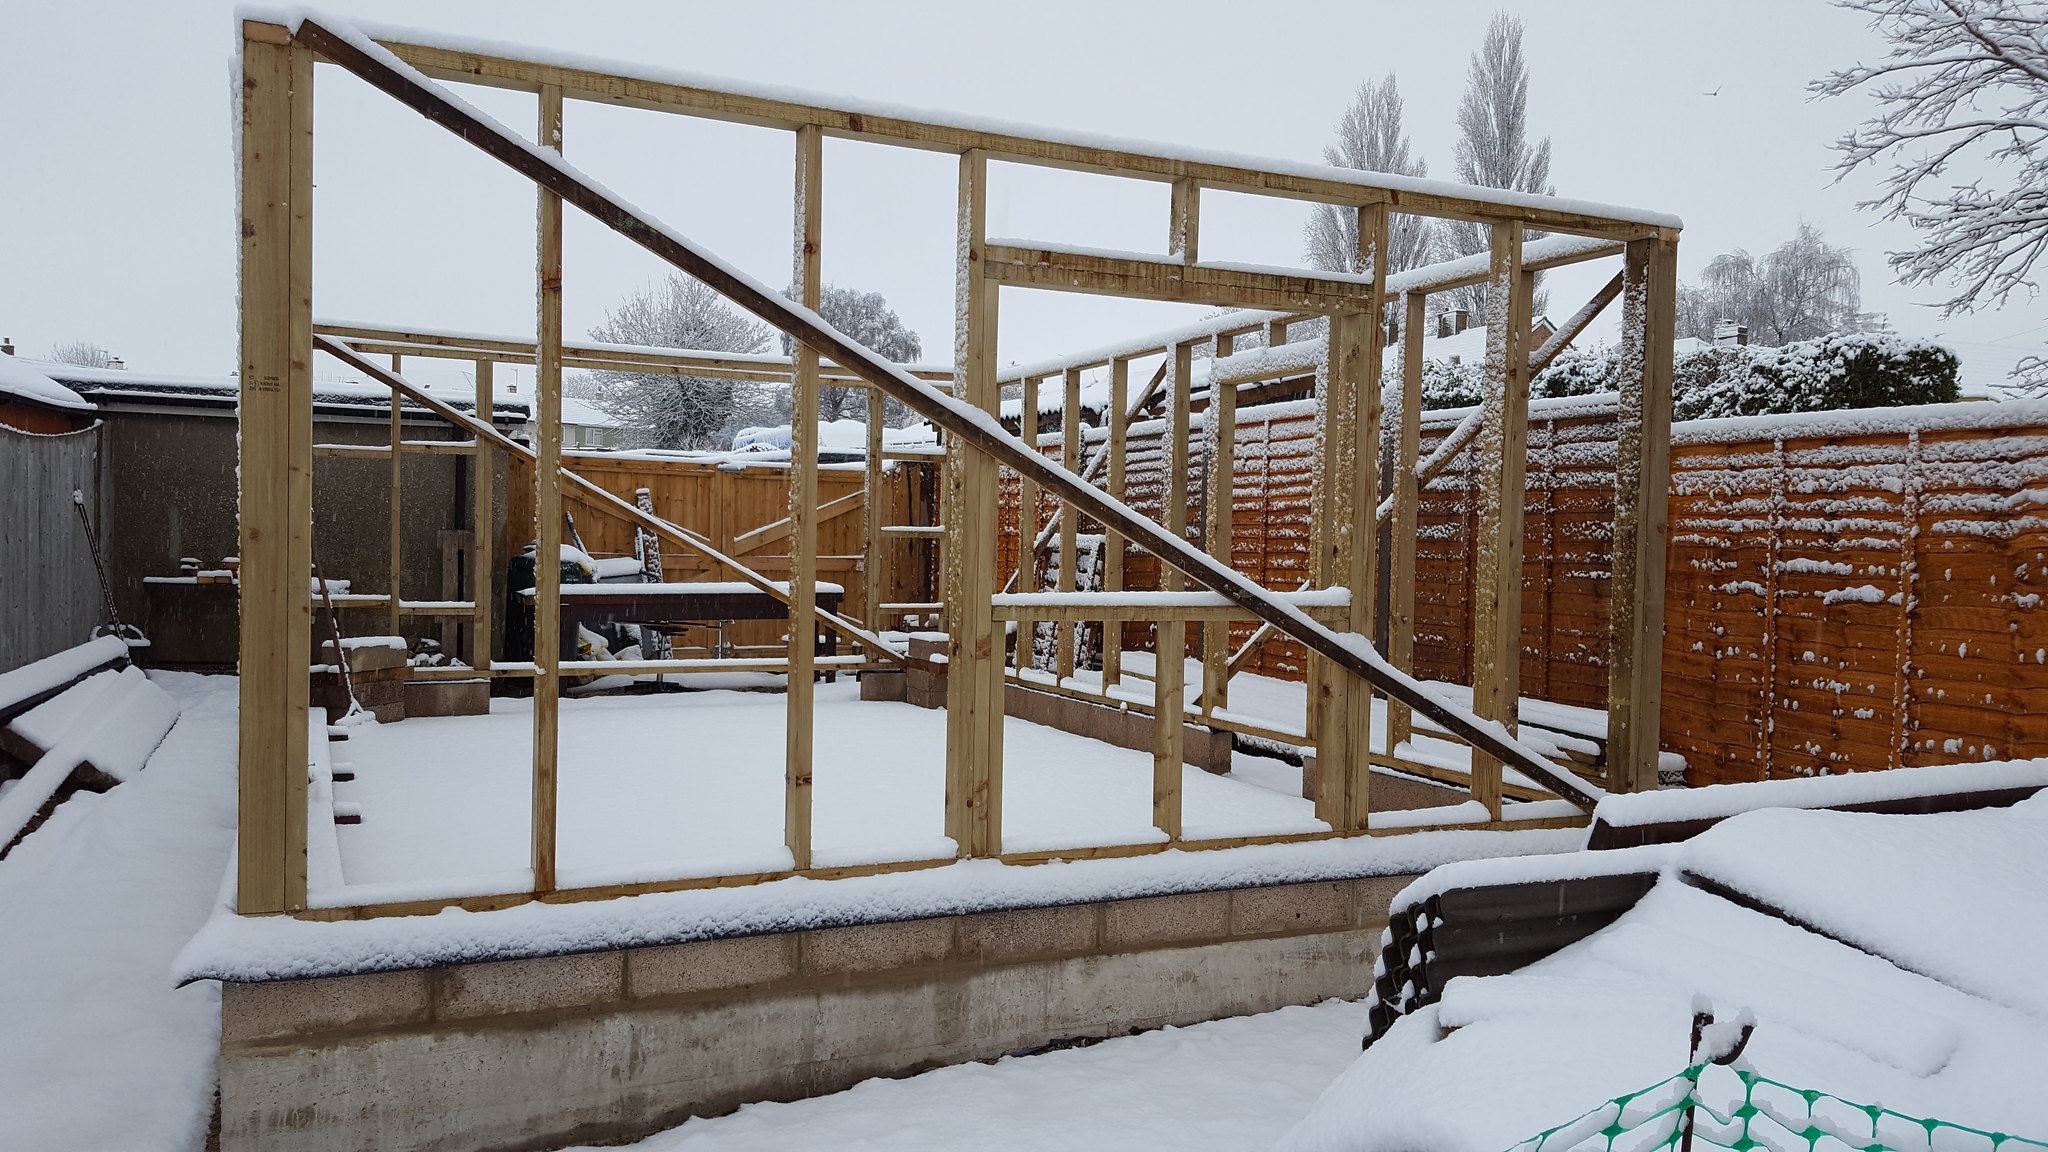
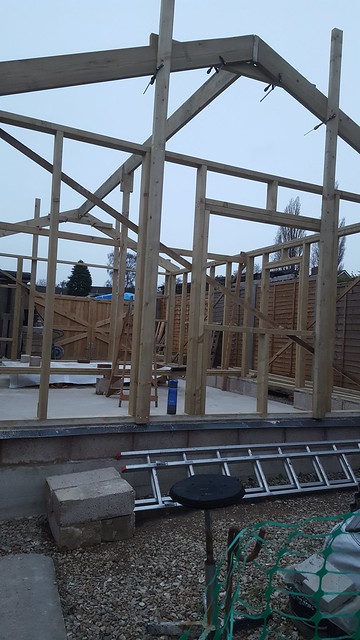
Anyhow, some real progress... The frames are up!!

38128017005_9cf2b63ef9_k.jpg


Poor photo, as you can see we had a bit of snow Sunday morning!

Did this on Saturday, the diagonals are within 2mm however a little bit of tweaking is needed with levels.

Frames were squared, braced and then erected one by one. The apertures for the two doors align with the gaps in the block work and it all went together rather nicely :eusa-dance:
It is all temporary screwed together pending final fettling - I'm willing to spend the time to get it as level, square and the wall plates as parallel as possible.

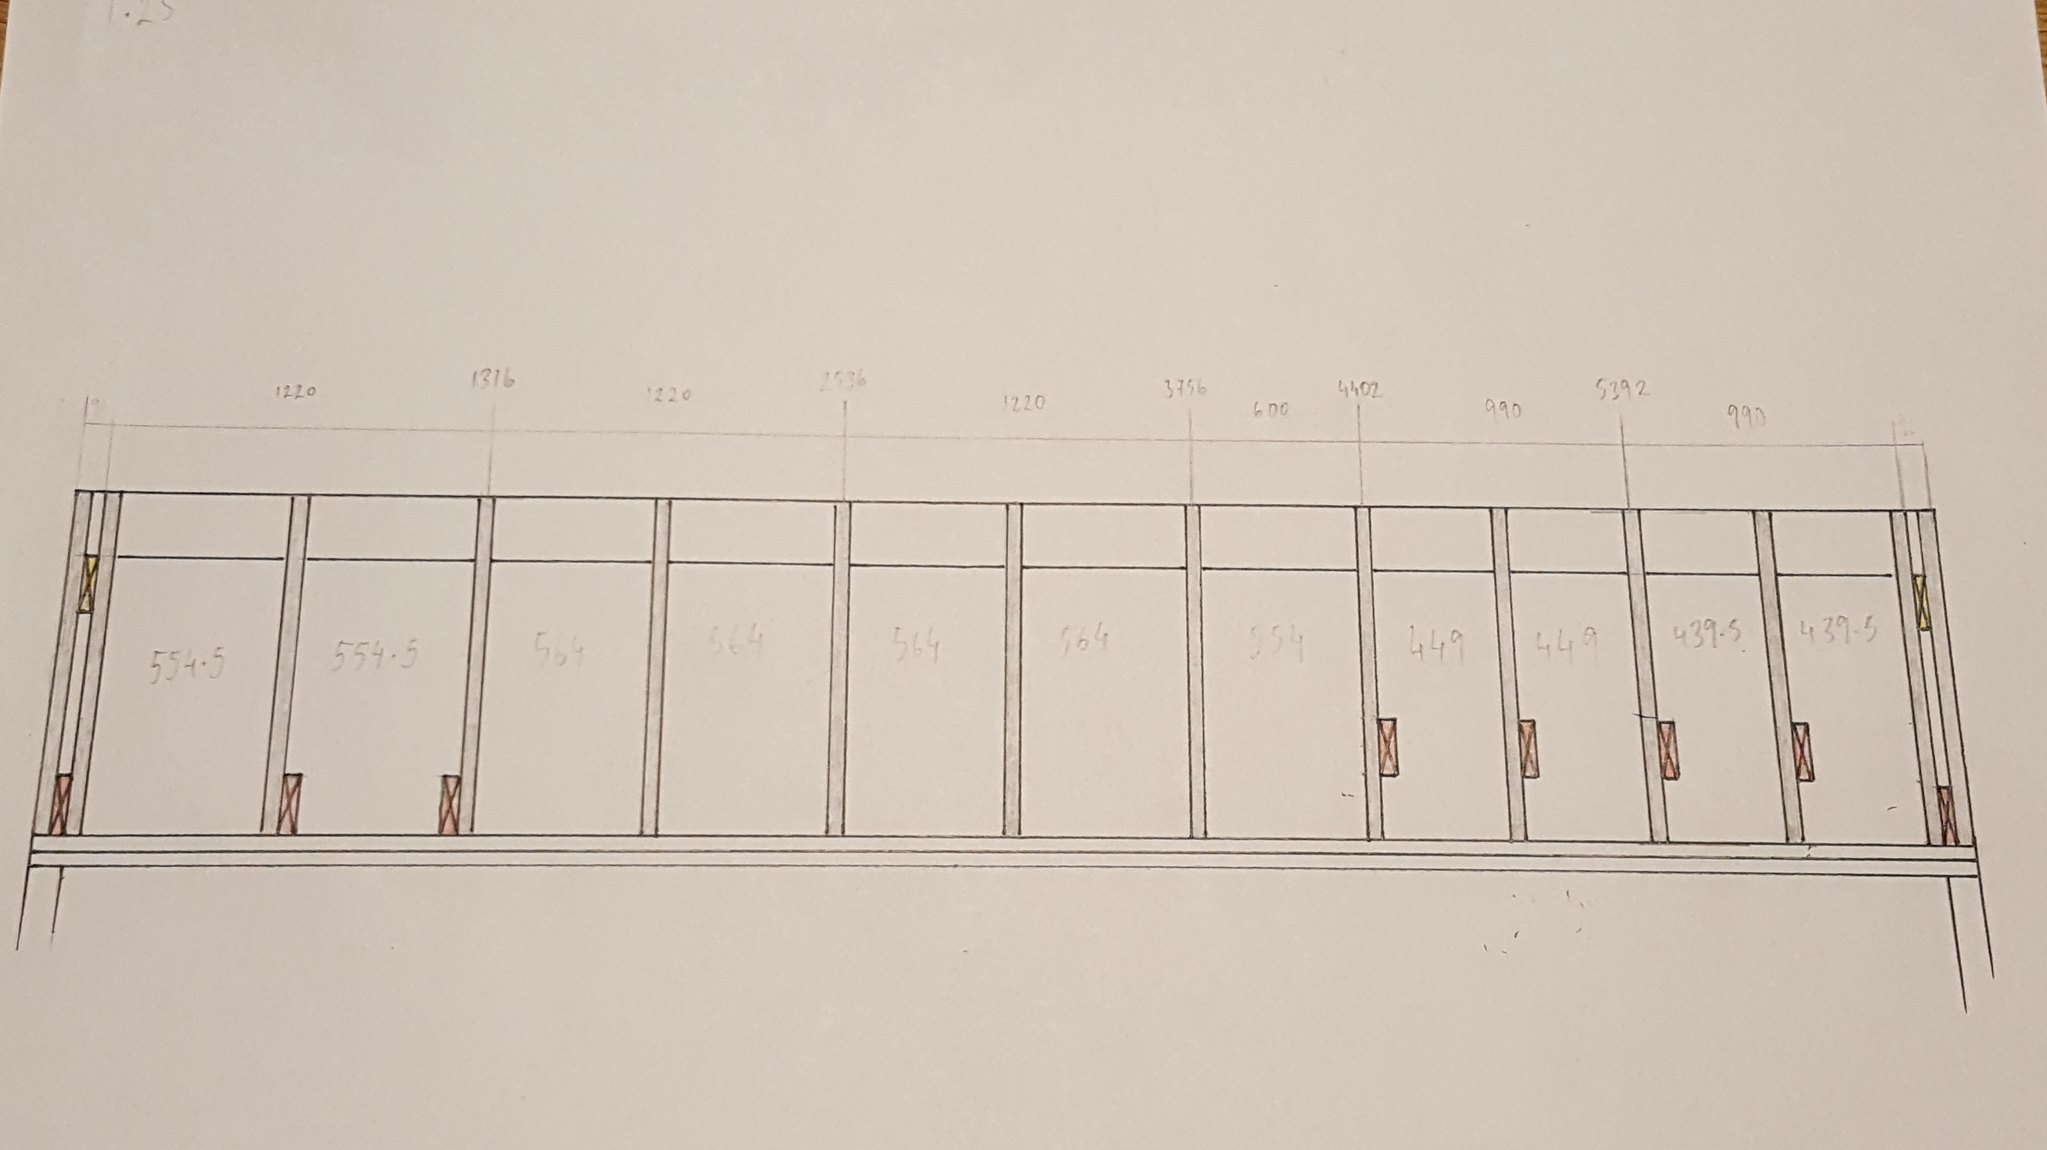
I have a plan for my roof. Something along these lines:

38978717902_f85c6838fd_k.jpg


Excuse my poor drawing skills! To summarise:

  • The end rafters are doubled up with a tie and a collar tie sandwiched in between.
  • One end has two pairs of rafters with ties at wall plate level
  • Other end has ties one third up on four pairs of rafters
  • The 9x2 ridge beam spanning ~3.6m where the rafters have no ties (extra headroom)

Rather than have the rafter spacing at ~600mm throughout I plan to have the four pairs of rafter with raised ties at ~500mm spacing. Why? The length of the building means if I carried the ~600mm spacing along the entire length, I would have a pair of rafters just ~200mm from the end rafters. Which annoys me!
There is also a benefit in that the area above the ~500mm spaced ties is planned for storage and having ties (joists) at ~500mm centres will increase the capacity of this storage area.

Yes it will involve some extra cutting of the internal cladding (OSB) but waste is minimal (OSB sheet sizes at top of drawing).

Anyone dare give me the green light on this plan?!
 
I'm not experienced enough to give you a green light, but so far the frames look good!
 
Malc2098":3av967ga said:
I'm not experienced enough to give you a green light, but so far the frames look good!

Thanks Malc. Your continued support is appreciated :obscene-drinkingcheers:
 
Mike G":3gr5hayi said:
Well you will certainly be improving the view of the end of your garden!

That's a nice size building you are planning, and having decent access will really help. One poor soul here had about a 60 or 80 metres journey, through an existing garage, to get to their workshop location.


:text-yeahthat: ...but a 2.1m wide, dog-leg archway drive.

I have a season ticket with an Osteopath.
 
Jimmy Mack":20vhhc5c said:
:text-yeahthat: ...but a 2.1m wide, dog-leg archway drive.

Well observed :eusa-clap: Not ideal I know but I'm sure I can live with it.

Jimmy Mack":20vhhc5c said:
Frame work looks good. Lovely time of year for it :?

Keep up the good work :)

Thank you for the encouragement :obscene-drinkingcheers: Yes, I never envisioned being in this position at this time of year - things took way, way longer!
Incidentally it's this damn weather that's holding me up, it's either been too cold (frost), too wet or I've been busy so I've not had chance to lay the bed of mortar under the frame!
However I have a plan... some accelerator/frost proofer admix! Plan is to do it this weekend, despite the weather looking rather chilly. I never knew such a product existed, has anyone any experience with such a product?
 
Still thinking about the roof, and I'm thinking about the verge/barge board and fascia detail.

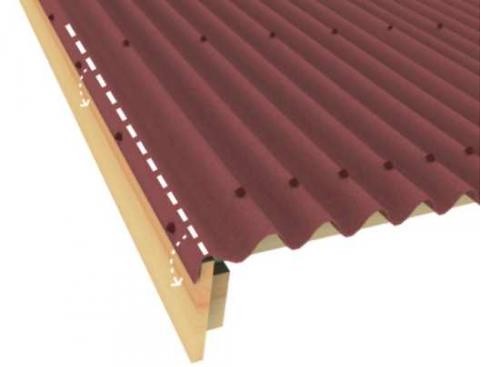
I am going to use Onduline for the roof, and this detail for the verges (I really dont like the look of the verge pieces by Onduline)

38629222335_3beafa4af4.jpg


My issue is with 200mm rafters plus ~50mm purlins and the height of the Onduline corrogation, it would mean having huge barge boards and fascias!

Thinking how to get round this, I'm thinking a solution would be to have no rafter tails.Then I could choose a fascia size (and barge boards to match) of my liking, which could be spaced out with batons to give the desired overhang (overhang will be minimal). The FE boards would then continue over the remaining exposed sections of the rafters.

Or, is there a simpler/easier way of avoiding bug barge boards/fascias?
 
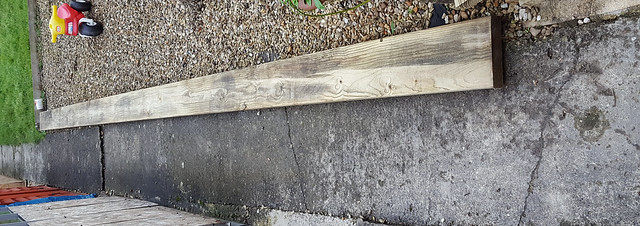
Mark, it must be an individual taste thing, because I was going to end up with bargeboards and facia's the same size and that didn't look right to me. So I made the bargeboard wider while leaving the facia at 150mm.

You don't have to have the angled depth of your 200mm rafters. You can cut their tails off to a depth that you prefer which then becomes the plumb for the bargeboard.
 

Attachments

  • IMG_1272.JPG
    IMG_1272.JPG
    451.6 KB · Views: 18,655
spearos":1gqj4iup said:
Still thinking about the roof, and I'm thinking about the verge/barge board and fascia detail..........

Or, is there a simpler/easier way of avoiding bug barge boards/fascias?

Yes. Use smaller ones! I'm not a fan of barge boards. On a shed, if you have them at all, then plant some 2x2 on the face of the gable and use this as the stop against which you run your feather edge boards. When you've finished your boarding, just plant some 3x1 or 4x1 over as the barge board, and have your roofing overhang this.

I avoid soffits and fascia boards as much as I can. I much prefer exposed rafter feet, with boarding between. Again, a piece of 3x1 or 4x1 as a fascia of sorts supports the lower edge of your roof material, but is hidden behind the gutter.
 
Malc2098":210r1khp said:
You don't have to have the angled depth of your 200mm rafters. You can cut their tails off to a depth that you prefer which then becomes the plumb for the bargeboard.

I get it... I think! - Do you mean a horizontal cut at the bottom the rafters? Cleary shown in your pic by the right angle at the bottom of your barge boards?

Mike G":210r1khp said:
Yes. Use smaller ones! I'm not a fan of barge boards. On a shed, if you have them at all, then plant some 2x2 on the face of the gable and use this as the stop against which you run your feather edge boards. When you've finished your boarding, just plant some 3x1 or 4x1 over as the barge board, and have your roofing overhang this.

This is somewhere along the lines of what I was thinking!

Mike G":210r1khp said:
I avoid soffits and fascia boards as much as I can. I much prefer exposed rafter feet, with boarding between. Again, a piece of 3x1 or 4x1 as a fascia of sorts supports the lower edge of your roof material, but is hidden behind the gutter.

And this then ties in with the barge detail above - the 'fascia' is minimal (possibly matching the barge board size), leaving the lower section of the bottom rafter plumb cut exposed?

If I remember correctly Mike, you have used Onduline on a previous workshop - may I ask how you finished the verges?

Lots to think about, cheers guys!

I have spent some time out there today - really is an awful time of year to be building a workshop! Managed to fill the void between frame and blocks with mortar on three sides. I'm sure I would have got more done if I wasn't mixing mortar by hand and if there wasn't a surprise (in that it wasn't forecast) shower, which meant some frantic running around trying to cover up!
 
Is Winter finally over?! Progress has been so slow!

But... This weekend I hope to have the roof framed, or at the very least most of it!

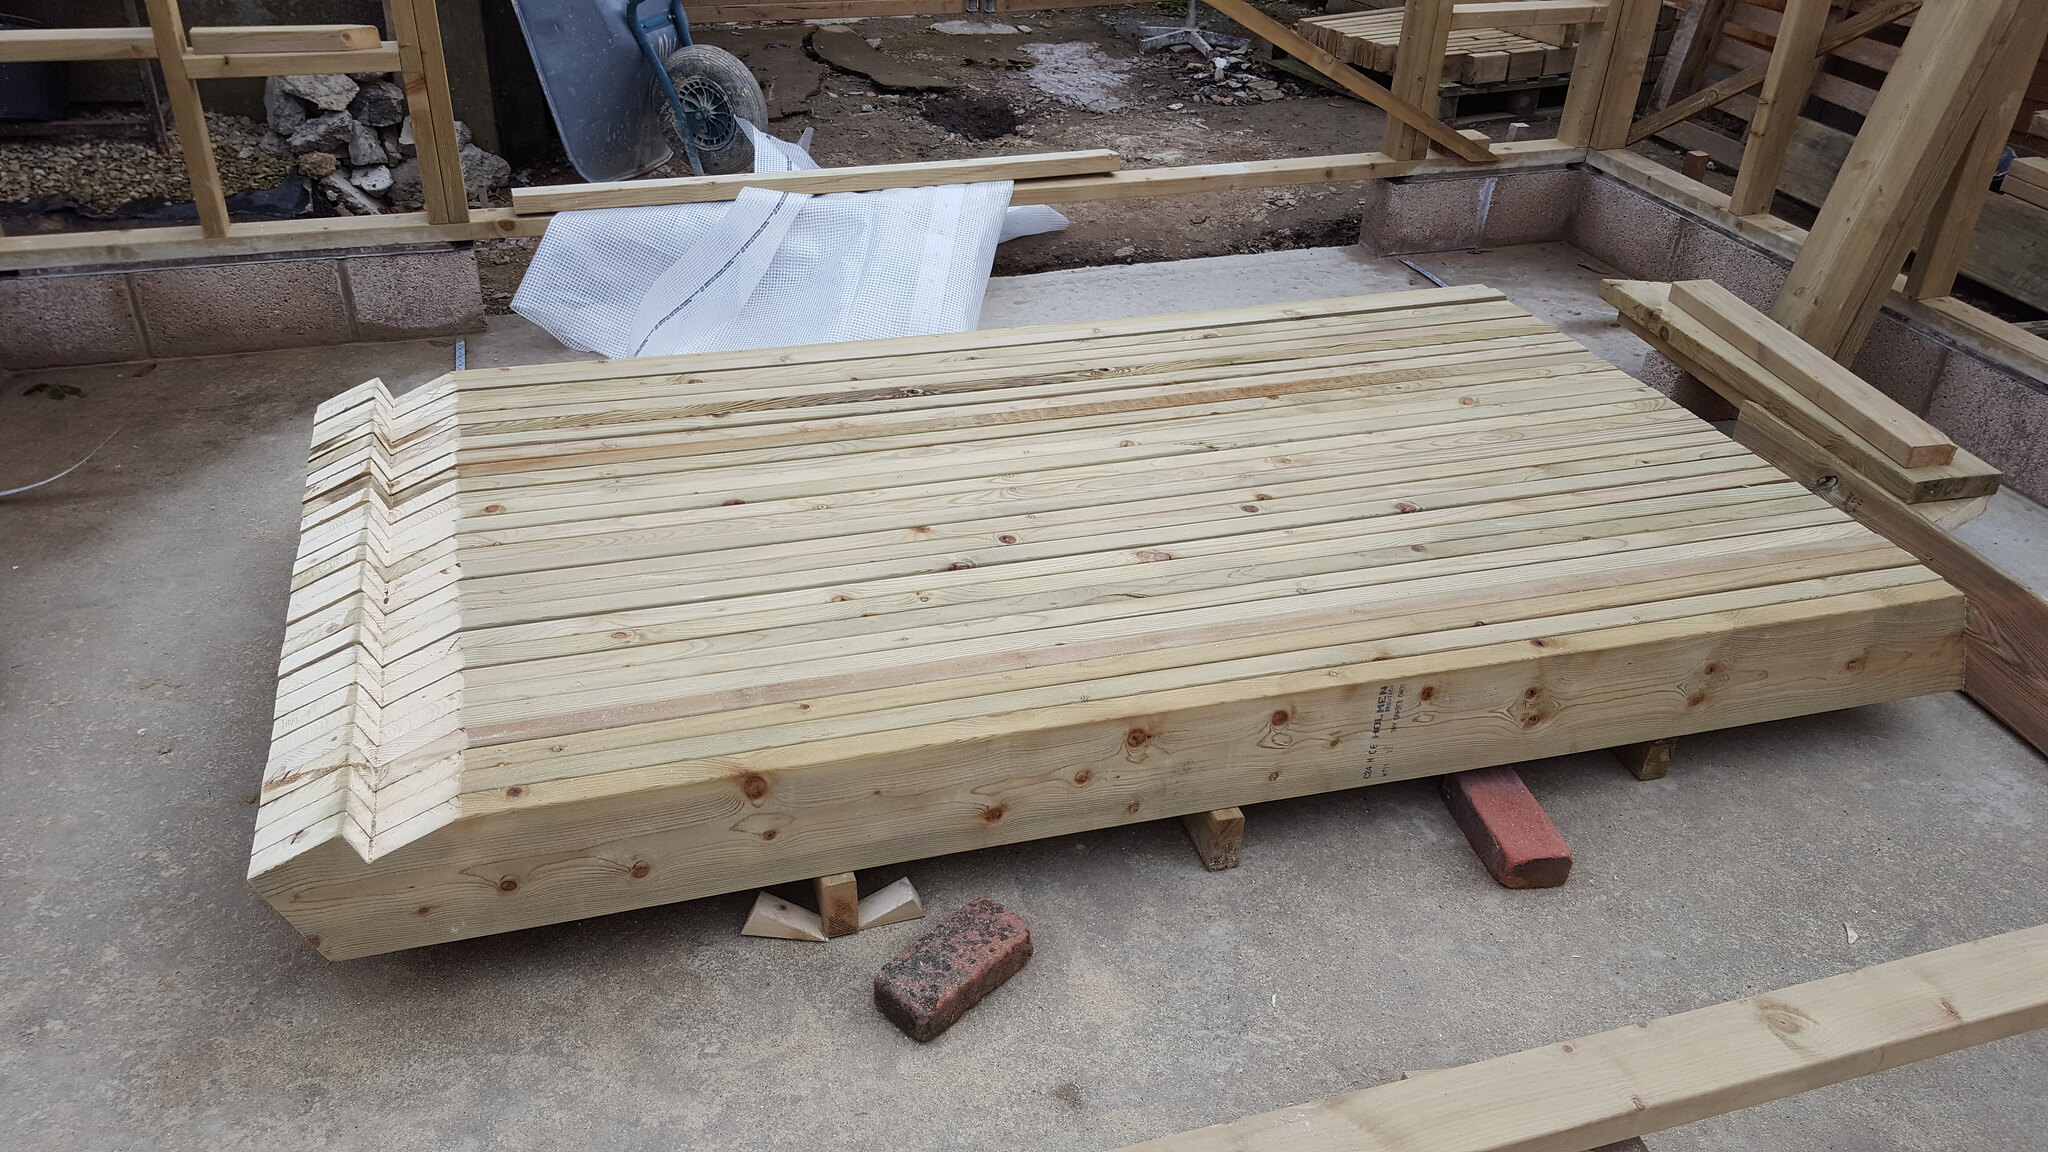
I have a whacking great ridge beam

40140630255_97e3450b22_z.jpg


And 28 rafters cut

40325365834_8167a6e447_k.jpg


And a load of timber for ties. Hopefully I'll manage to get it all together!

After reading all the differing opinions my friend Google suggests, I am still unsure of the best way of fixing the rafters. I'm thinking skew nailing with 4" nails; for the birdsmouth a couple of nails (one either side) of the level cut and for the top of the rafter 3/4 nails - either 2 one side and 1 the other, or, 2 either side? Any on the upper 'thin' edge?
Rafters are 8"x2".

The ties will be bolted.

Due to my lack of experience, I'm thinking it might be best to drive the nails with a hammer, rather than using the Paslode? Taking it slow and steady, leaving the heads proud until I'm 100% happy (mistakes more easily put right this way!).

Something very basic for more experience folks - putting a few nails in! However I would very much appreciate any tips, suggestions etc :obscene-drinkingcheers:
 
I went for screws, too.

I used torx screws from Class Olson with an impact driver. Brilliant!
 
If you cant make it accurate than make it adjustable. :) Screws will give you an opportunity to re-jig if necessary.
 
Thanks guys - using screws is something to ponder. That's a lot of pilot holes to be drilled though! I do think though it'd be quicker to just leave the heads proud on the nails, so should any adjustment be needed they can be quickly pulled out?

Out of interest though how many screws per rafter did you use?
 
The screws from Clas Olson had a sawtooth thread for about its first quarter. I used 90, 100 and 120 mm screws and never needed to pilot them at all.

https://www.clasohlson.com/uk/5.0x100-mm-C4-Countersunk-Wood-Screws/Pr409560011

For the rafters I did one central and two skewed.

I felt it was also important for me a an amateur, that the weight of an impact driver that can be carried on a belt with the screws was far far lighter than nailer with a trailing air pipe.

I made all the frames up on the ground with the nailer and wish now that I had found these screws earlier, as I would not have bought the nailer and used screws throughout. A professional doing this all the time would probably have a different view, but I found the screws more efficient and that screwing on the top of a ladder on an unstable structure was safer with a light impact driver that with a heavy railgun and air pipe.
 
Why use a compressed air powered nailgun (or even a railgun ;) ? By a Paslode and then sell it on eBay when you're done. You'll get close to what you paid for it. I adopt that approach on all my projects.
 
Malc2098":9sn3gi4x said:
For the rafters I did one central and two skewed.

Thanks Malc.

A couple skewed for the birdsmouth too?


RogerS":9sn3gi4x said:
Why use a compressed air powered nailgun (or even a railgun ;) ? By a Paslode and then sell it on eBay when you're done. You'll get close to what you paid for it. I adopt that approach on all my projects.

Exactly as I have done! :text-+1: Although I may now keep it!

Made the wall framing a breeze. I'm just unsure about letting it loose under my control on the rafters!
 
spearos":3p184un0 said:
A couple skewed for the birdsmouth too?

Yes. I probably overdid them, but I used three each either side of the ridge and three each at the birdsmouth. But the ridge and rafters were meaty at 145 x 45mm.

My mate today said there's no way mine will ever fall down!
 
Malc2098":tsf8se7j said:
Yes. I probably overdid them, but I used three each either side of the ridge and three each at the birdsmouth. But the ridge and rafters were meaty at 145 x 45mm.

My mate today said there's no way mine will ever fall down!
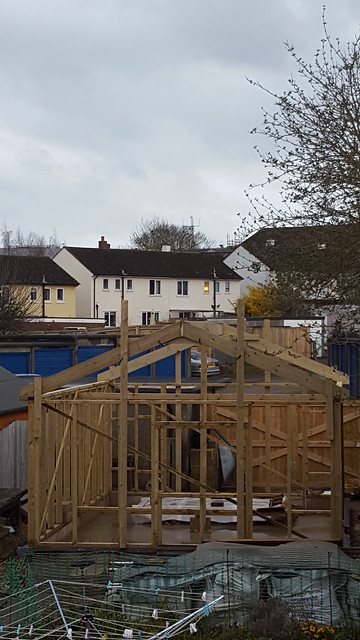
Thanks for that Malc. I guess it's better to have more than you need rather than less!.. Unless in this scenario it splits the timber!

I have decided though that I'm going to stick with nails. From what I've read there is some thought behind not using screws, that being screws are hardened which makes them brittle. Making them more likely to completely fail under stress, whereas a nail will just bend.

Anyhow, a significant step accomplished this weekend! Weather and family commitments meant I didn't have as much time as I would have liked on my build, however the ridge beam is up!

40479186414_1a3360dfa2_z.jpg


27318451608_89e0a1d04a_z.jpg


Following Mike's technique it wasn't that difficult getting the 6.5m, 225x45 ridge up to ~3.5m with just me, my Dad, an assortment of ladders and pieces of timber.

Birdsmouths seem ok -

27318619888_57a1f118f9_z.jpg


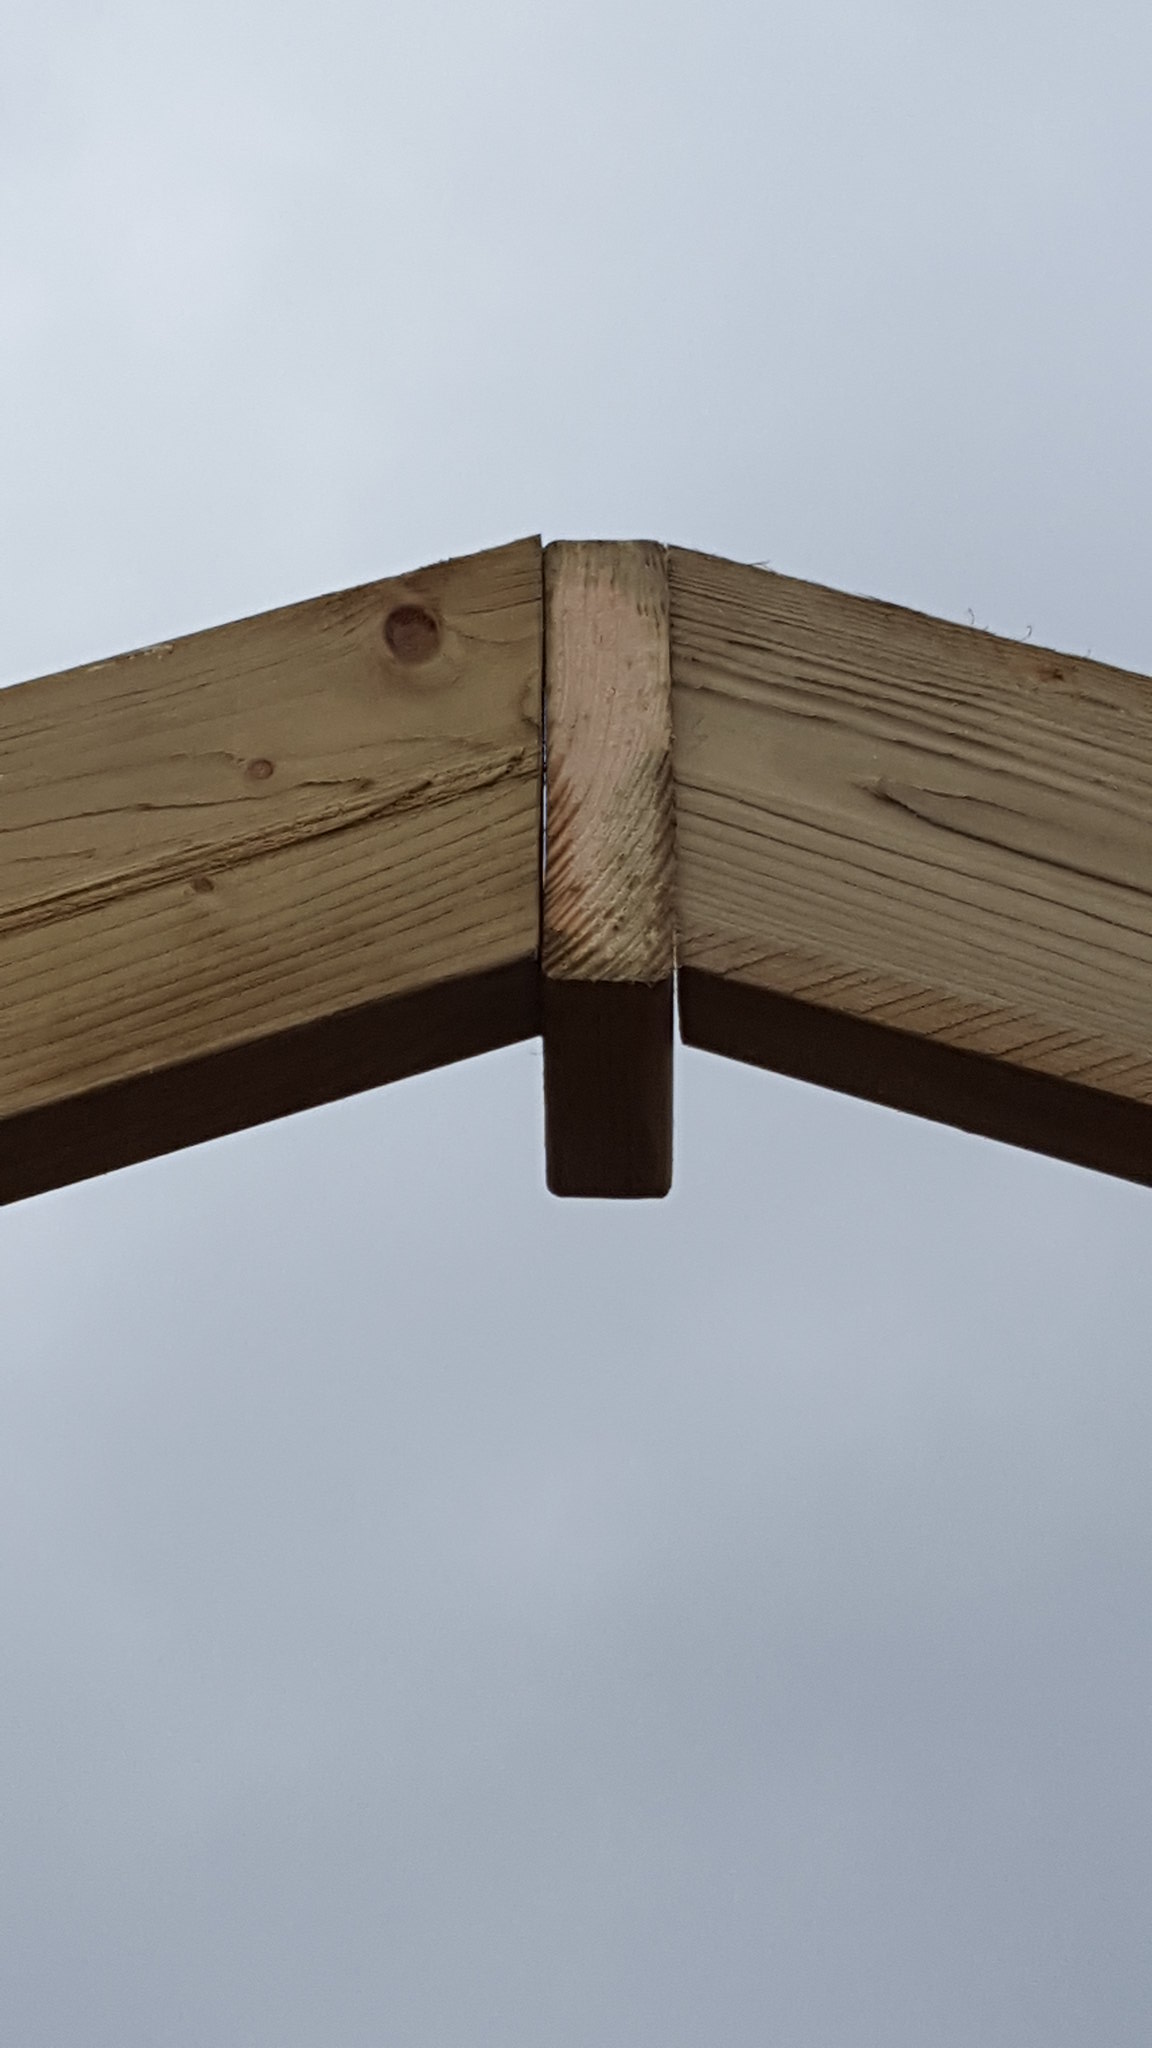
But... The ridge is cupped, meaning the rafters aren't sitting quite right at the top :( This photo shows it well (taken whilst setting up end rafters with an ridge offcut).
26319637827_970c5087fa_k.jpg


Currently the roof is held up with temporary clamps, braces, screws and nails, and the plan is to sort it out next weekend.

What should I do with the cupped ridge/rafter fit though? How much of a problem is this? :eusa-think:

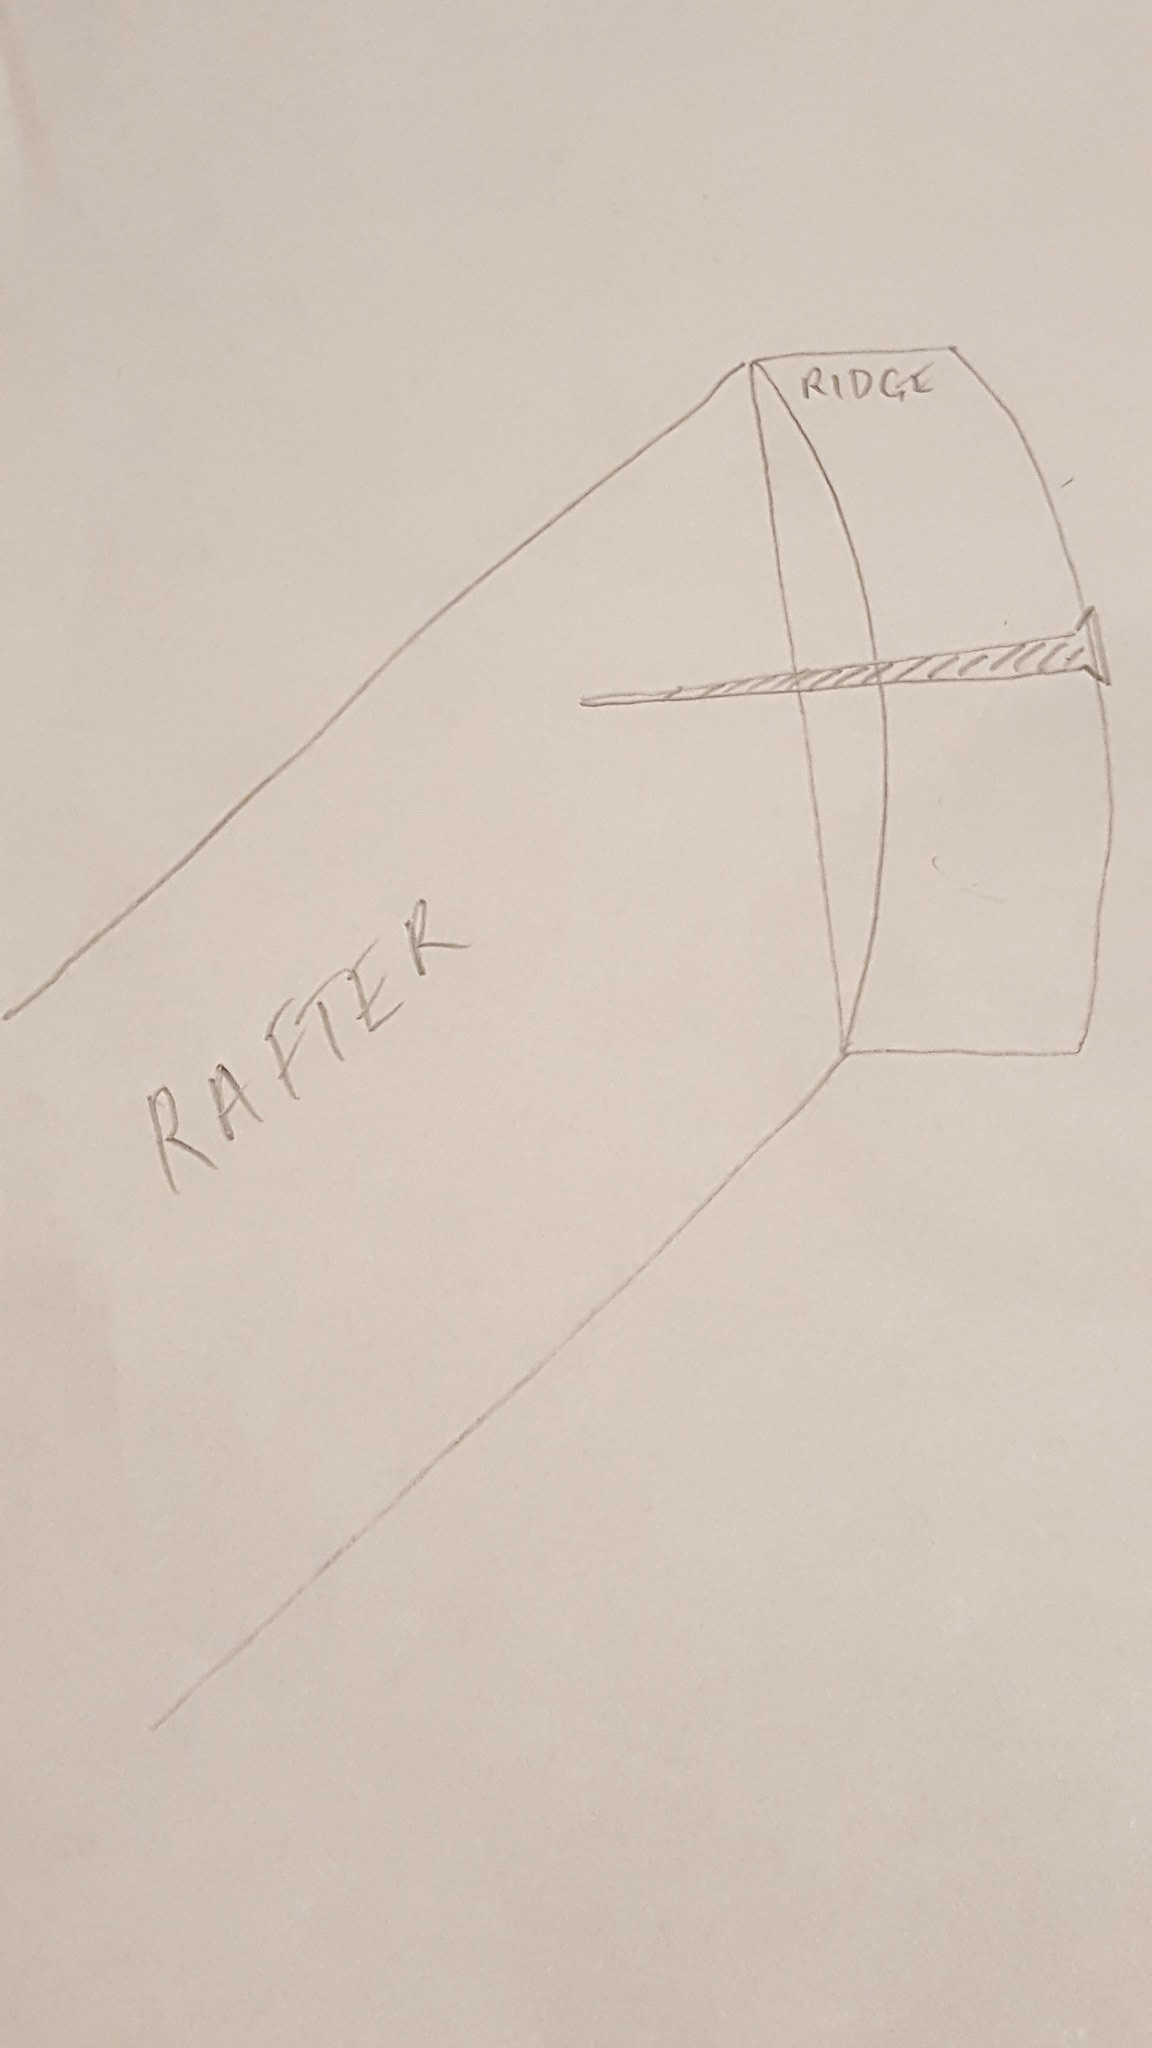
An idea I've had is something along the lines of this; supporting the ridge and removing the rafter on the convex side of the ridge, then pulling the ridge plumb against the in situ rafter with a large screw. A quick sketch should help explain my idea -

40298027175_1908ce127c_k.jpg


Any thoughts/opinions very much appreciated!
 
Looking good.

I've no qualification and only just a little more experience, but I recall a video I watched of a Japanese carpenter who said something like, 'just go with the wood.'

As you go along the ridge you might find that they all are 'out' in different ways, but the combined structure of all the joints begins to stiffen the structure up.

Then once you get the roof and wall sheathing on, it'll be stiffer still, I suspect, whether the ridge is cupped or not.
 
Mark..just go with it. It's a workshop...not a piece of furniture (although I admit to the same degree of fretting at times).

Your suggestion won't work as you are screwing into more-or-less end-grain and the screw will just pull out.
 
RogerS":2njlqjz3 said:
Mark..just go with it. It's a workshop...not a piece of furniture (although I admit to the same degree of fretting at times).

It's the structural implications of the ridge/rafter joint that I'm concerned about, not how it looks!

However, thank you guys :obscene-drinkingcheers: Your comments make me feel more confident about continuing as it is and making the best fit I can with the ridge.
 
spearos":2180jhy5 said:
RogerS":2180jhy5 said:
Mark..just go with it. It's a workshop...not a piece of furniture (although I admit to the same degree of fretting at times).

It's the structural implications of the ridge/rafter joint that I'm concerned about, not how it looks!

However, thank you guys :obscene-drinkingcheers: Your comments make me feel more confident about continuing as it is and making the best fit I can with the ridge.
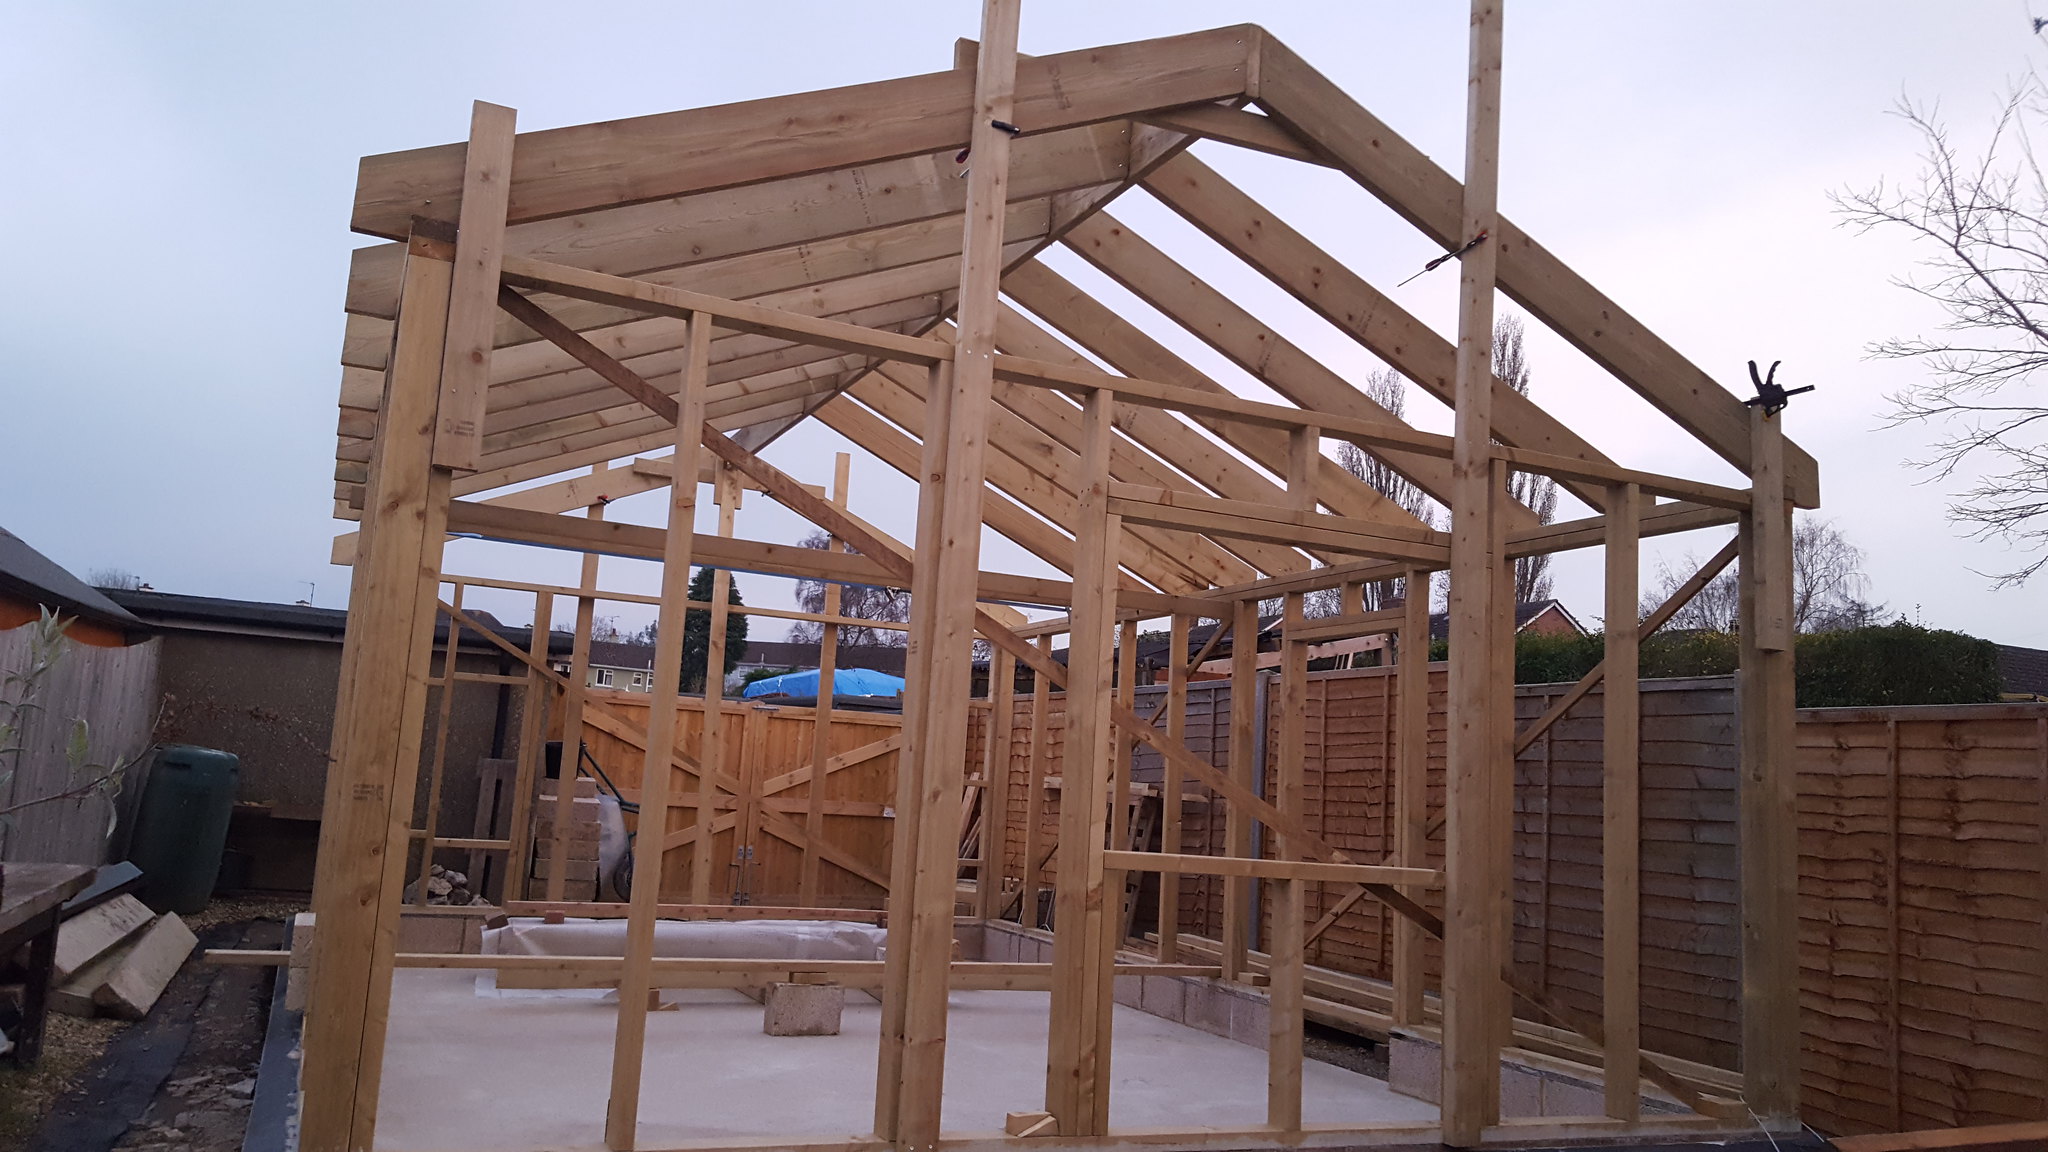
These sort of structures are analysed for strength and stability on the basis of the properties of the materials and assuming each joint is a hinge. So little strength is derived from the joints.

Bob
 
Looks good Mark. Don't worry for a second about a cupped ridgeboard. I've seen gaps on rooves made by pros which you could get a finger into.
 
Thanks for the comments Bob and Mike! - I feel a whole lot better for hearing them, and I can't wait to get out there at the weekend and cracking on! :eusa-dance:
 
More progress, more pics -

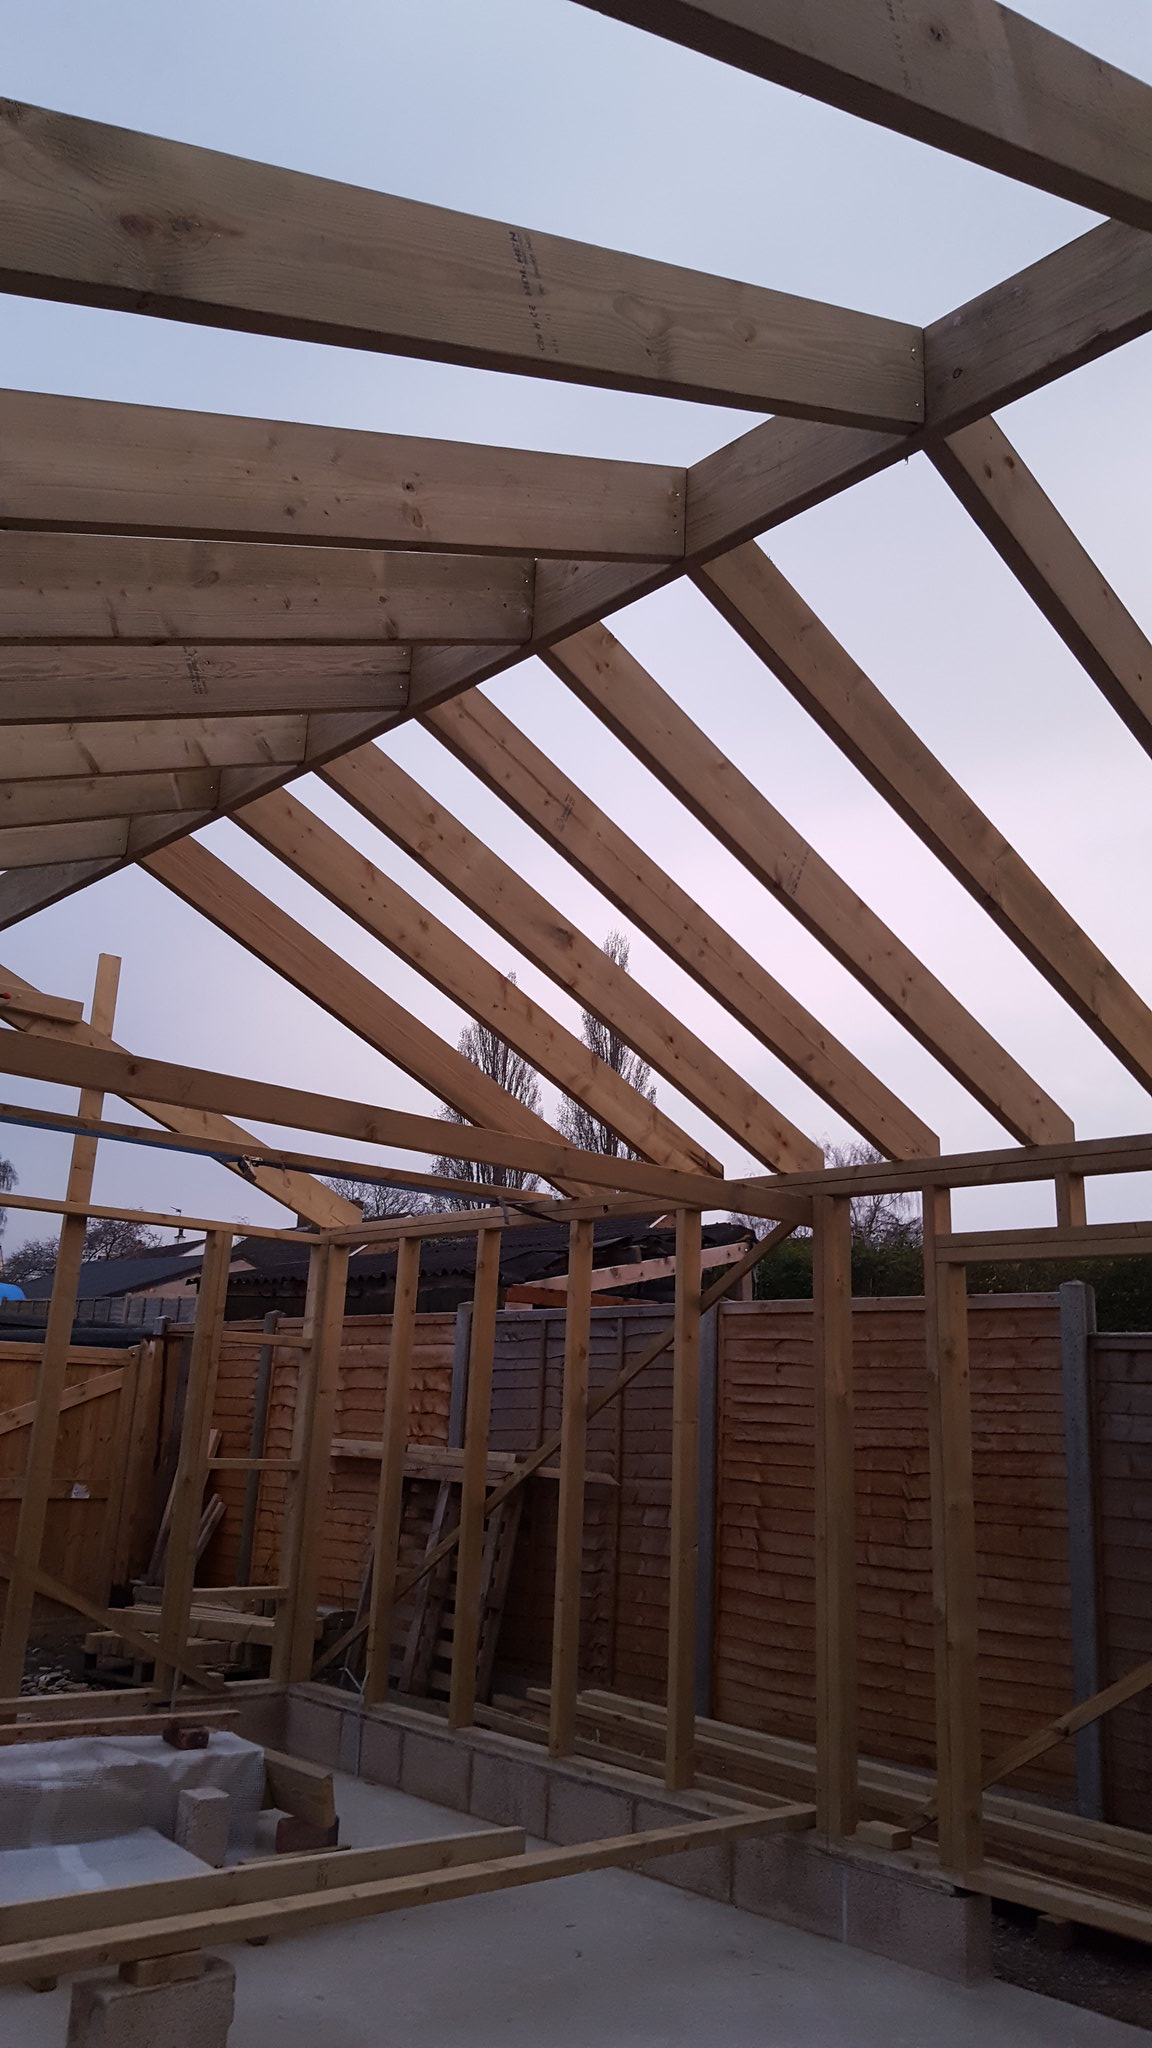
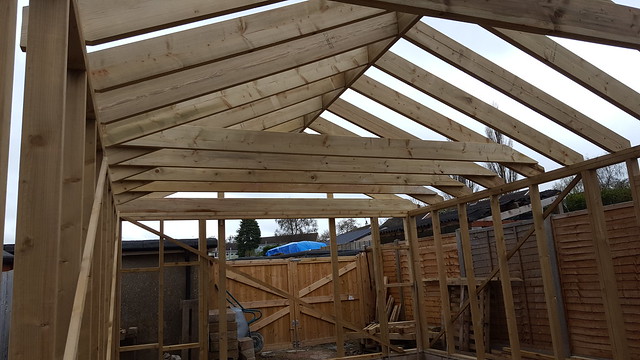
Most of the rafters up 8-)

26478037447_e9bf59f20d_k.jpg


41306562742_140ccc2690_k.jpg


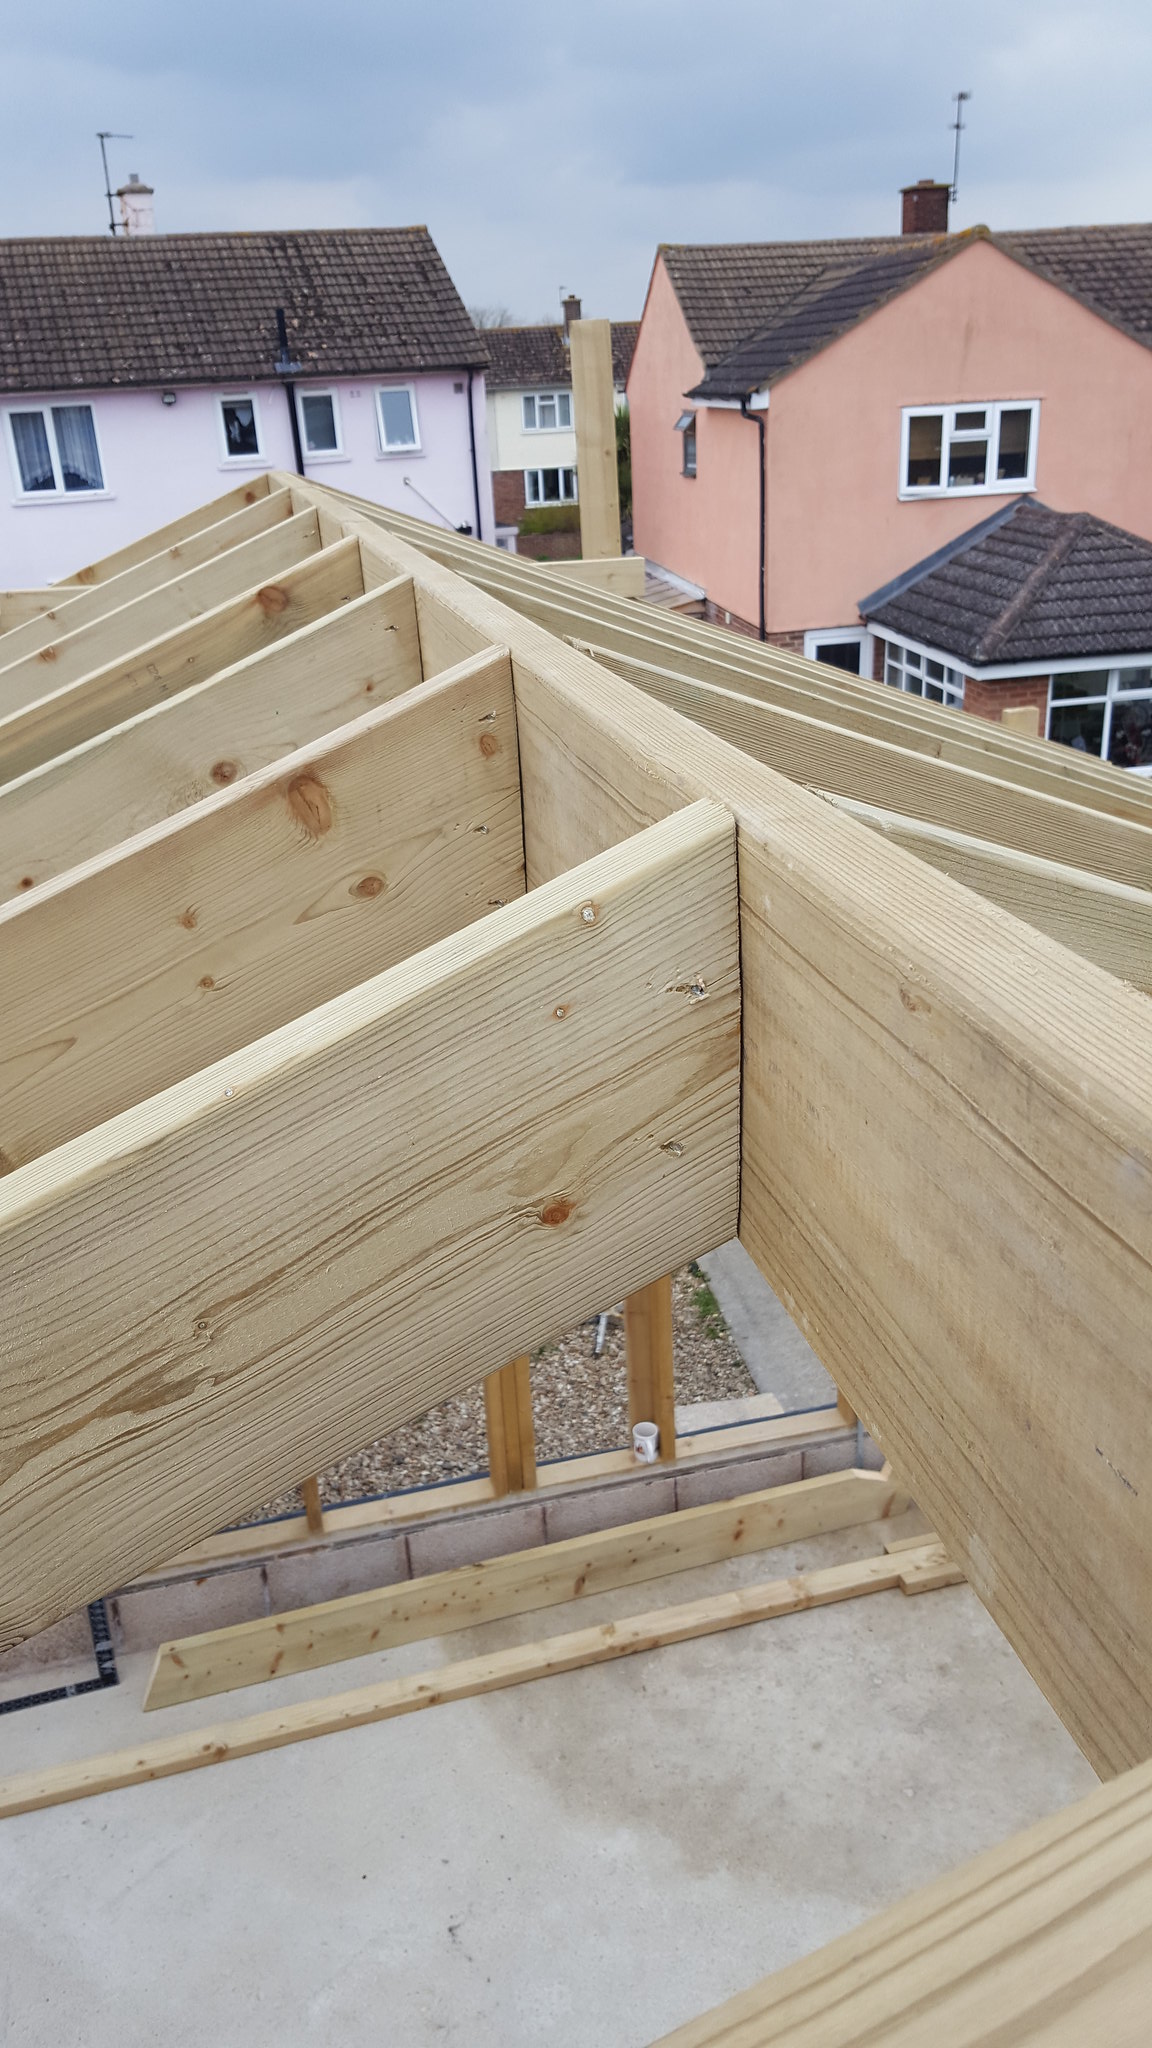
Despite my earlier concerns, I'm quite pleased with the actual 'fit' at the ridge beam

26478051707_7c047ca7f4_k.jpg


I would have liked to have got all the rafters up (two pairs left to do), however I had to tweak the building width at one end which robbed me of time. Despite setting the wall plates parallel two weeks ago with a piece of timber cut to the correct length (my 'test' piece for the birdsmouth cuts), it become apparent they had moved/warped.
I appears the timber is very unstable in the variable weather we've been having!

Next job is to fit said two pairs along with the ties and add some support at the gables...
 
Roof coming along slowly! This build seems to be taking forever! Having one day every week at best means it's been around year now since I submitted my planning application!

A few photos of the limited progress -

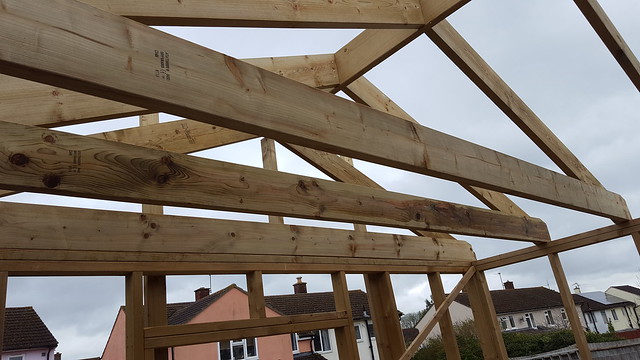
Ties at wall plate level one end

26941970247_e51c251191_z.jpg


Raised ties the other end

40911187175_7f8f39fd38_z.jpg


It was ever so satisfying that the ties all sat level when simply sat on wall plates or in the case of the raised ties on spacer blocks of the same size placed on the wall plate ;)

There is more progress (collar ties added, ties bolted etc) so photos to follow...


Meanwhile I've discovered felt Shingles! I really like the look of a timber building with a slate roof so I may have to amend my application! - I think I'm going to go for grey square felt shingles. They are reasonably priced, easy to fit (hopefully!) and they have an appearance similar to slate.

With this in mind I have been thinking about the verge detail and have been perusing all the shingle 'accessories' which led me to ridge vents. I understand the theory and to me it makes sense, however, I question whether I should install ridge vents because hardly any outbuildings seem to have them?
 
Rome wasn't built in a day Mark and you are making faster progress than others did at this stage. Keep going.
 
Doing well, Ole Son!

I like to see the timber framework. It was sort of sad after mine all got covered up by sheathing inside and cladding and roofing outside. But I know it's there!
 
Thanks Andy. Soon I'll be able to do bits during the lighter evenings so that'll help move things along.
I totally underestimated how long it'll take! My lack of experience means I'm maybe a bit too meticulous with measurements etc, just hope it all turns out ok!
 
Malc2098":2iccimfn said:
Doing well, Ole Son!

I like to see the timber framework. It was sort of sad after mine all got covered up by sheathing inside and cladding and roofing outside. But I know it's there!

Cheers Malc! Your building looks great, it really does! So not seeing the frame isn't such a bad thing!
 
spearos":27mm94pv said:
Malc2098":27mm94pv said:
Doing well, Ole Son!

I like to see the timber framework. It was sort of sad after mine all got covered up by sheathing inside and cladding and roofing outside. But I know it's there!

Cheers Malc! Your building looks great, it really does! So not seeing the frame isn't such a bad thing!


Thanks, Mark.
 
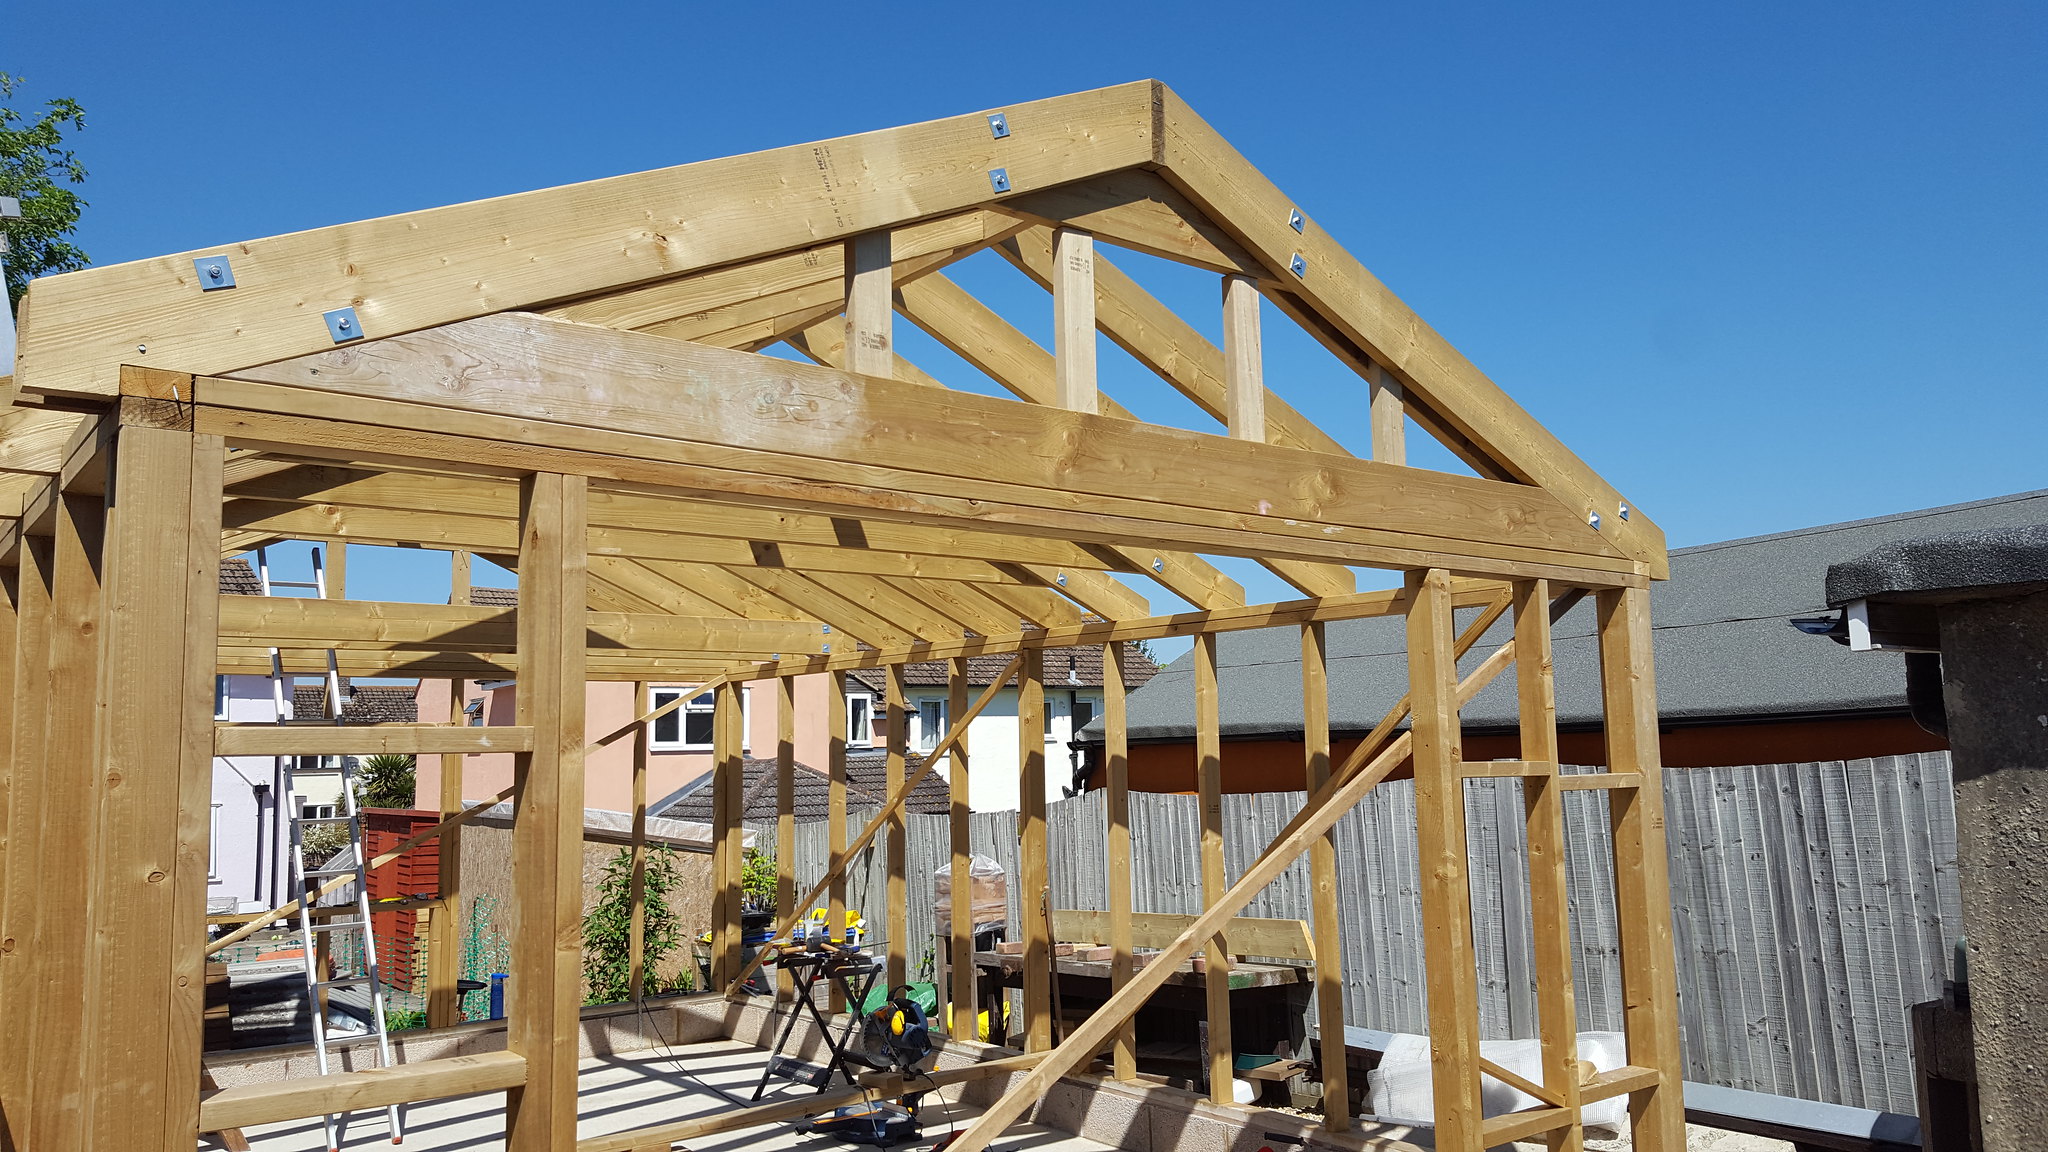
The gable framework is finally done! I managed to finish it today, after a very frustrating day yesterday - dry and sunny all week, dry and sunny all morning and early afternoon whilst taking the kids to the park and having my brother and parents over for tea and cake. Then I get my tools out at about 3:30 and shortly after it's hacking it down!! :evil:

Anyhow, pics -

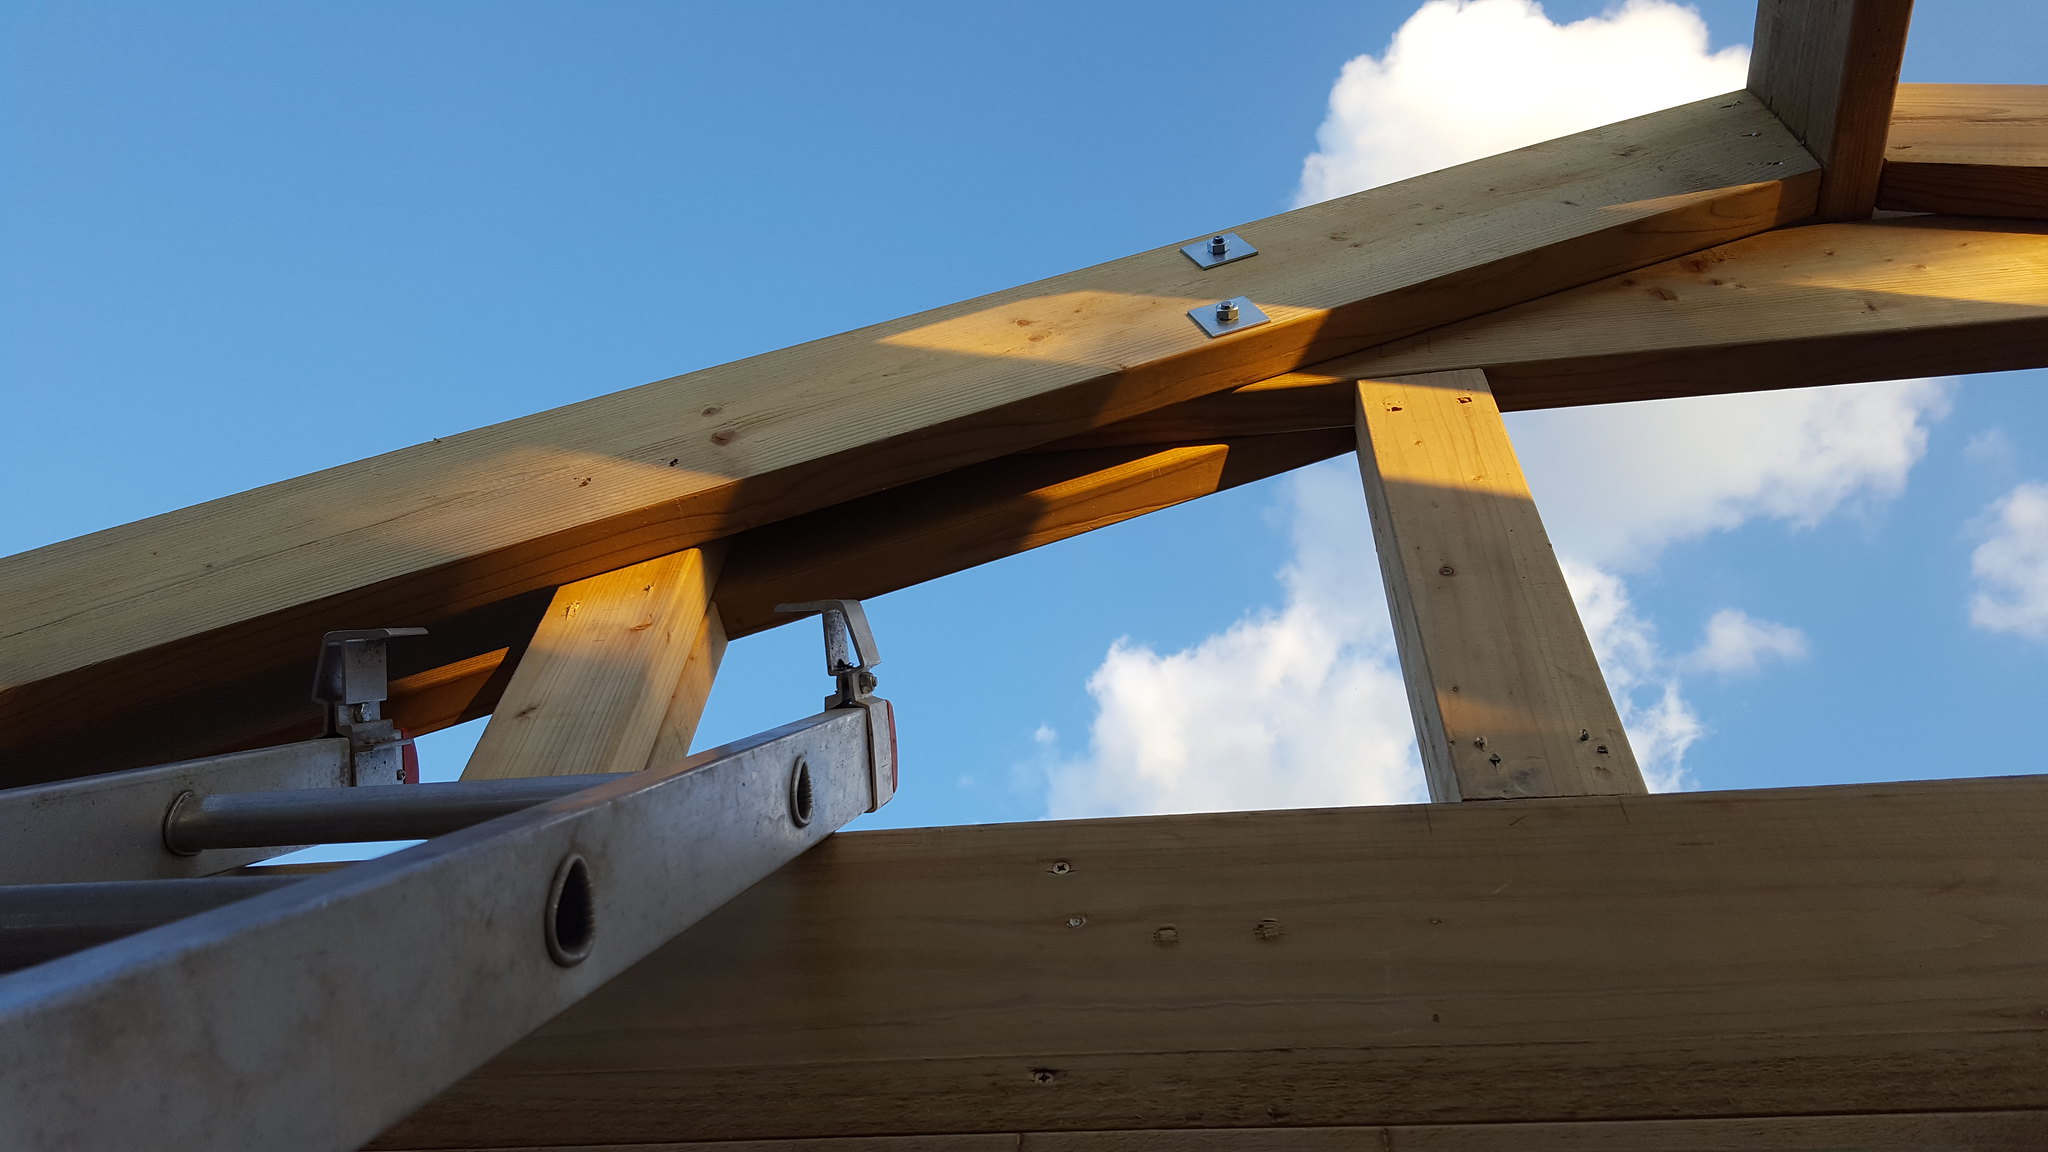
Double rafters sandwiching the tie and collar tie

41369460914_8d2ef48d93_k.jpg


I mainly used 4x2 for the gable studs as I have a lot of 4x2 offcuts! The orientation of these do not follow the wall studs because some of the inner gable studs are sandwiched and go all the way up to rest under the collar tie.
The gable studs are mainly to provide fixing points for the internal cladding and batons for the FE boards, although no doubt they provide extra strength/rigidity.

41369433724_b707f5dfa8_k.jpg


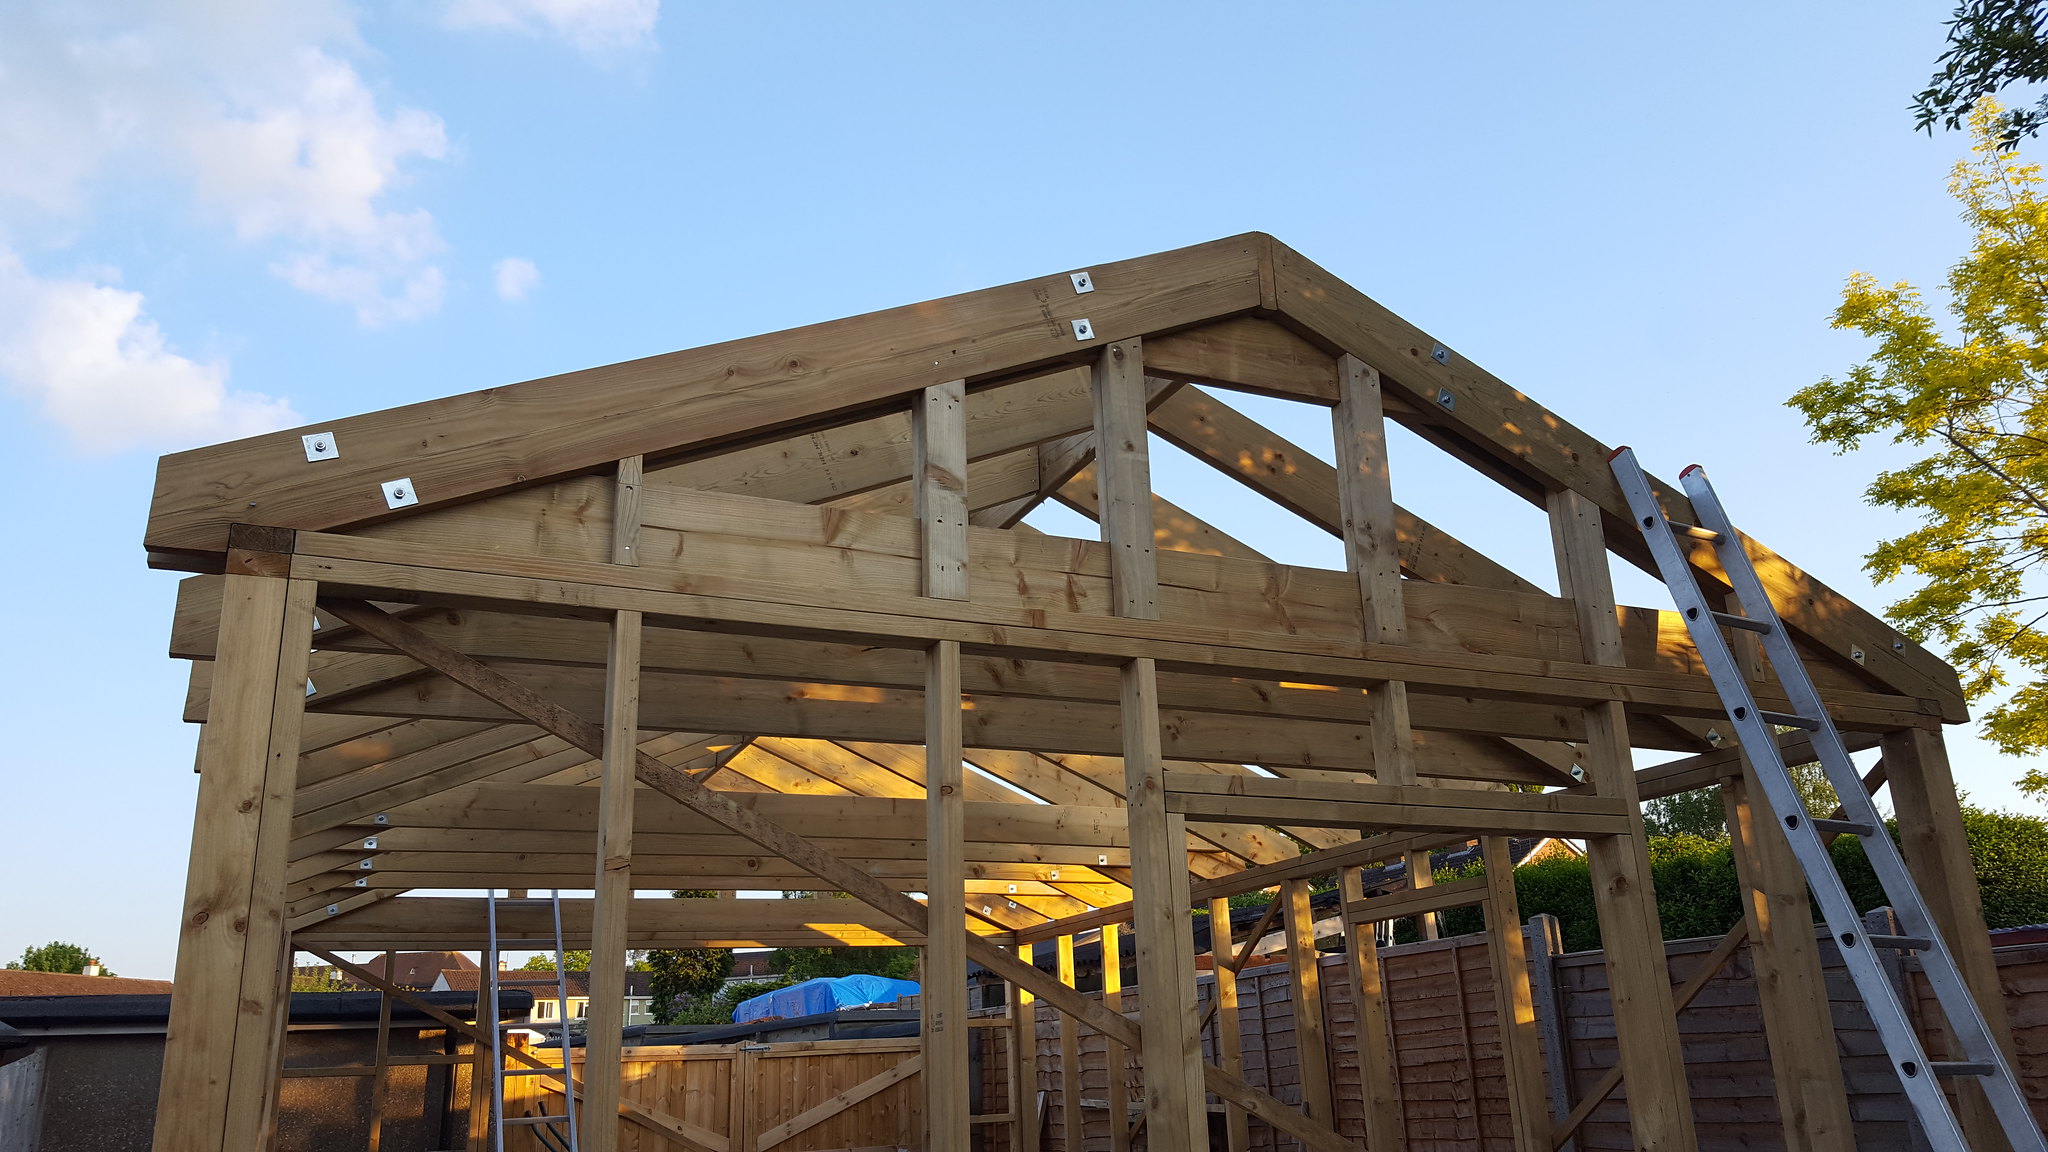
Finished jobby one end -

42088656981_df3e66063e_k.jpg


The other end before fitting the outer gable studs. The detail here is slightly different because of the extra 8x2 mated to the tie, forming the door lintel -

41369450504_290cf90cfd_k.jpg


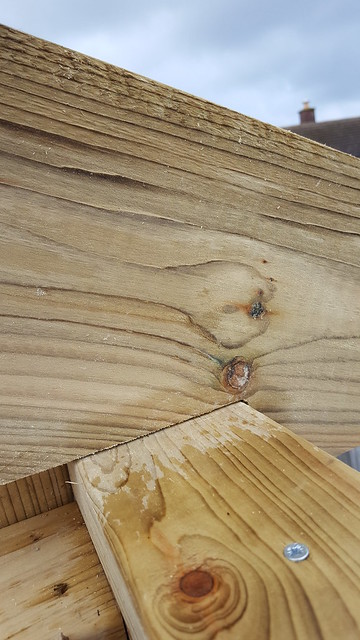
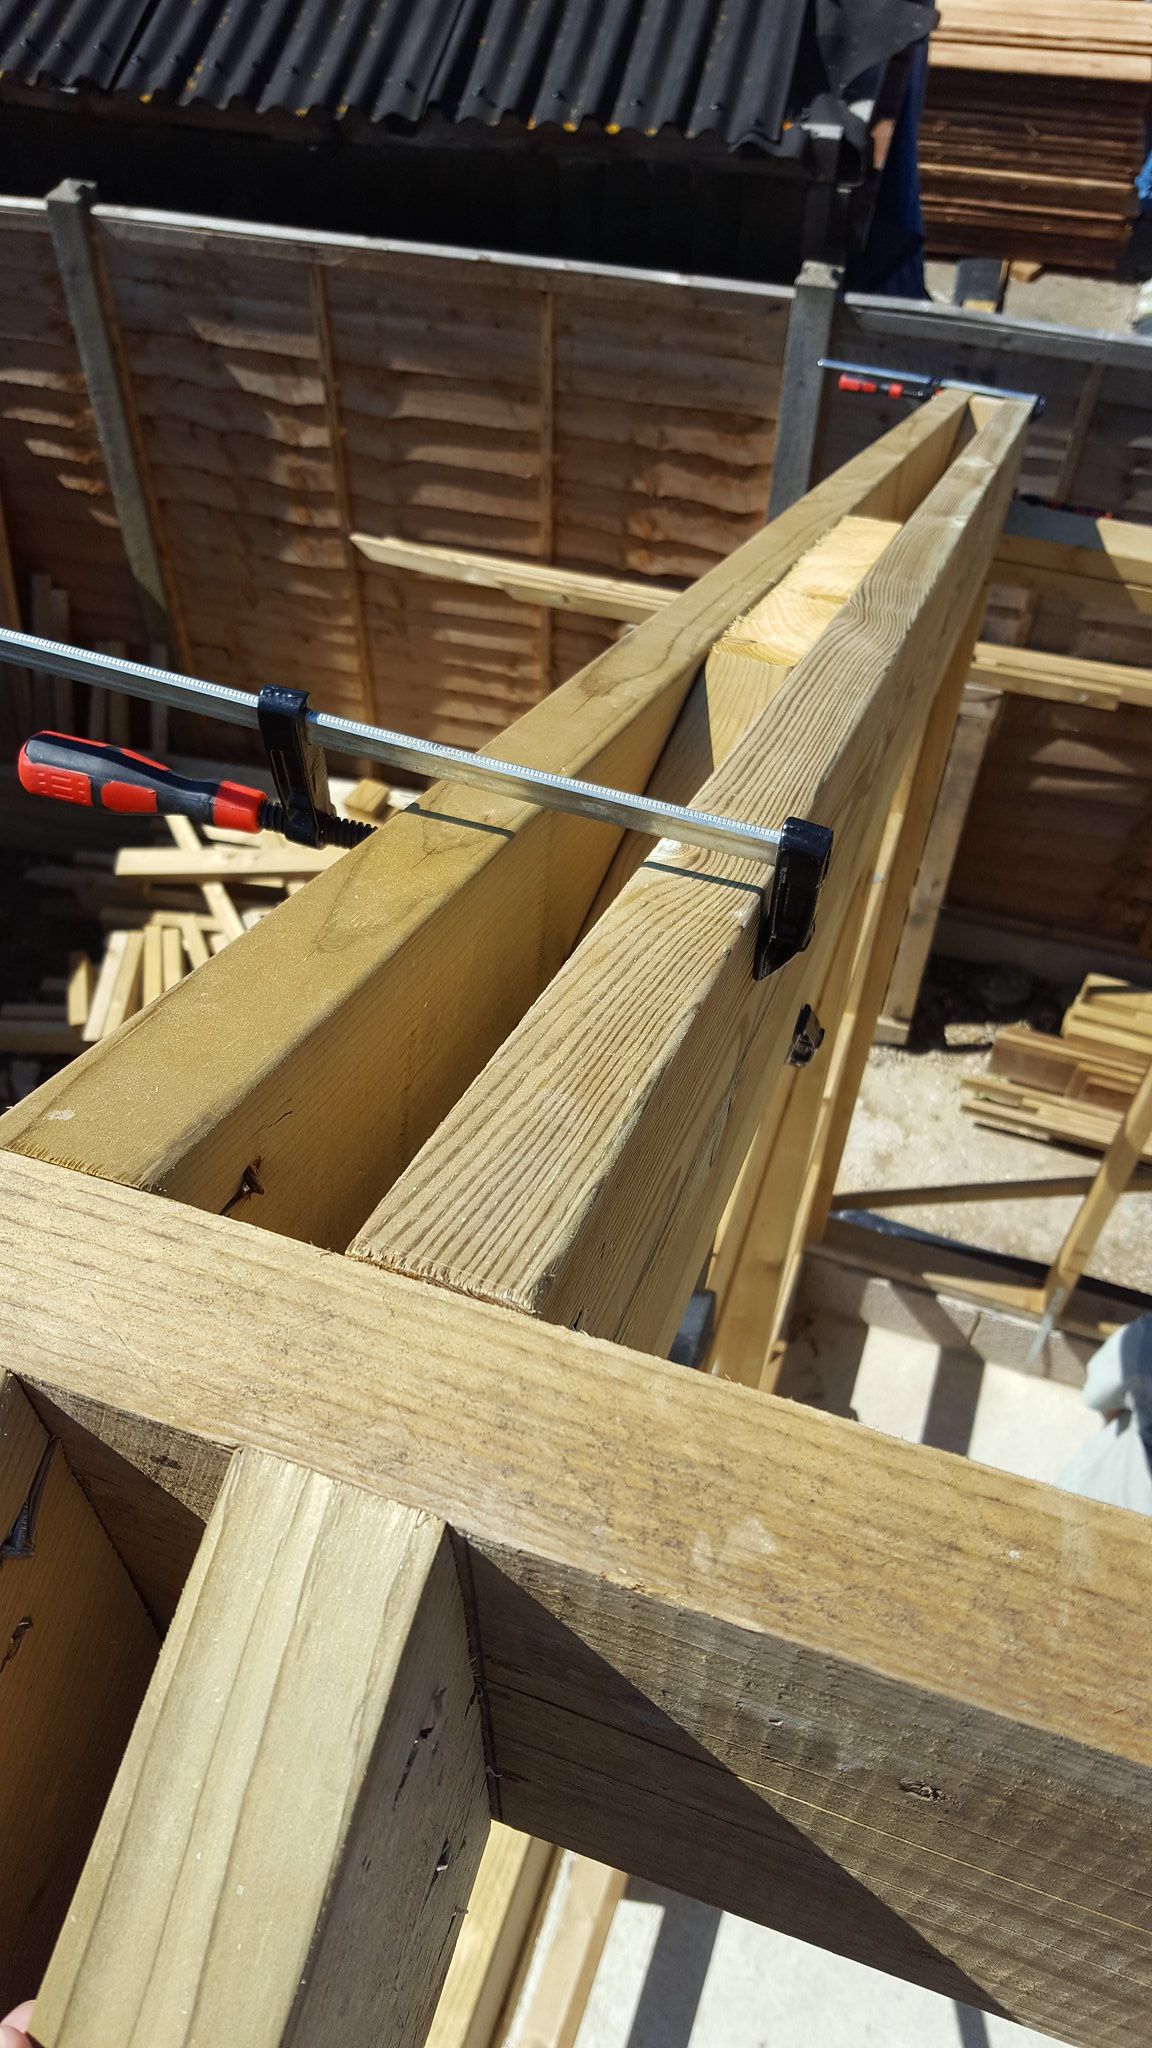
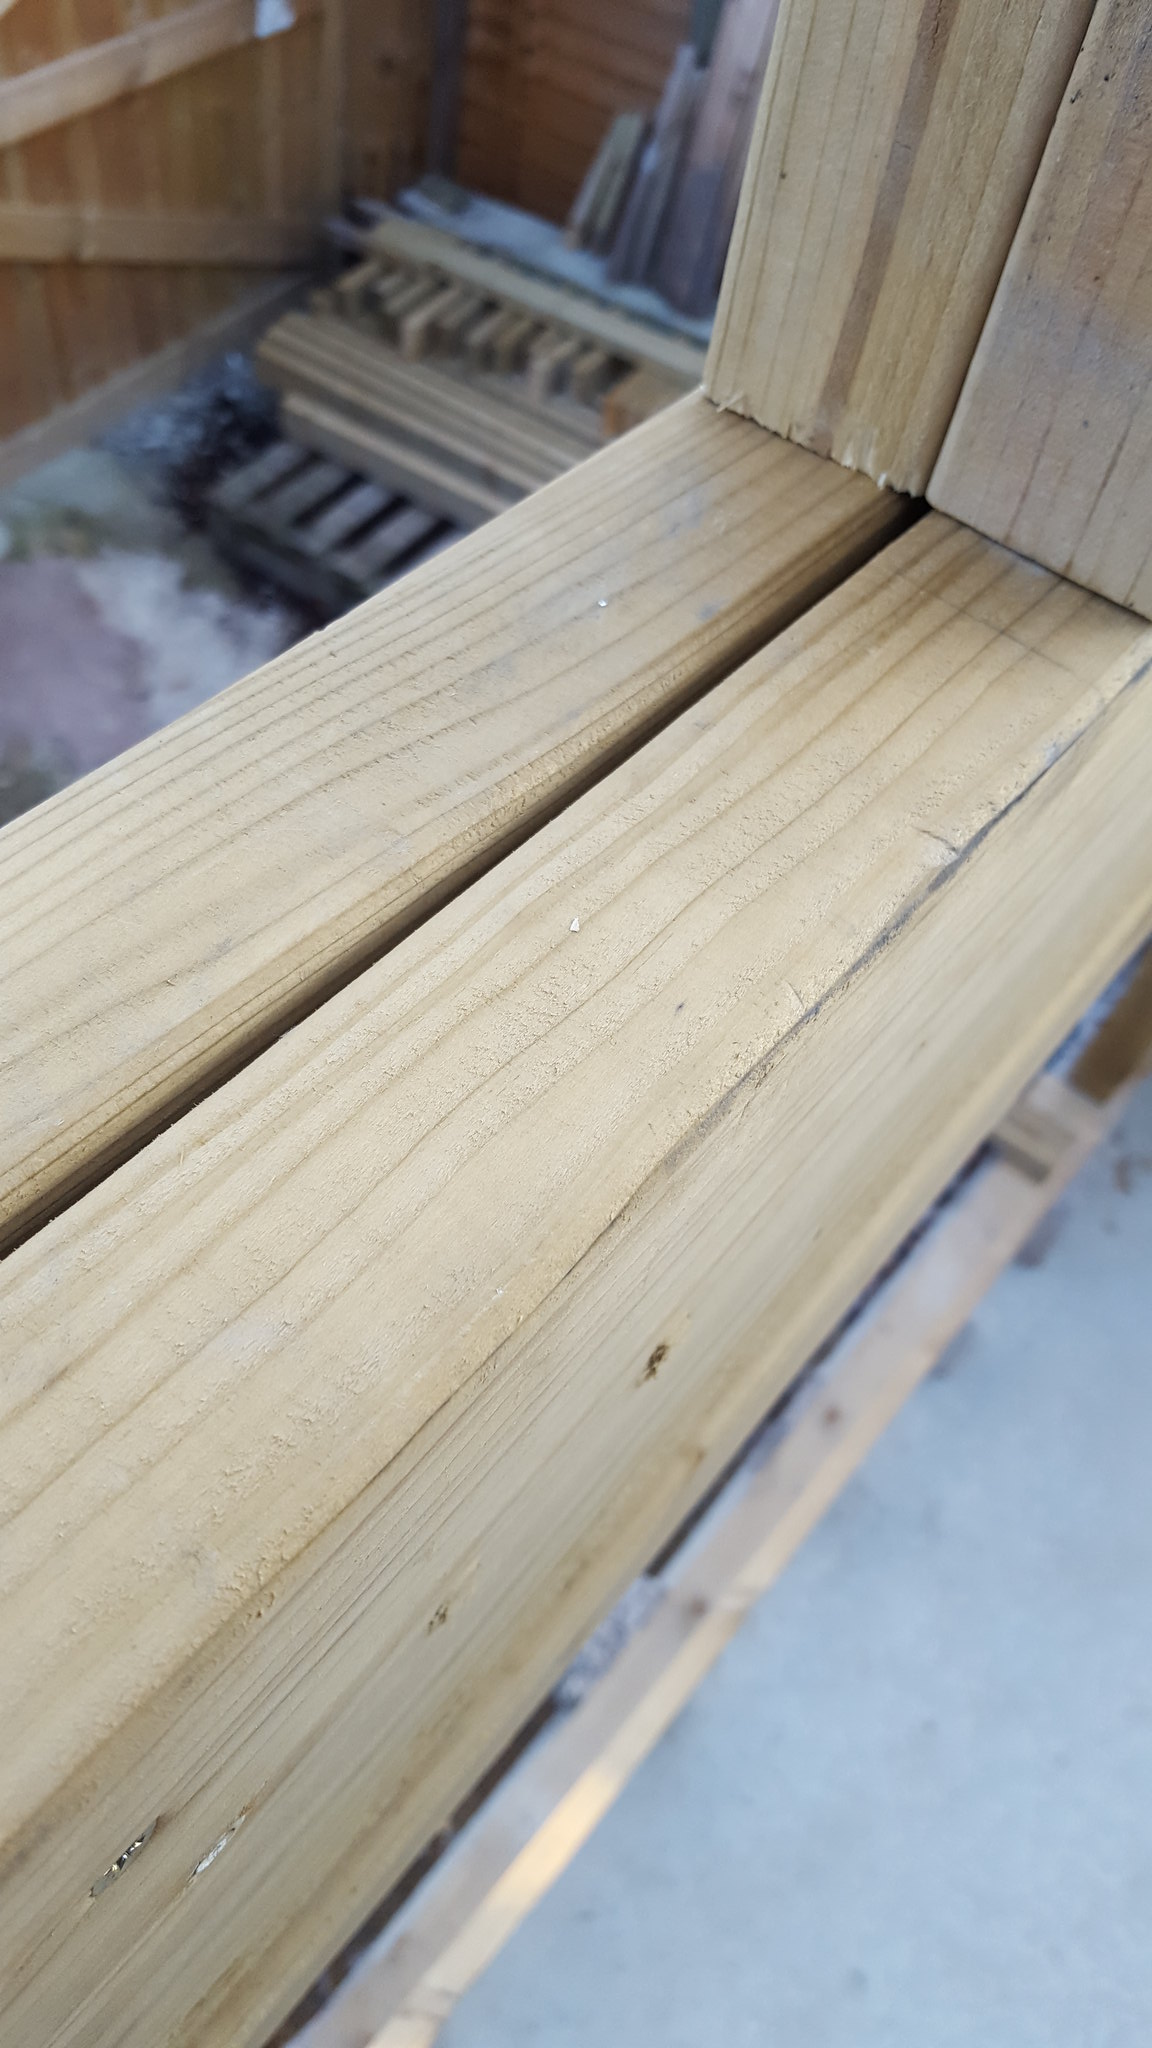
And here's a good example of what I was talking about earlier reference how surprised I am with how unstable the timber is. This is the doubled up 8x2 lintel which when fitted seemed reasonably dry and was clamped tightly together before being fixed by several fasteners.

28215856378_02c9494f55_k.jpg


This, and the difference in width of the wall studs (~95mm) and gable studs (~2x45mm) means there will be complications when fitting the internal cladding and FE batons. However I have a plan....
 
Back
Top